Table of Contents Show
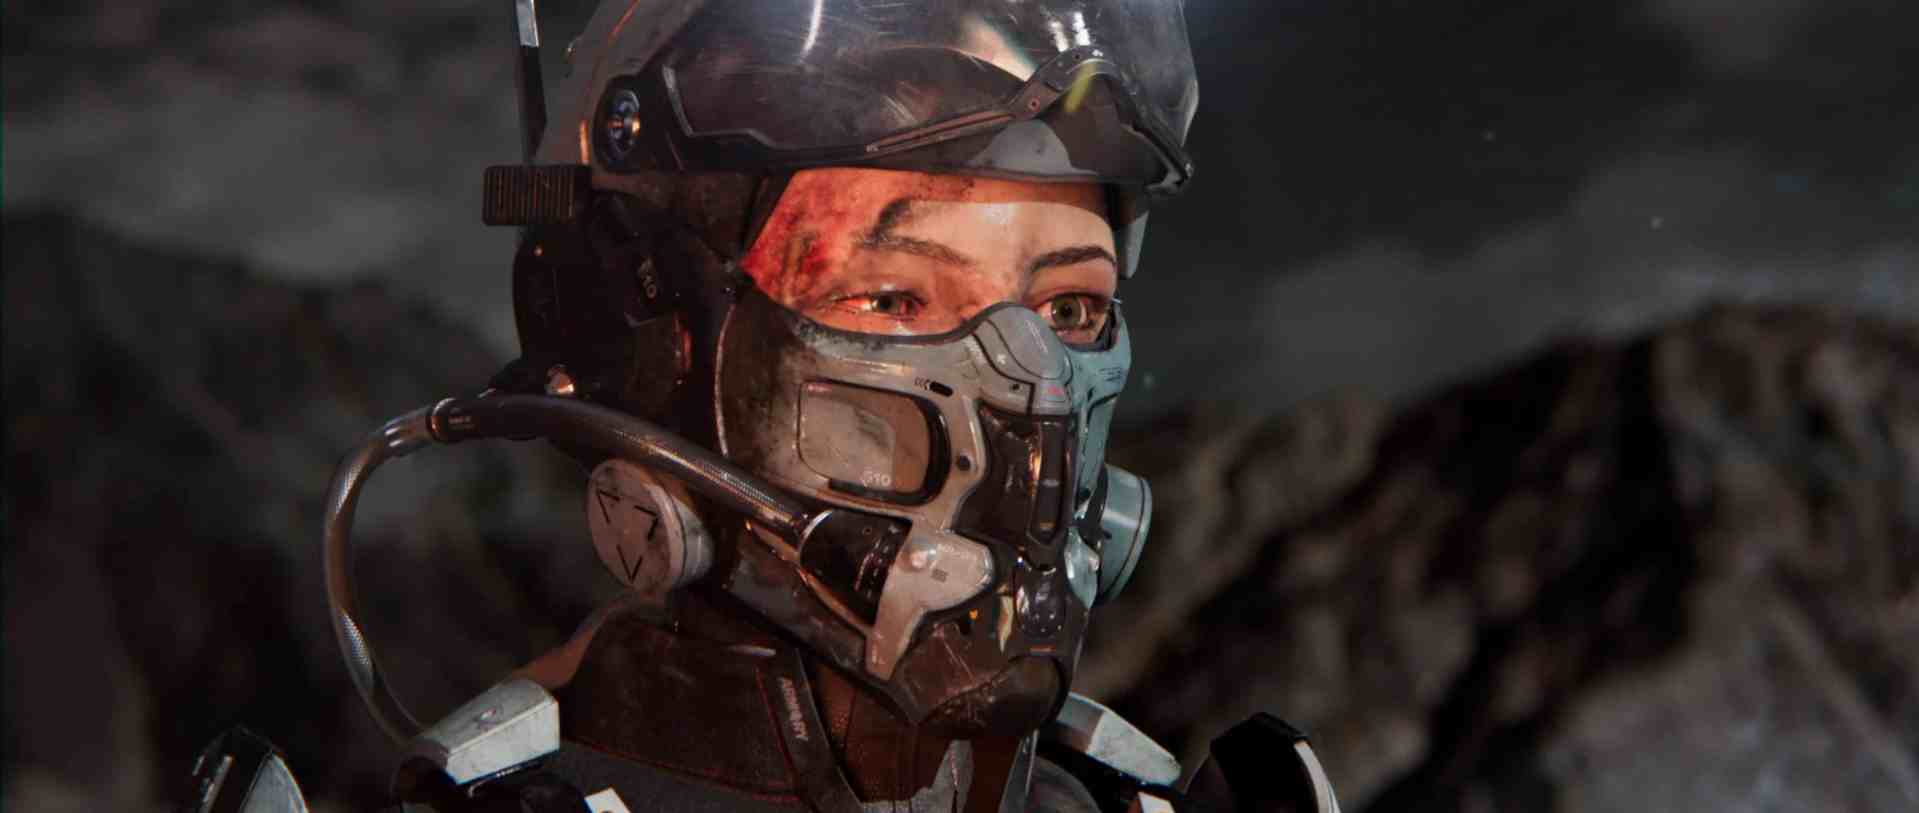
The Survivor is a sci-fi-inspired project depicting the story of a crashed pilot who, despite sustaining injuries, has survived. She stands before her burning, shattered jet, gazing into the sunset—a symbol of hope.

The goal was to develop a convincing character within two months, conveying strong emotions and narrative depth through both modeling and texturing. This project was a collaboration between Paul Zielske (Modeling) and Julian Frank (Texturing, Look Development), serving as part of their graduation thesis at PIXLVISN Media Arts Academy.
Modeling with ZBrush
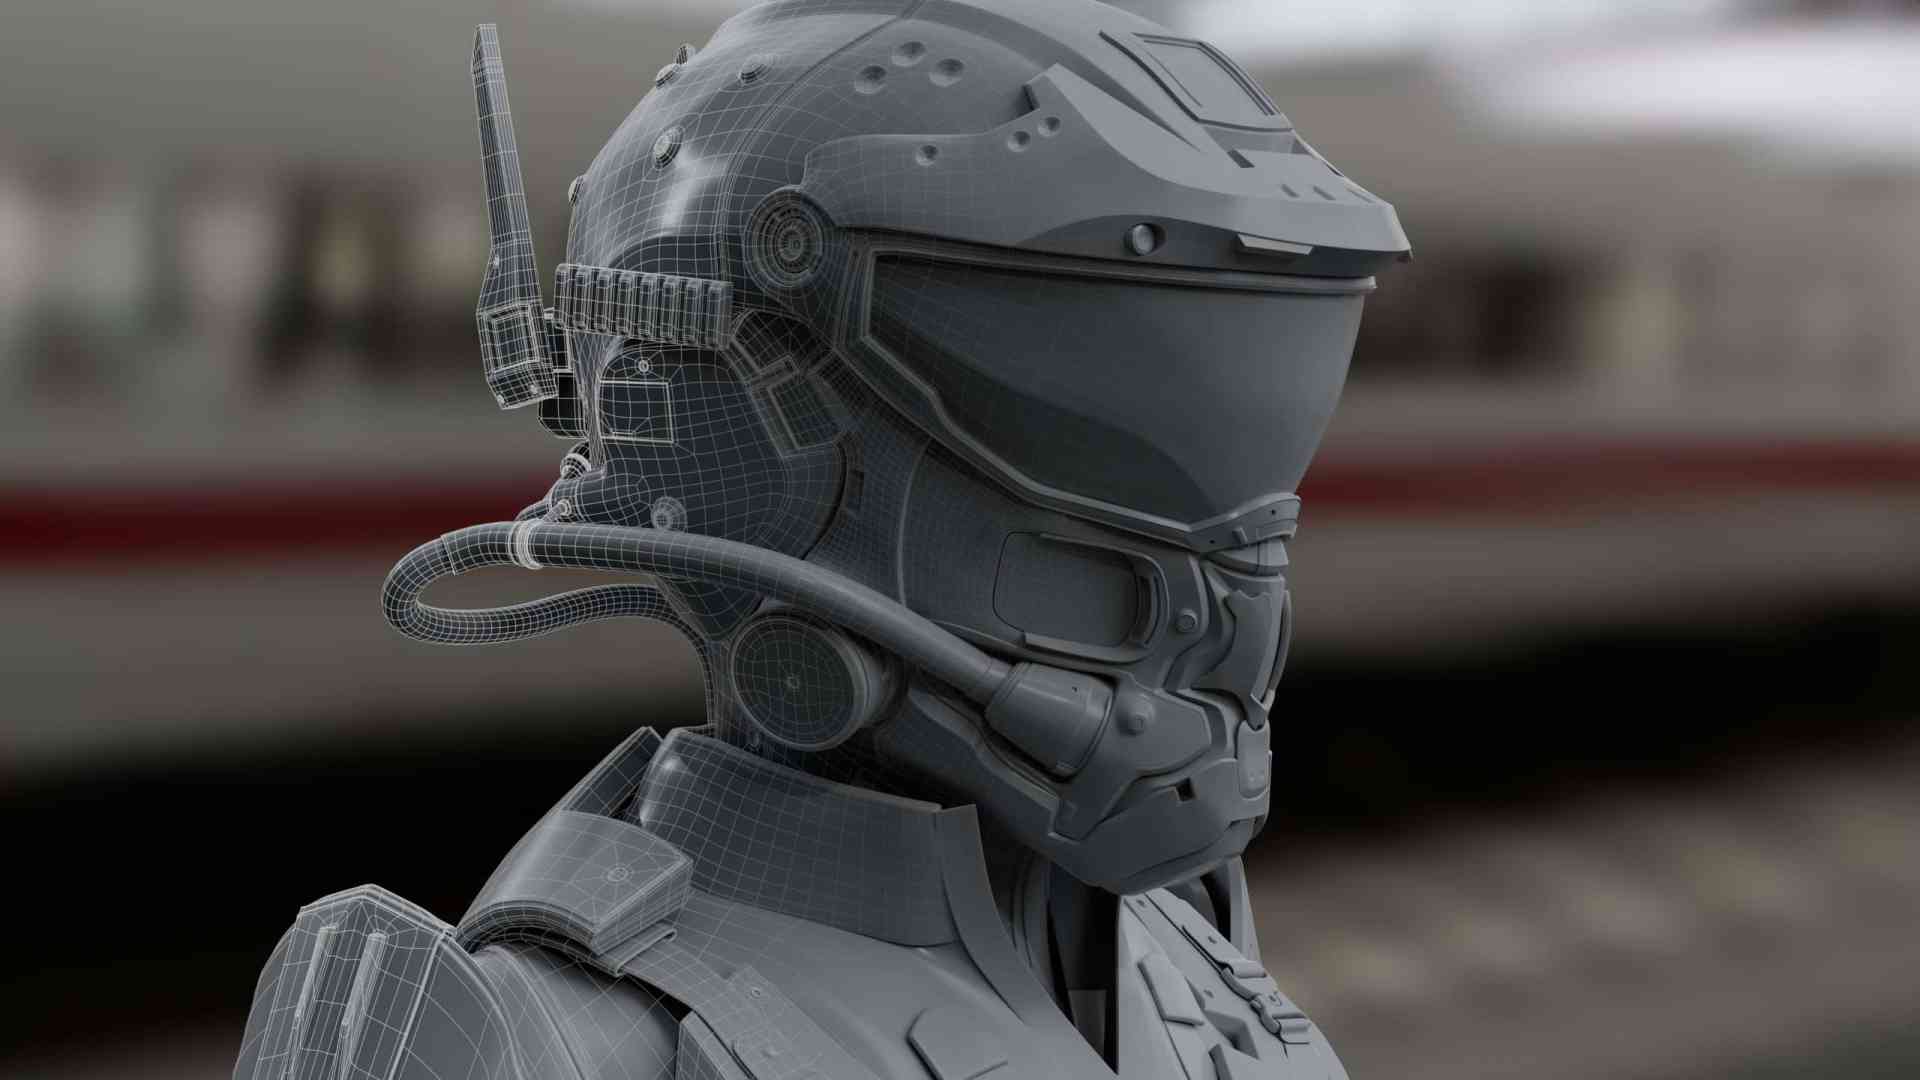
The character was modeled by Paul Zielske using ZBrush. He placed particular emphasis on expressive and anatomically believable representation, focusing on facial structure, expressions, and skin folds to support the character’s emotional story. The character emerged from a combination of various concept ideas, which were jointly developed and refined. Paul successfully translated this template into a convincing 3D model.
Texturing and Look Development
Julian Frank was responsible for the entire texturing, look development, and all subsequent steps up to the final rendering. The focus was on telling a believable story through the character’s surface using details, materials, and visual mood. For this project, they deliberately chose to develop only the upper body of the figure. This allowed for a more intensive focus on details in modeling, textures, and expression to achieve a particularly high-quality representation.

The Role of References
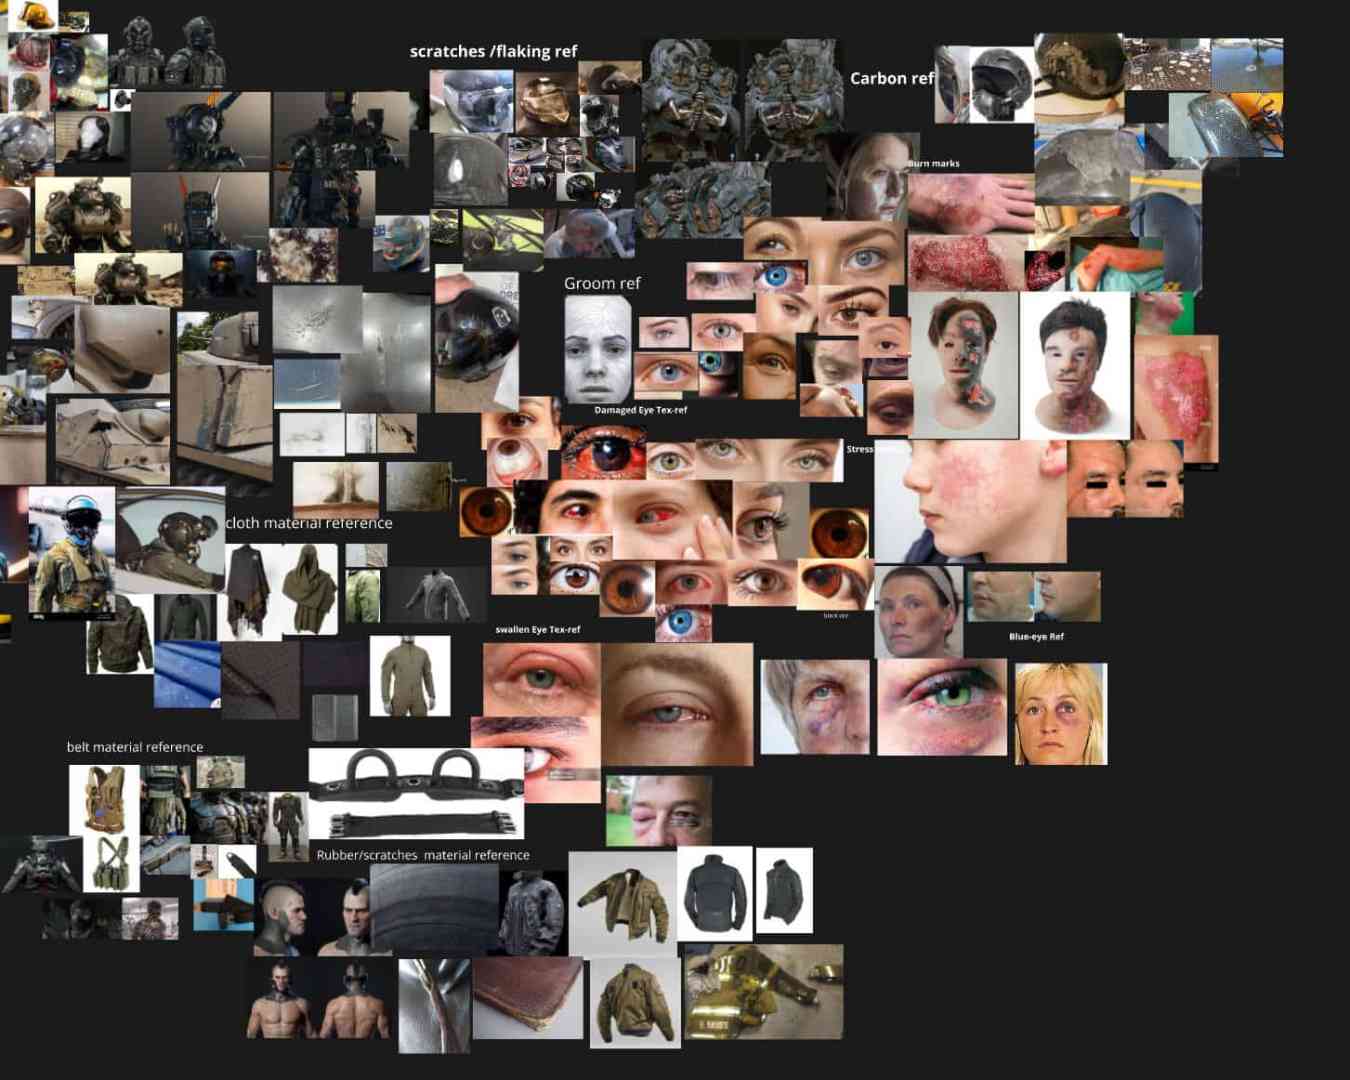
Since there was no fixed concept art for the look and feel of the character, the team developed the character entirely based on various references. This approach involved some risk but also provided the creative freedom to develop an independent figure.
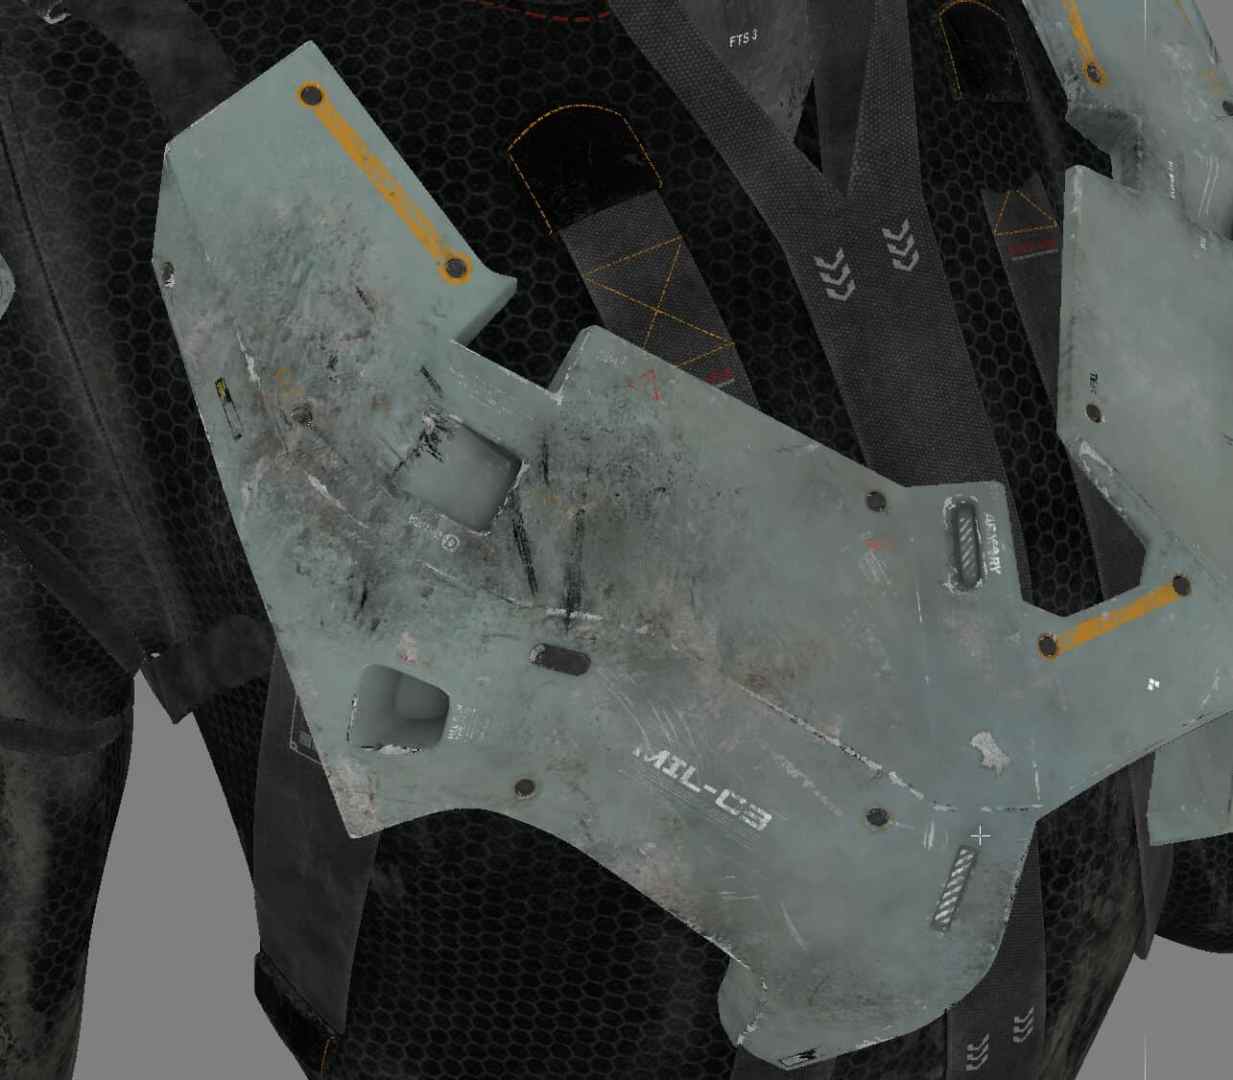
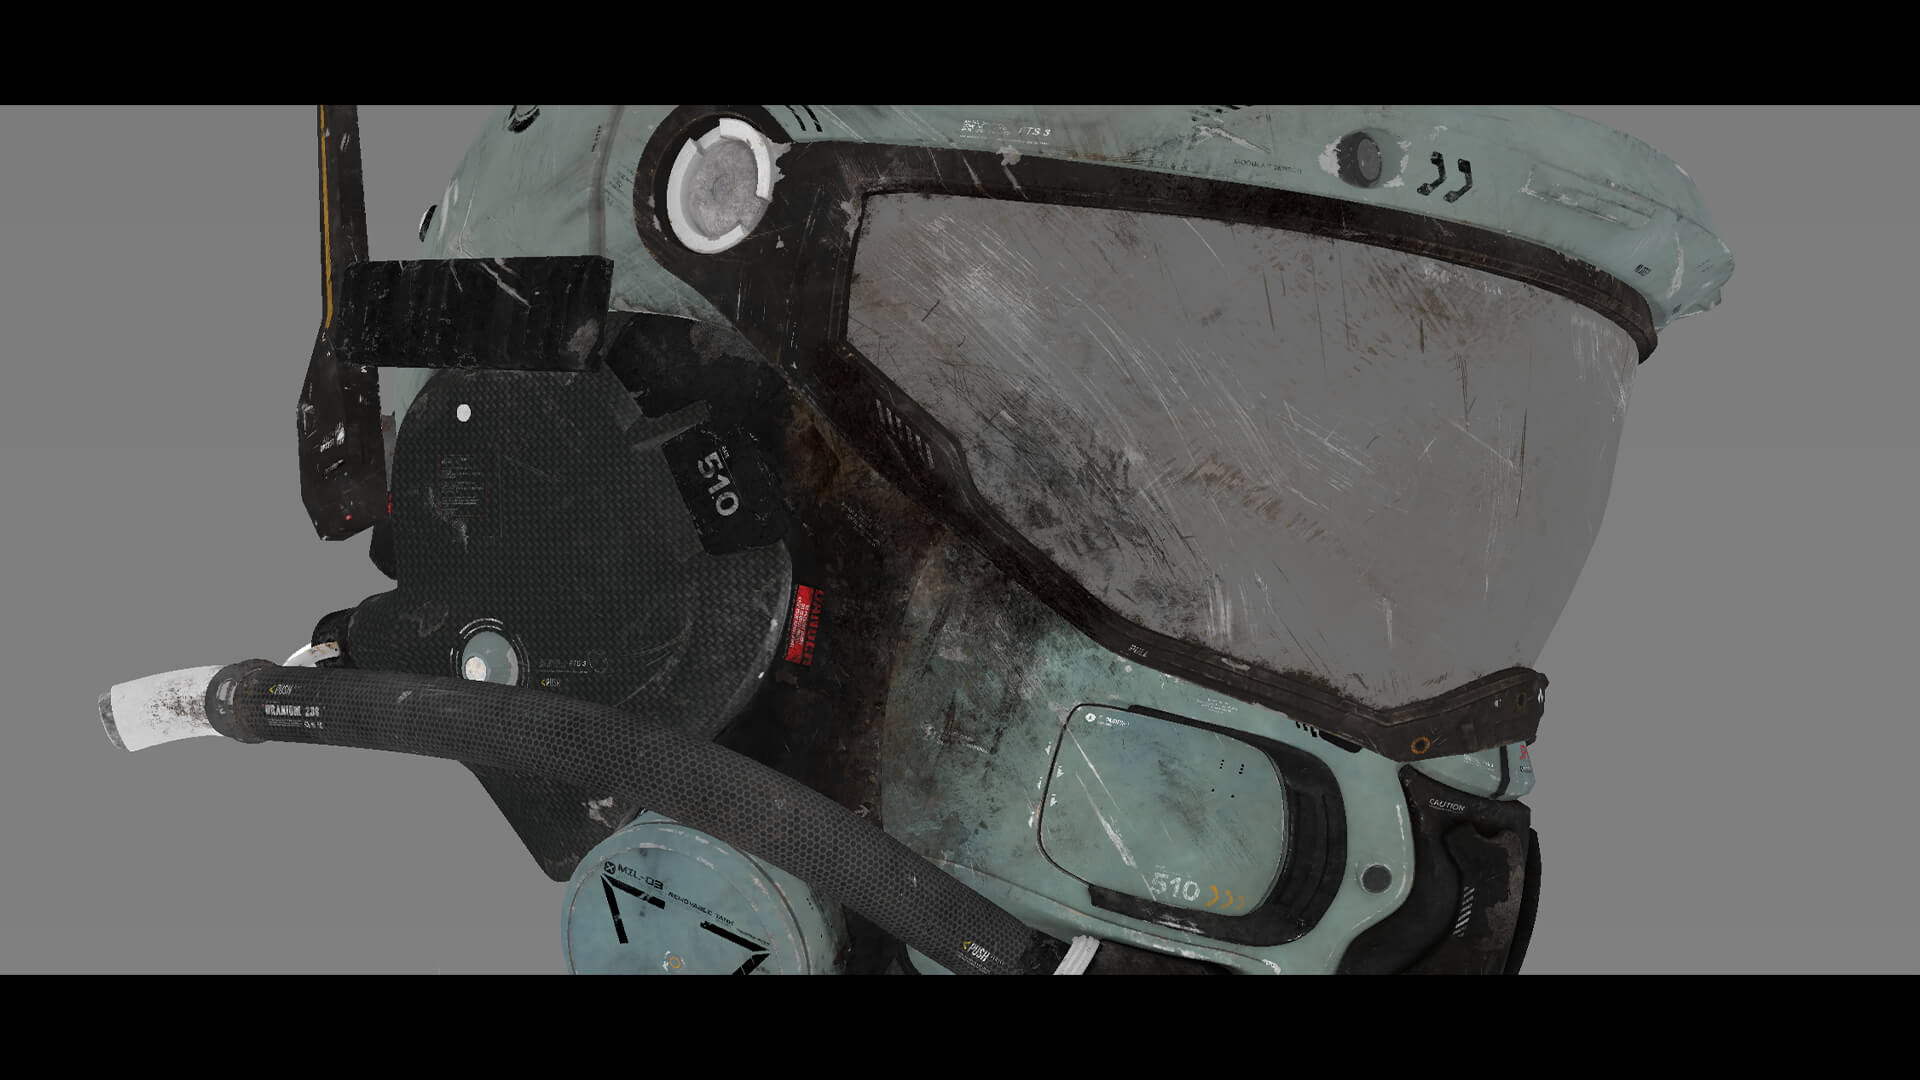
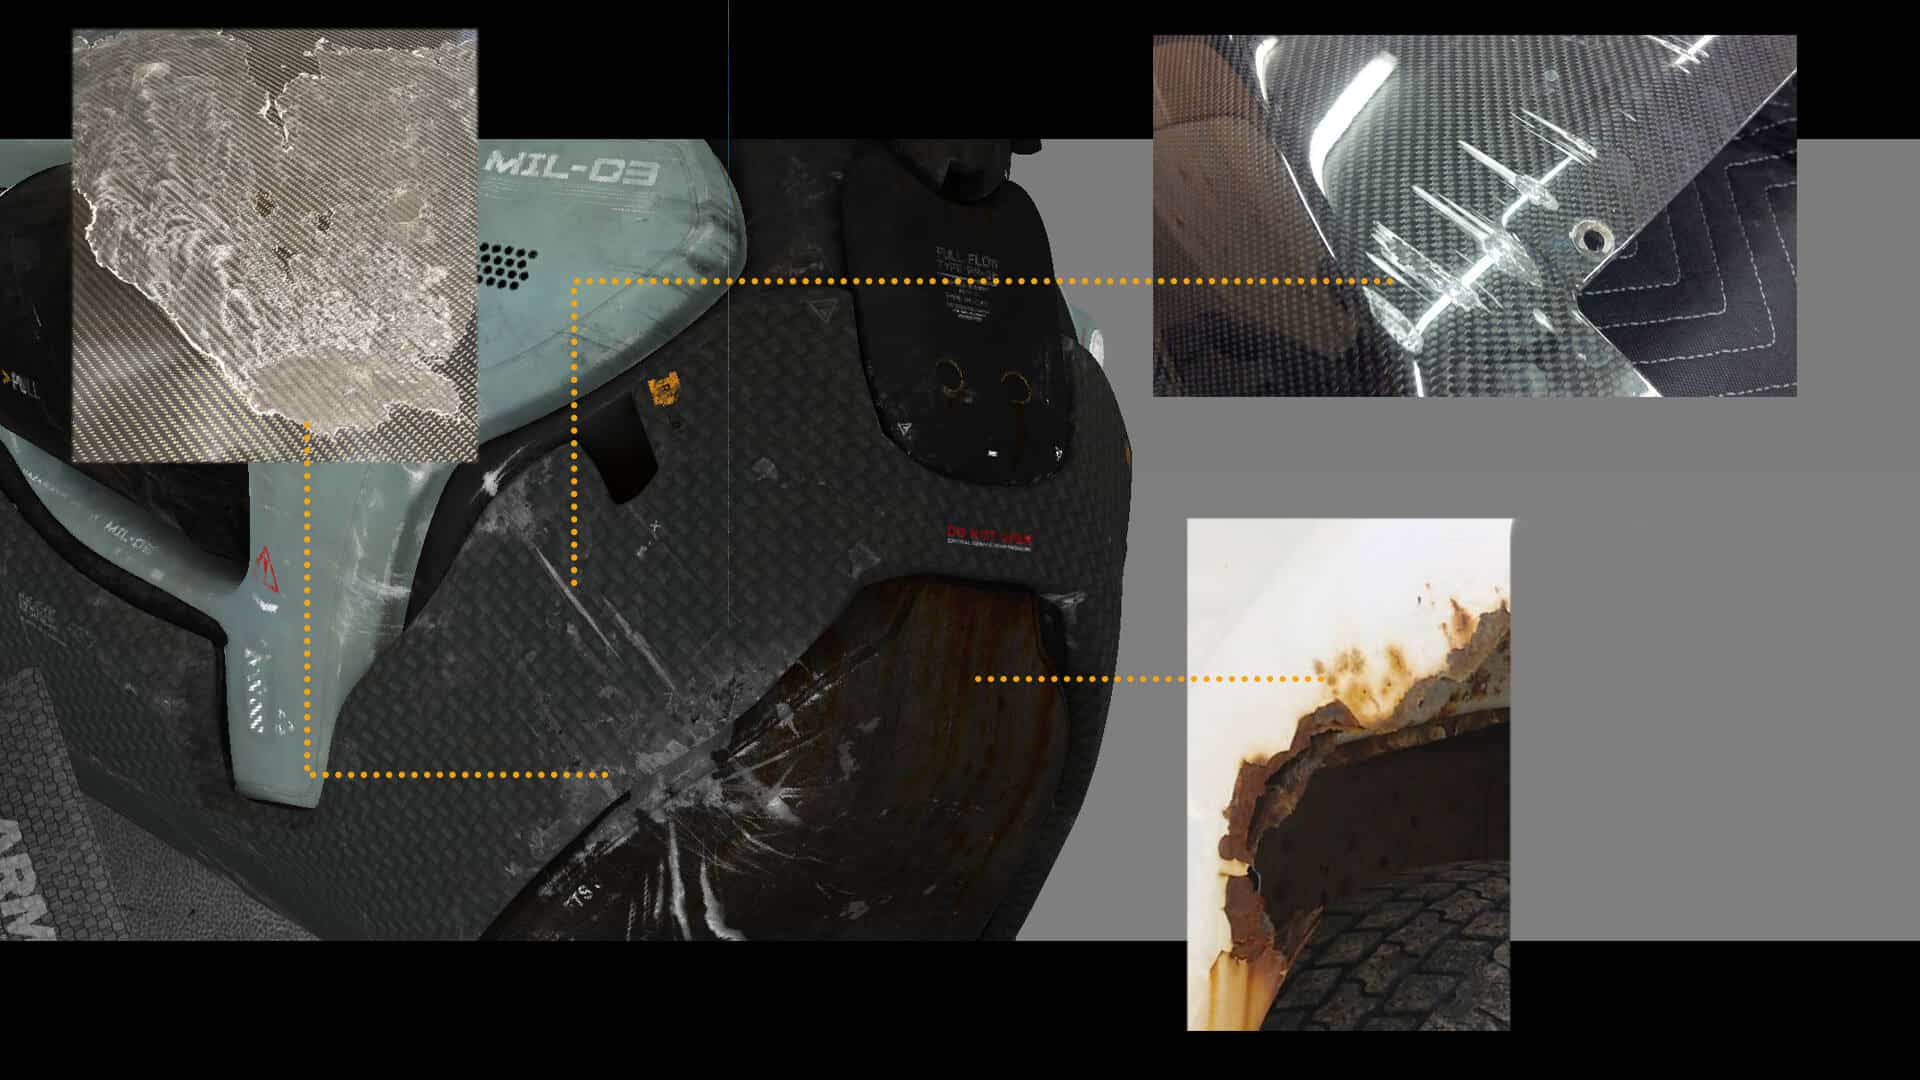
In this project, Julian focused on a variety of different surfaces: damaged, glossy carbon, peeling paint on metal, decals, realistic skin with blemishes, second-degree burns, as well as heavy, coarse fabrics. The goal was to showcase the full range of materiality and to tackle various challenges deliberately.


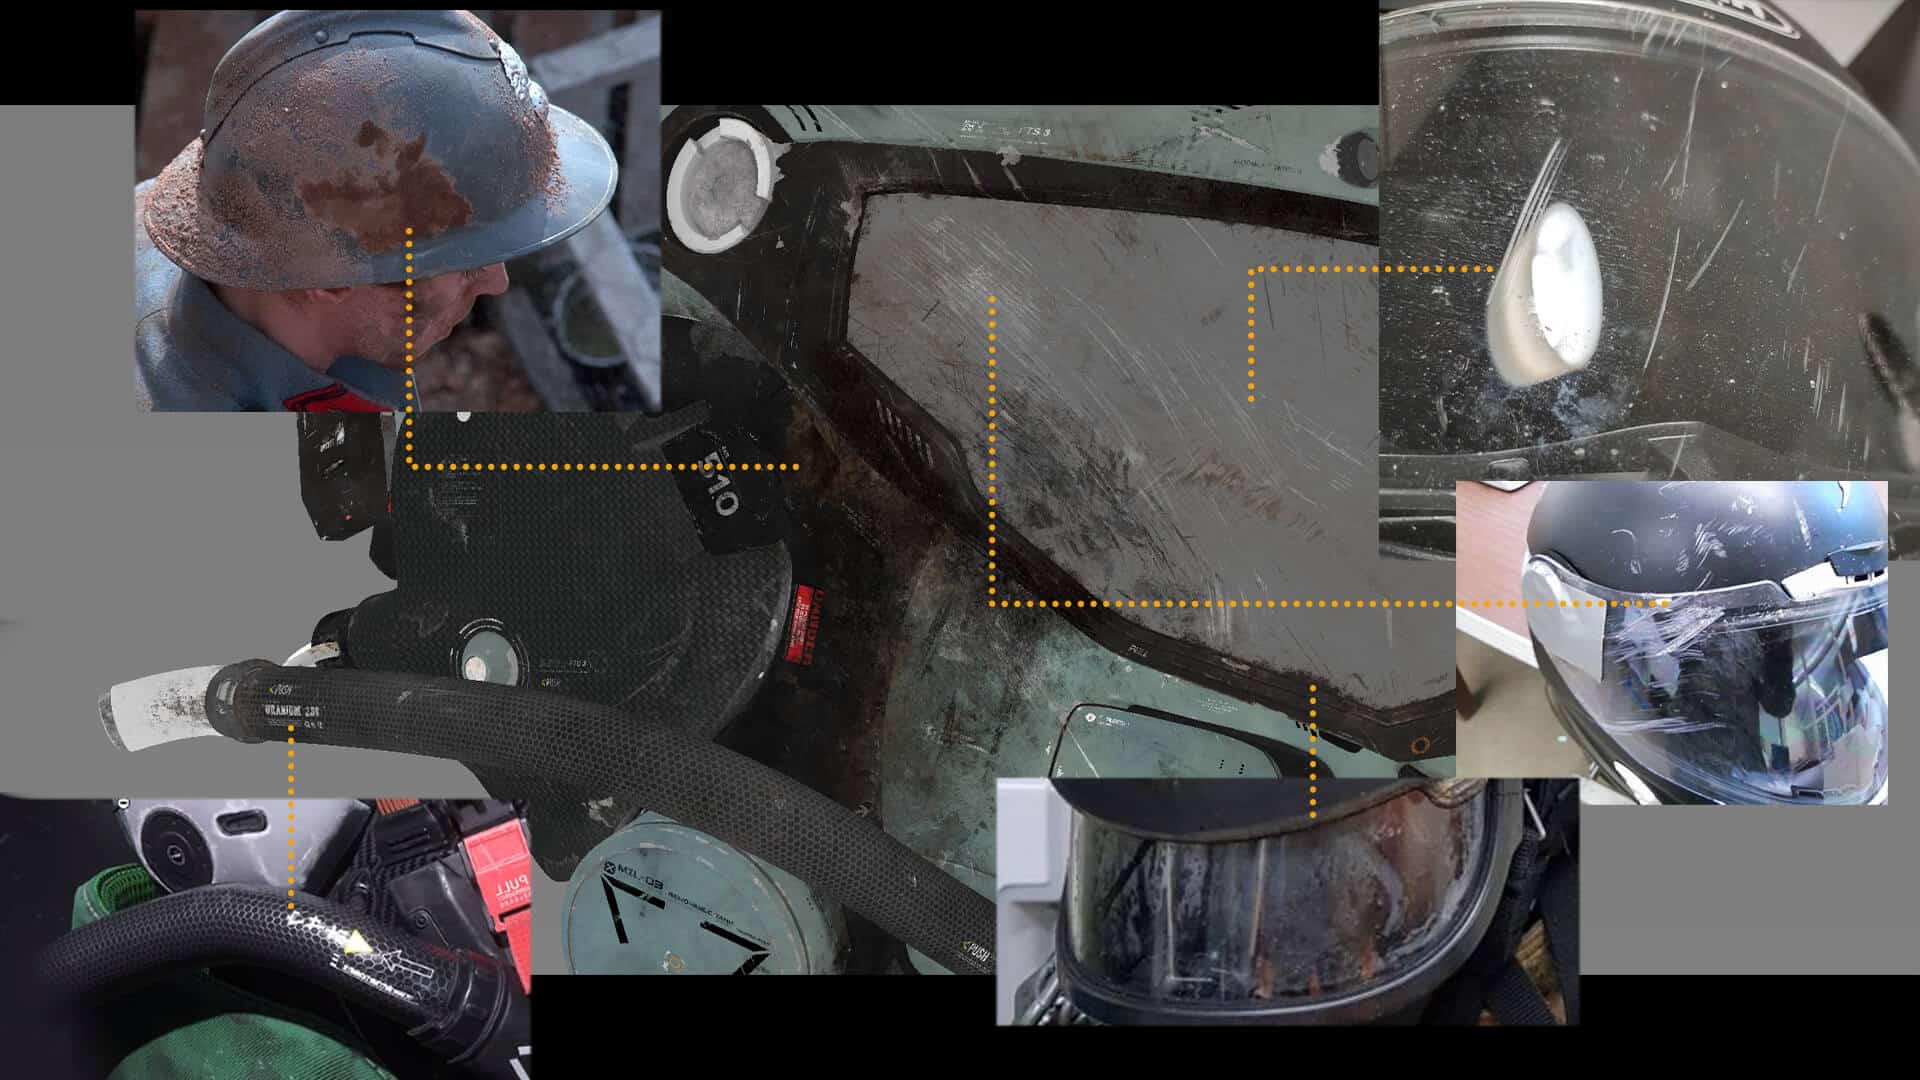
At the beginning, a large collection of references was built to understand the characteristic features of these materials—from color schemes to light behavior to microdetails on the surface. Julian believes that by closely analyzing one’s own references, one develops a better sense for aspects like color, contrast, composition, and material effect. This research process significantly influenced the visual style of the project.
Pipeline and Workflow
As previously mentioned, the project began with an intensive research phase. The team first searched for reference material, both for the character itself and for the general look and feel of the scene. Once this was completed, Paul began modeling in ZBrush. In parallel, Julian created a reference library, specifically focusing on materials, texturing, and the storytelling of the figure.

After the model was completed, Julian handled the remaining aspects of the pipeline: starting with layout and blockout in Maya 2024, texturing in Mari 7.1v2 , look development in Arnold, the lighting setup, and finally, the final composition.

Texturing with Mari and Substance Painter
Although other tools like Substance Painter were considered, they presented limitations when working with large UDIM workflows. Substance is efficient in game and real-time contexts, but it often struggles with performance and memory usage when dealing with dozens of high-resolution tiles. Navigation becomes sluggish, and asset management across many UDIMs can be inefficient.
Mari, on the other hand, is built for heavy, film-quality assets. It supports large UDIM sets natively and efficiently, allowing Julian seamless painting across multiple tiles—even at 4K or 8K—without significant performance loss. This made it particularly well-suited for the level of detail required in this project.
In addition, Mari’s non-destructive, layer-based system offers deep control over masks, channels, and procedural effects. Its support for advanced shaders, industry-standard color workflows like OCIO, and easy integration with tools such as Houdini, Katana, or Nuke makes it a robust solution in high-end production pipelines.
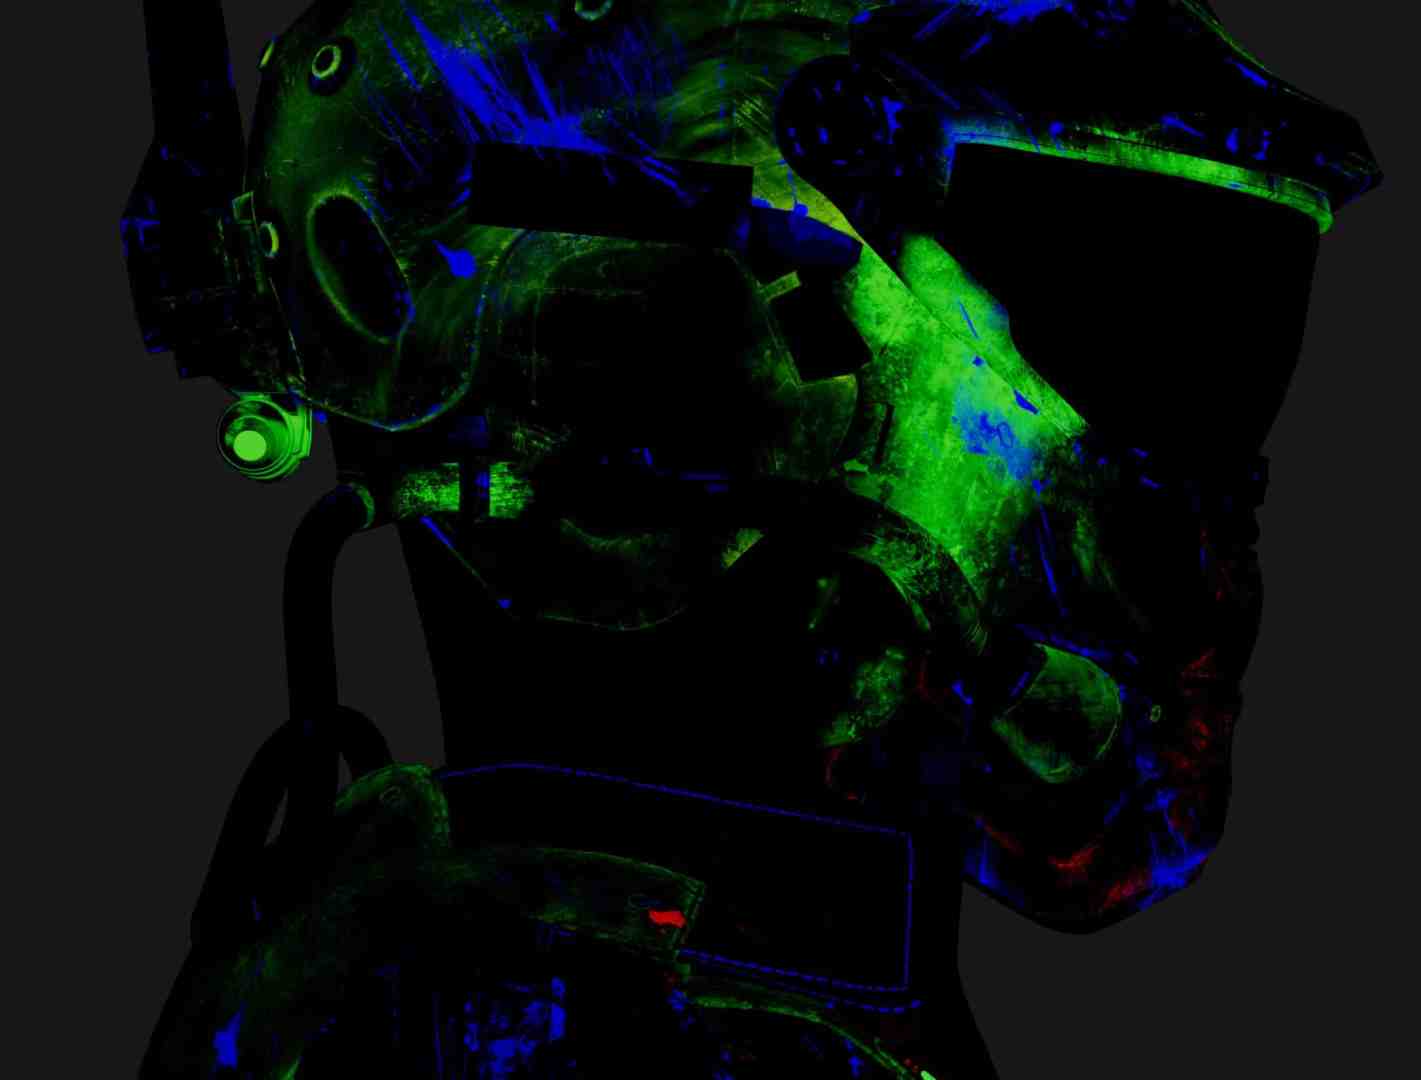
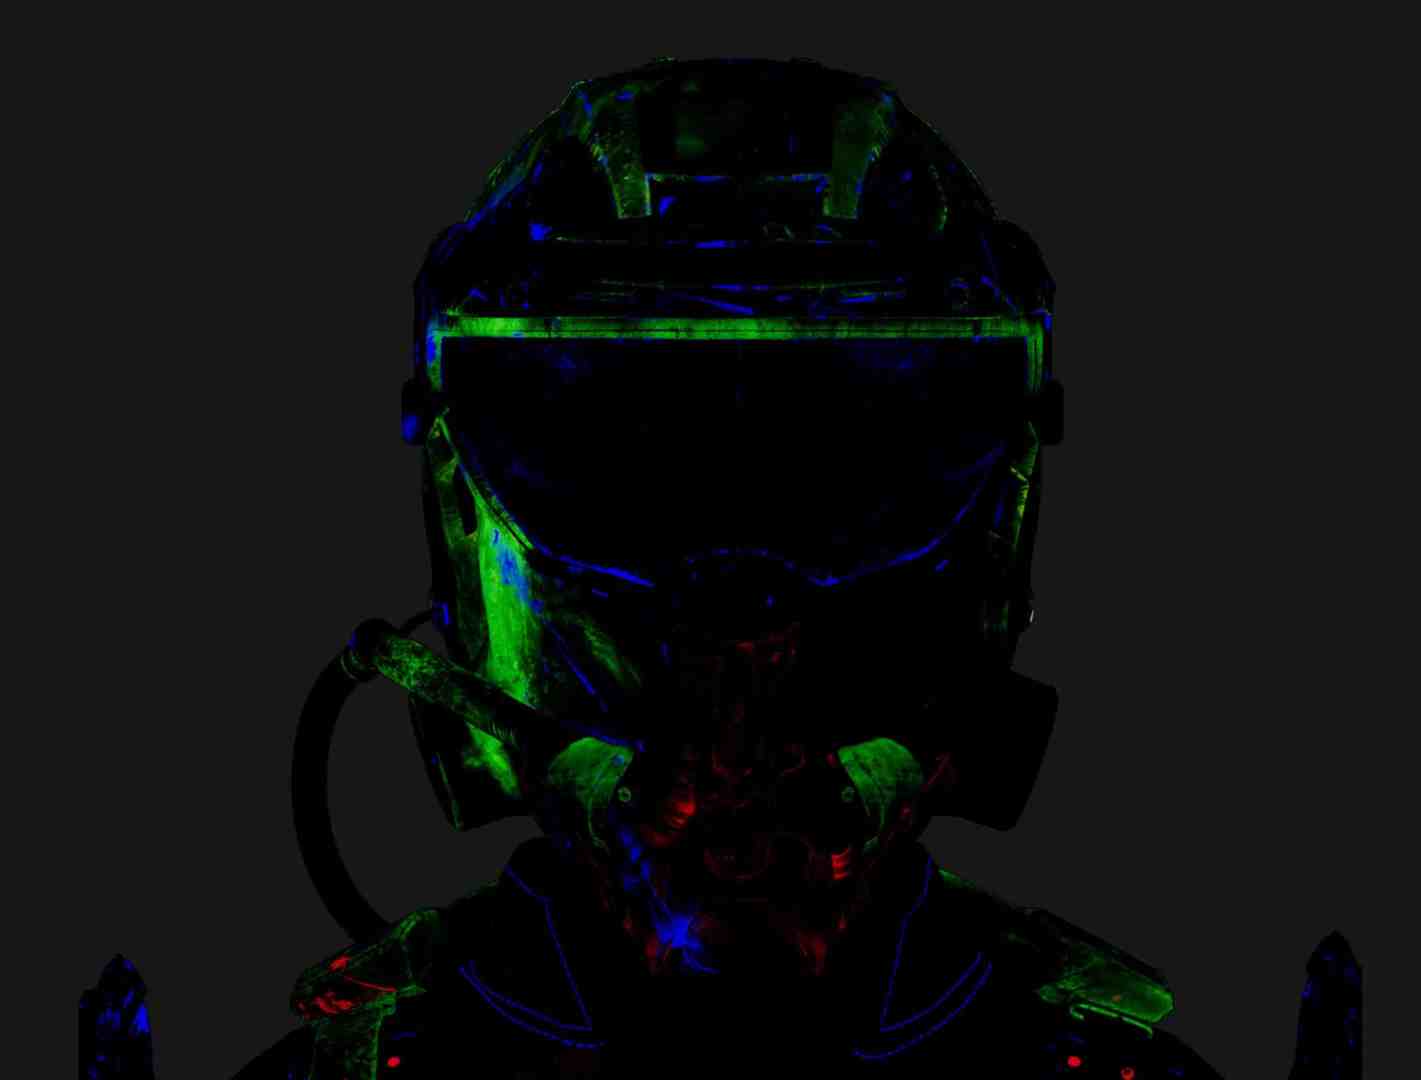
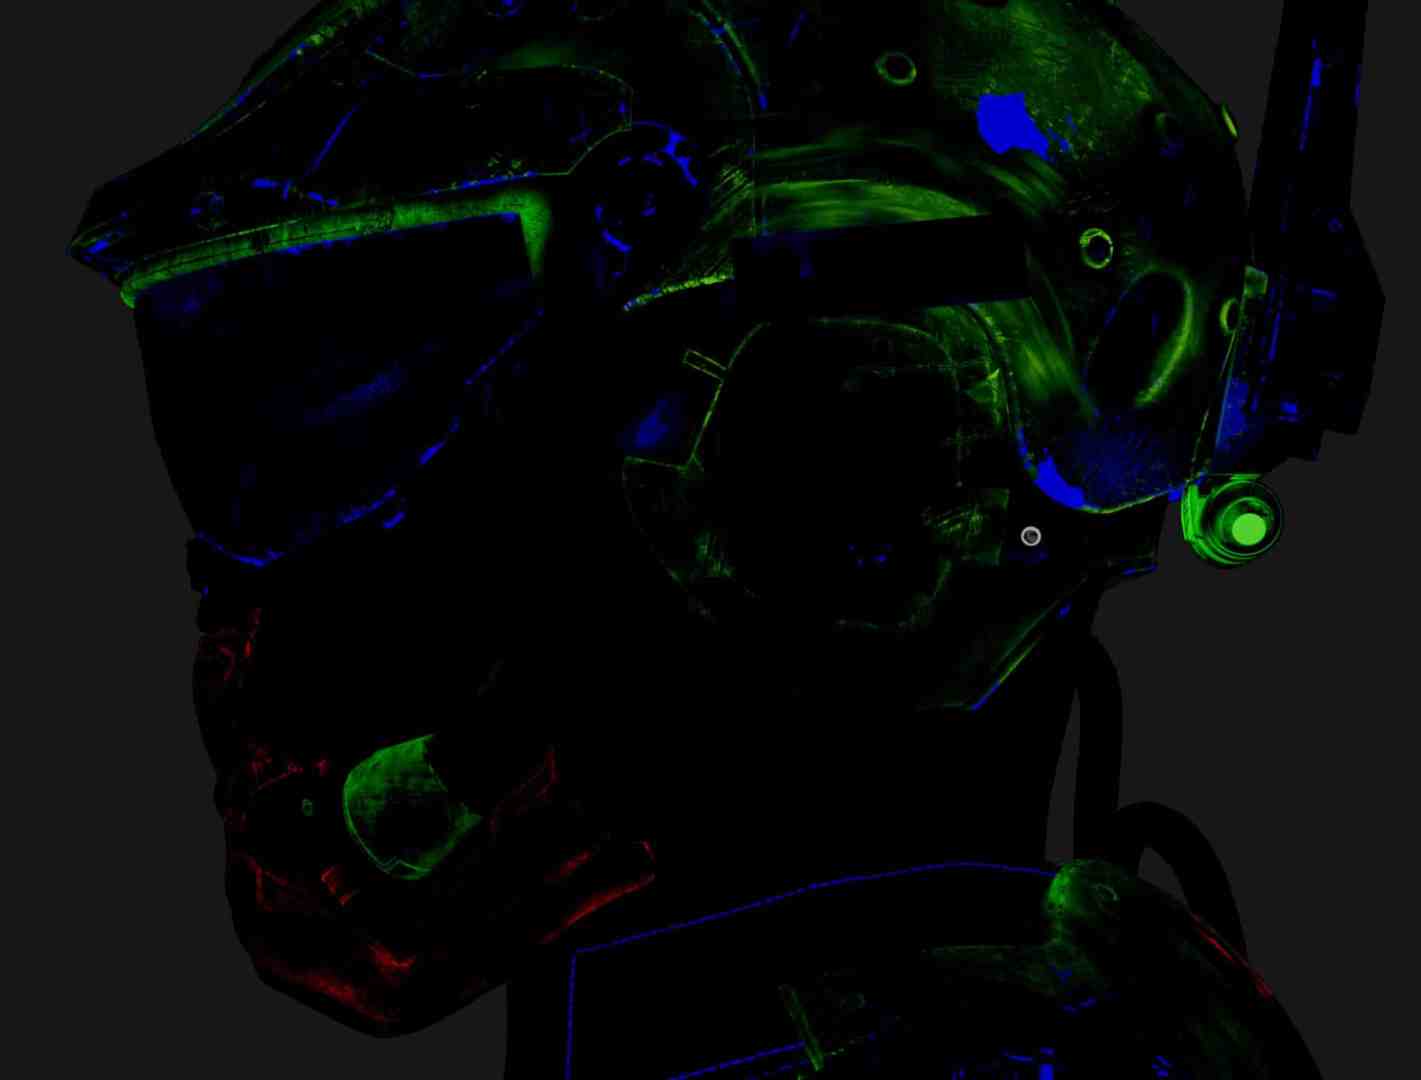
At the same time, Julian used substance painter strategically to generate smart masks quickly and efficiently. Three masks were packed into the R, G, and B channels of a base color map, which was then imported into Mari as a paint node. Using the Split RGB function, each mask was extracted and used as a separate alpha, allowing precise material control and adjustments without overloading the scene. This hybrid approach preserved Mari’s performance while benefiting from Substance’s speed and intuitive mask creation, combining the best of both tools.



Texturing Workflow
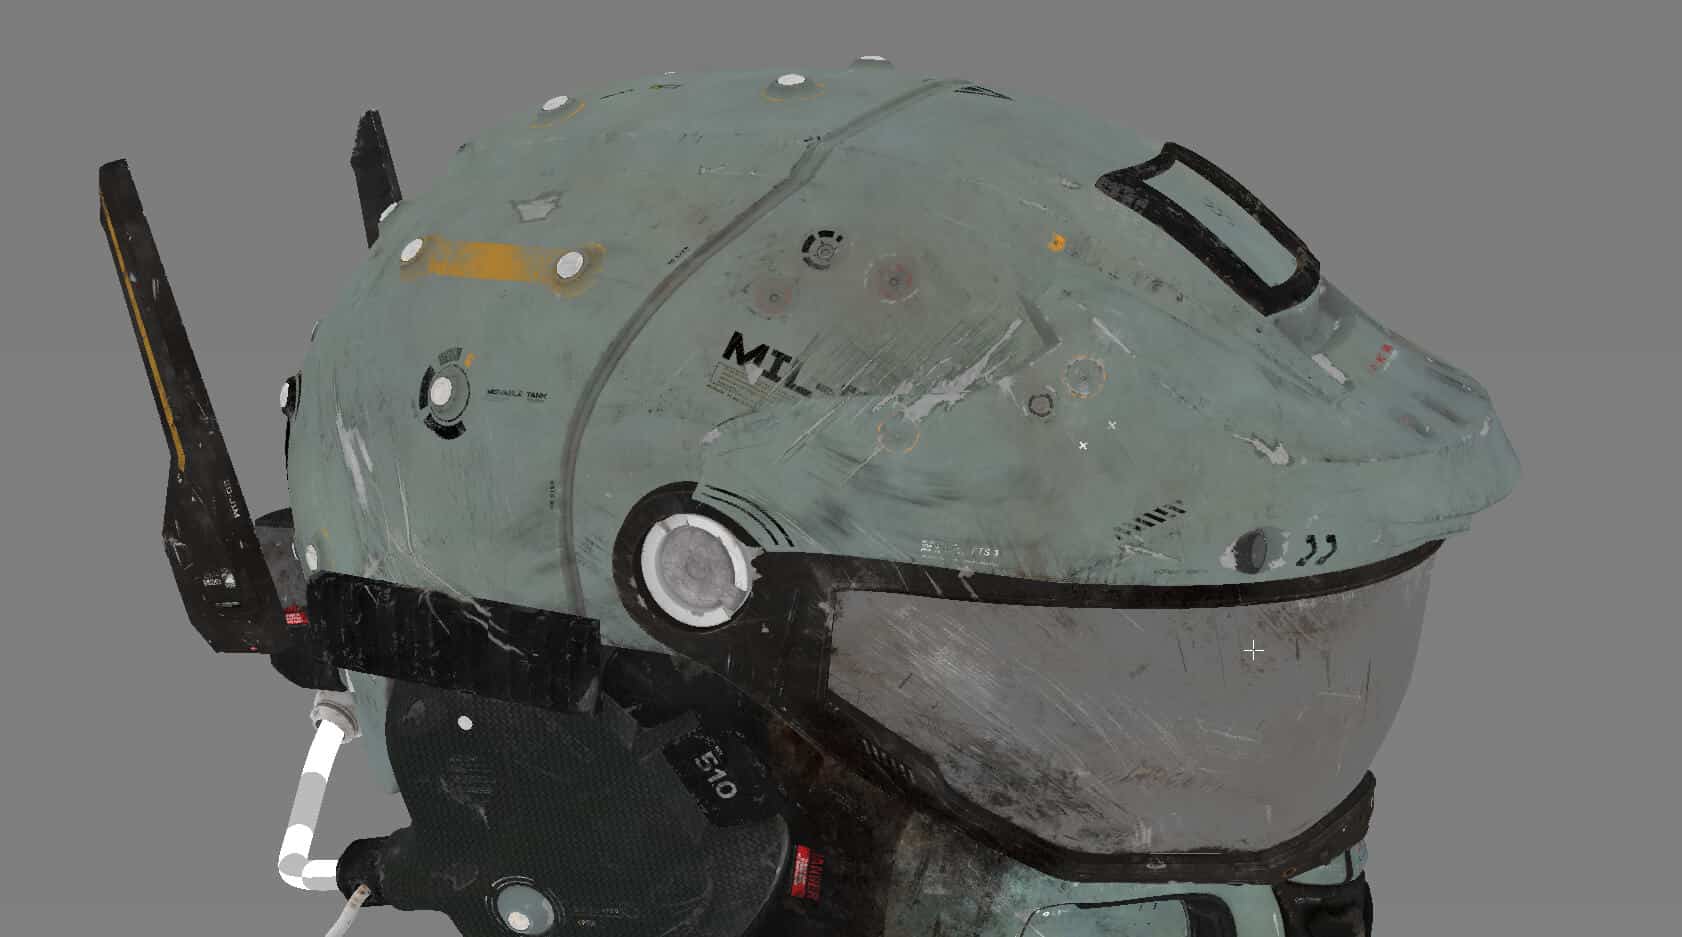
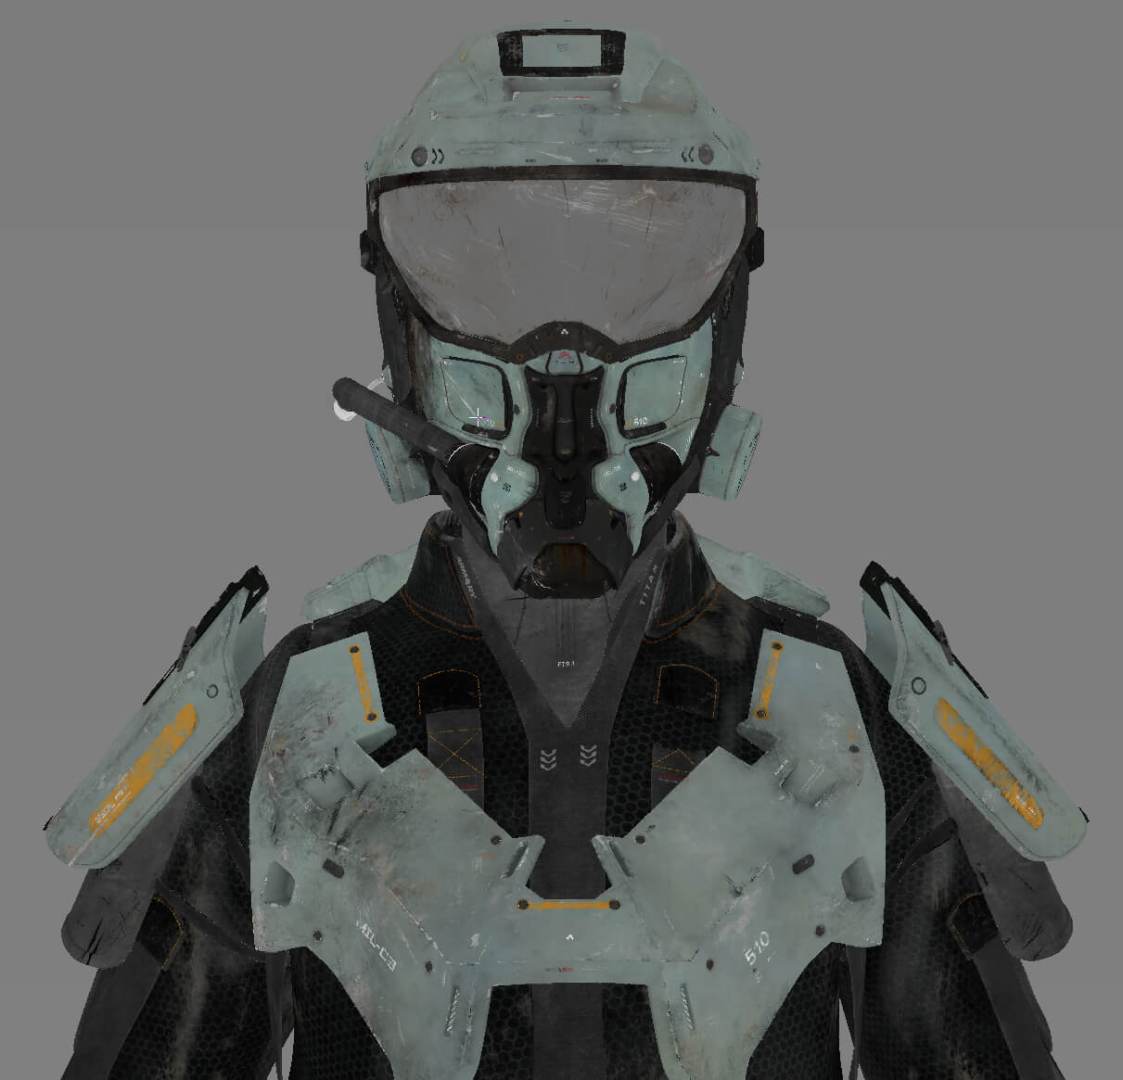
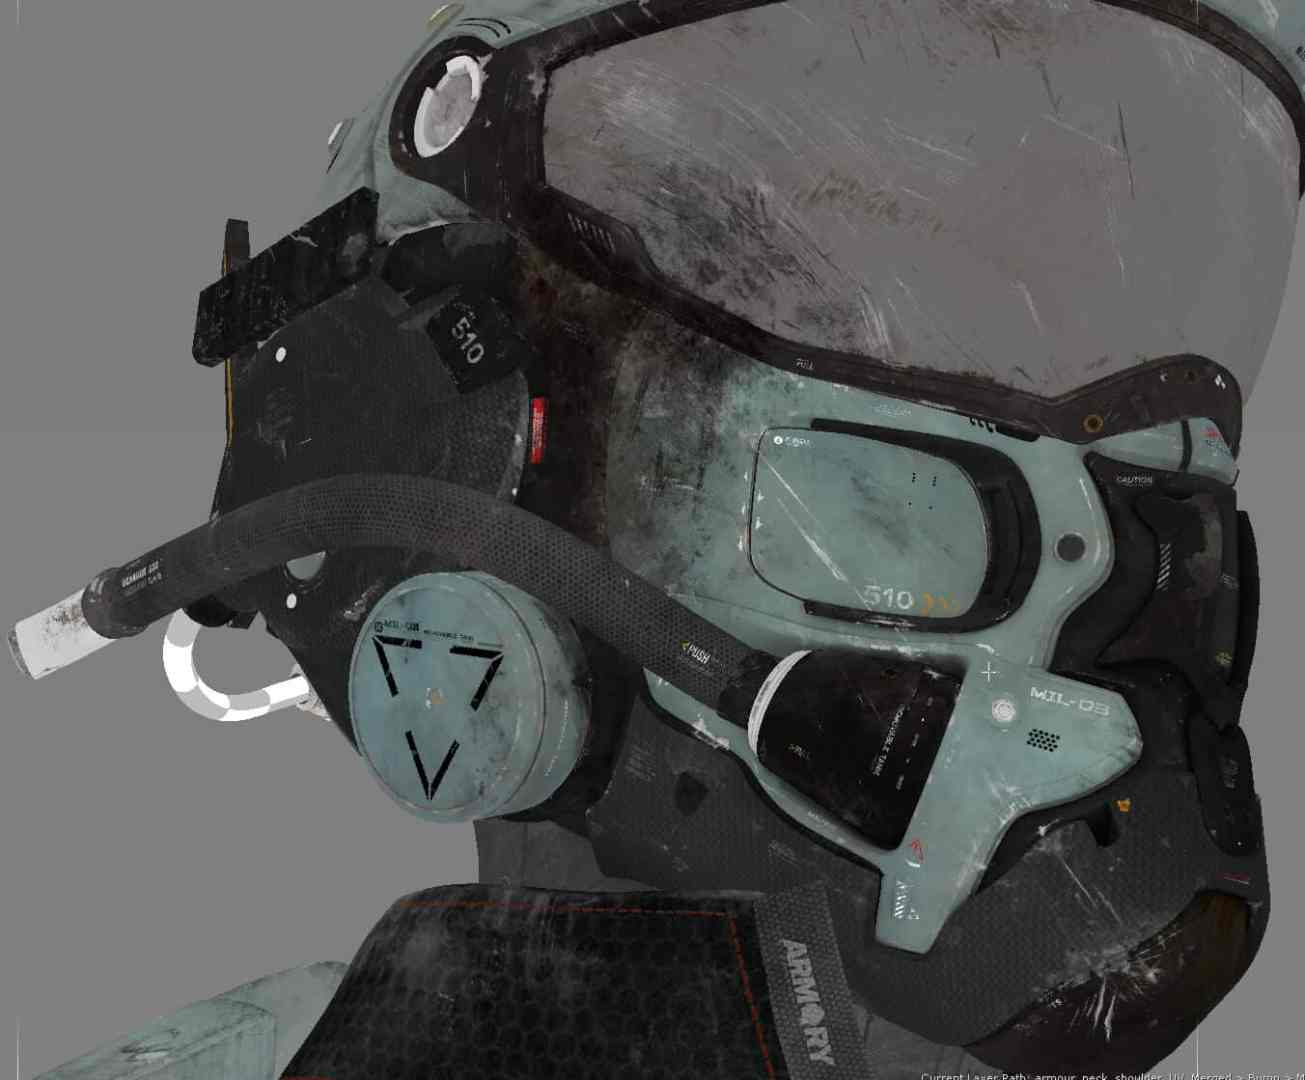
The texturing workflow in Mari began with a basic blockout based on triplanar projections and tileable maps. Building upon this, materials were clearly separated, and layers for dirt, dust, and damage were added. Details were then painted and projected.

It was important to mentally place oneself in the character’s situation. Where could scratches, wounds, or chipping realistically occur due to a plane crash? Where might the character have hit her head, and what would that mean for the material and surface?
The process started with the base color, which received the most attention. Throughout the process, references were constantly consulted to replicate damage, dirt, and material irregularities as credibly as possible. A particular focus was on clearly separating the different materials (such as individual layers of metal, carbon, paint, wear, and dirt). This was not only helpful for maintaining an overview but also enabled the creation of precise RGB masks for look development. These masks later provided more flexibility in shading and allowed targeted adjustments to individual material groups. This workflow was used to work through the secondary layers, such as roughness, specular weight, coat, bump, displacement, etc. This gave the character more life, realism, and depth.
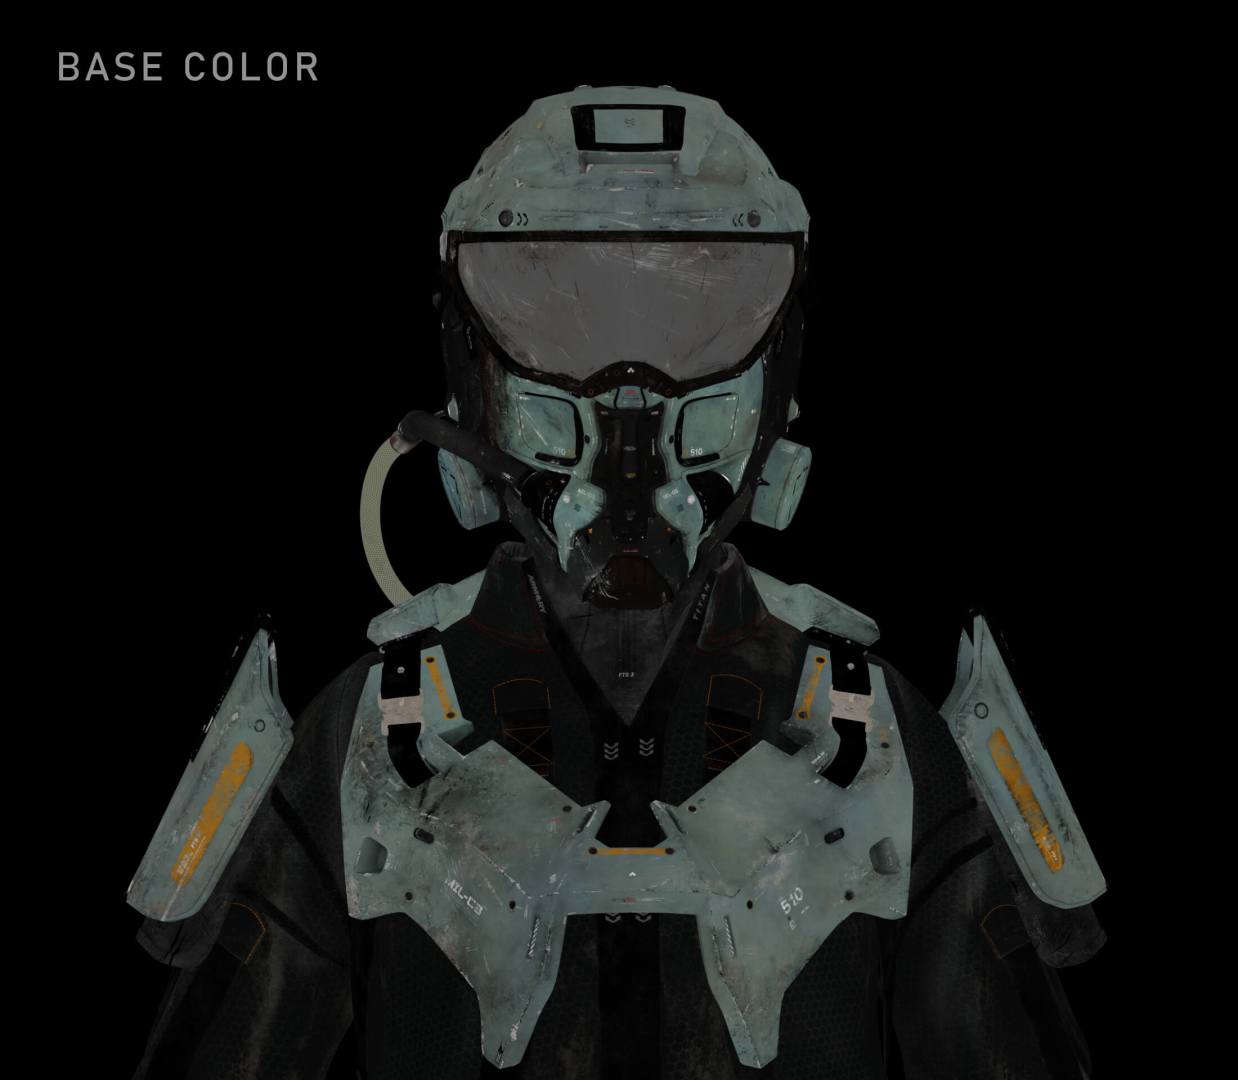
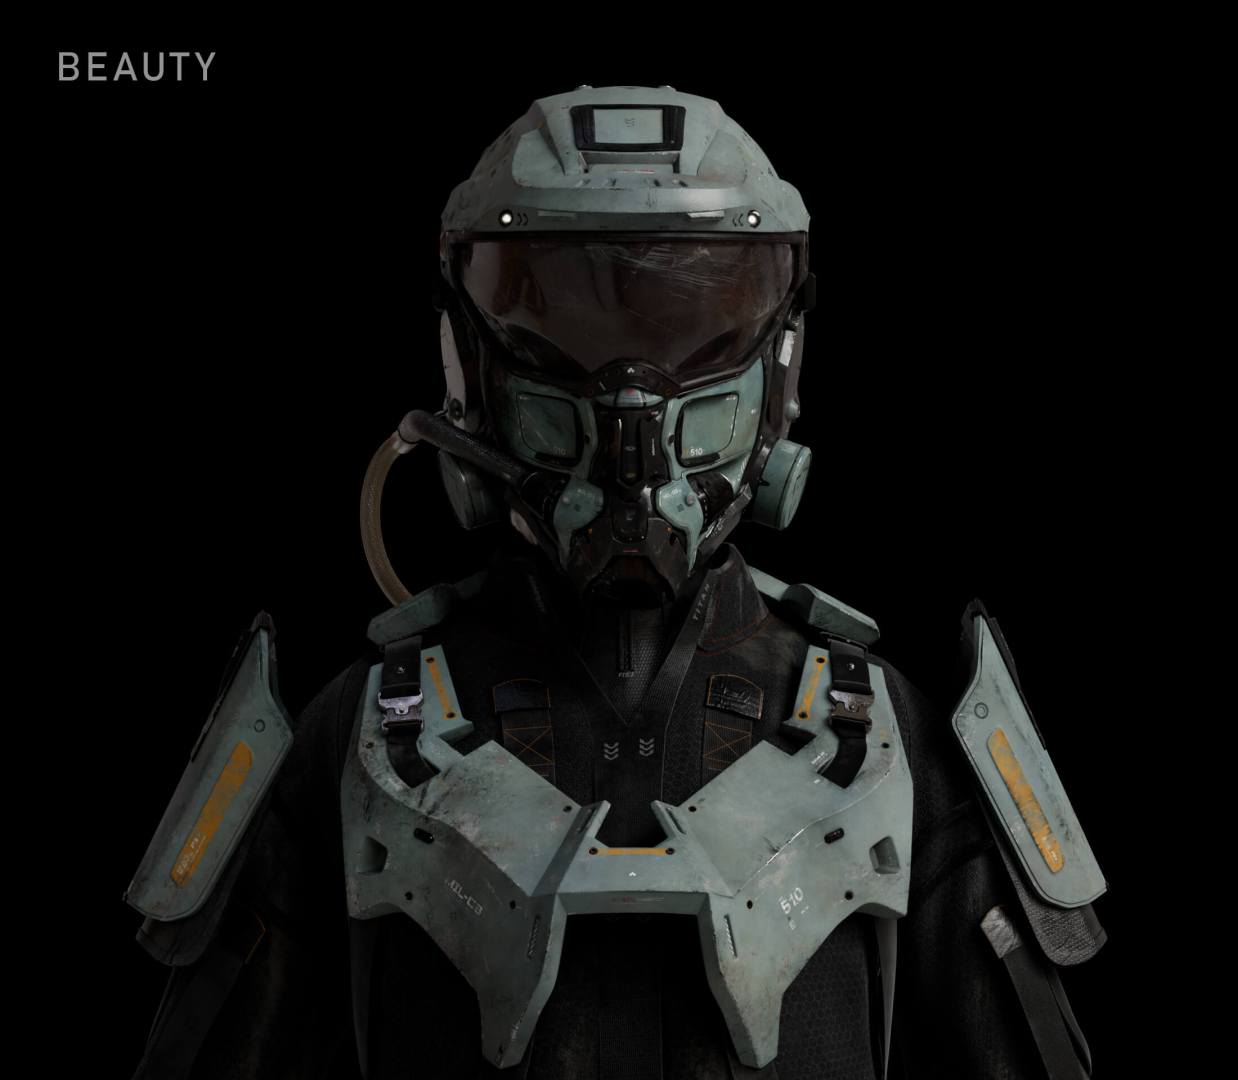
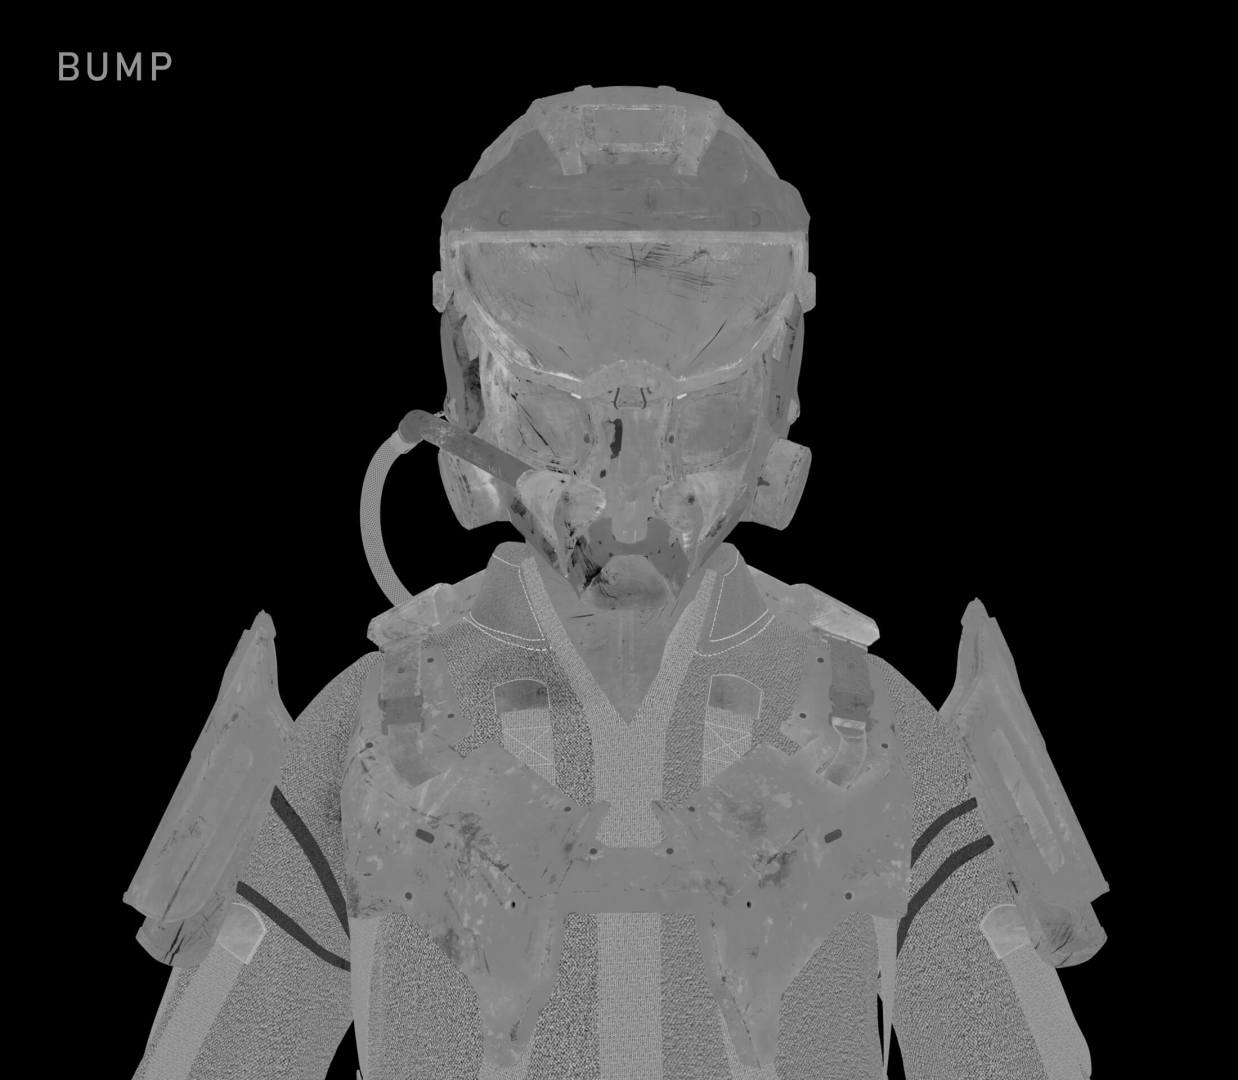


During the texturing process, regular switches between Maya and Mari were made. In Arnold, the shader setup was built, and turntables were rendered to specifically adjust the values of the maps and achieve the best possible result.
Challenges and Storytelling
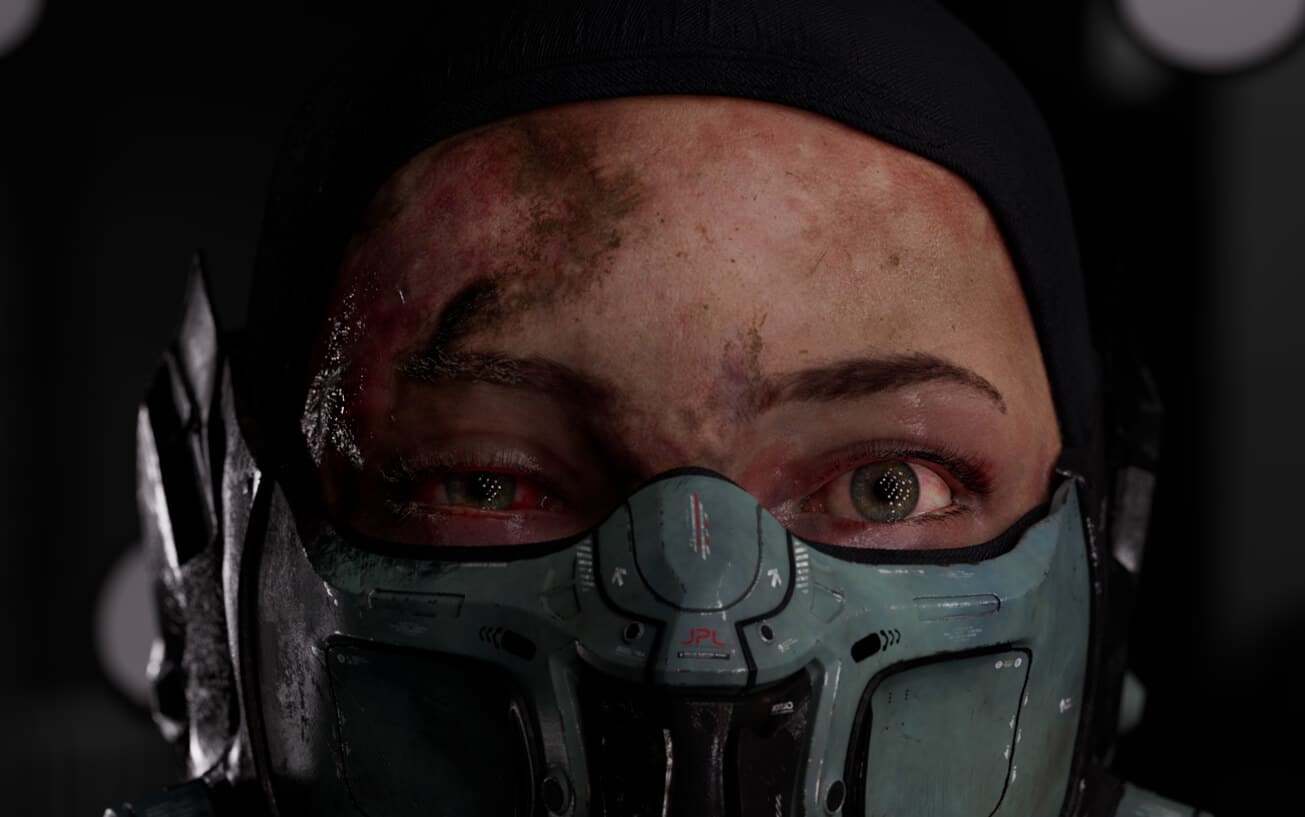
The biggest self-imposed challenge was creating a realistic skin texture with blemishes and second-degree burns. Although Julian had previously worked on various skin textures and CG doubles, implementing a face with wounds, skin imperfections, and simultaneous grooming was both exciting and demanding.
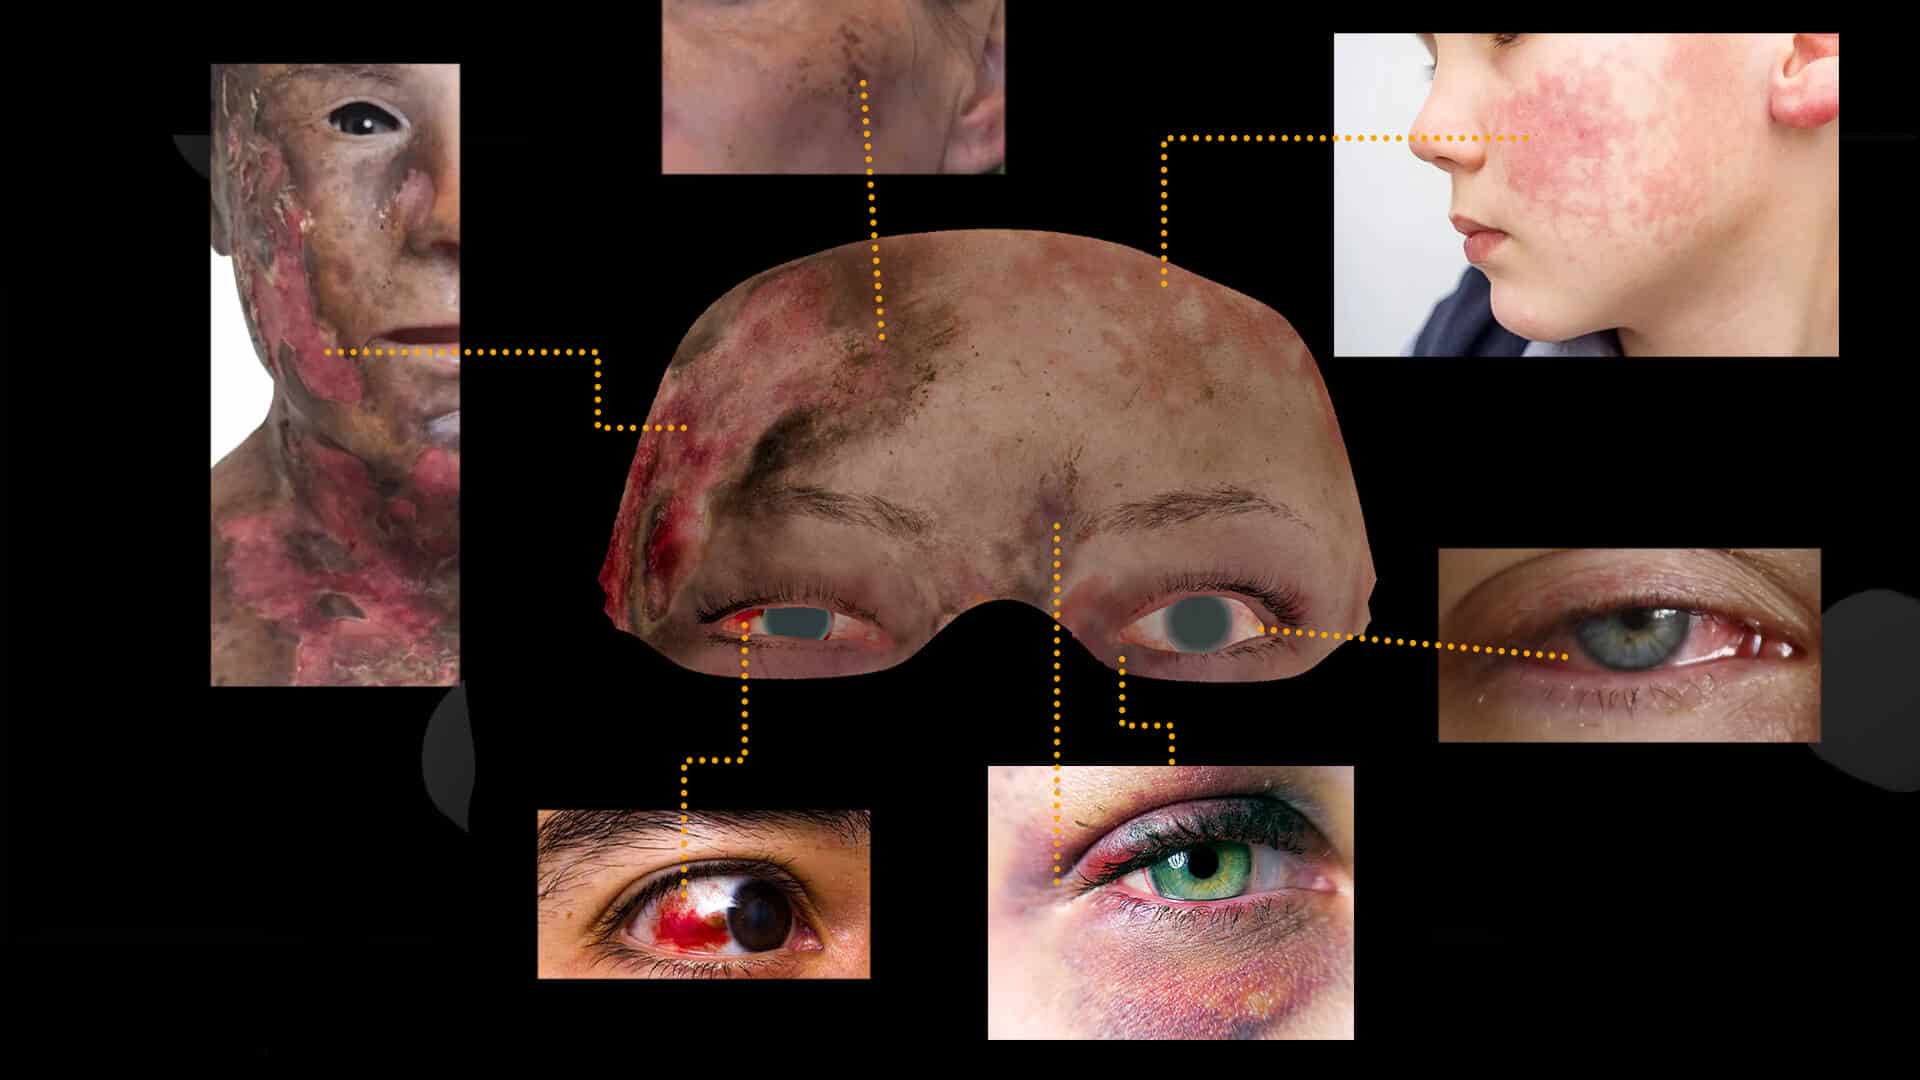
Balancing the facial areas was particularly challenging. Since the burn on the left side was very dominant, additional details had to be integrated on the right side to create visual balance. This included stress marks and dirt. Additionally, hair was deliberately removed on the left side to credibly represent the burned area.
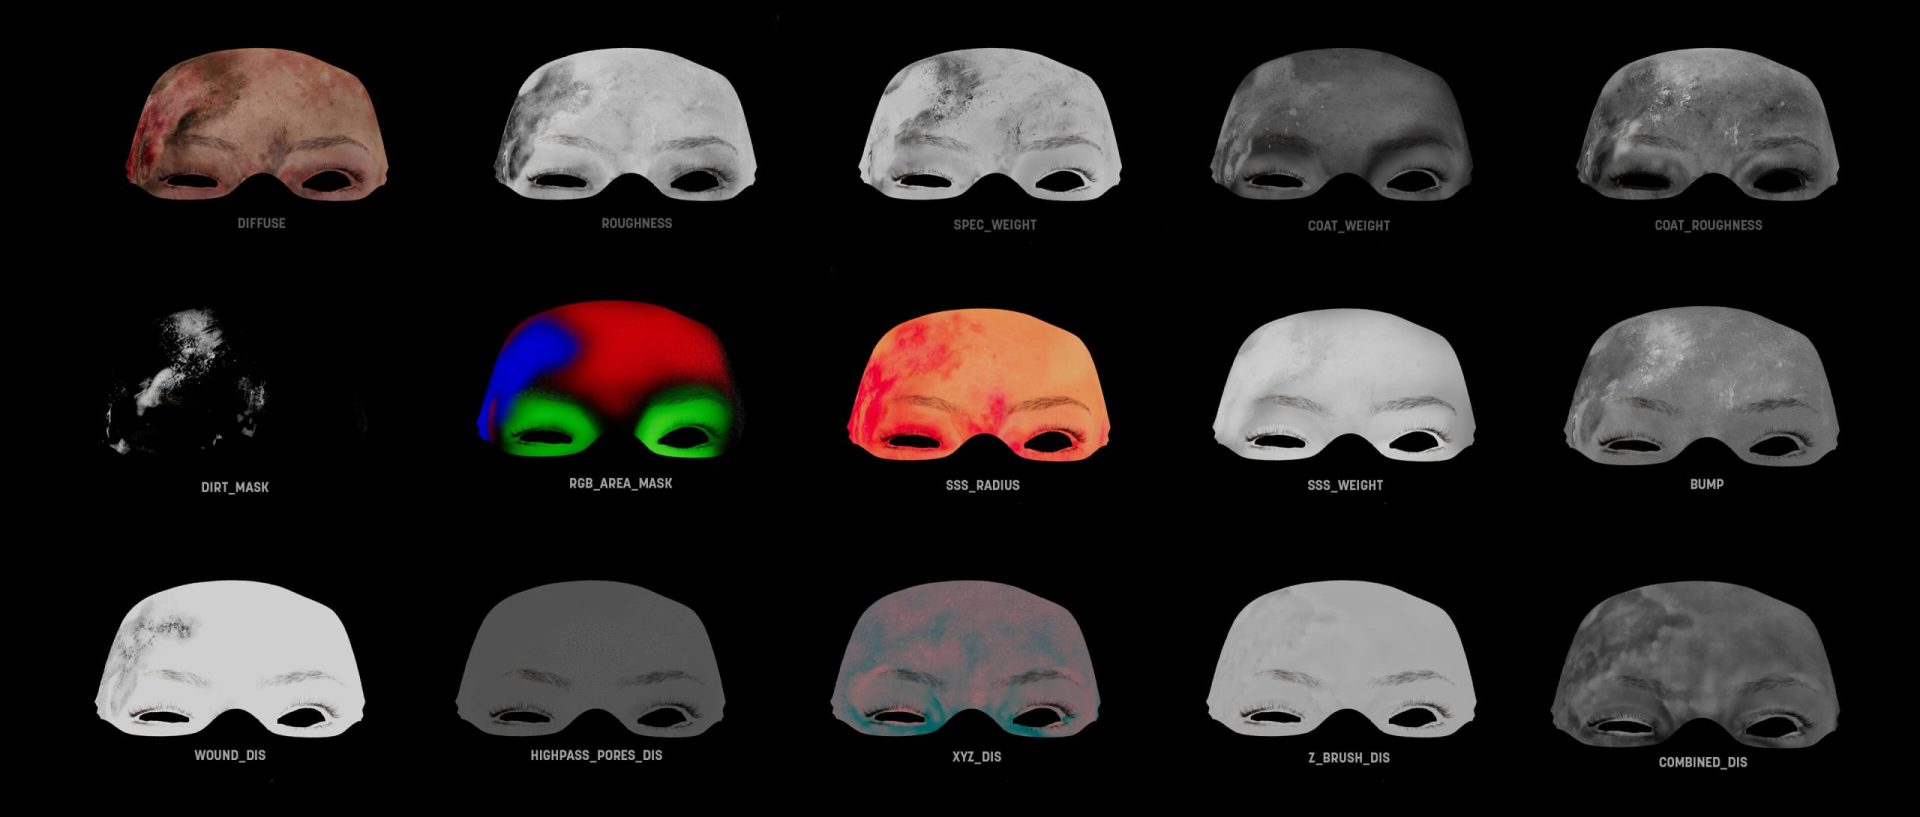
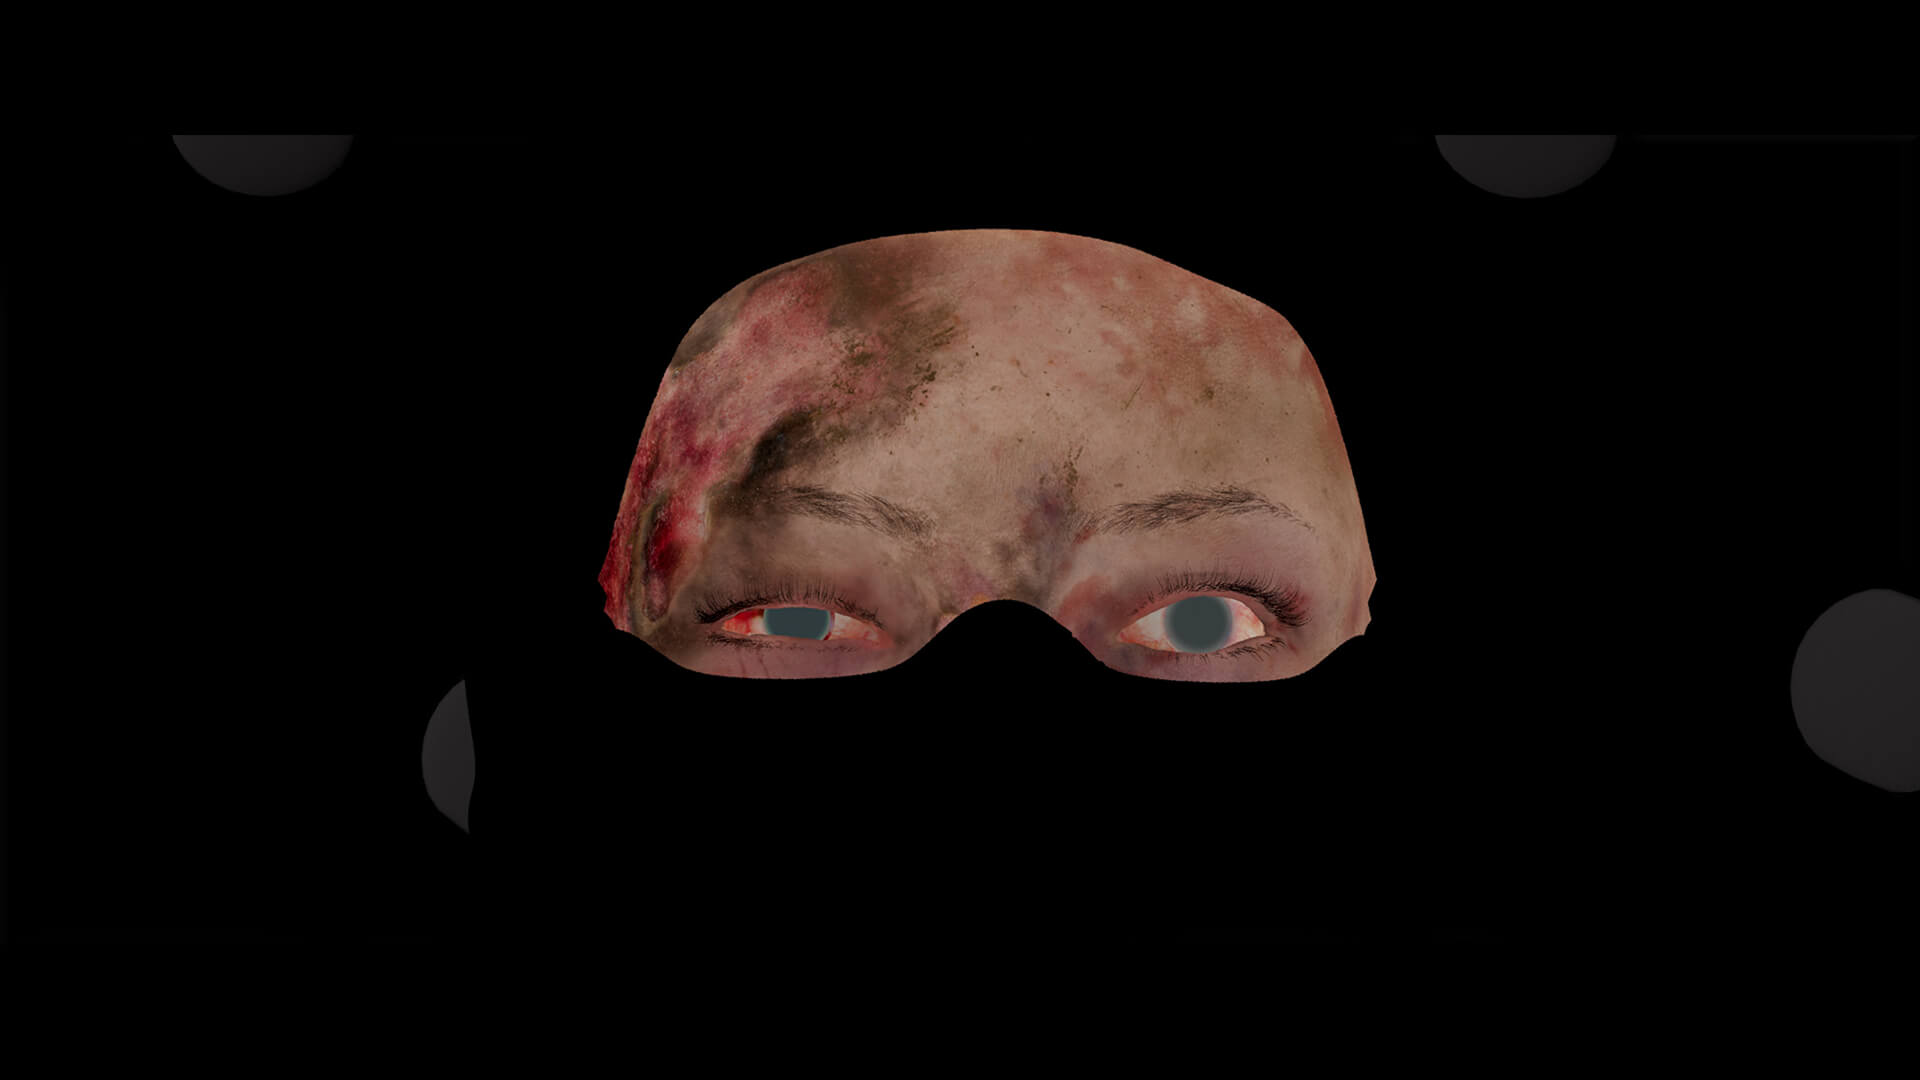
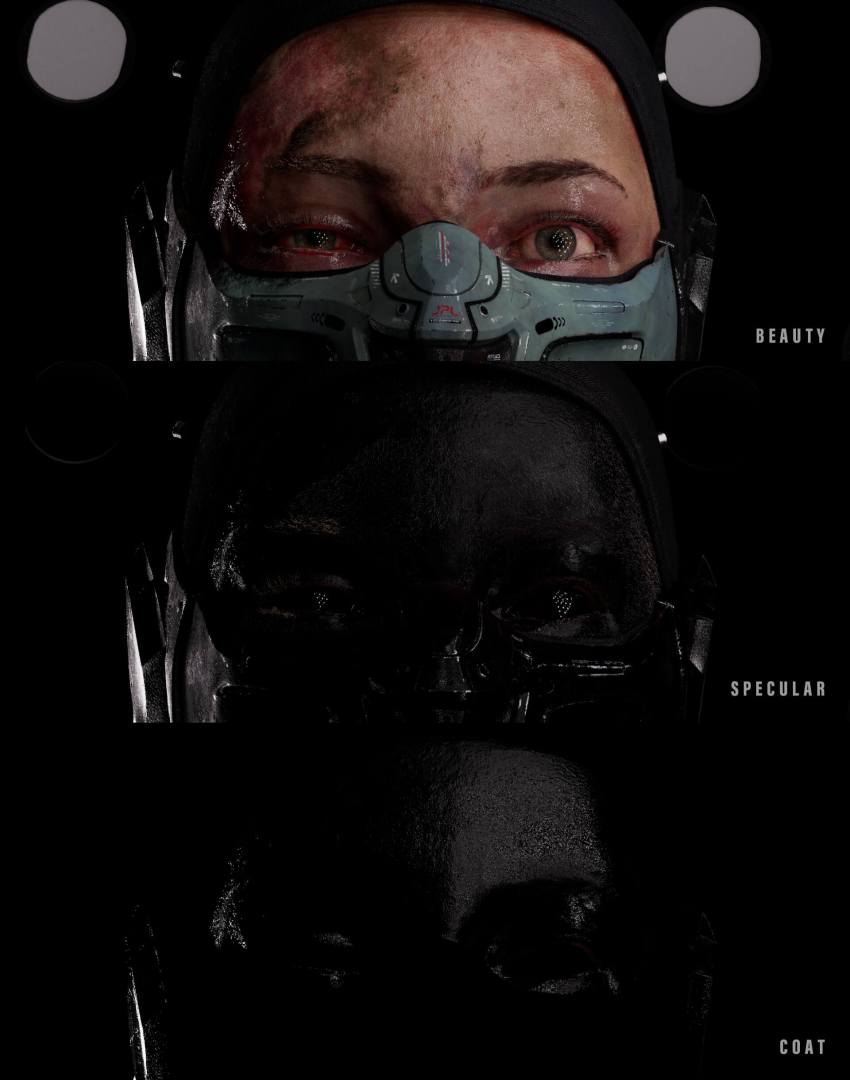

For more control in the shader, secondary maps, layered displacement maps, and RGB area masks were also used. This ensured that the textures functioned as planned and allowed for more flexible work. Storytelling played a central role—every scar, every dirt mark was intended not only to be visually convincing but also to convey something about the character’s fate and experience.
Lighting Implementation
Since the project was carried out by only two people, a deliberately simple environment was chosen. The lighting mood was strongly influenced by the story-based scene: the pilot is illuminated from the left side (where her burning, crashed plane is located). To achieve this effect, an animated fire was used as a gobo light source—simple and effective. The character gazes into the distance of the landscape, with the focus on the helmet, face, and expression.

Additionally, a key light and a fill light were used to emphasize important details and ensure the character’s readability. A suitable HDRI provided soft, natural illumination of the entire scene.
For each light, AOVs were rendered separately. This allowed full control over the lighting mood in Nuke and in the “back-to-beauty (b2b)” process, enabling targeted adjustments in post-production. The lighting setup was overall simple but functional, which was precisely the goal: to create atmosphere without overloading.

It is recommended to render essential AOVs (ideally AOVs per light). This provides maximum flexibility and artistic freedom in post-production.
Reflections and Learnings
In hindsight, the lighting and perhaps the environment might have been adjusted further. After rendering the final sequence, additional look development still frames were created in a forest environment to showcase texturing and look development separately. It was noticed that the character appeared somewhat more realistic and atmospheric there.
However, due to a clear schedule in the pipeline and a fixed deadline, a complete change of the lighting setup was not possible at that point. Nevertheless, satisfaction with the result was achieved, and that’s what ultimately matters.
Overall, Paul and Julian had a very structured approach from start to finish: numerous meetings, clear task distribution, and joint planning of all steps. The decision to focus on the upper half of the character and deliver 100% quality proved to be absolutely worthwhile. Joint brainstorming, regular mutual reviews, and constant exchange greatly strengthened their teamwork. This also ensured a smooth technical pipeline.
Future Plans
The Survivor is completed, and everybody was happy with the result. Personal projects are definitely already in planning. There is a desire to continue working on strong characters and atmospheric scenes, with great attention to detail and a good sense of atmosphere. There are certainly enough ideas!
Contact Information
If you have any questions or are interested in a creative exchange, feel free to reach out on LinkedIn and say hello. Paul Zielske here on LinkedIn, ArtStation, and The Rookies and Julian Frank here on LinkedIn, ArtStation, and The Rookies under their respective names. They always welcome feedback, project-related discussions, or new contacts from the industry!


