Table of Contents Show
InstaMAT has set out to become nothing less than the holy grail of the material and texture pipeline. To that end, it combines a layer-based painting system with a scalable node-based material and asset editor, adds a mix of innovative features, and builds on InstaLOD’s mesh-processing DNA. We are taking a closer look at this ambitious package to see whether it can earn a place in a real production pipeline, or whether the free version will remain its main selling point.
In the spirit of Substance Painter, we start by texturing an asset. The Element Graph, comparable to Substance Designer, will be examined in detail in a second part. We will not ignore it entirely here, as the tight integration between these areas offers too many interesting possibilities to leave aside.
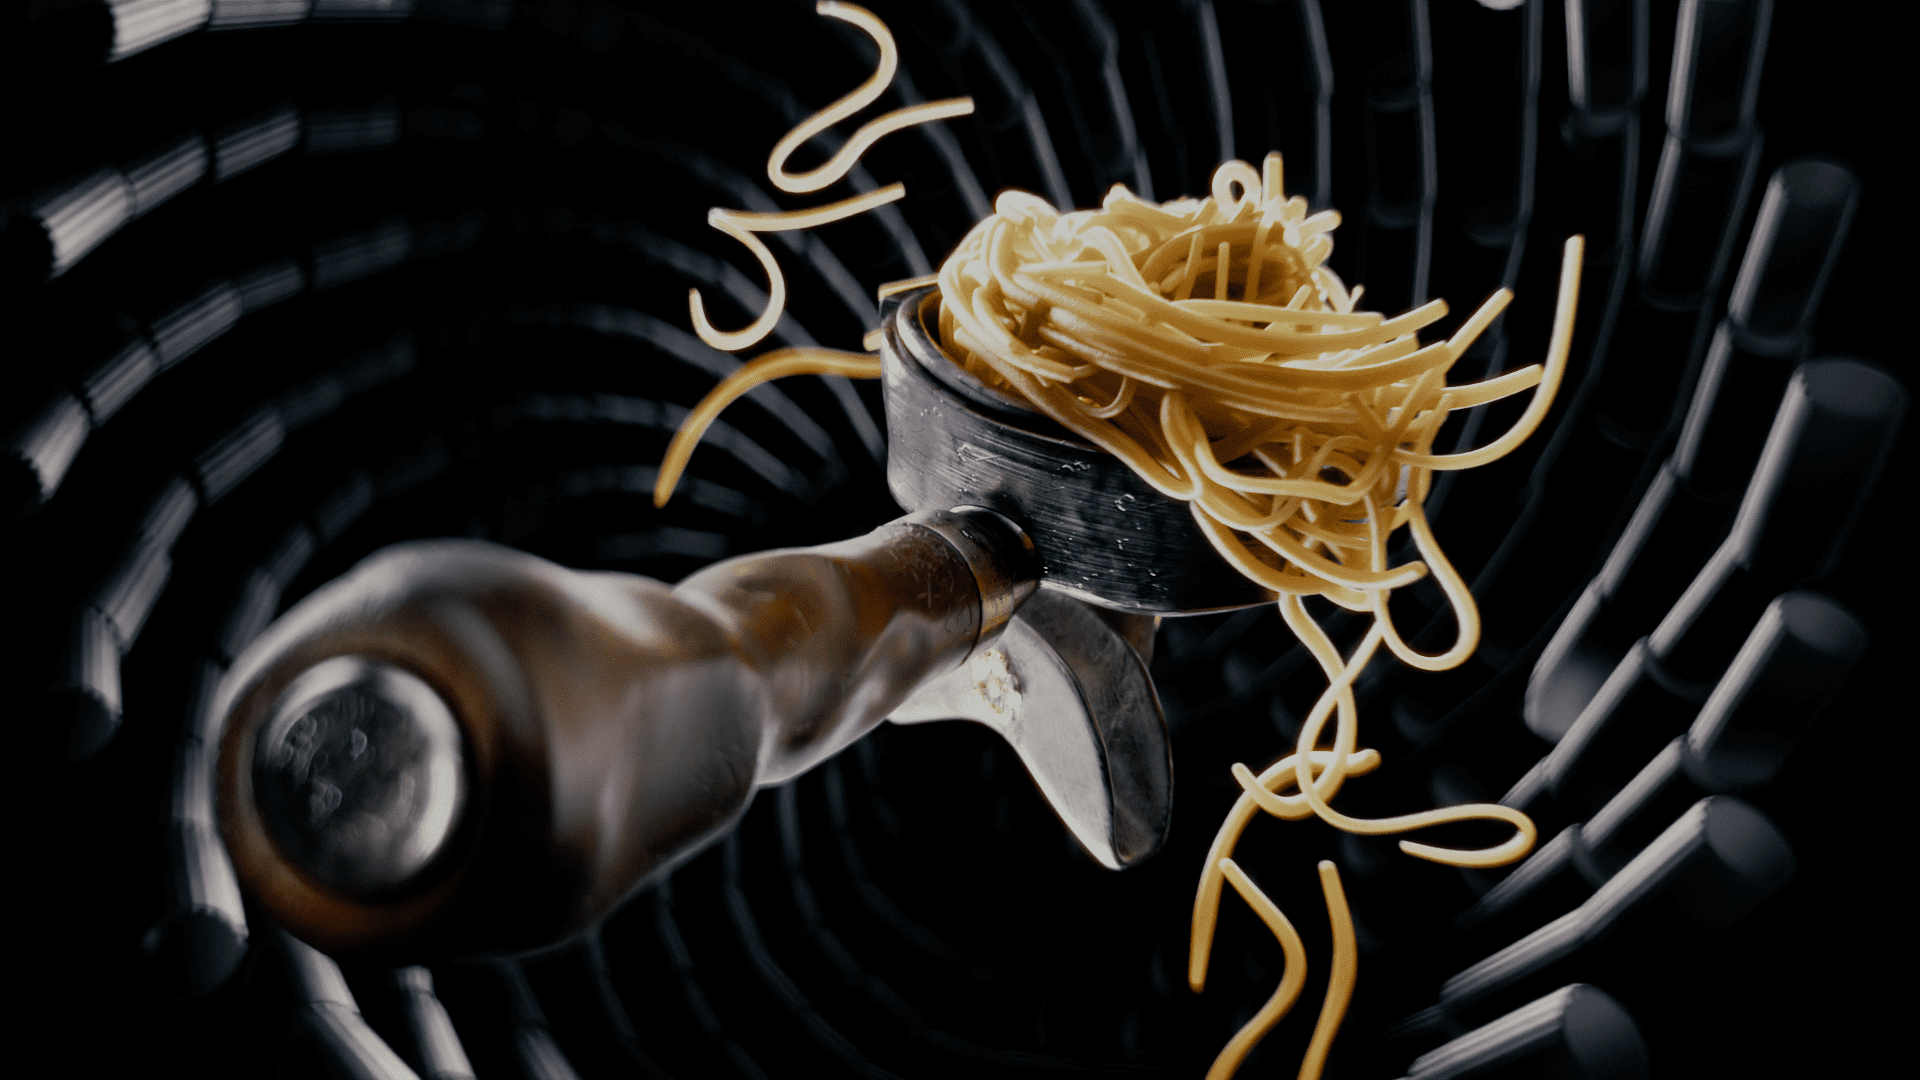
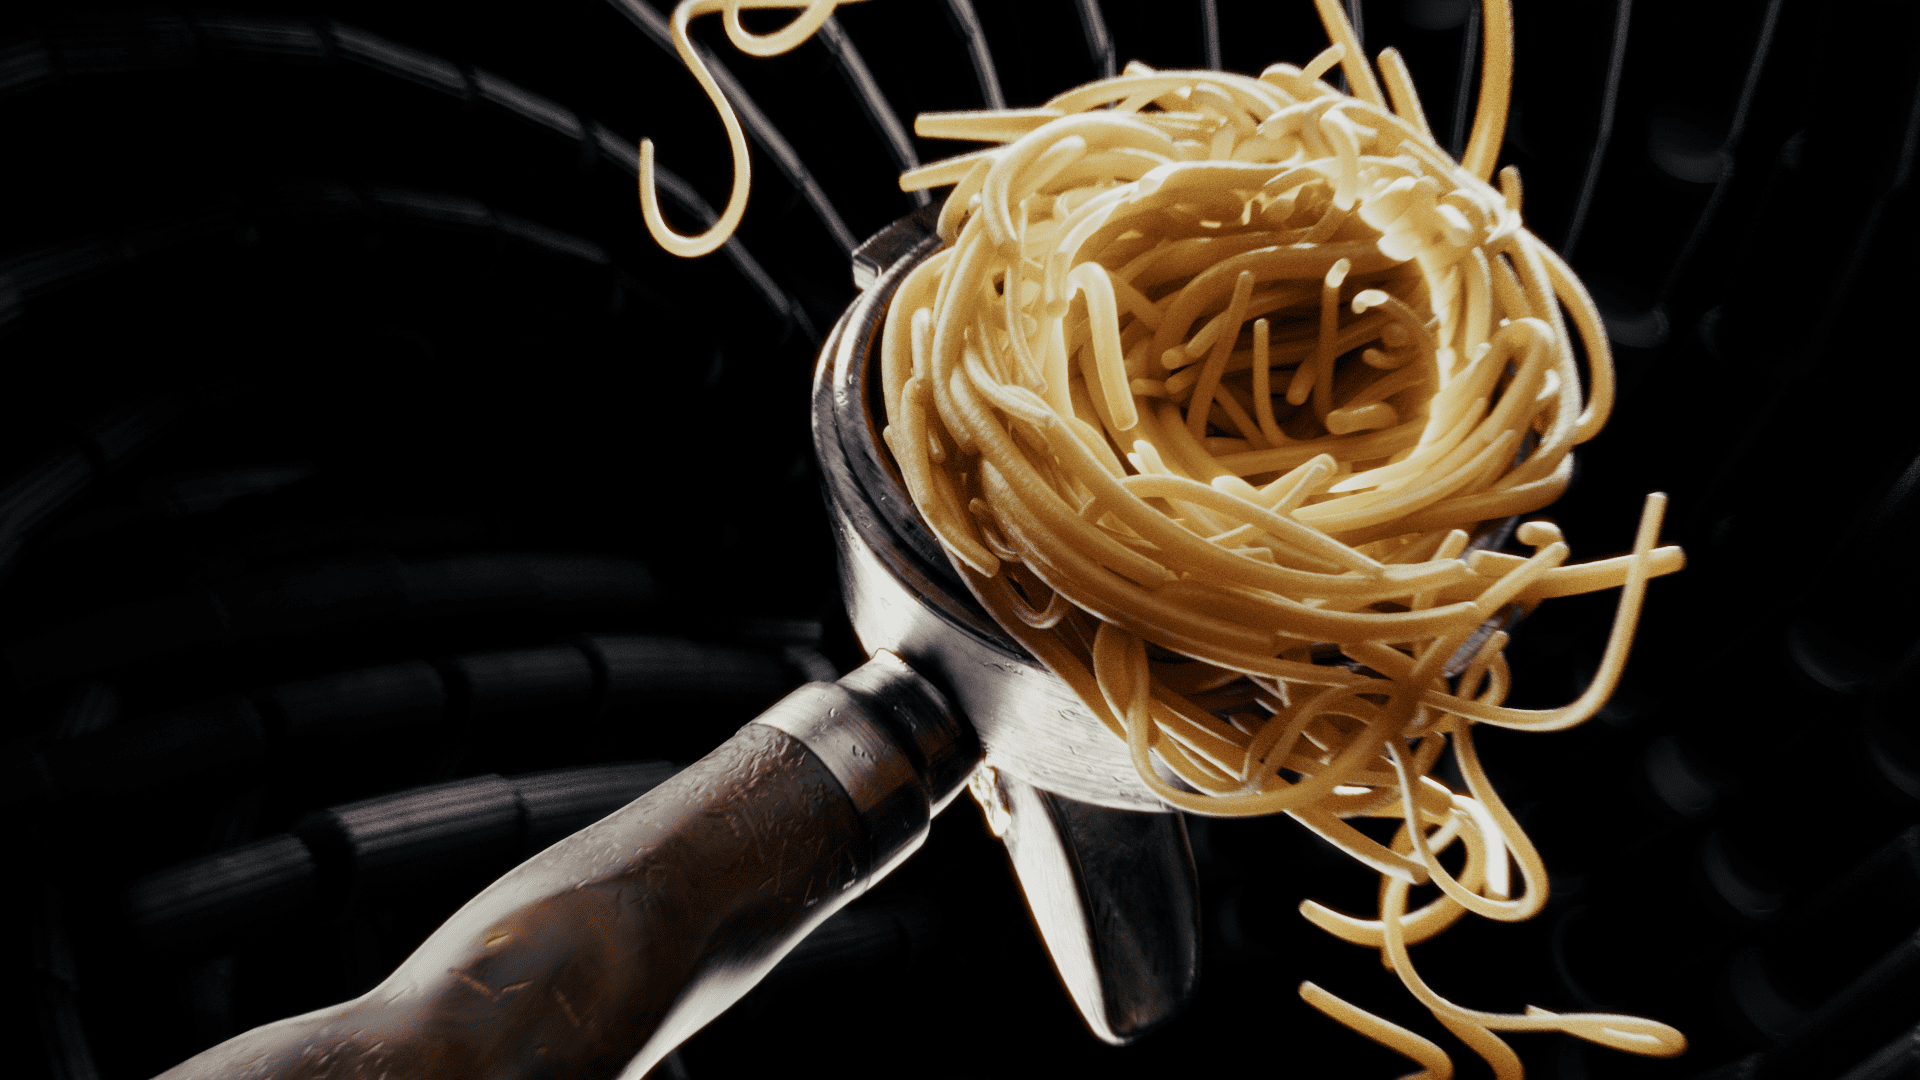
For our demo workflow, we need a suitable asset. Which object combines all materials in one place? Exactly, the pasta strainer portafilter. Wood, plastic, metal, and something organic. Quickly modelled in Houdini and exported as USD.

PROJECT vs PACKAGE
A bit of differentiation is needed here. The welcome screen first offers the option to create a project, which then leads to a second level of choices. For the sake of simplicity, we loosely map familiar tools to the respective options, but this is only a rough orientation. InstaMAT is not restricted to these boundaries and lives from the interplay between its different areas.
Asset Texturing works much like Substance Painter, allowing you to paint directly onto a mesh or apply materials.
Material Layer Project is closest to Substance Sampler or Quixel Mixer, enabling the creation of a new material by layering pre-made materials.
Materialize Image uses AI-based methods to generate a PBR material from a photograph.
Element Graph operates in the vein of Houdini’s Copernicus or Substance Designer, providing a node-based environment for material creation. InstaMAT goes significantly further here, offering everything from automated mesh processing to terrain generation.

That said, this initial choice is not particularly critical. Afterward, you end up in the Package overview, where you can freely create additional projects and import assets. It is best to think of a Package as a folder structure that contains your projects, such as layer painting setups and node graphs, along with all imported meshes and assets.
UV Unwrapping
For our purposes, “Asset Texturing” is the obvious next step. Unfortunately, the modeller clearly had nothing but pasta on their mind and forgot about the UVs. According to InstaMAT, this is not a problem at all. This is where the mesh functionality inherited from InstaLOD comes into play.
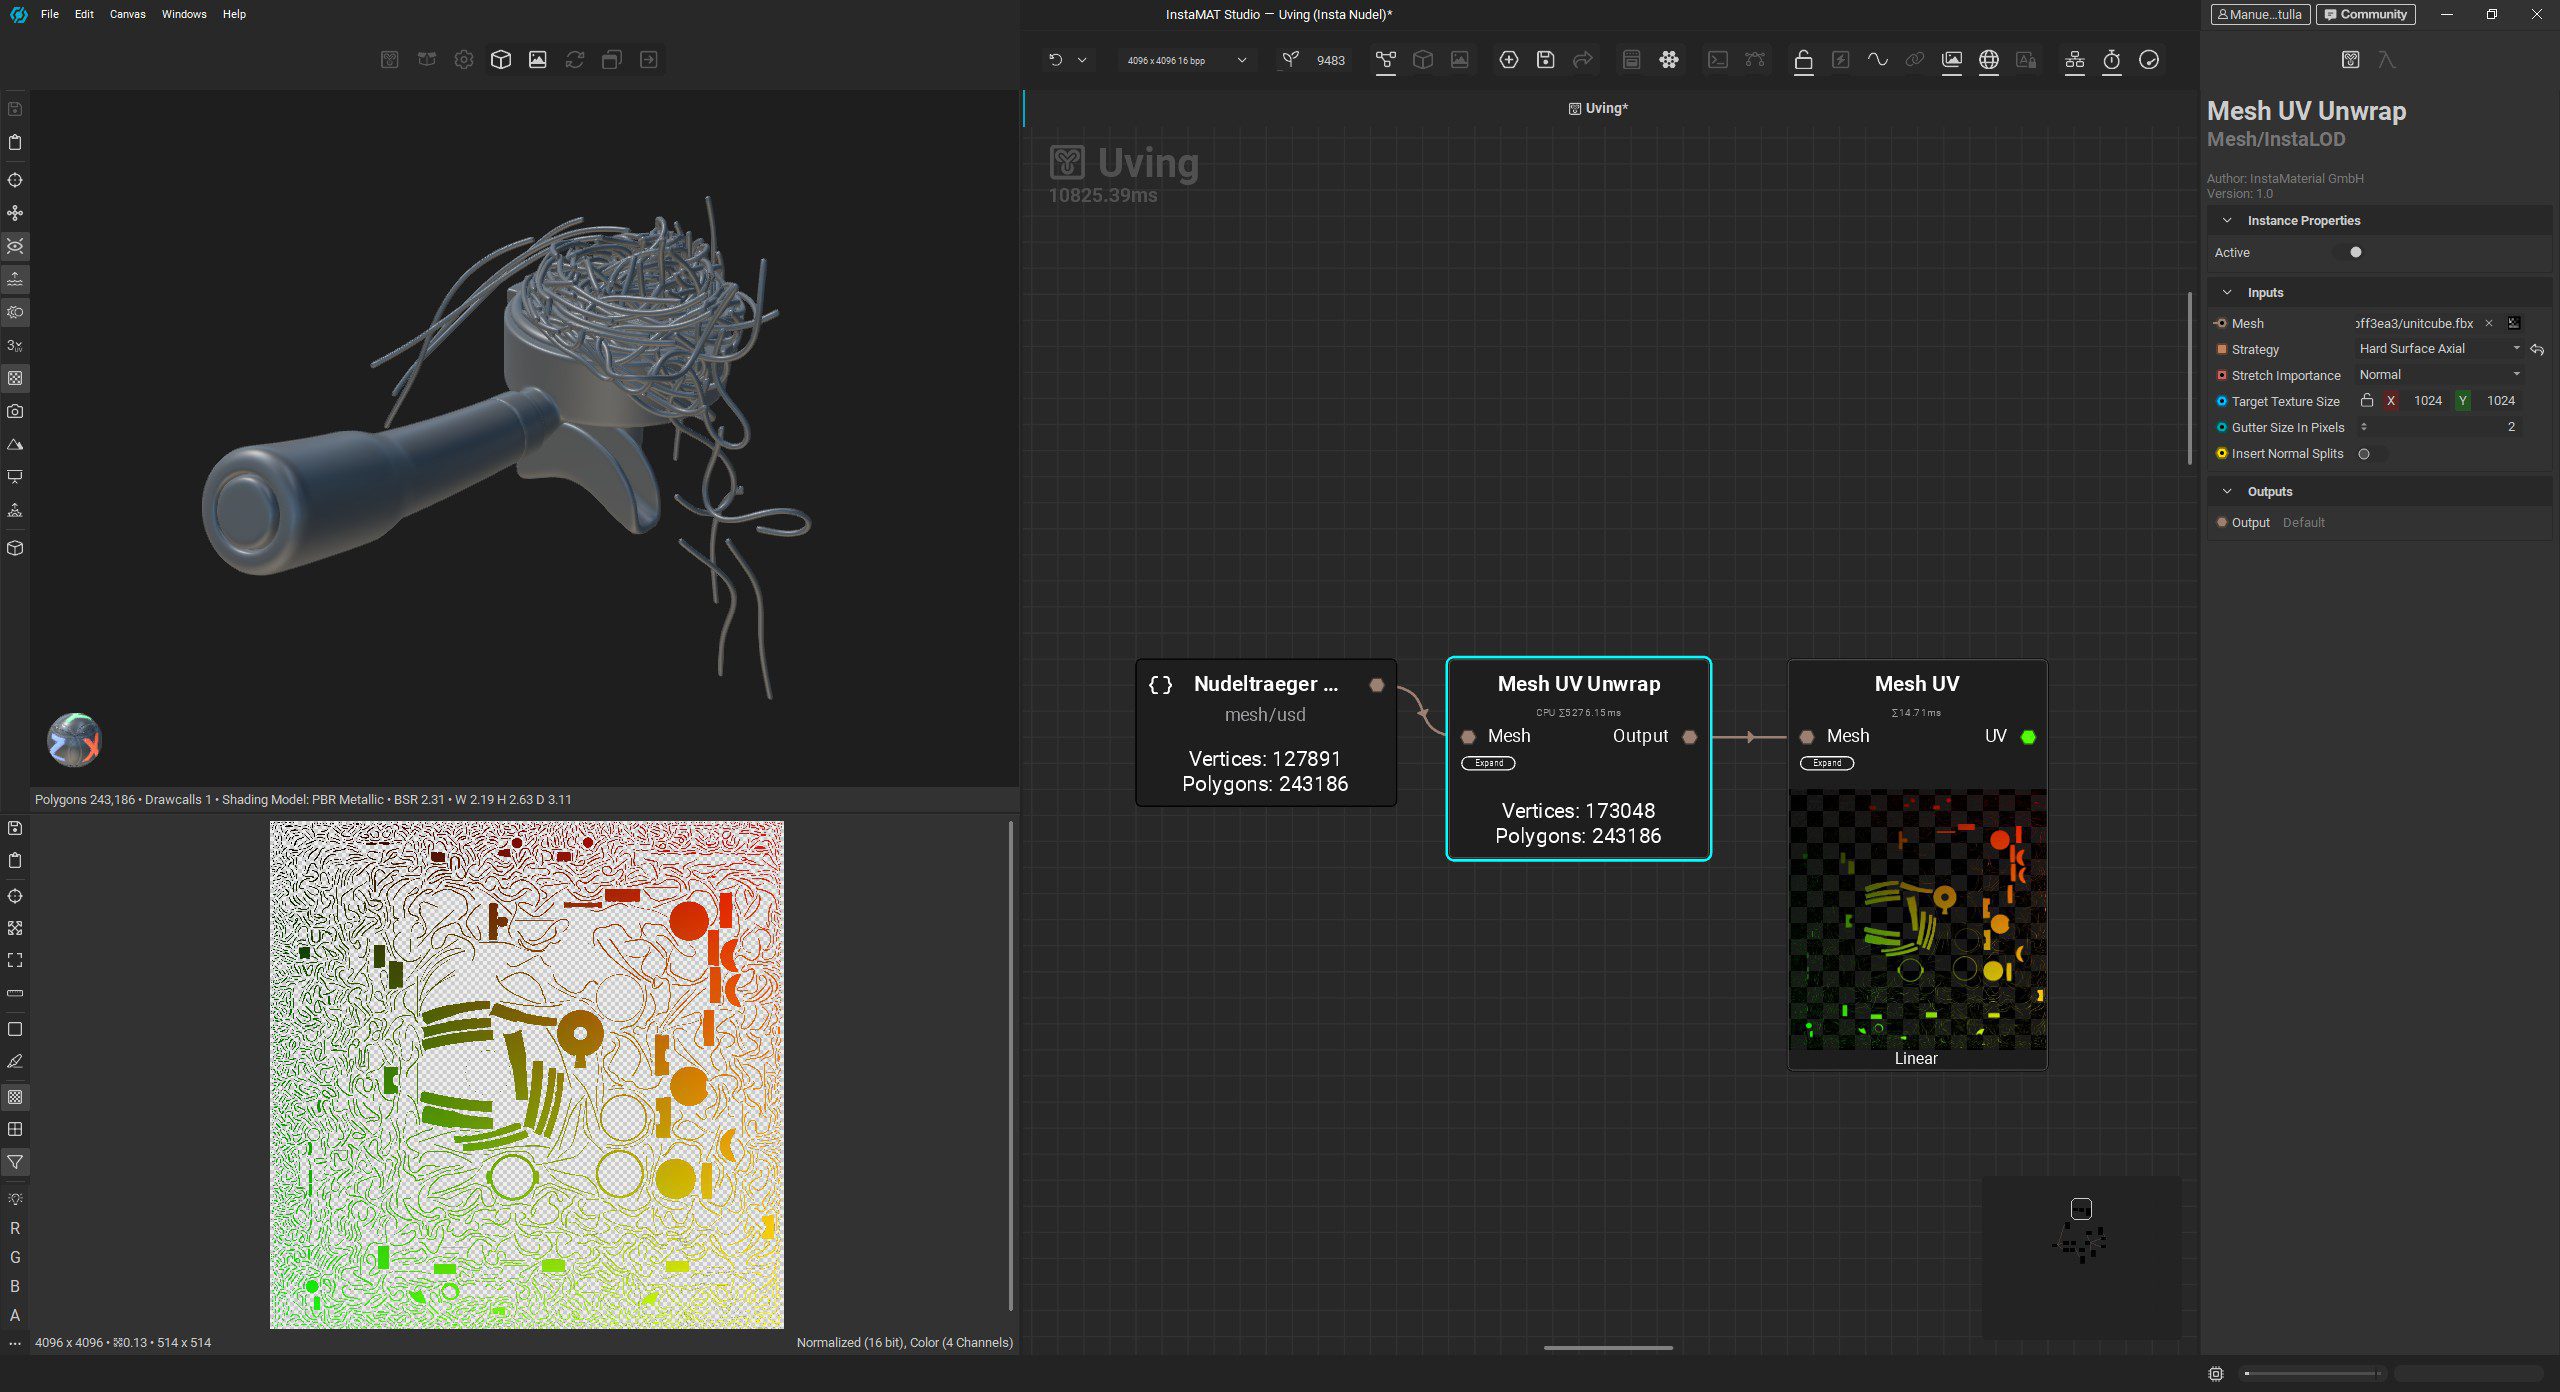
We start with our first small Element Graph, created via File > New Project > Element Graph. The unwrapping itself happens inside this controlled node-based environment. Since we do not want to keep things too simple, we split our mesh into three UDIM tiles for the handle, the strainer, and the noodles. The USD mesh is added to the Package via drag and drop and from there into the still empty node graph.
During import, InstaMAT triangulates the mesh in the background. If issues occur at this stage, for example with non-importable NURBS geometry such as the noodles, it helps to pre-triangulate the mesh in the DCC application. The basic unwrap pipeline consists of adding a Mesh UV Unwrap node via the space bar, and that is essentially it. Different methods are available, including Organic, Hard Surface Axial, and Angle. In our case, we use Hard Surface Axial.

Noodles with UVs
Since the noodles already have UVs and we want to unwrap the handle and metal parts separately, we split the asset using the Mesh Extract by Submesh node. Submesh masks detect connected polygon flows within a mesh. This very useful node is also available in the Layer Painting context.
To generate UDIMs, we offset two of the node branches by one and two units respectively using Mesh UV Transform, then merge the three branches with Mesh Append. Finally, we export the mesh, now equipped with proper UV tiles, as FBX. Details on the export dialog and the rather central export button will be covered later in this article.
Orientation
We drag the FBX we just exported into our Package and can now create an Asset Texturing project. For new projects within a Package, there is a very prominent “+” button. In the project dialog, the key setting to watch is Type set to UDIM, and selecting the mesh from the Package. Templates can safely be ignored for now.
In terms of logic, the interface follows the conventions of established painting applications. You find your way around quickly and, more importantly, actually enjoy working in it. There are a few quirks, but after some quality time in InstaMAT, they stop standing out.
Interface
So we begin with the classic material brawl. We pick suitable materials from the library and happily mix them using all kinds of masks. A first plastic material is selected from the library on the left (A) and dragged directly onto the handle. Even though this is a single mesh, InstaMAT automatically and correctly masks the handle’s polygon flow using the same submesh technique, via Mesh Mask by Submesh. That is genuinely practical.
The library also contains grunge maps, decals, alphas, and similar assets. Navigation is quick, helped by various filters and view options. The additional tabs on the left, above the library, lead to the project settings. These include the UDIM setup, bit depth and colour space per channel, and the underlying mesh. There are also viewport settings, such as tone mapping, AgX in our case, lighting controls like HDR blur and saturation, and render settings. Thanks to optional ray tracing and global illumination, the viewport looks quite presentable.
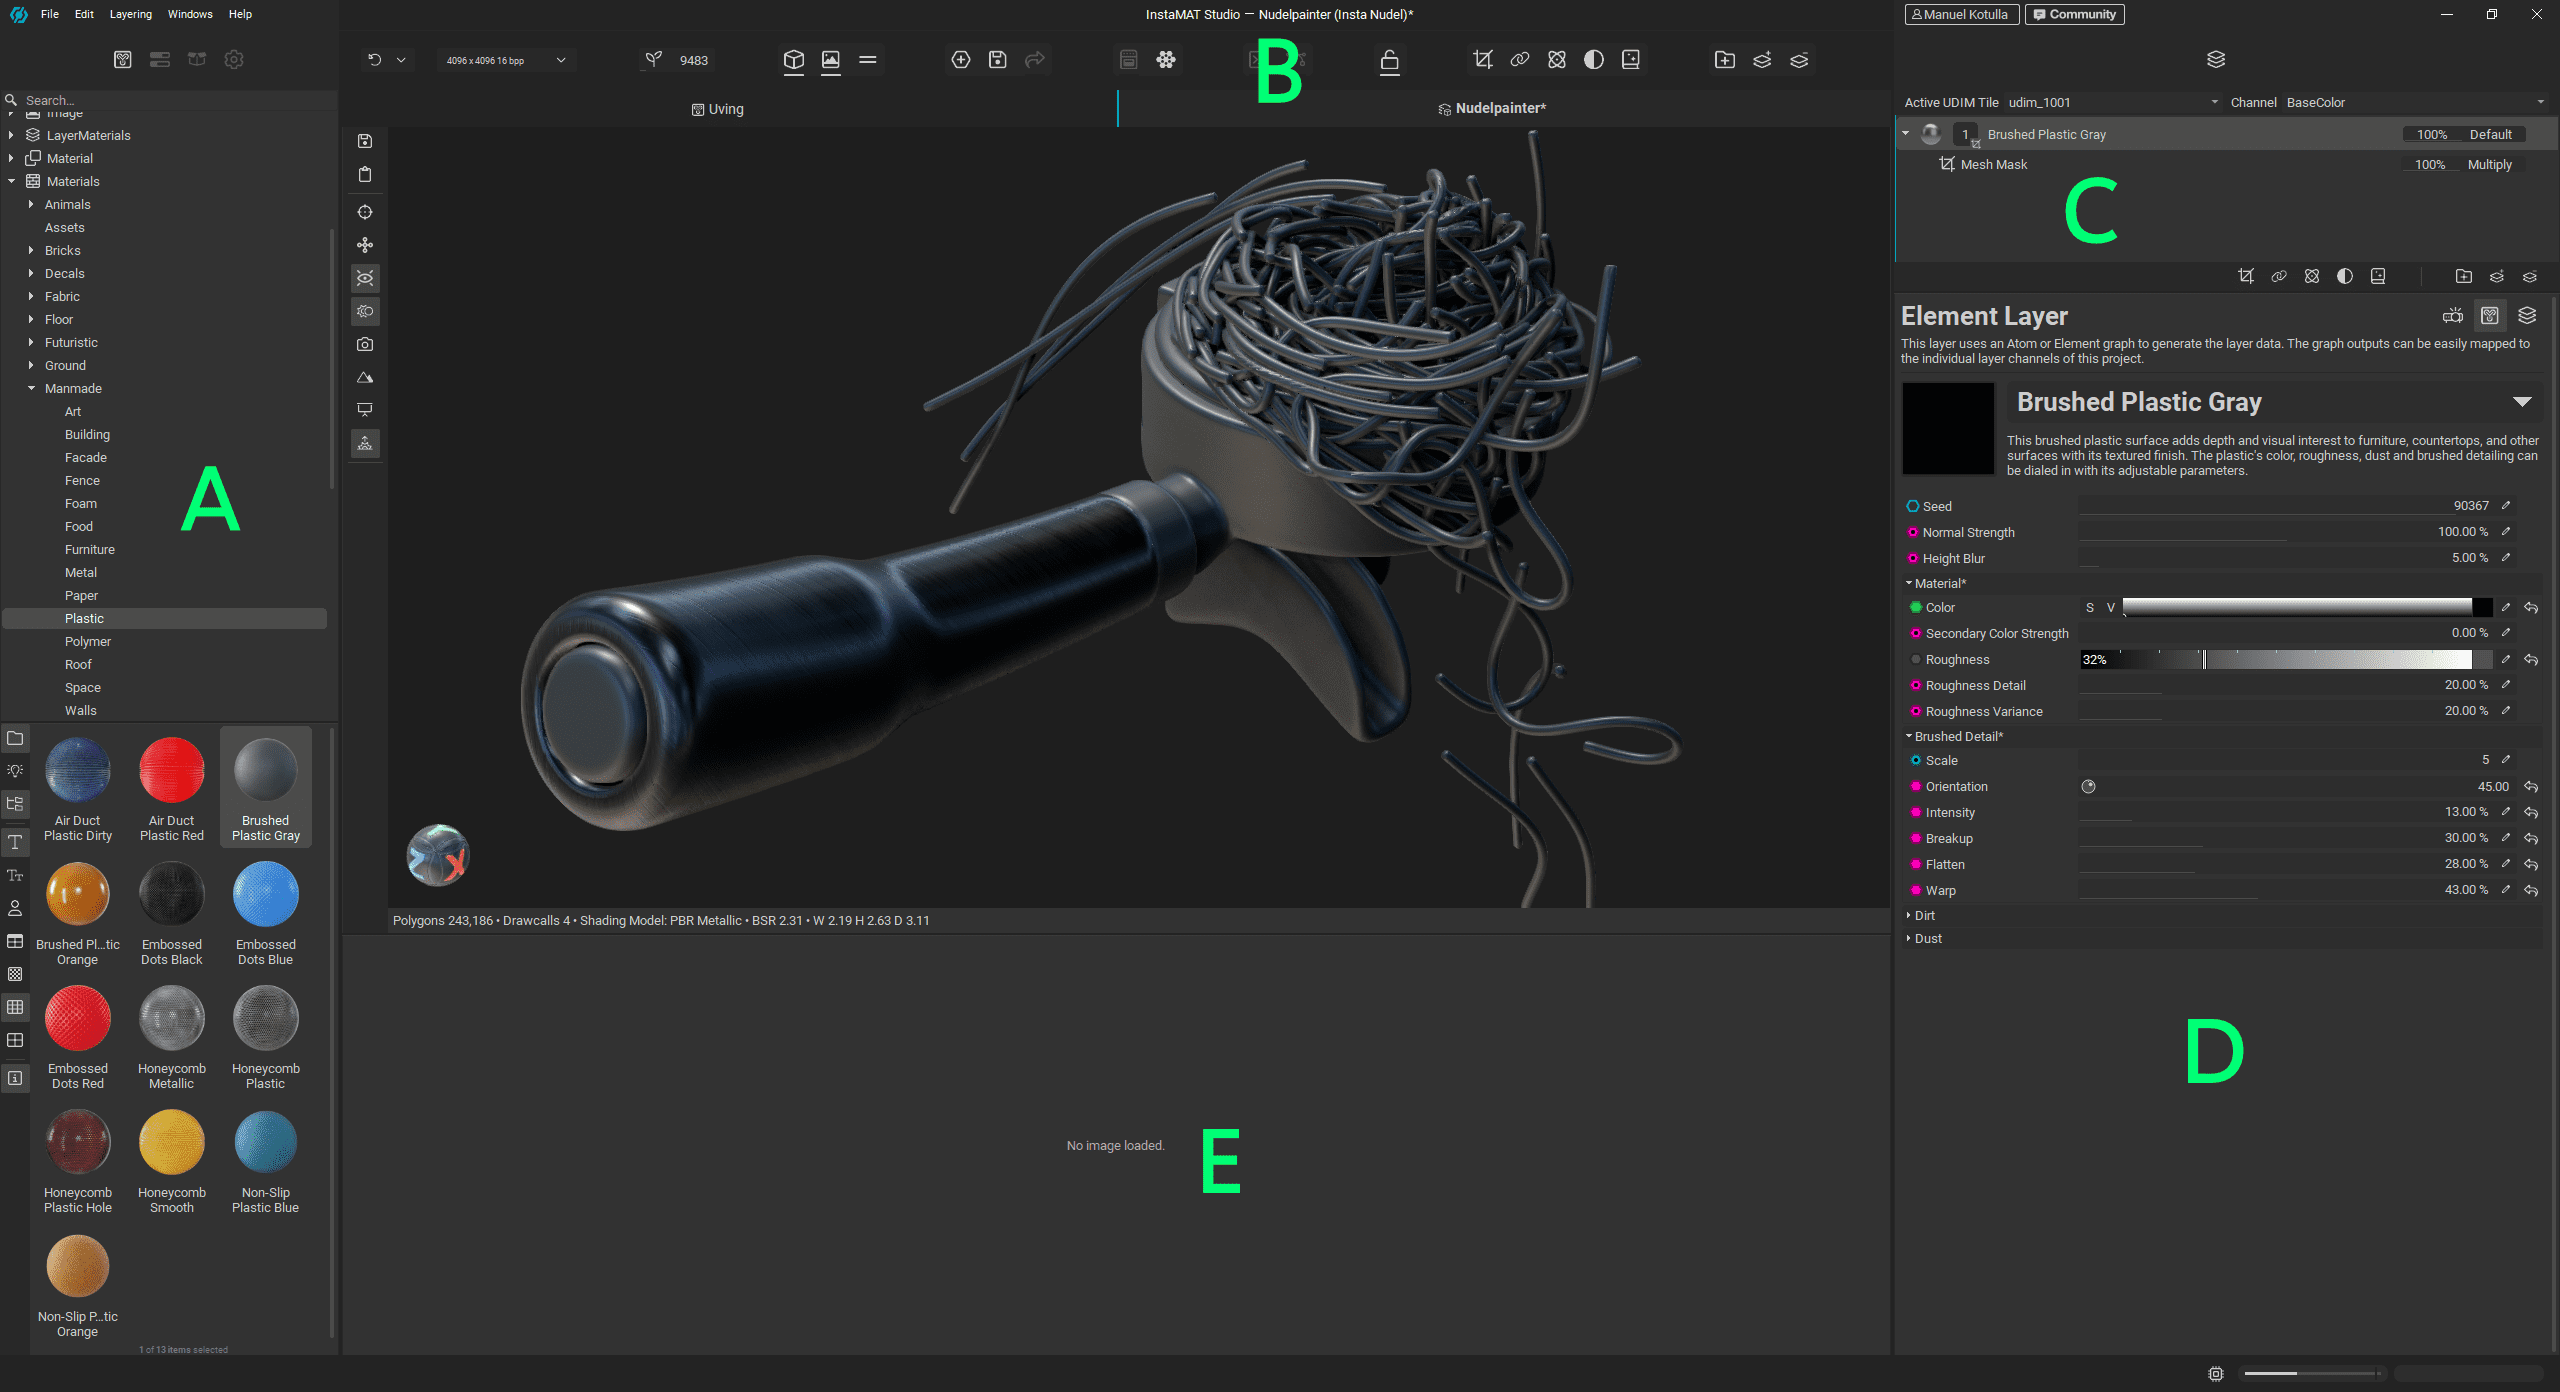
(A) Libary, Package, Project- & Viewport-Settings; (B) Top Bar with quick commands (C); Layer Stack, (D) Layer Properties, (E) 2D image viewer
As expected for this genre, the HDR can be rotated interactively using Shift plus right mouse button. The icon with the open package finally takes us back to the Package overview, listing all projects and assets. The bar above the viewport (B) acts as a quick access toolbar. It contains the baking and export dialogs, as well as a few, partly duplicated, commands for the layer view and the handy option for creating new projects.
The layer stack (C) itself is built in a very traditional way and holds no real surprises in terms of logic. Individual channels such as base colour, normal, and roughness can be selected, their opacity adjusted, masked, and enhanced with effects and generators. Things become more interesting with the “Reference” function, which we will come back to shortly, along with the two different layer types.
Below the layers palette are the layer settings (D). These include options such as projection type, for example decal, triplanar, and UV. More options will likely appear here in the future. This area also holds the material or brush settings, as well as channel mapping, provided the layer is based on an Element Graph. At the bottom, we find the Image Viewer (E) for checking textures, baked maps, and masks.
The Great Noodle Bake Off
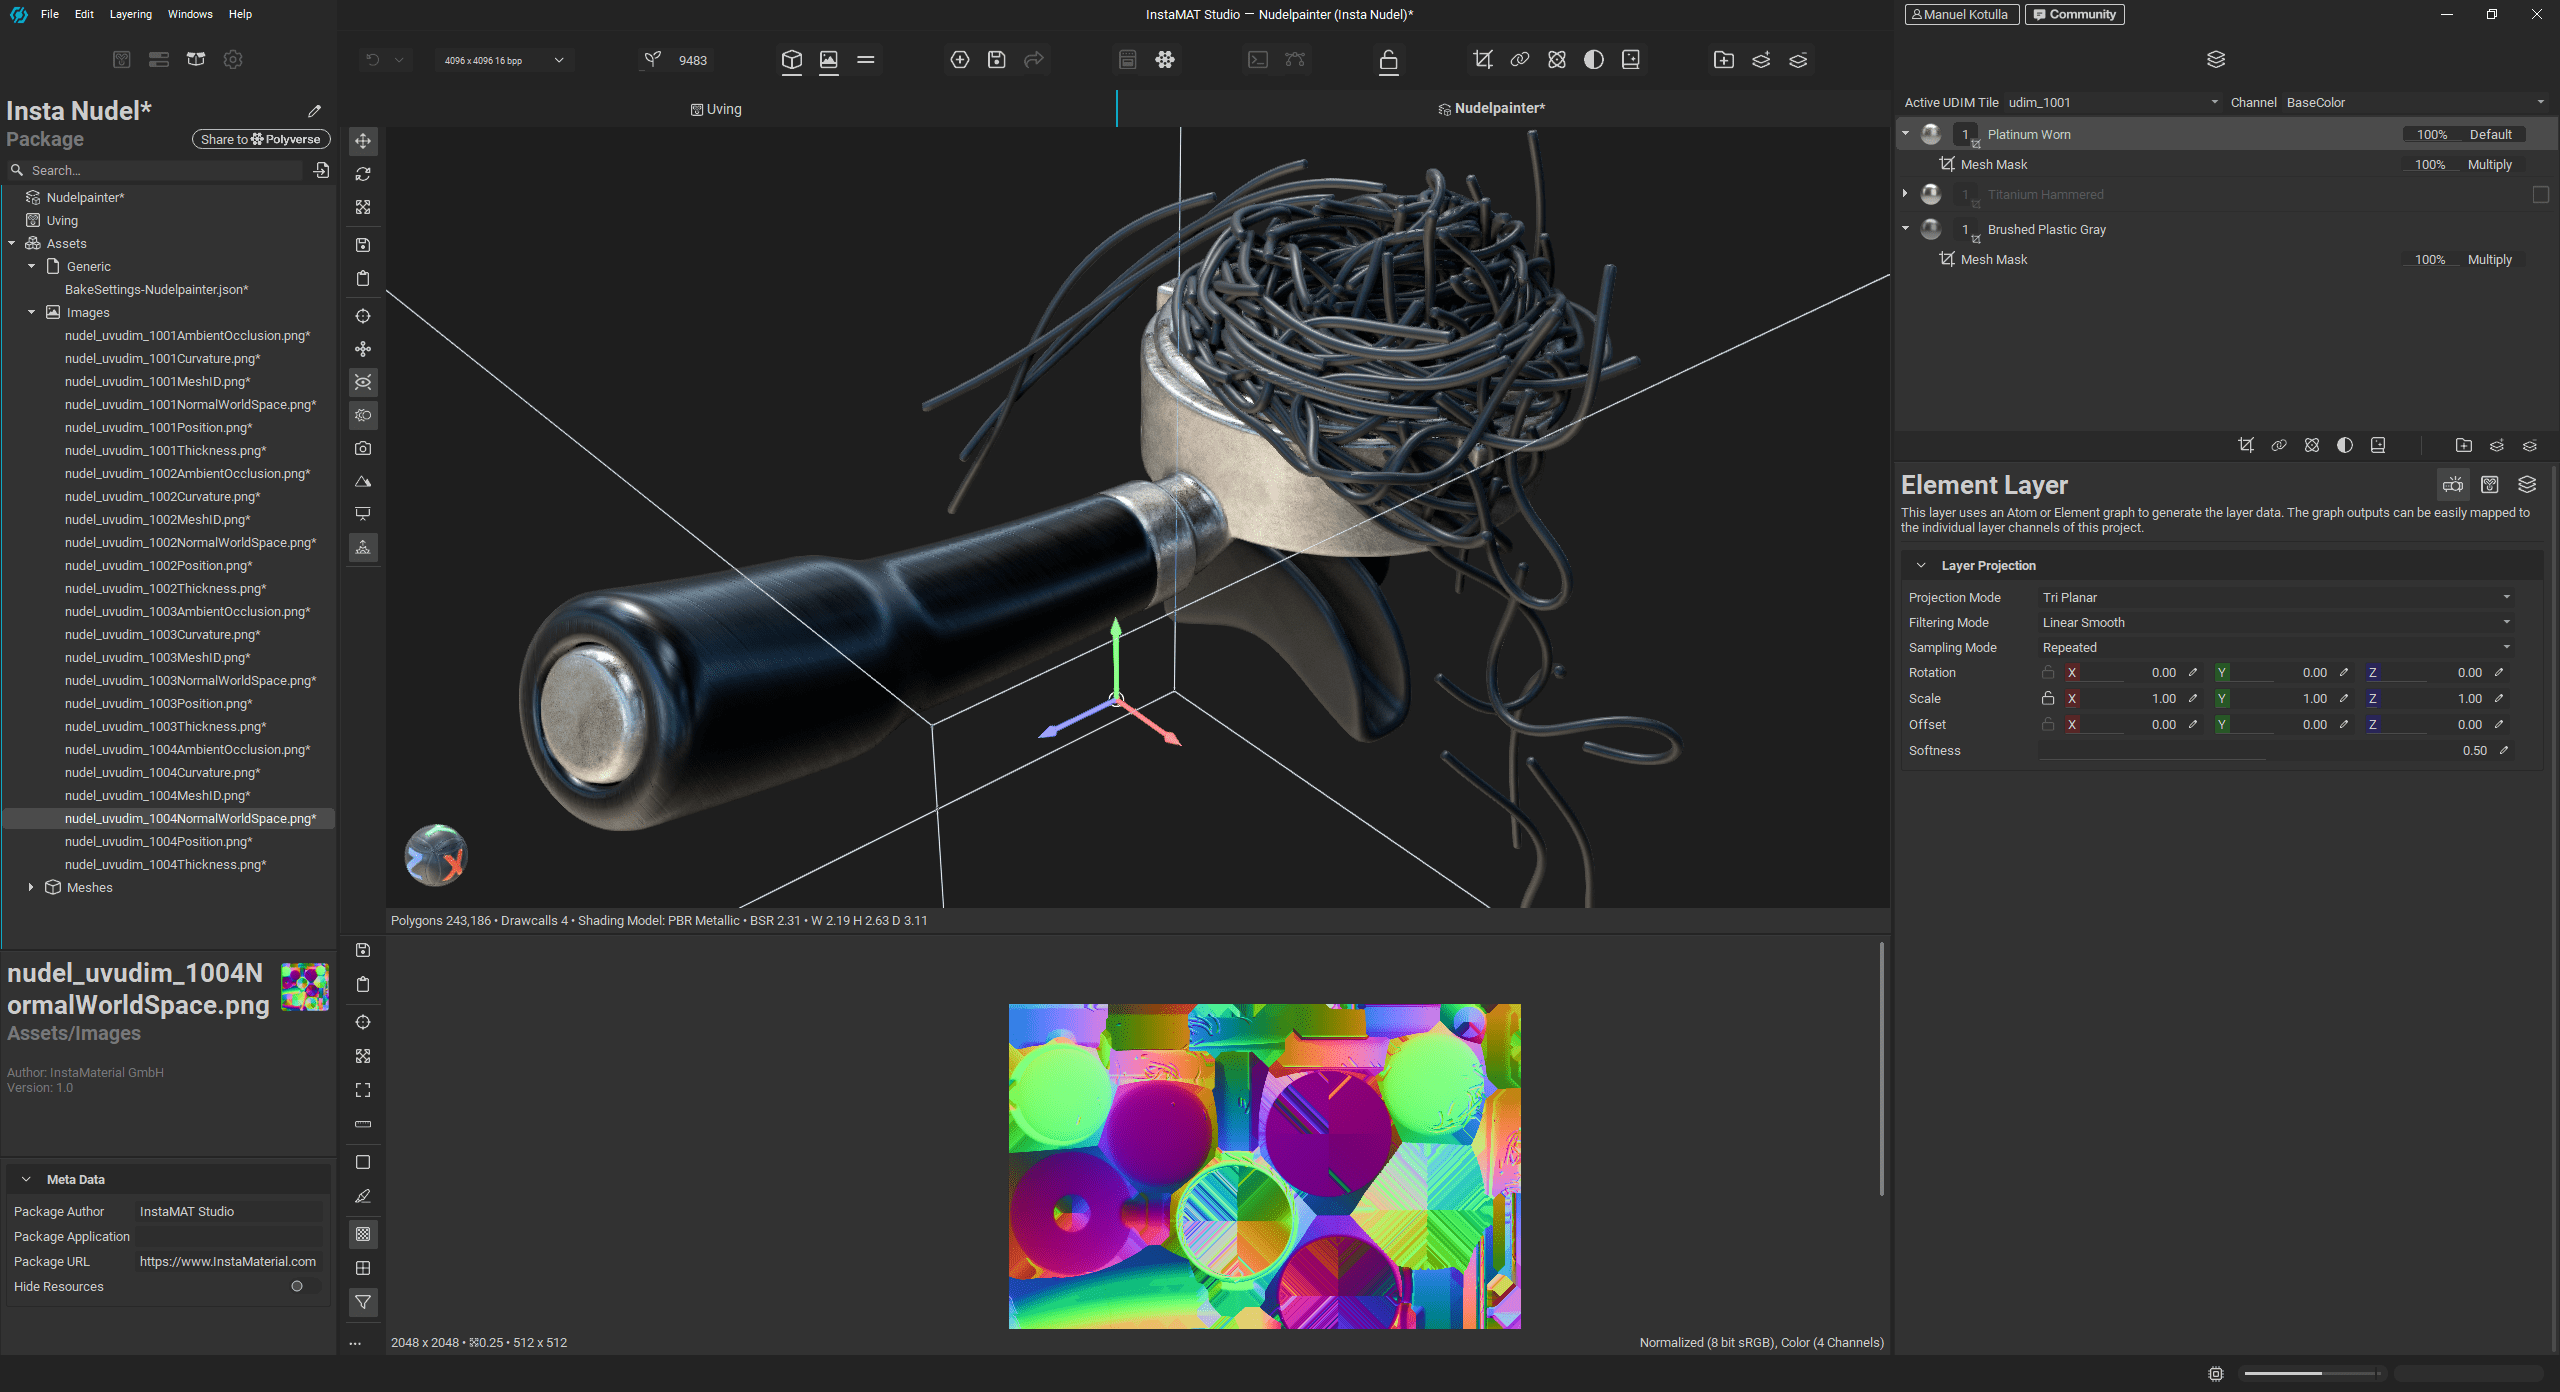
Before we really dive into the materials, we need to handle baking. This is where the geometric details of our mesh are “baked” into 2D textures. This is essential because without maps like Curvature, Ambient Occlusion (AO), World Space Normals, or Position, the generators and masks would be groping in the dark later on. For instance, the rust effect used later relies on the Curvature map to locate edges.

The Baking Dialog (accessible via the toast icon in the toolbar) is easy to understand: check the desired maps, select the resolution, and fire up the oven. The finished textures land neatly organized in our Package and are automatically linked by InstaMAT, so we can get started right away.
Material Brawl and Layering
InstaMAT ships with around 1,000 procedural materials covering a wide range of use cases, and they look genuinely good. Additional materials can be created either in the Element Graph using nodes or via Photo2PBR. A few hundred more can be found on the in-house Polyverse platform, even though that ecosystem does not (yet) come close to the breadth of Adobe’s Substance Assets.
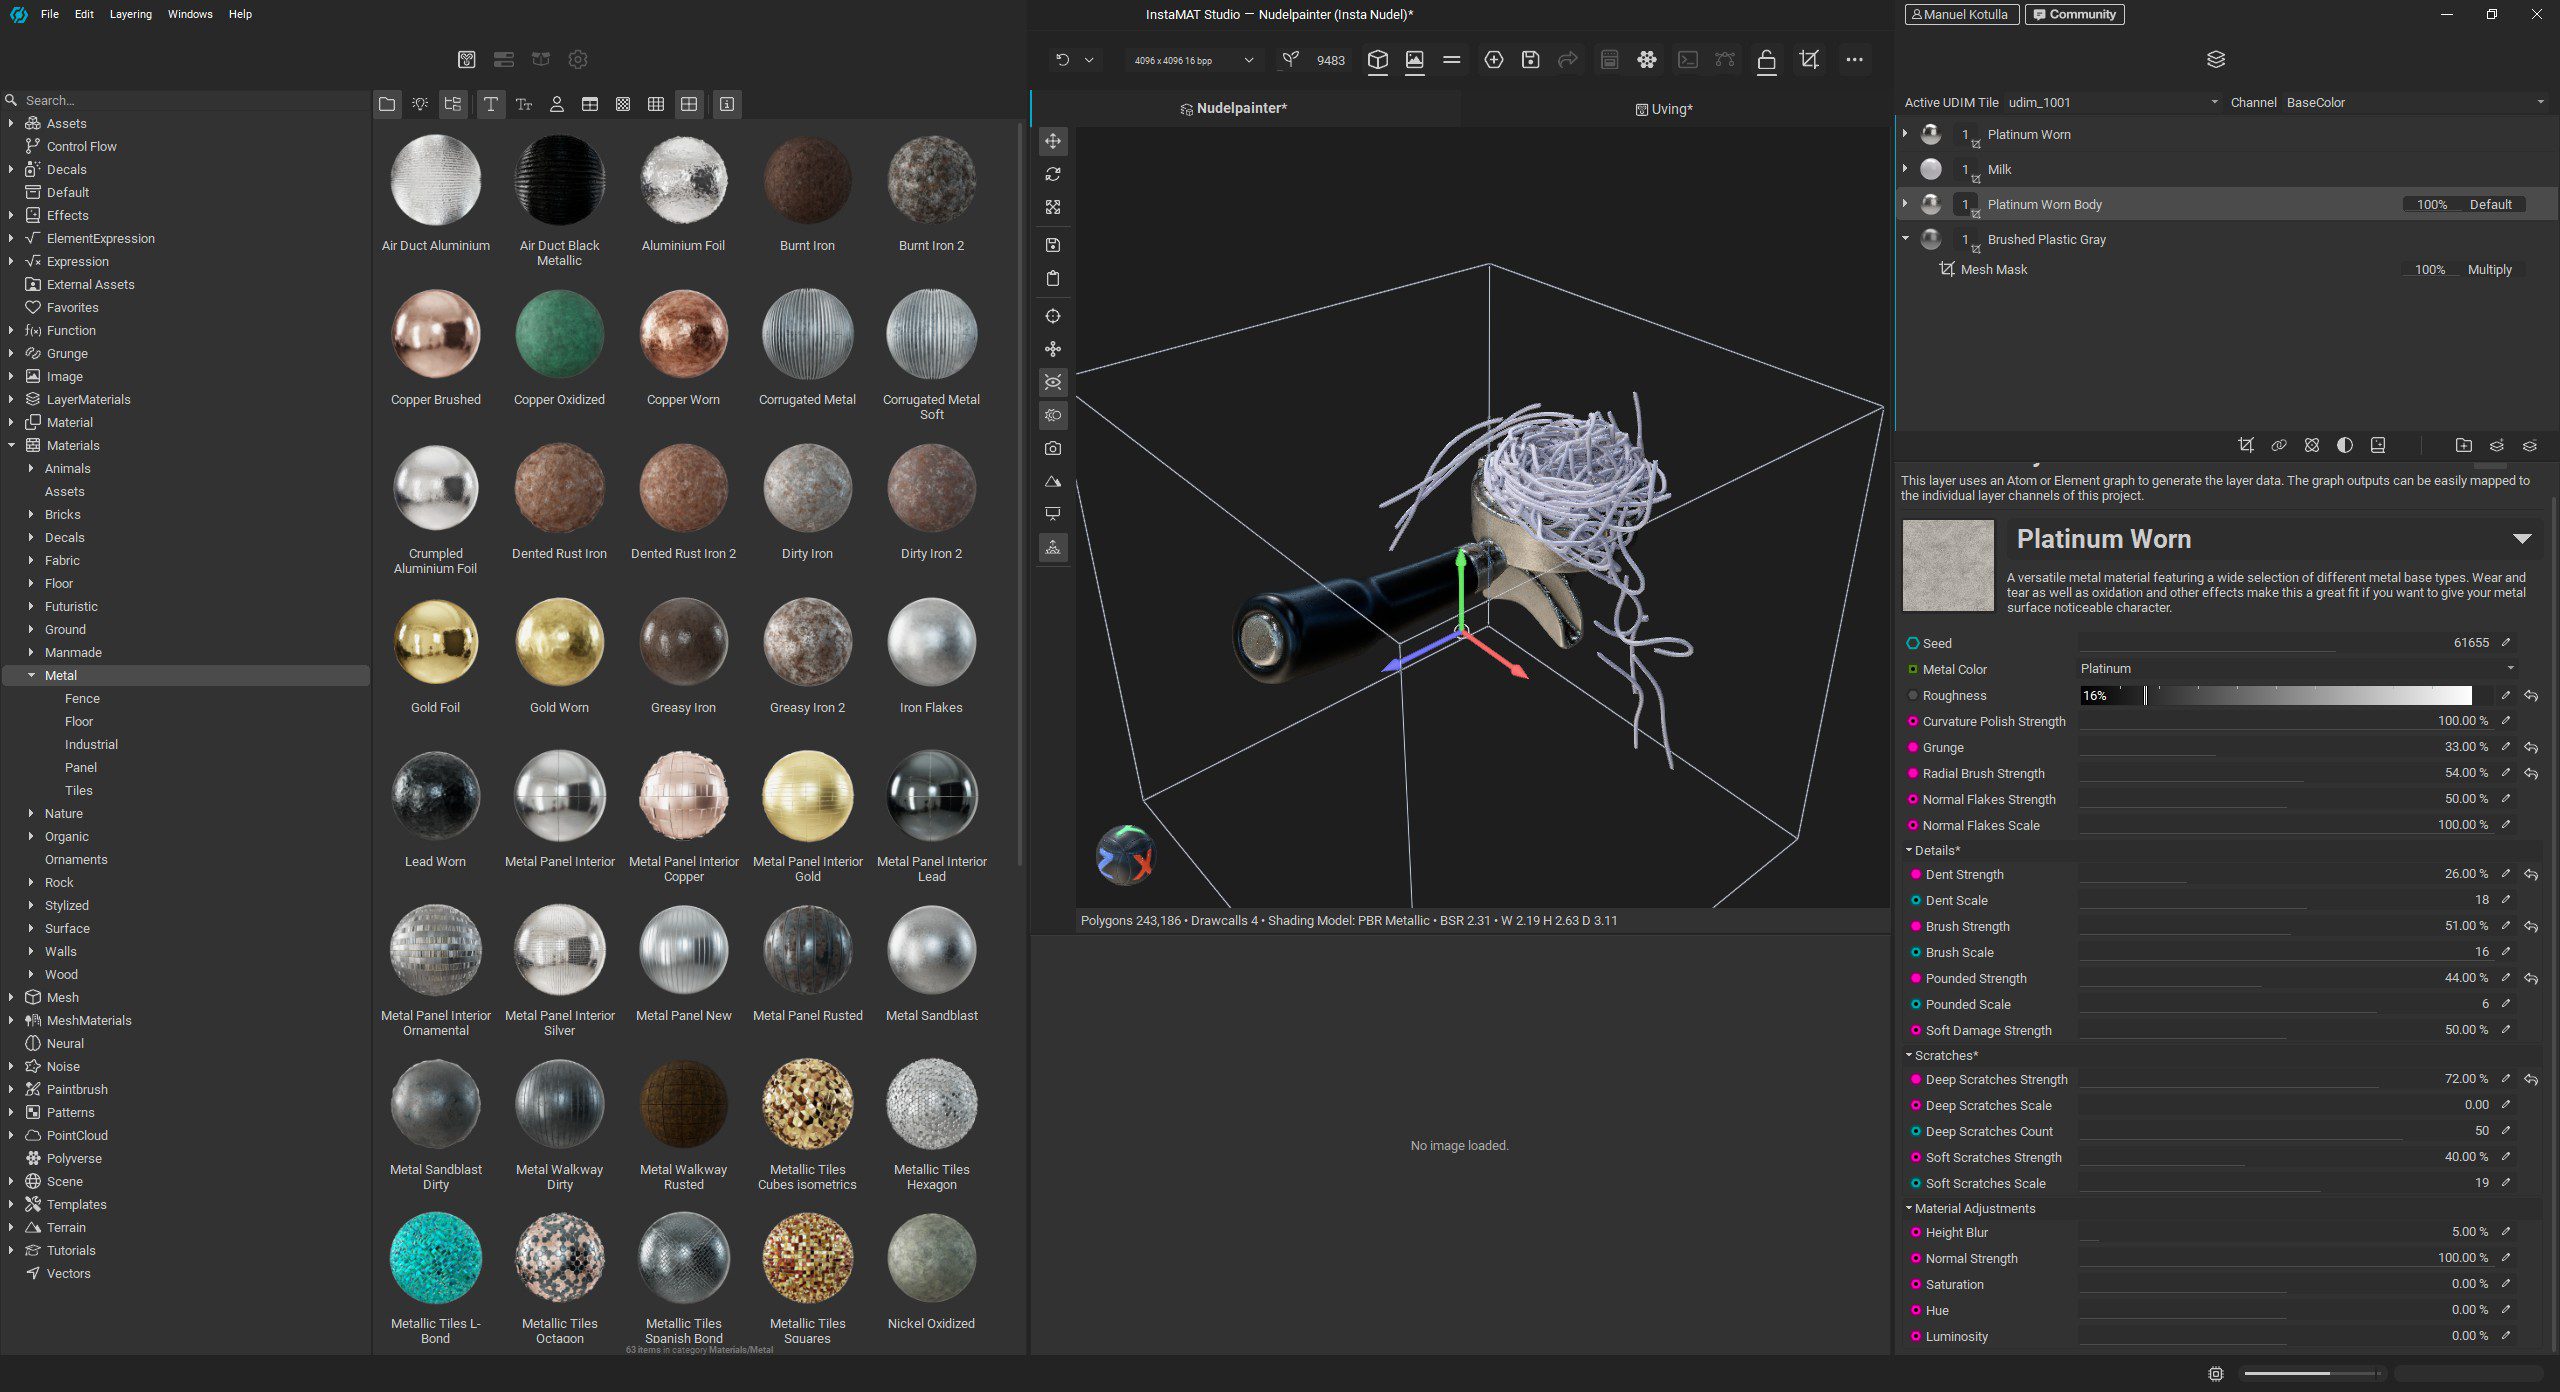

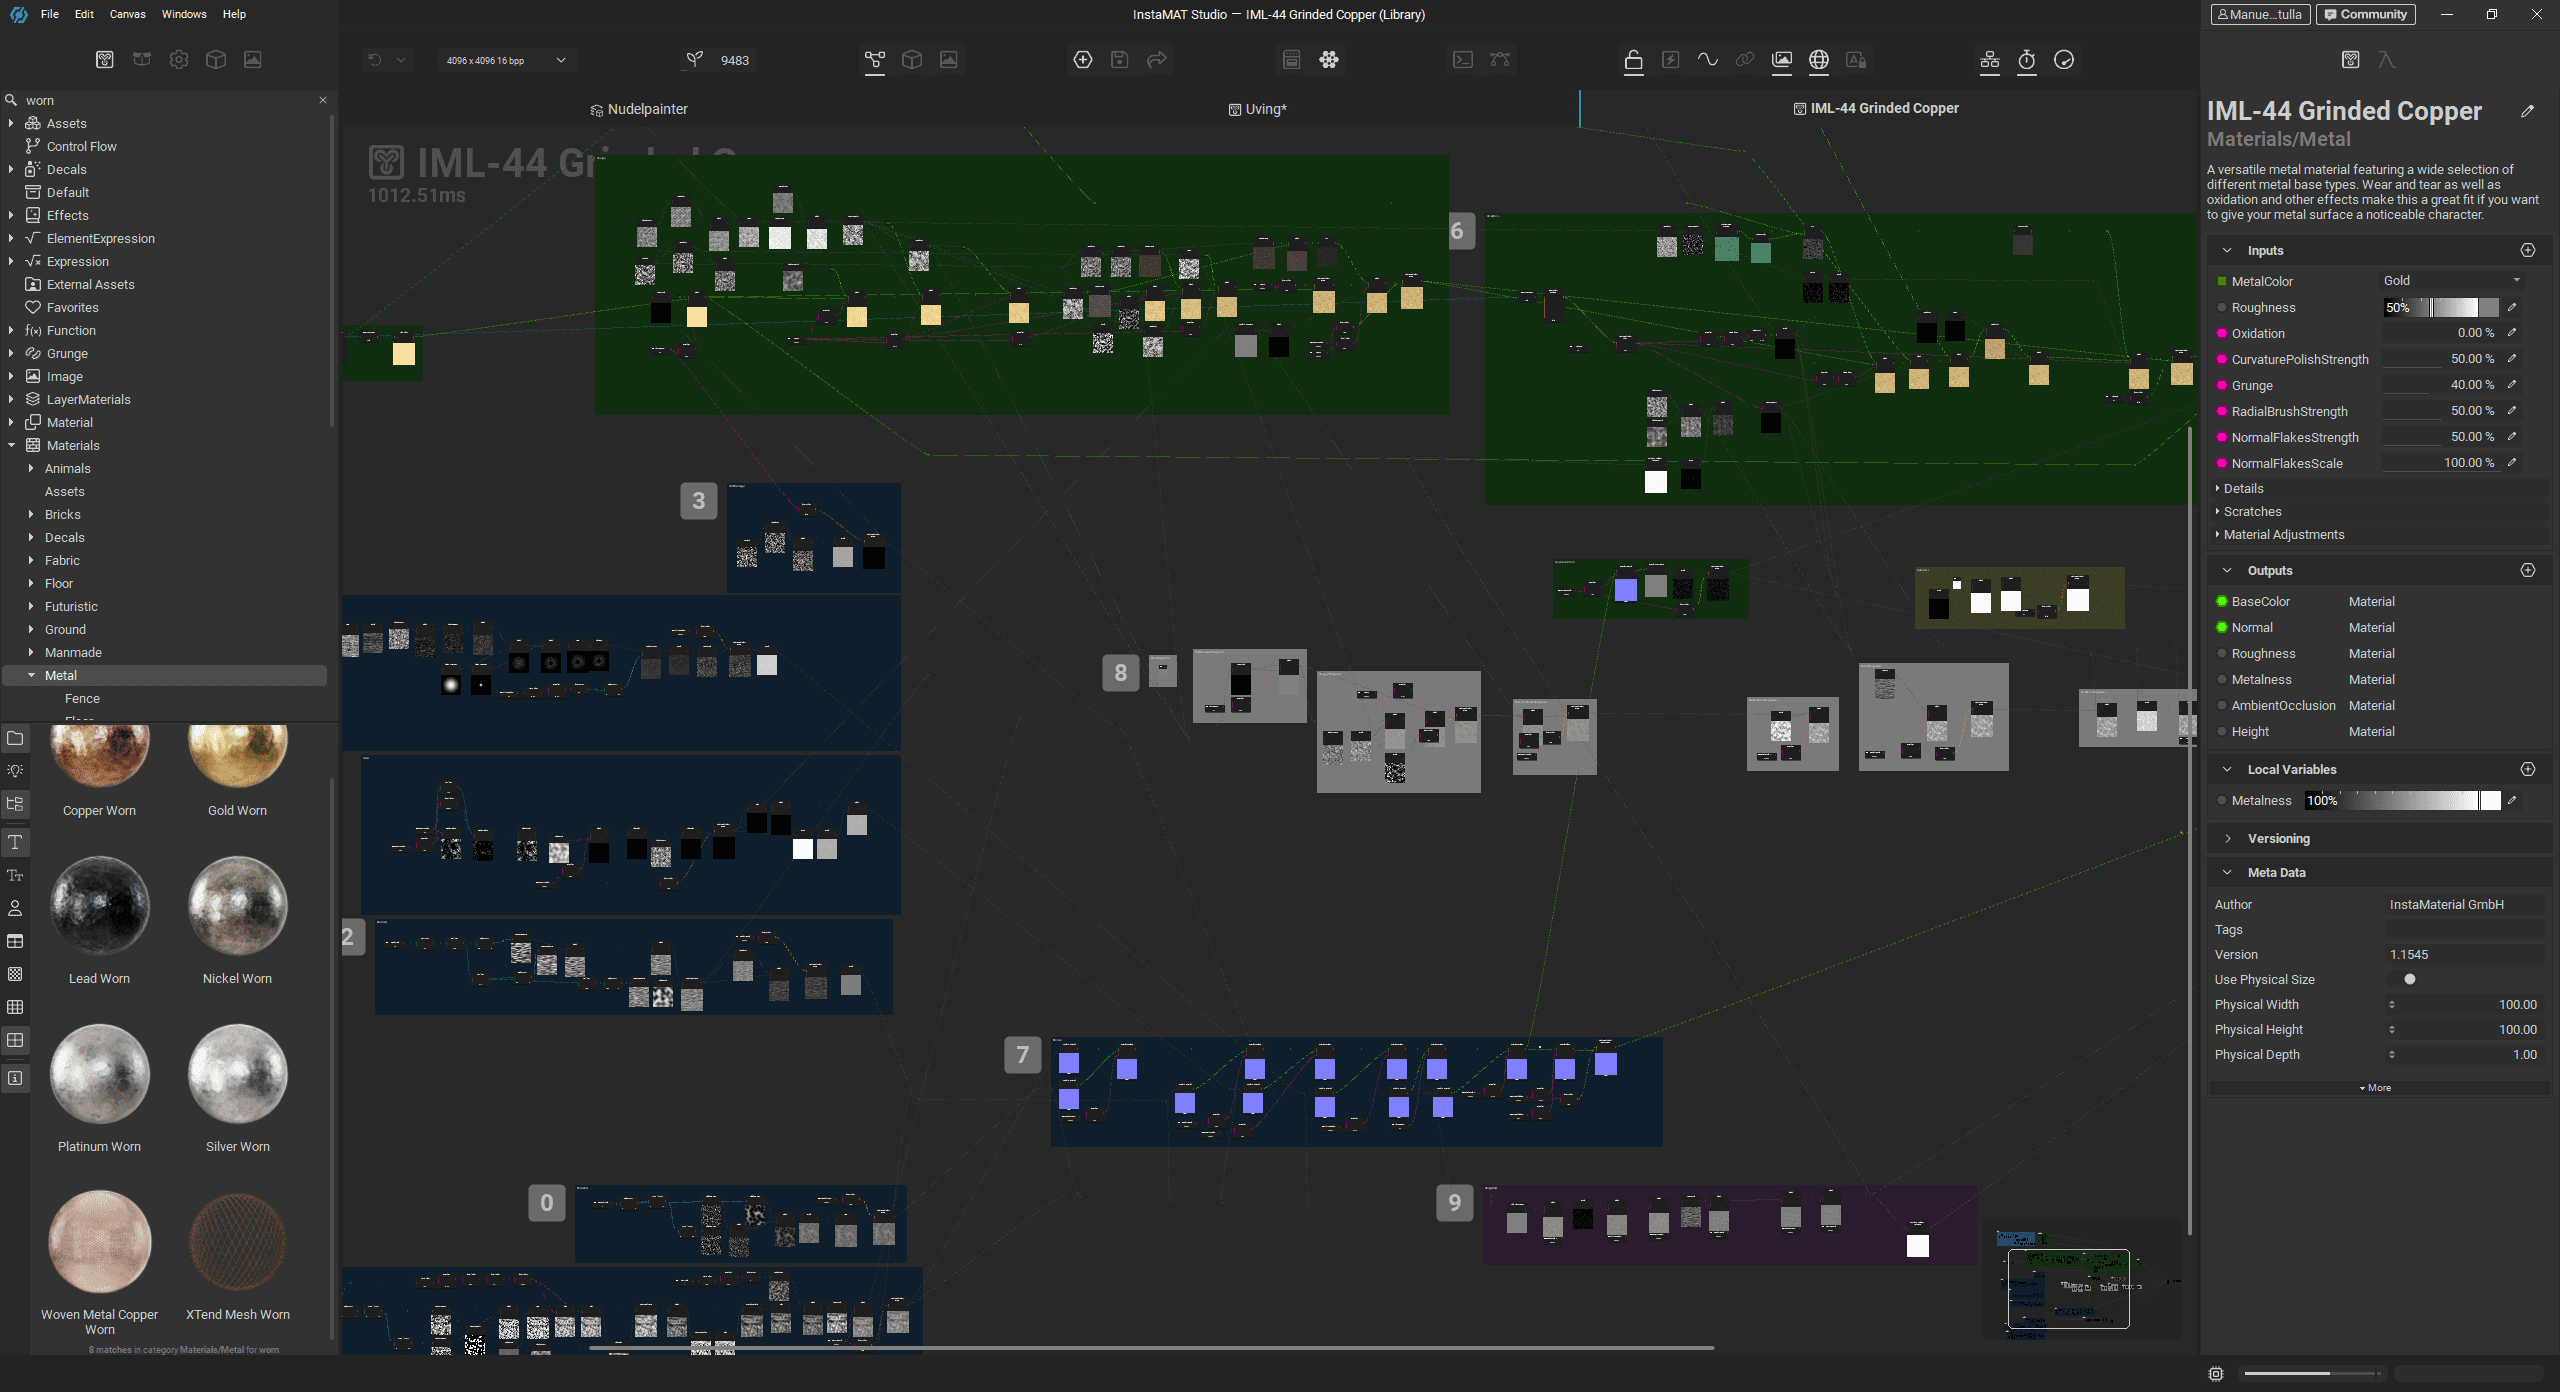
For the metal parts, we drag a nicely scratched, used-look material straight onto the mesh. Since all bundled materials are created in the Element Graph, they can also be opened there and adjusted down to the smallest detail. The black plastic is replaced with an oiled wood material from the library.
The materials already come with pleasing imperfections, but they are still a bit too well-behaved. Time to dive into generators, filters, effects, and masks. For the obligatory hint of rust found in any respectable kitchen, we first drop a Rust Iron material onto the strainer and select Edge Wear Mask directly under Mask. To avoid overly regular edges, we multiply in a grunge map using Mesh Project Mask. This workflow will feel familiar.
The Brush Engine
First contact with the brush engine happens through Mesh Mask Painting. Here, we can use a brush and repurposed decals as brush masks to add targeted stains. Once again, the interplay with the node graph becomes apparent. Under the hood, the stain decal is not a simple alpha image but a highly adjustable Element Graph. Parameters such as the number of splatters and the dryness at the core can be tweaked, and endless variations can be generated via the seed.

Need your own micro-scratch alpha? Then you build it in the Element Graph. Using the plus icon in the top bar, we create a new graph and, in fast-forward, turn a thin oval shape generator into a pattern with random rotation, scale, and opacity using the Guided Scatter node, controlled chaos, in other words. Warp and Slope Blur nodes handle distortion and edge bleeding for the individual scratches, driven by procedural noises and grunge maps. A final grunge map multiplies in extra detail, and the result is written out via an Output node to our Package under Paintbrushes and Masks, immediately ready for use in painting.

Proper Scratches
To properly scratch up the nice wooden handle, we create a new multichannel layer, also known as a fill layer, above the wood layer. We enable only the Height channel and set it to Subtract. On the wood layer, we paint a mesh painting mask using the brush we just created, accessed via the Asset Browser, and reference this mask on the new height layer using Mask Reference. Below the wood layer, we drop an Aged Wood material, so that lighter core wood shows through in the scratched areas. The principle is a familiar one.

A Matter of View
Using the shortcut C, we cycle through the channels. With S, we activate solo mode for the currently active layer, including masks. By right-clicking on a layer and choosing Output for Current Channel, the channel opens in the 2D viewer. A few dropdowns would be welcome here. Viewing a more complex mask is also still a bit cumbersome. If we want to see the combined effect of an entire mask stack, we have to right-click the topmost mask layer and select View Composite Output. The well-established Alt-click on a mask would be preferable here.
That said, InstaMAT is still very young and developing rapidly. These quality-of-life features will likely be implemented sooner rather than later, especially since the team actively listens to user feedback and feature requests.
Multichannel-Element-Layer
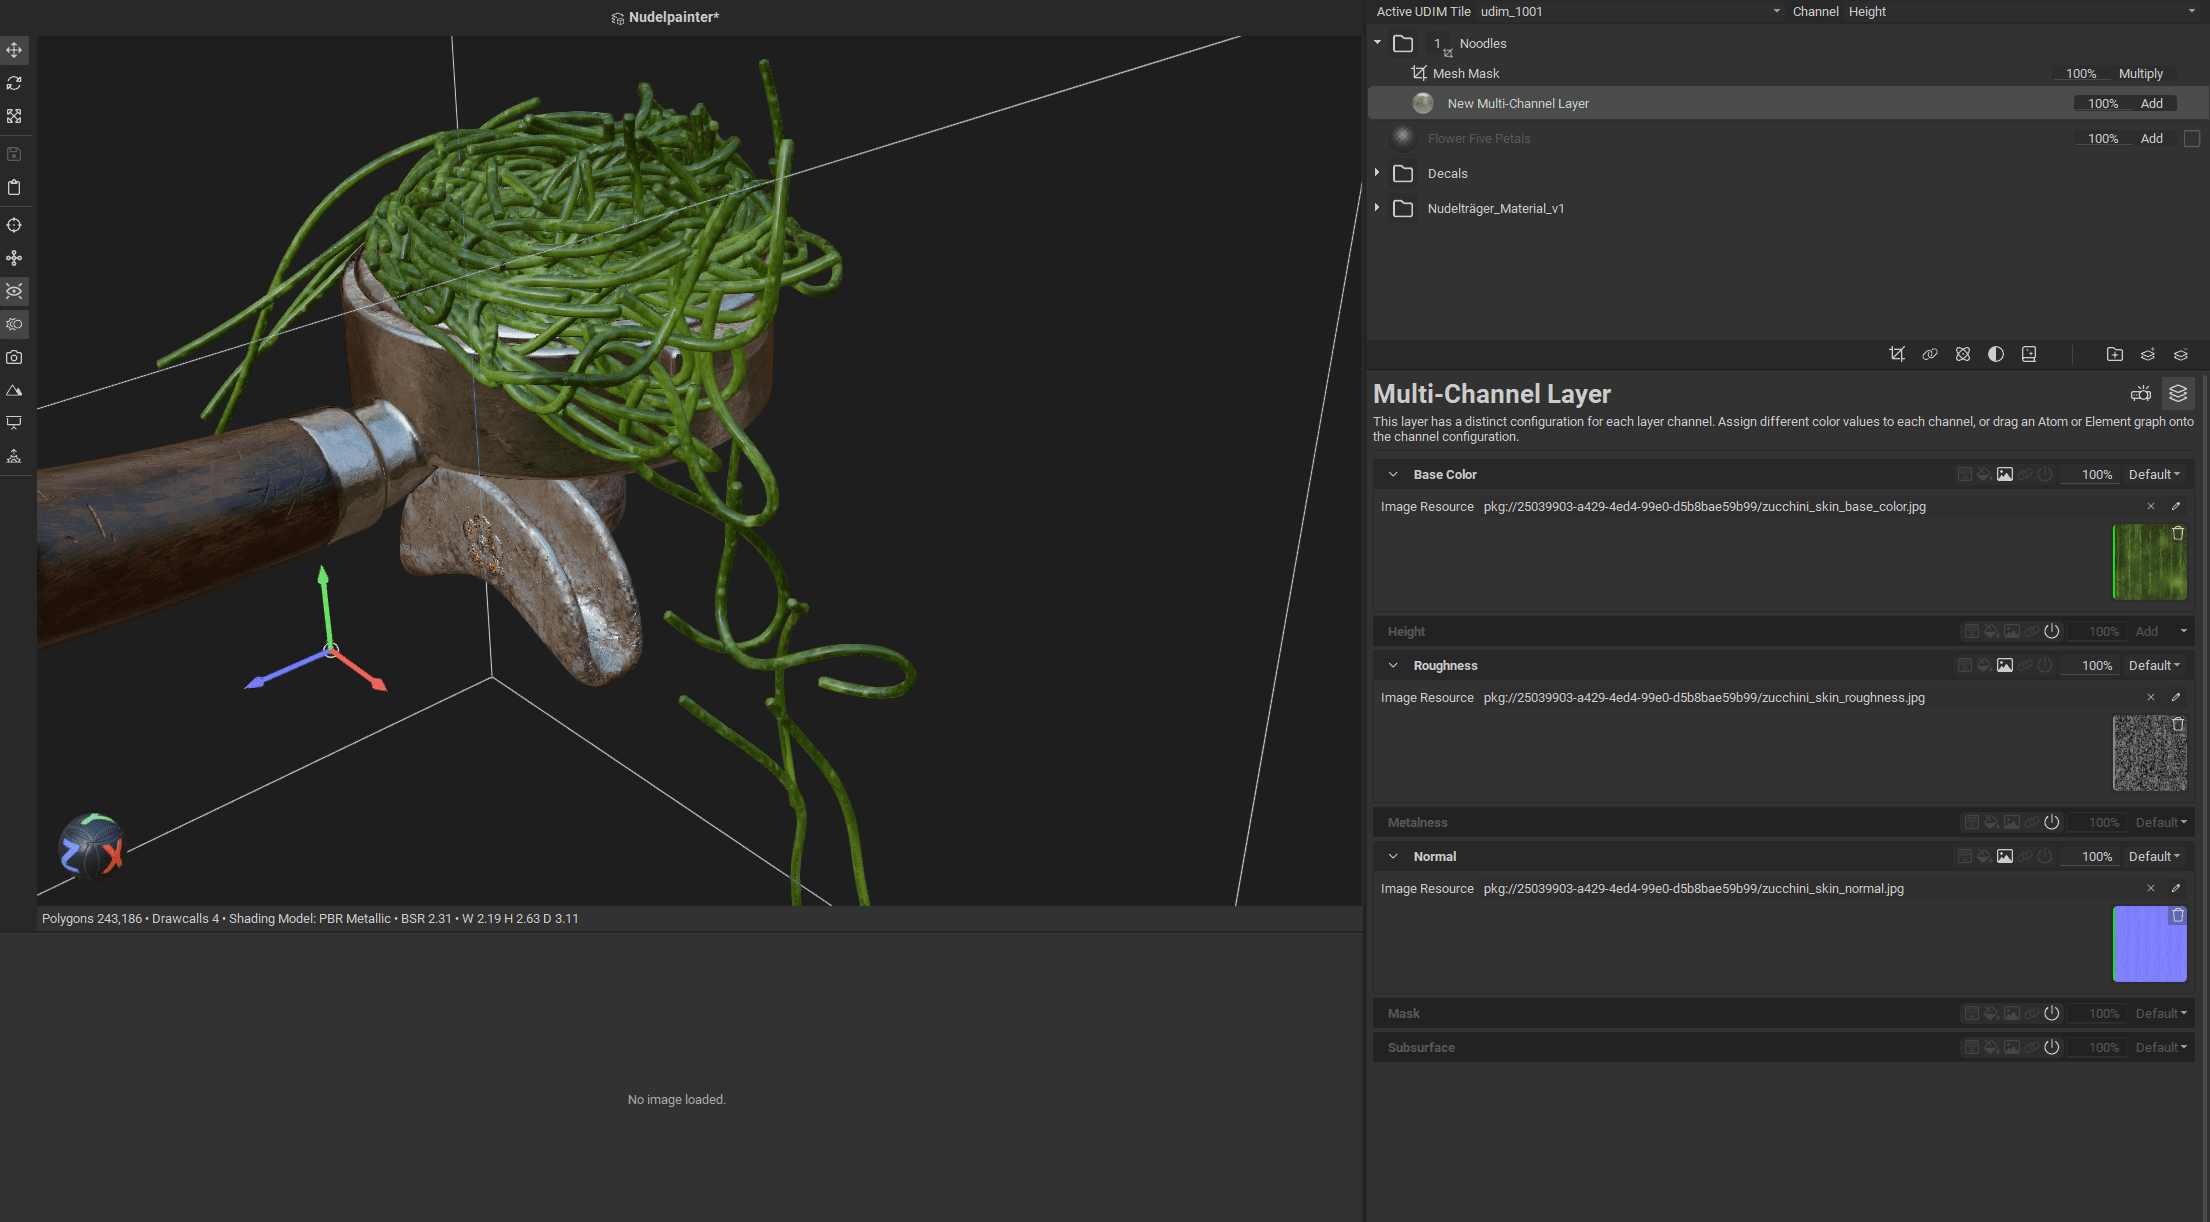
In the layer palette, we find four fundamental layer types: Multichannel Layer, Element Layer, Multichannel Brush, and Element Brush. A Multichannel Layer acts as an almost omnipotent stem cell and can essentially become anything. Right after creation, it looks rather unassuming, showing only a colour in the base colour channel. This is where the range of possibilities starts to unfold. Instead of a flat colour (which applies to all channels), we can assign textures, procedural graphics, layer references, or full Element Graphs.
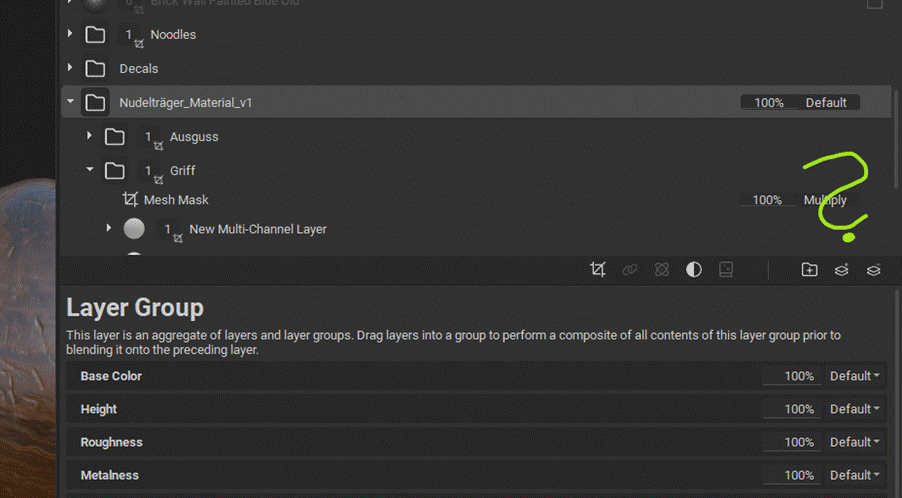
If we want to use texture maps from an external material inside InstaMAT, this is the layer to use. Once the maps are imported into our Package, we assign them to the corresponding channels on the layer and end up with zucchini noodles. Do not forget the mesh mask, we accidentally create the world’s first vegan portafilter. It is best applied to a folder rather than directly to the layer.
An Element Layer is simply an Element Graph applied as a layer on the mesh. Typical examples include materials and noises, but also more exotic options such as BezierCurve, which lets us draw a curve in a separate window and project it onto the mesh as a decal. Following this logic, the Element Brush allows us to paint directly onto the mesh using a material or any other Element Graph-based asset, while the Multichannel Brush represents the classic empty painting layer across all channels.
InstaMAT Unmasked
When it comes to masks, InstaMAT offers a wide range of options. The previously mentioned Mesh Projected Mask can be filled with more than just grunge maps or textures. Any graph, effect, or generator can be used, even those originally intended for something else. For exploration, it is worth typing “mask” into the search field and browsing through options such as Aged Paint or more unusual entries like Circular Scatter.
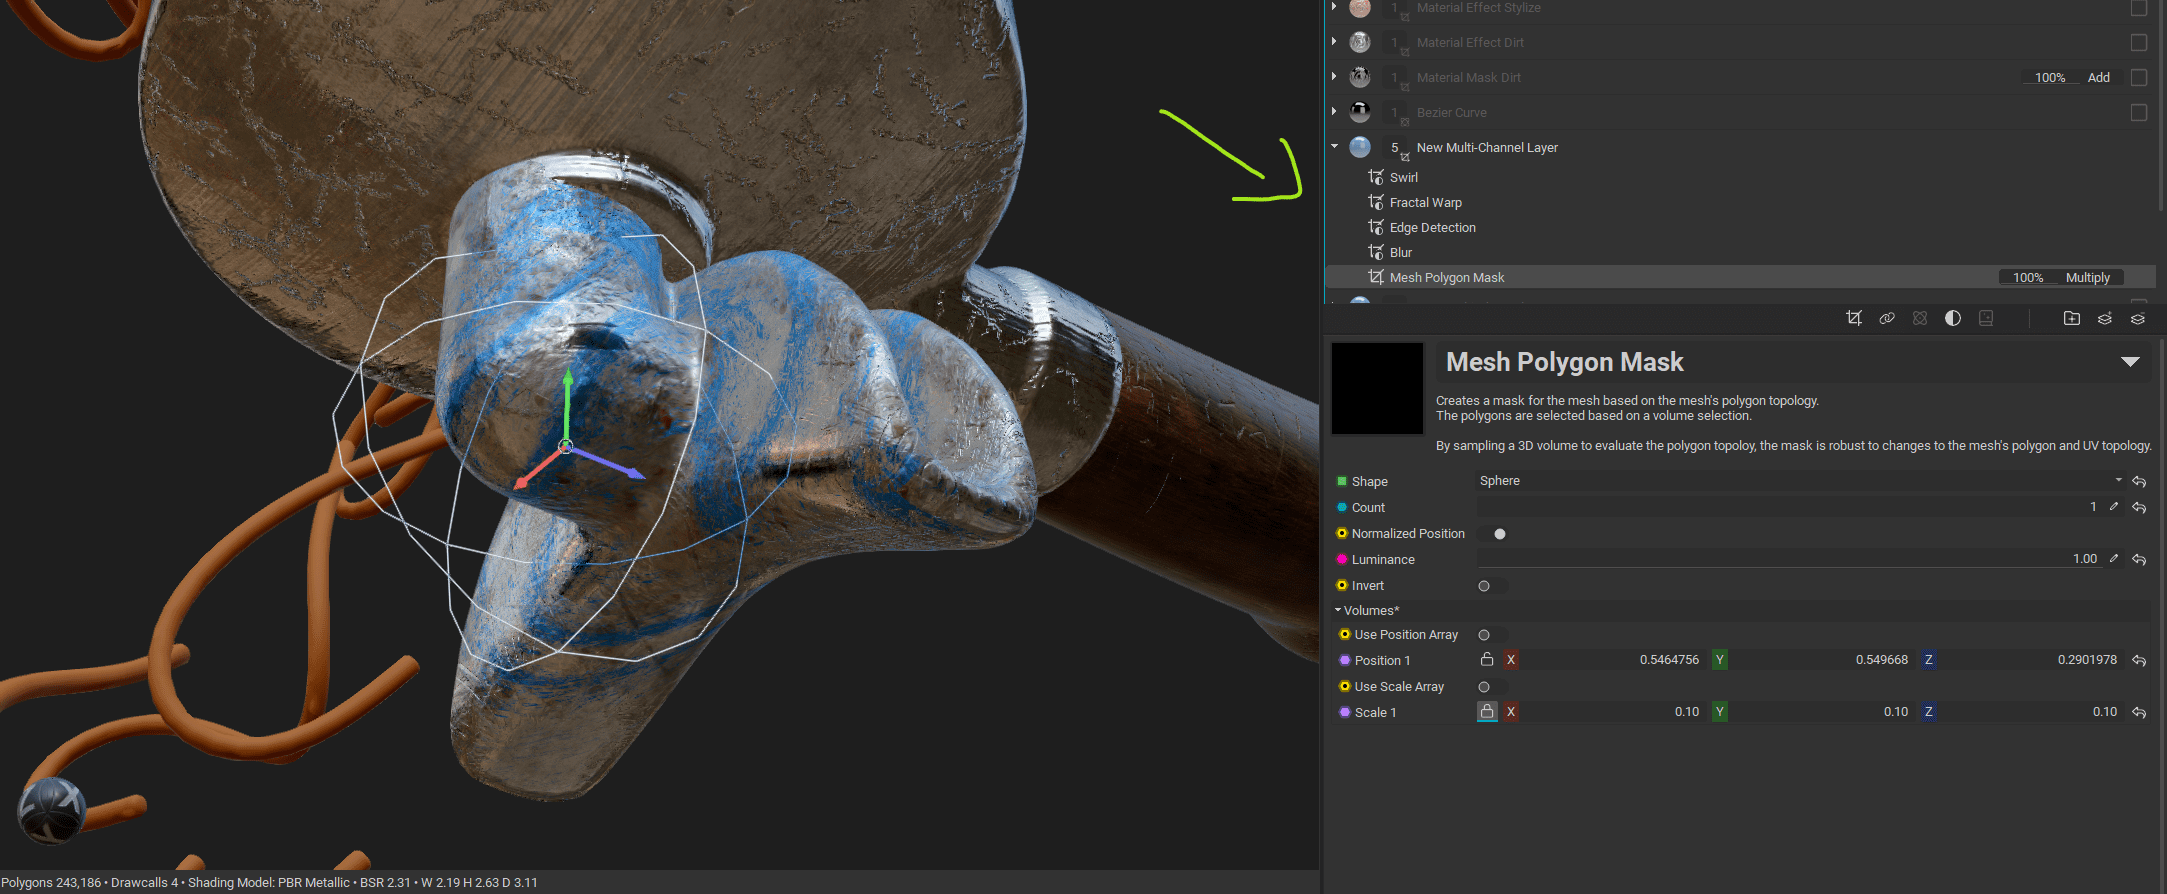
The Polygon Mask operates using a freely movable 3D cube or sphere in space. These masks can be modified with an arbitrary number of filters. Do not rely solely on the Add Filter menu. Browsing under Pick from Library reveals even more options.

The Volume Mask is a bounding box mask. It treats the entire object as a cube, can be moved freely, and allows for softened edges. A clear highlight is the Mesh Mask, which identifies connected polygon flows. For Houdini users, this corresponds to name attributes or USD paths.
King of Masks
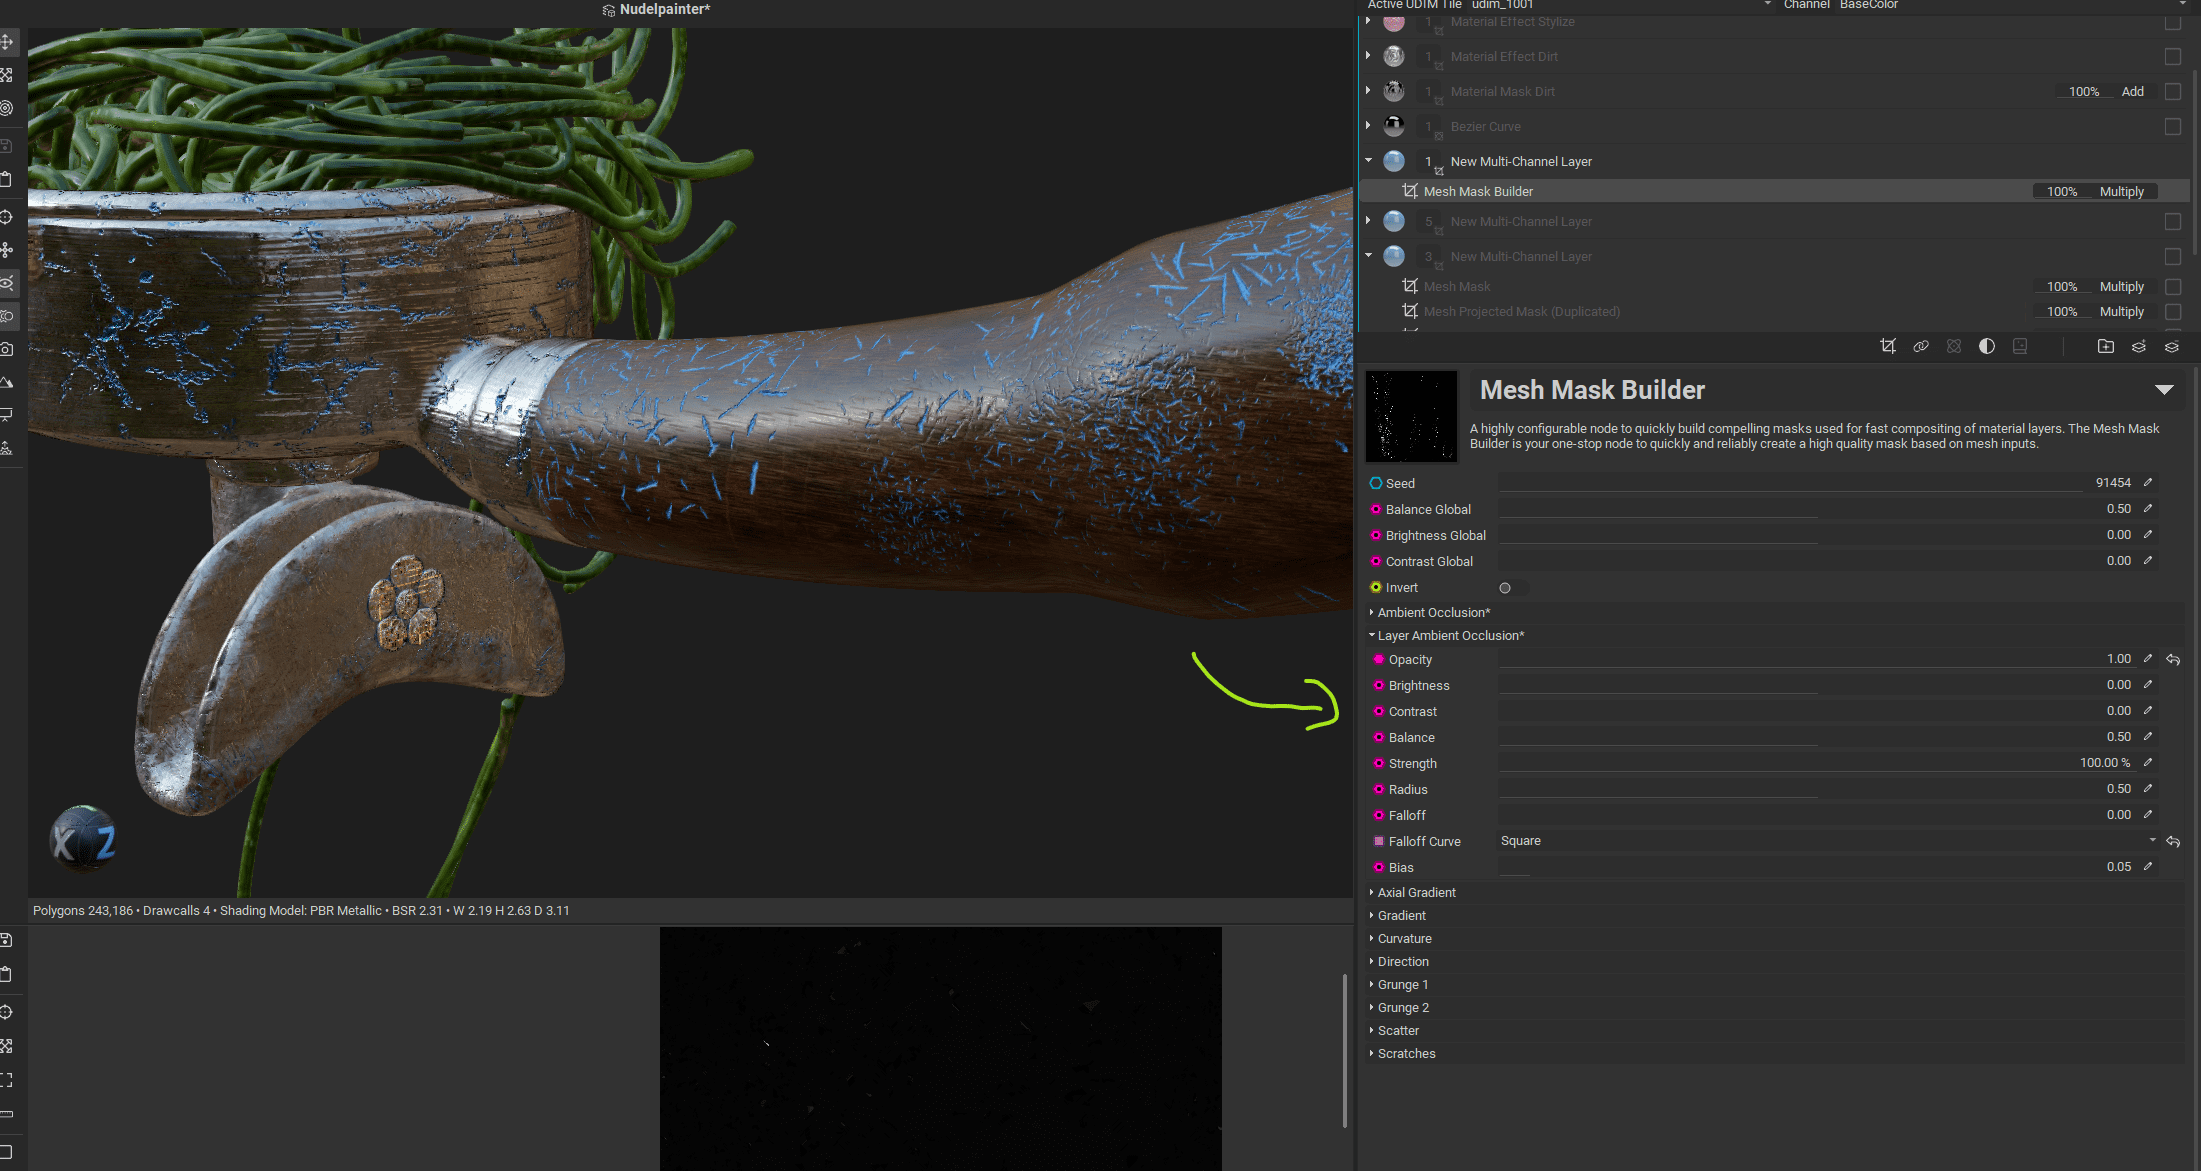
The undisputed king of masks, however, is the Mesh Mask Builder. It allows the creation of highly complex masks within a single layer. It not only accesses baked mesh maps but also, as if internal references were set, picks up on effects previously painted onto other layers. The Layer Ambient Occlusion function, for example, incorporates existing scratches. Directional behaves like a freely positionable spotlight, or aligns itself to normals, and Curvature forms the basis for all edge wear effects. Grunge and scratch layers are then used to break things up again. This starts to look suspiciously like an Element Graph, and indeed, building custom masks of this complexity is entirely possible.

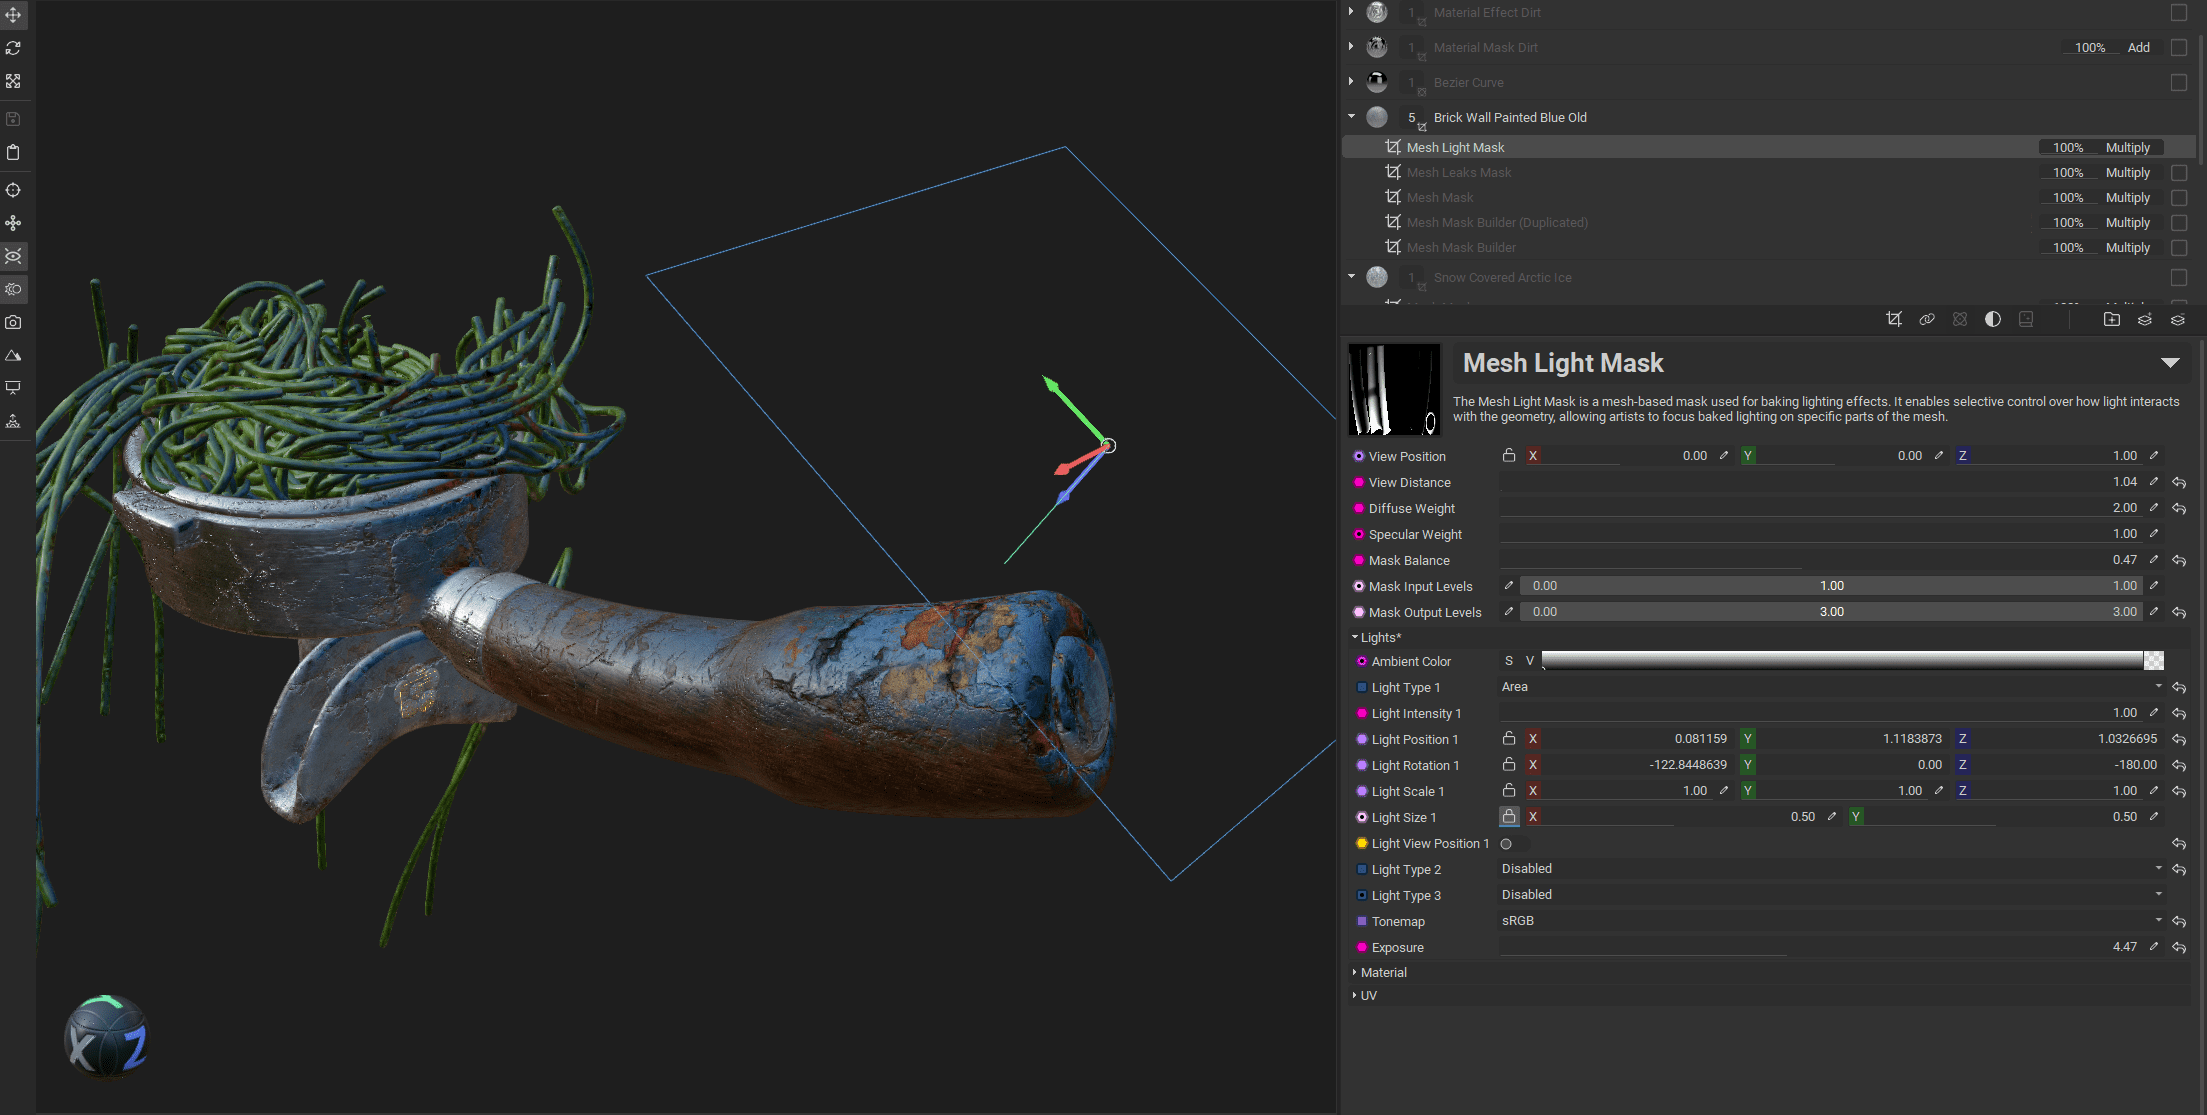
Additional masks can be found in the asset library. Examples include the Mesh Leaks Mask, which simulates dripping fluids, the Light Mask, which allows actual lights, such as area lights, to be positioned and used as masking tools, and the Layer Height Curvature Mask, which takes height information from all layers as curvature input.
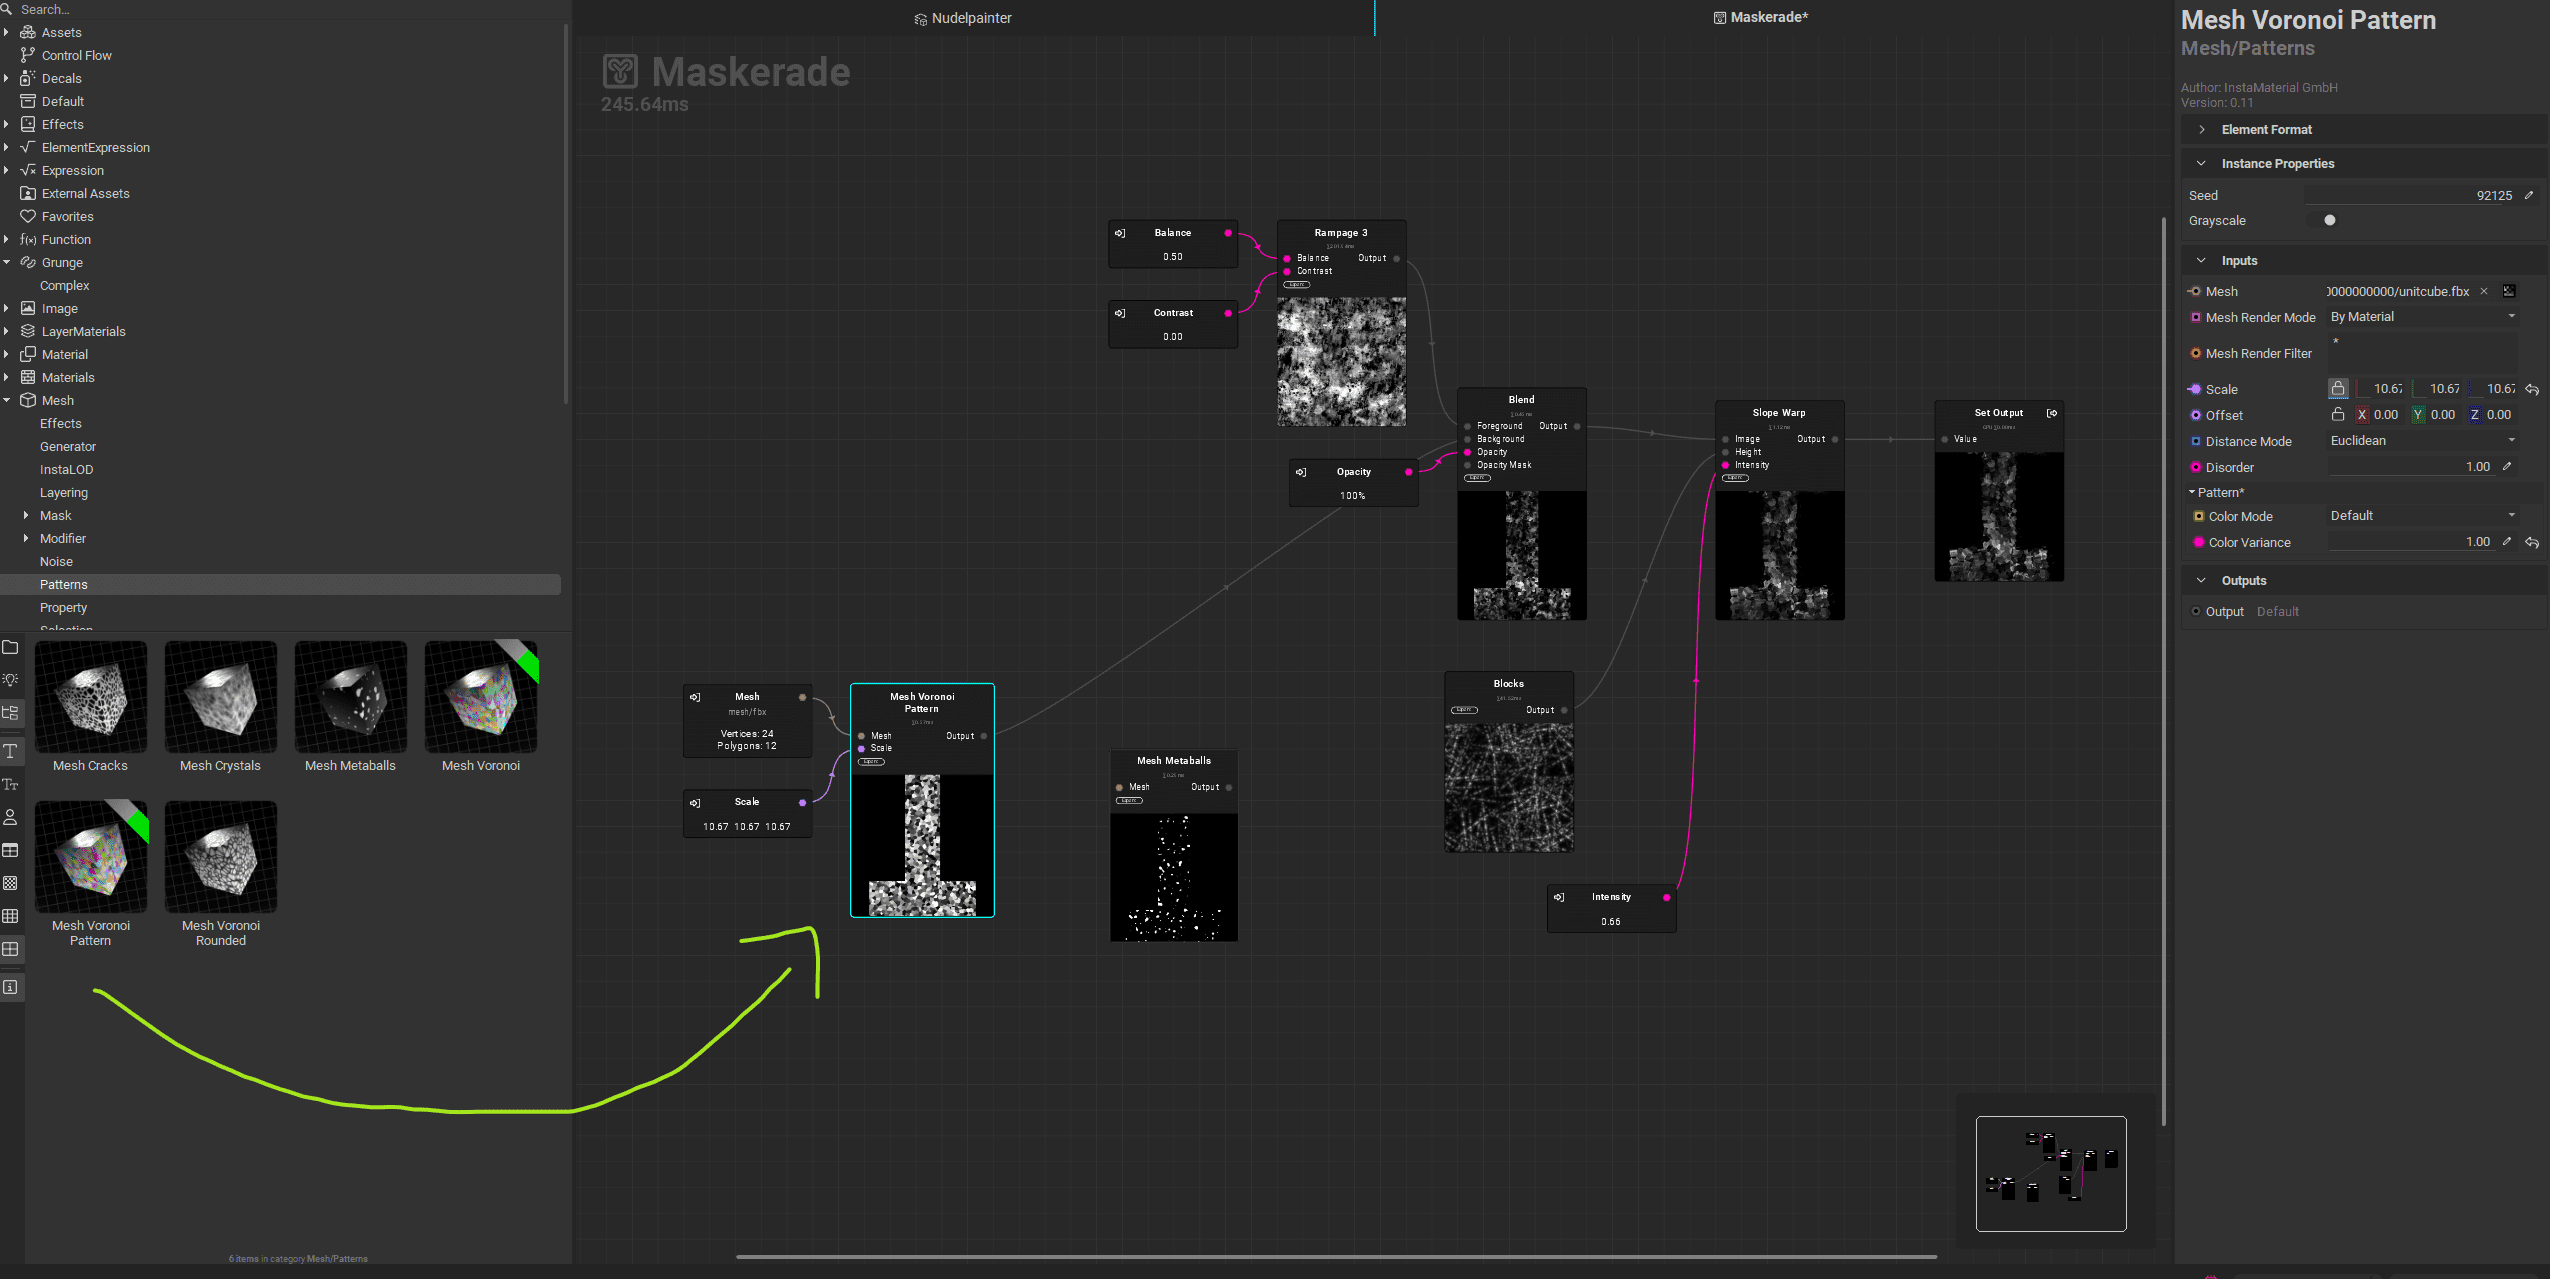
And just because we can, we quickly build our own mask in the Element Graph. It generates a Voronoi pattern as a base and distorts it with a few nodes, exposing their sliders as parameters. Saved under Mesh/Mask, it appears immediately in the layer palette and can eventually be used for some painterly look, one day. The important part is that it works, and it opens up a large range of possibilities. This mask look can be extended further into a complex generator or even a full material as an Element Layer.

Generators and Effects and Filters
At their core, generators are practical Element Graphs designed to take the pain out of detail work. A good example is the highly configurable Scratches Generator, which can wreak havoc across low and high frequency damage, complete with per-parameter variation. Numerous additional controls, such as distort and warp, help achieve a more organic look. This should feel familiar from the Element Graph when we built our own scratches brush tip. Helpfully, each generator or graph displays a short description directly underneath it.
Effects and filters have close relatives in any image editing application. At first glance, you encounter the usual suspects like Swirl, Radial Blur, and Warp, along with Levels, Curves, and Saturation. Things get more interesting once we switch to Pick from Library. Here, a more adventurous set reveals itself. Channels can be mixed, HSL values randomised, film grain added, the previously mentioned Edge Detect used for mask refinement, or photoreal textures pushed into a stylised direction via Stylized filters.
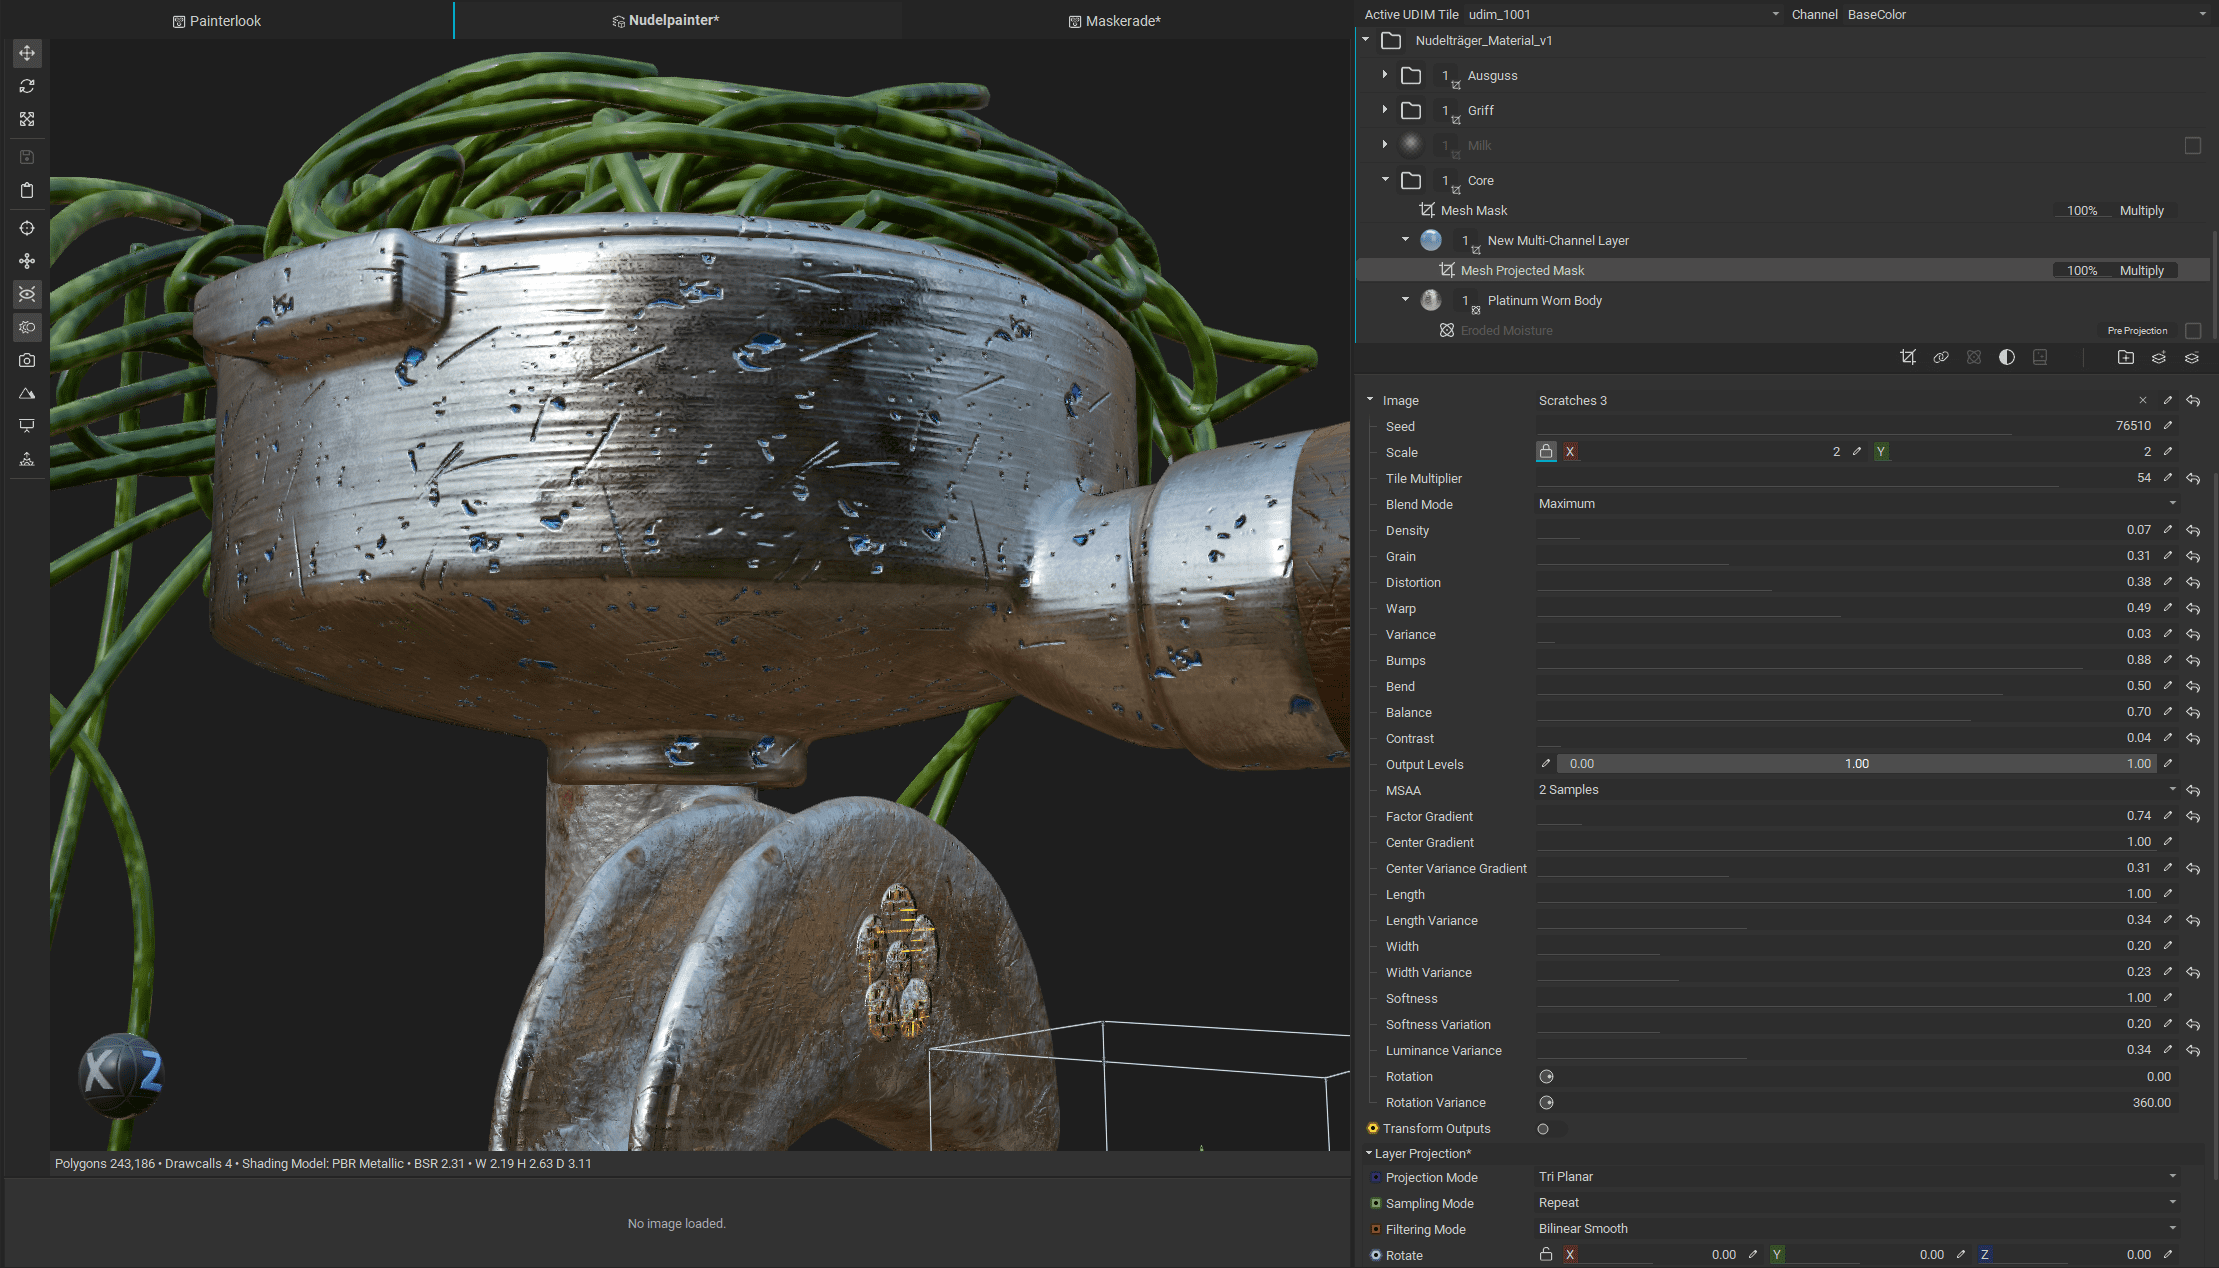
Looks too clean? There are plenty of options for breaking up the scratch shapes.
Filters and effects are spread across the library a bit. It is worth browsing through different categories such as Image, Mesh, or Material and simply throwing what you find onto the asset to see what happens.

Decals
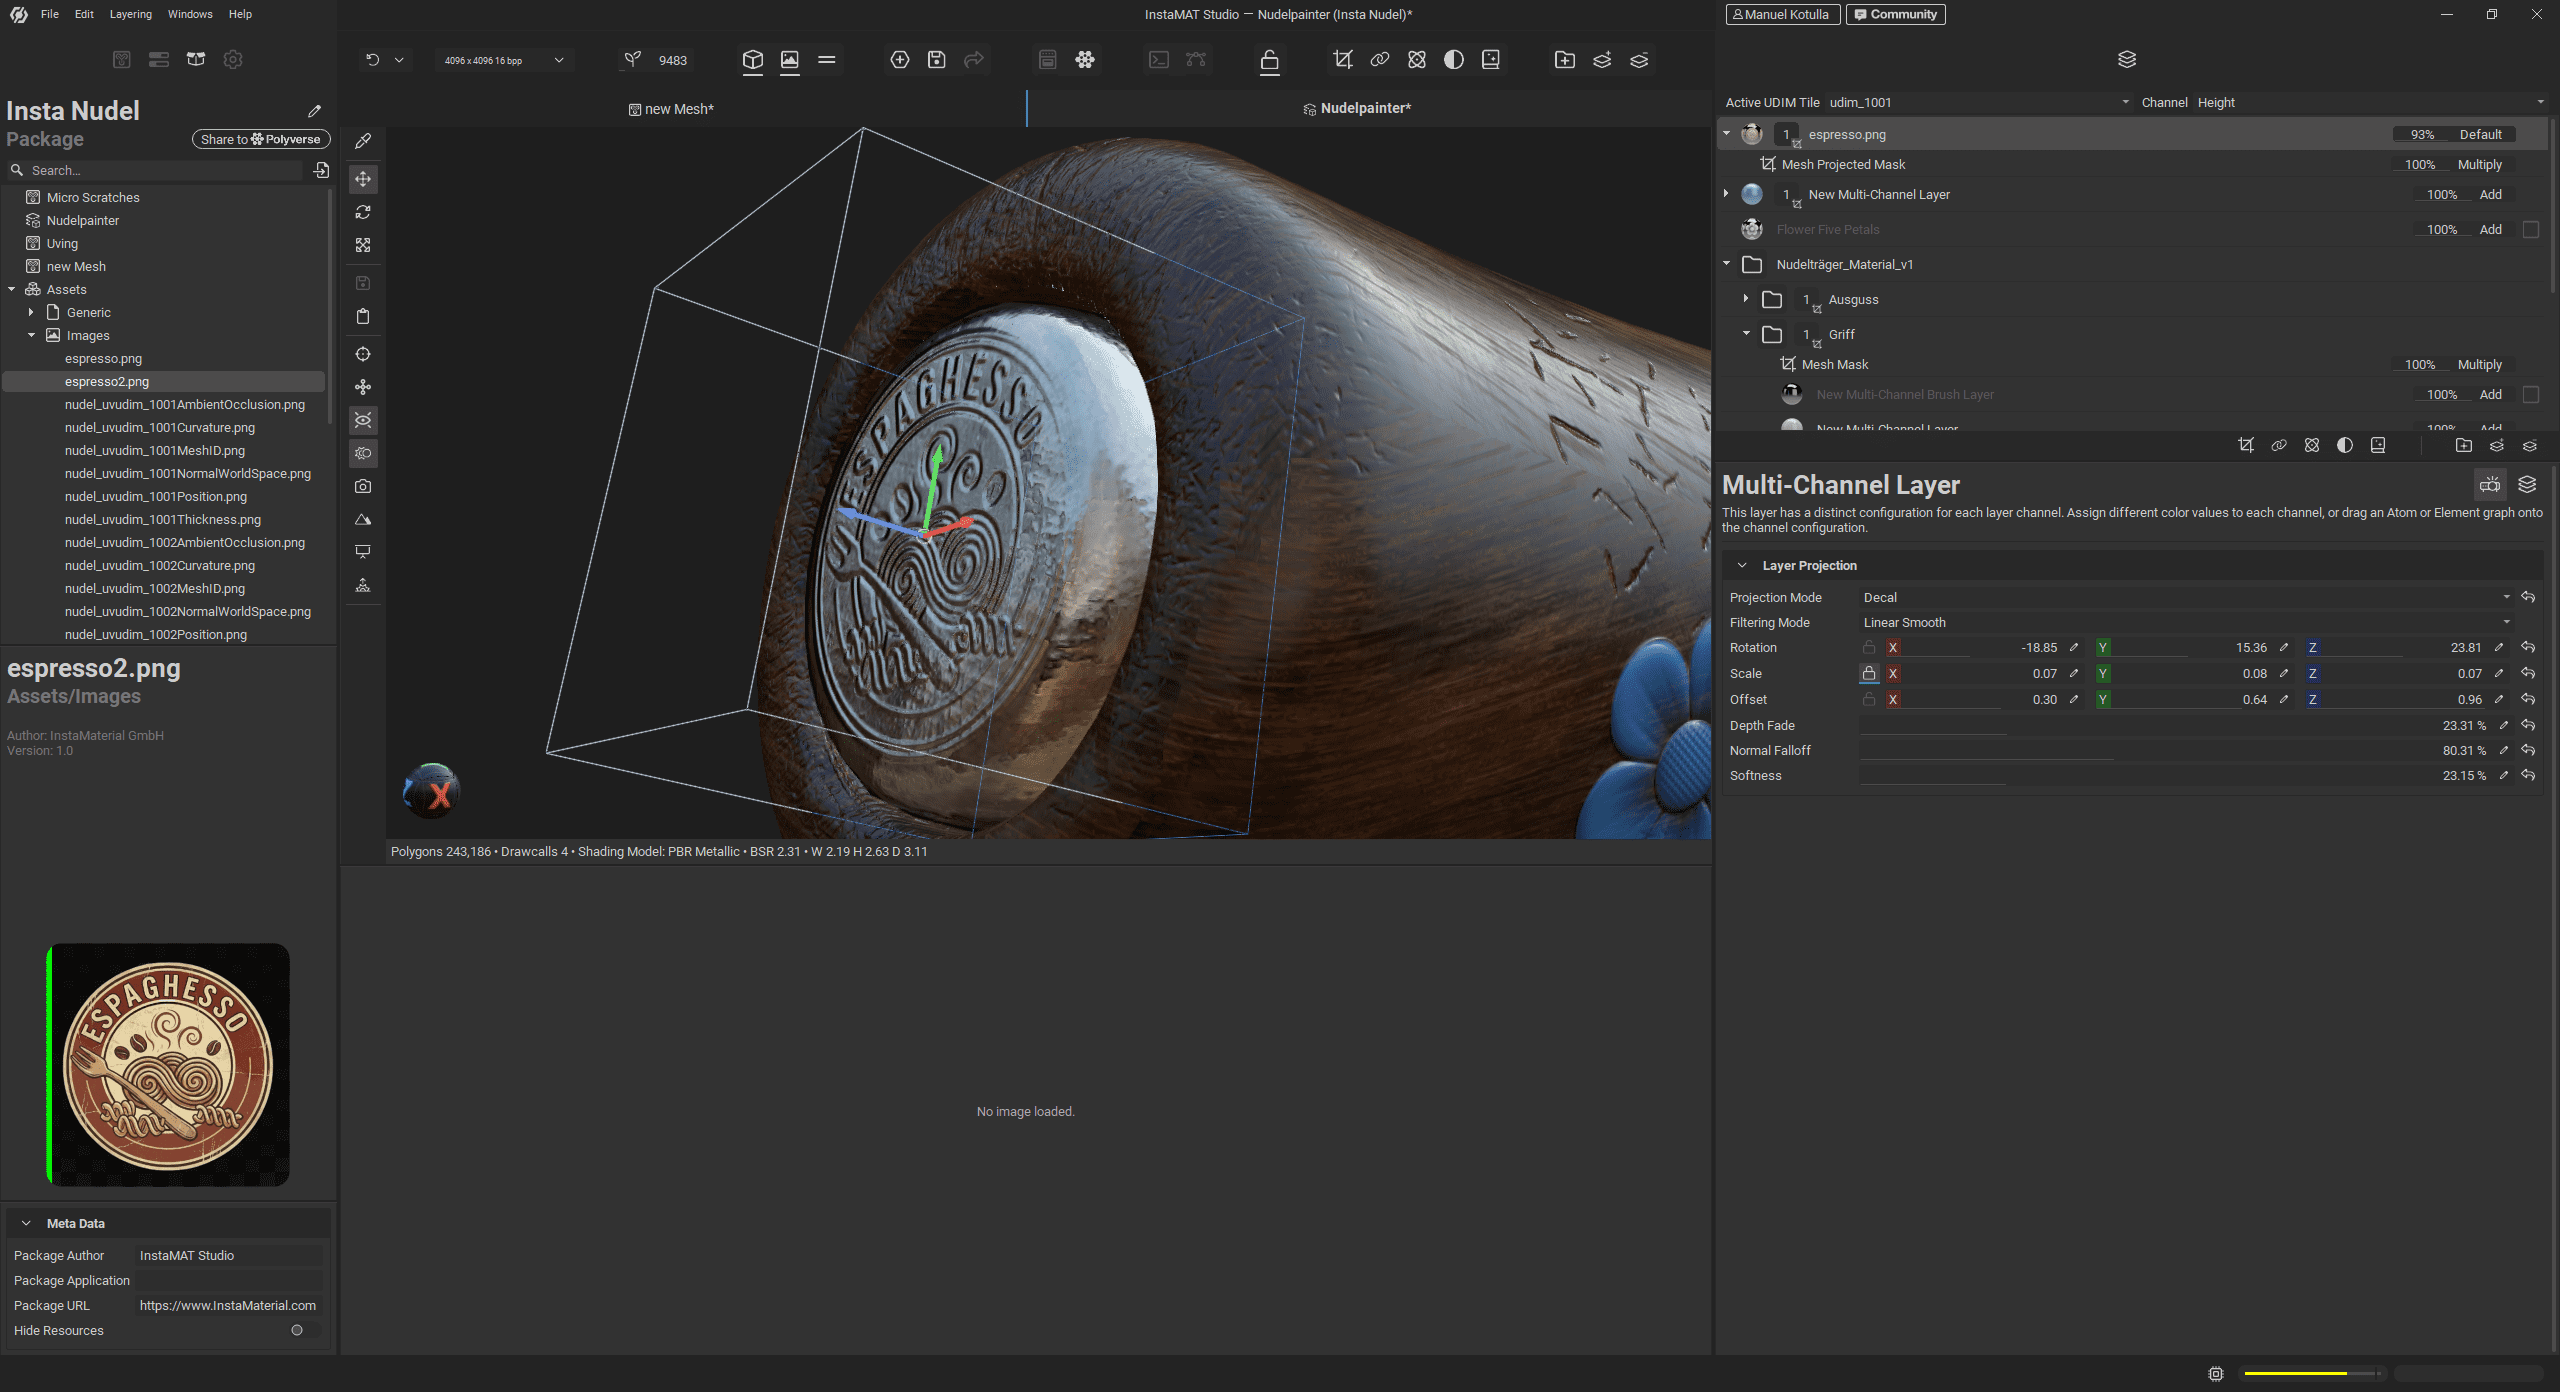
Logos, icons, bullet holes, and similar details are commonly projected onto a mesh as so-called decals. In InstaMAT, an image is simply dragged directly onto the mesh and positioned in Decal mode. Under the hood, this creates a multichannel layer, allowing us to add a separate roughness or height map, as well as additional masks.
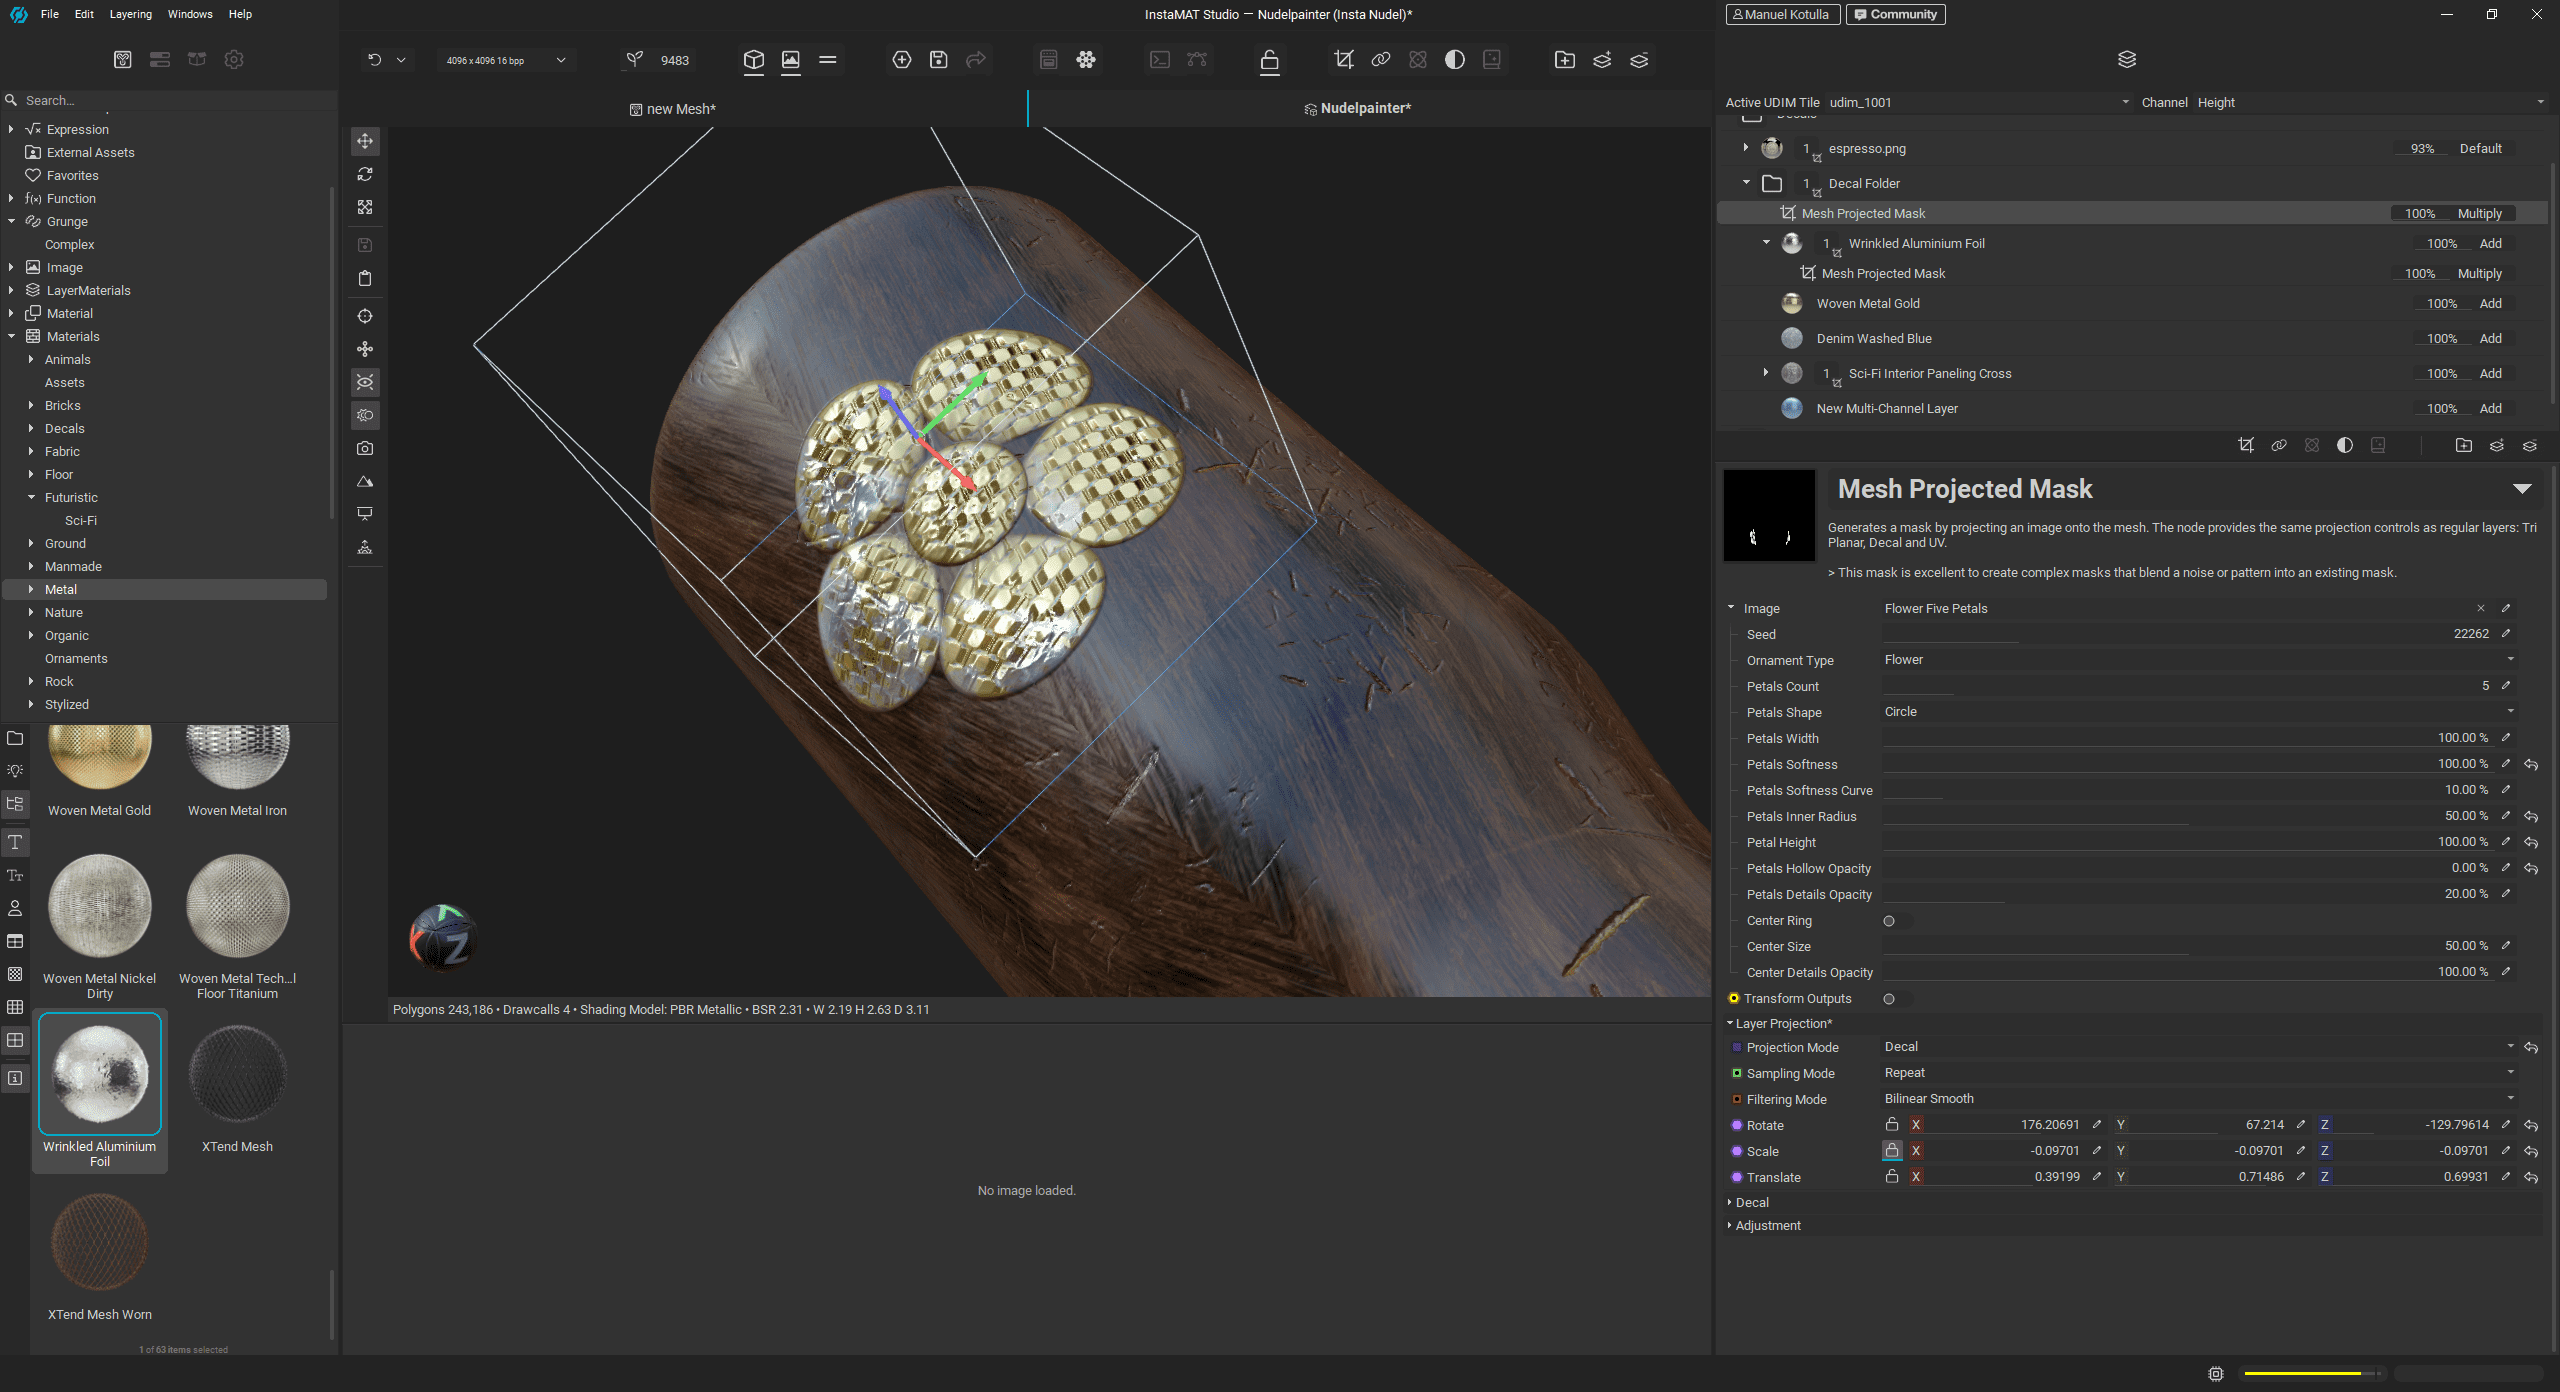
It is also possible to project an entire folder structure containing materials and custom masks onto the mesh by using a Mesh Projected Mask set to Decal mode, effectively turning the whole setup into a decal.
Hand Painted … Look
When it comes to hand painting, InstaMAT distinguishes between actual hand painting and a hand-painted look, however that is achieved. The latter is easy to produce thanks to its procedural approach, with powerful masks and generators. In the most brute-force way, we could build an oil paint effect in the Element Graph and apply it directly on top of a PBR texture, or simply use the Stylize material effect. Conveniently, this need not even happen in the painting context. Everything can be done in the node graph, as effects and filters are accessible everywhere, making it easy to create variations.
So what exactly can the brush engine do right now, and what can it not do yet? At the moment, we have three tools: Paint Brush, Eraser, and Paint Projector. Artists who like to actually swing a brush can set brush size, rotation, position, and flow to be constant, random, or driven by pen pressure, which works very precise and smooth on my Wacom. There are also options for axis-symmetrical and path-oriented painting, along with fundamentals such as falloff and spacing.
For now, that is unfortunately all. Tools that are essential for serious hand painting, such as Smudge, Stamp, and Lazy Mouse, are already on the roadmap but not yet available. (Buuuuut: We were able to catch a glimpse of a preview build. It already features many improvements, like Lazy Mouse, mighty Curves for your seam needs, and Radial Symmetry.
The Paint Projector works in a familiar way, allowing us to paint a texture onto the mesh from a camera perspective using a brush, or alternatively apply it directly as a mask. At the moment, only 3D painting in the viewport is supported. 2D painting in the texture viewer is currently in development. The real strength of the current system lies in the ability to design custom brushes, masks, alphas, and effects in fine detail via the Element Graph.
Material Generation from Photos

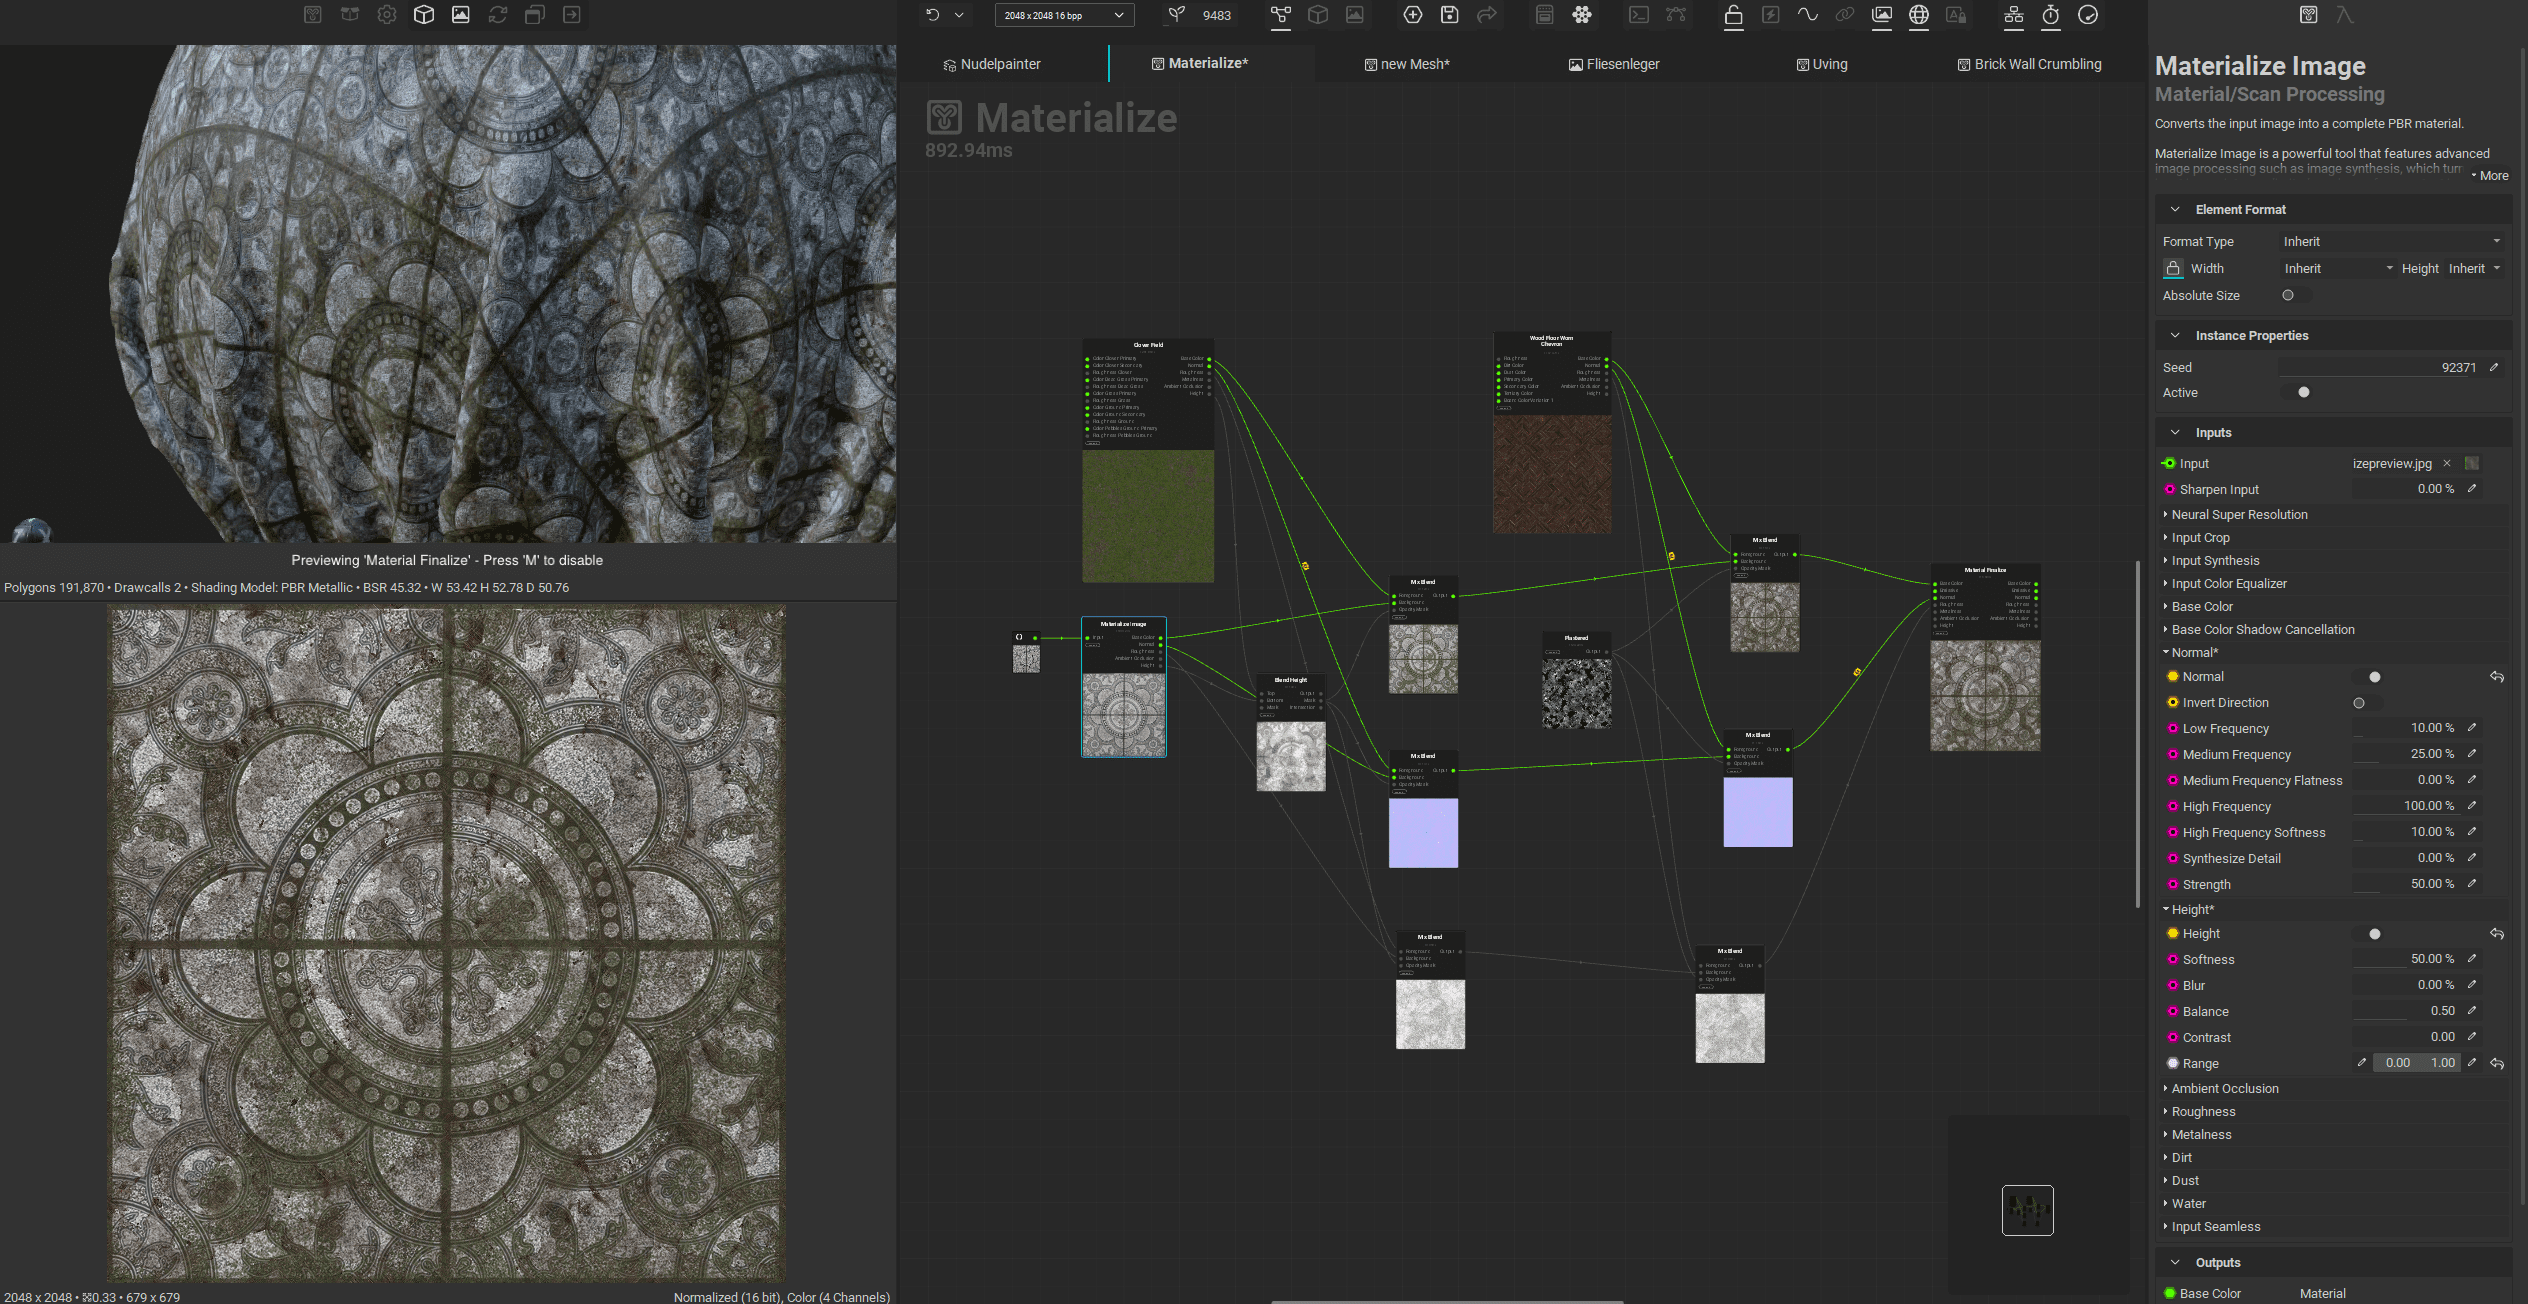
What if the handle is made from kitchen tiles? Time to test material creation from photos. To turn a simple smartphone photo into a usable material, we once again start a new project via the “+” button, this time choosing Materialize Image and selecting our image. In the next step, we already get a preview of the resulting material. The input image can be cropped or upscaled using neural assistance. The Color Equalizer normalises the image, while Base Color Shadow Cancellation removes lighting influences from the photograph. Individual channels can be adjusted separately. For example, roughness can be broken up using a grunge map. Optional dust and dirt effects can be added directly.

Once the prominent Save button in the top bar is pressed, the material becomes available in both the painting context and the node graph. From this point on, we can freely switch back and forth between the Materialize and Texturing tabs to refine the result.
For more complex materials, the node graph comes into play. Materialize Image appears here as a node. Why does this matter? It allows us to process individual channels using the full power of the image processing engine, combine them with other materials, or push the look in a more stylised direction.
Mesh Changes
Just before finishing these lines, our modeller made a few changes to the mesh. Fortunately, we can simply drag our existing unwrapping graph into a new graph, which gives us a node with exactly one input and one output, and then add the updated mesh. Since the naming and number of submeshes have not changed, the unwrapping is effectively done at that point. We duplicate the project via File > Save Project Copy and replace the mesh in the Project Editor. Re-bake the maps once, and we are done.
But what happened to our hand-painted masks? Did they carry over in the same way as the generators? Thankfully, yes. This apparent magic is explained by the fact that every single brush stroke is stored in 3D space rather than painted onto the 2D UVs. As long as the mesh does not change too drastically, as in this case, the strokes are always projected onto the correct location. Only one decal needed a slight adjustment, which was to be expected given the slightly different mesh orientation. We will take a look at how to implement this in an automated and scalable way within the node environment at a later point.

Performance and Flow
InstaMAT runs pleasantly smoothly and feels modern, admittedly a subjective impression. In some places, you can sense the procedural foundation. Especially when opening a project, it can take a moment for everything to be recalculated, depending on complexity. Helpfully, the UI displays VRAM usage in the bottom right. In this project, four UDIMs at 4096 resolution with 16 bits per channel filled 24 GB of VRAM once, resulting in a crash. Paying attention to the red warning icon and restarting the application promptly would likely have prevented that. For performance optimisation, the project resolution can be changed at any time, for example, working at 2048 and exporting at 4096, or by disabling viewport ray tracing. Or even better: Limit VRAM usage in the settings. This leaves some memory for the system.
Export & Rendering
The Export button, centrally located in the top bar of the UI, opens a clear, well-structured menu. Here, in fairly standard fashion, we can set file formats, resolution, and bit depth, with the latter two configurable per UDIM. Desired channels can be added via simple toggles, and the entire setup can be saved as a template.
When creating a template, we can go a step further and fine-tune the mapping of individual channels and enable output converters. These can, for example, convert roughness into glossiness maps or allow us to choose between DirectX and OpenGL normal formats.

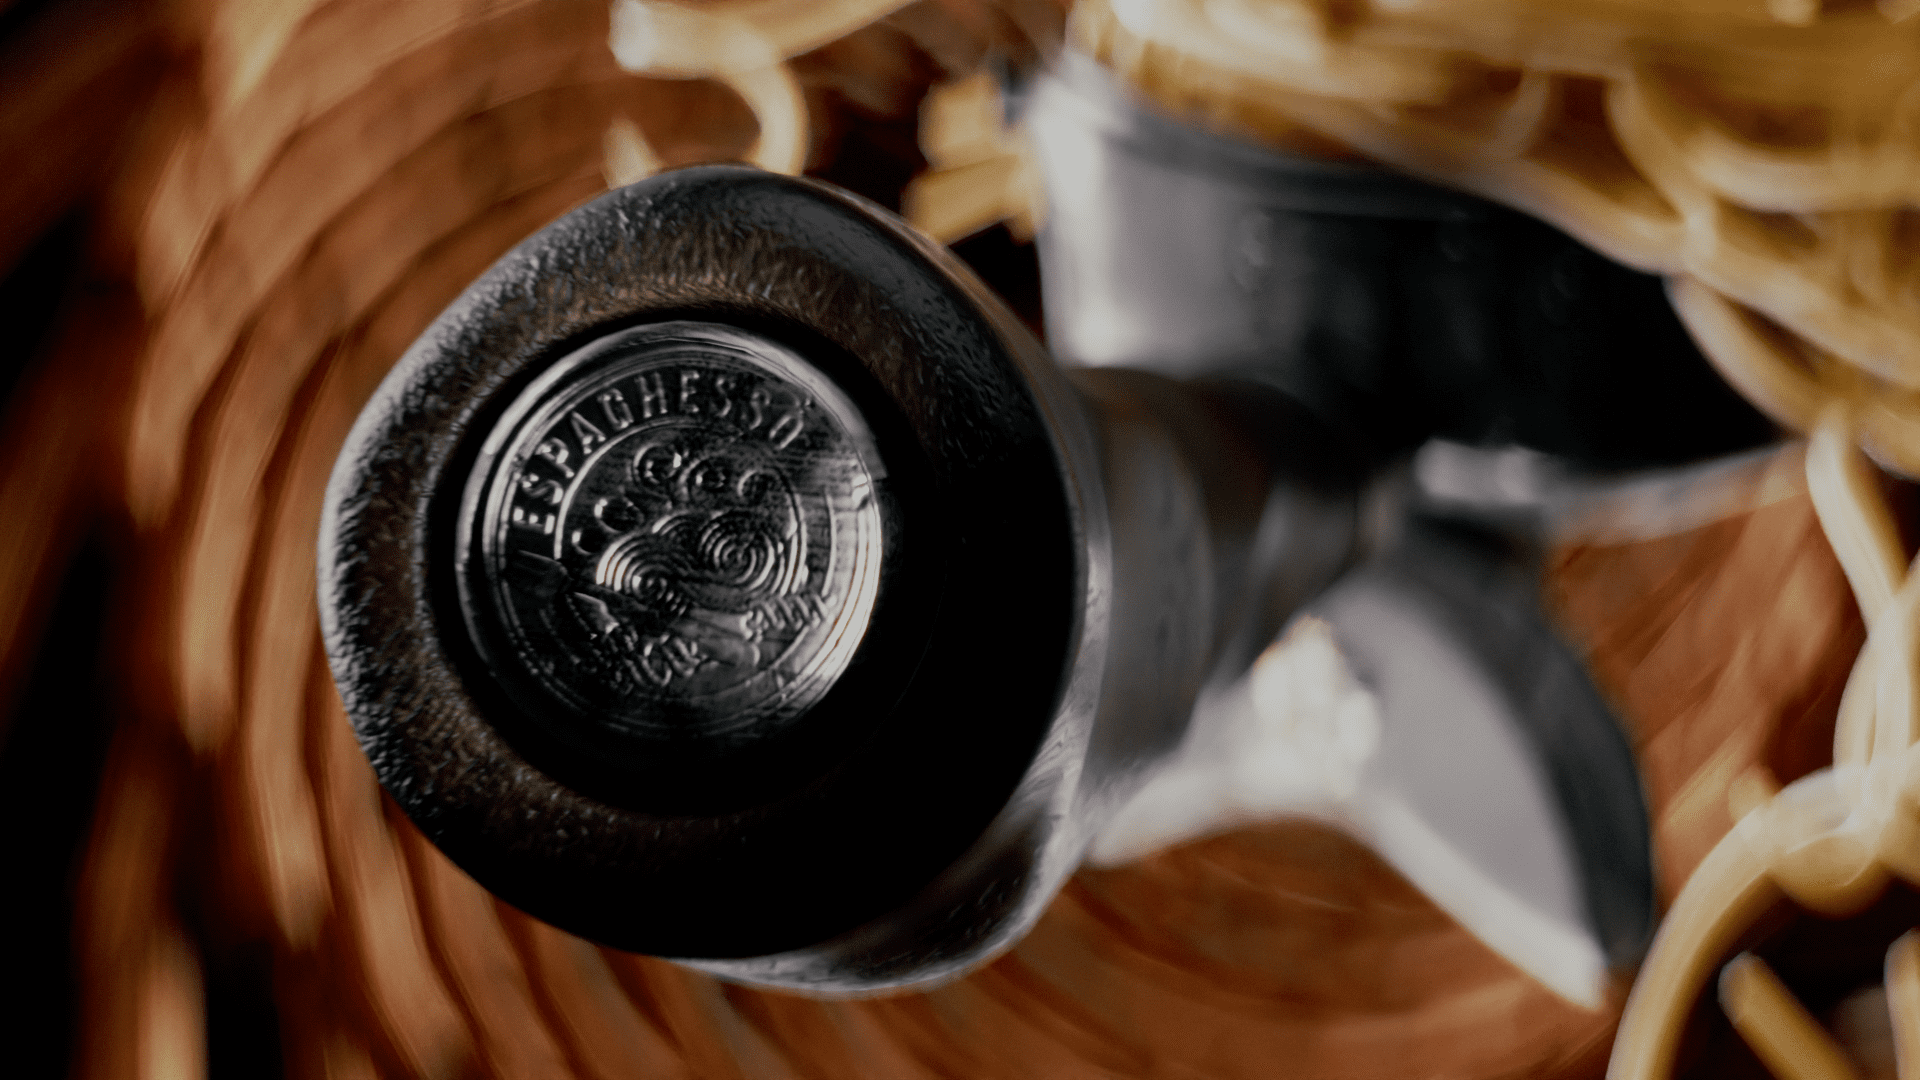
The export itself is quite fast, and the maps are easily picked up by Octane and Karma (and likely by every other engine, too). Here are some rendered examples, it was a lot of fun to noodle around with the maps, putting them through their paces in extreme close-ups and under various lighting conditions

Community and Tutorials
Help, information, and like-minded pioneers can be found on Abstract’s Discord. On YouTube, there is a growing number of tutorials and presentations created by the steadily expanding community and by Abstract and its founder.
Particularly helpful: the application ships with several well-documented example scenes that can be dissected, studied at leisure, or used as a starting point. These well-documented sample projects make it easier to get started and illustrate solution paths for more complex problems.

Good ideas and user feedback are always welcome; feature requests can be posted right here in the forum: https://community.abstract3d.com/c/instamat/features/67
Polyverse
Think of Polyverse as InstaMAT’s extended arm into the web and collaborative workflows. It doesn’t just execute InstaMAT on the server side. It simultaneously serves as a management, versioning, and review tool for assets and materials. This even includes direct download plugins for Unreal and Blender. Beyond that, assets and materials can be processed right in the browser. Tasks like file conversions or turntable generation can be handled directly online

Pricing and Availability
The good news first: InstaMAT is available as a fully featured Pioneer License for free, as long as your revenue stays below USD 100,000 and you mention the tool. Above that threshold, there is an Indie version for revenues under USD 250,000. This is available either as a perpetual licence for USD 489 or as a subscription for EUR 8 per month.
Wait, a subscription? Software development costs a lot of money and needs to be funded somehow. You have to keep in mind that Abstract is not a global corporation. It is a small German developer with fewer than 30 employees. Considering they poured a lot of private capital into InstaMAT, the price is actually more than fair.
Beyond that, there is also a Pro version that offers the same integration with game engines as the Indie license. The Pro license removes the 250k USD revenue cap and includes server-based services, such as a virtual machine for running InstaMAT.
One important detail: the Pioneer License is an always-on licence. When my Wi-Fi dropped out once, InstaMAT immediately followed suit because the licence could no longer be validated. Offline licensing is only available at the Enterprise level or higher. A compromise is the Indie and Pro license that only requires occasional connection with the internet.
Sneak Peak
Just before wrapping up these lines (again), I managed to catch a glimpse of an early preview build. I cannot go into too much detail, but plenty of great things are coming our way. The brush updates include Lazy Mouse, Radial Symmetry, and Curve Tools, alongside a new Mesh Mask from normal and new Materials. The release is already planned for Q1! (Since all brush operations run procedurally in the background, adjustable post-drawing deformers like jitter are also on the roadmap. However, they might not be ready for the very next version.)
Instalove? The Verdict
The seamless and immediate integration of Painting and Nodegraph makes InstaMAT a remarkably fast and flexible tool. The Element Graph is an incredibly powerful instrument with capabilities that extend far beyond pure image processing found in other tools (our journey of discovery promises, among other things, RBD sims, complex mesh processing, automation, and even terrain creation). It can be compared to Houdini: if we are missing a specific effect, tool, or setting, we can very likely build or adapt it ourselves directly in the Element Graph.
The decision to compute brush strokes in 3D space rather than 2D is a clever design choice that directly addresses the reality of changing base meshes and scalability. However, a few brush tools are still missing to fully satisfy dedicated hand-painting artists. Though those who primarily paint masks won’t find this particularly bothersome. Speaking of which, the masks are another major strength: clever generators and the interplay between masks (maps) make complex effects achievable very quickly.
Anyone familiar with the Substance ecosystem won’t take long to feel right at home in InstaMAT. I highly recommend trying out the free Pioneer License to see how you can integrate the tool into your workflow. It is well worth it and will lead to quite a few “Aha!” moments.
What I liked most:
- The integration of painting and node graph, with the ability to intervene and combine procedurally at any point
- The highly customizable masks
- Performance & Flow
- Brush strokes and basically everything else are calculated in 3D space, so its easy to change the modell oder make automatic texture processes.
Room for improvement:
- Channel/Mask viewing is still a bit cumbersome
- Direct brush & painting features such as Clone, Path, and Smear
With the new update on the horizon, many wishes are being addressed. Once released, we will take another close look at InstaMAT. We will also dive deeper into the terrain and scaling workflows then.


