Table of Contents Show
Of course, you can get together privately and split the price if one interested party already has the licence and wants the device alone and the other only wants to upgrade to Studio. From this point of view, the device is extremely reasonably priced, because the excellent mechanical quality with the elaborately mounted rotary wheel and the robust keys has not been spared. It has also become more portable, as it weighs only 800 grams instead of the keyboard’s 2.3 kilograms. That may seem a lot, but the Speed Editor contains a battery that enables many hours of mains-independent operation. In addition to operation via USB-C, control via Bluetooth is also possible; however, a few users still report connection problems. The additional USB ports have been removed and there is now only one USB-C socket.
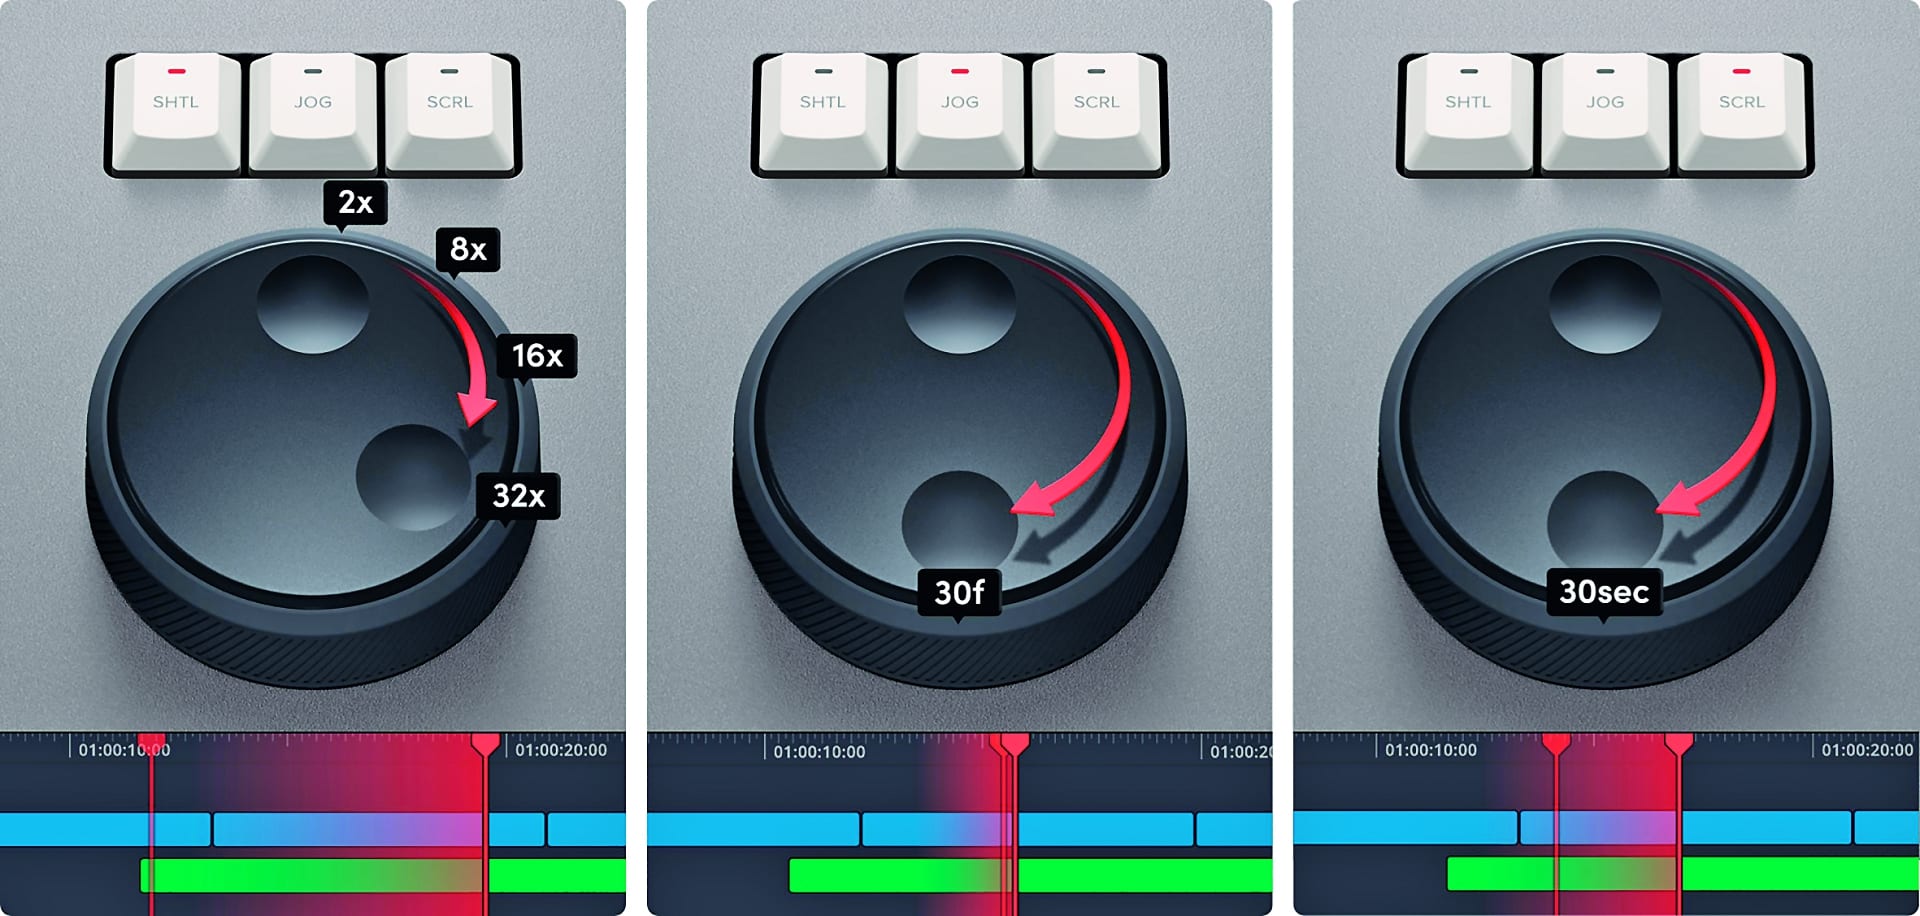
The only point of criticism that we already had with the mechanics of the editor keyboard has remained: SHTL (shuttle) mode lacks a tactile preload and consequently the automatic reset to standstill when the wheel is released, as is the case with classic controls for editing devices. The shuttle function is therefore only a faster version of the SCRL (scroll) setting, and both together replace the function of the JKL buttons in keyboard mode. When switching to JOG, on the other hand, the rotary wheel does exactly what old hands expect: precise transport frame by frame.
Unusual cut page
The SE control panel still has its home game here, but in the newer versions of DaVinci Resolve a number of functions can also be used in the other areas (more on this below). Since our last article was a while ago, I would like to present the most important features of the current Cut Page here. If you have been editing in the Edit Page up to now, you will have to adapt. Those coming from Final Cut Pro X, on the other hand, not so much. The first video track V1 reacts in a similar way to the magnetic timeline there: It does not allow any gaps. On the other tracks, however, you can distribute and edit the clips in freestyle as before.

The magnetic track is generally not a handicap. The “RIPL DEL” (Ripple Delete) and “SMART INSRT” (Smart Insert) buttons can be used to delete or insert clips, and the rest of the timeline is moved accordingly. What is smart about this? You don’t have to precisely navigate to a cut point, you just have to be close to it with the playback cursor. A discreet white wedge indicates the relevant cut. When the “SNAP” button is activated, this point is also precisely controlled, just like when the magnet is activated in the edit page. Double-click and hold Snap to continuously resize the viewer with the wheel.
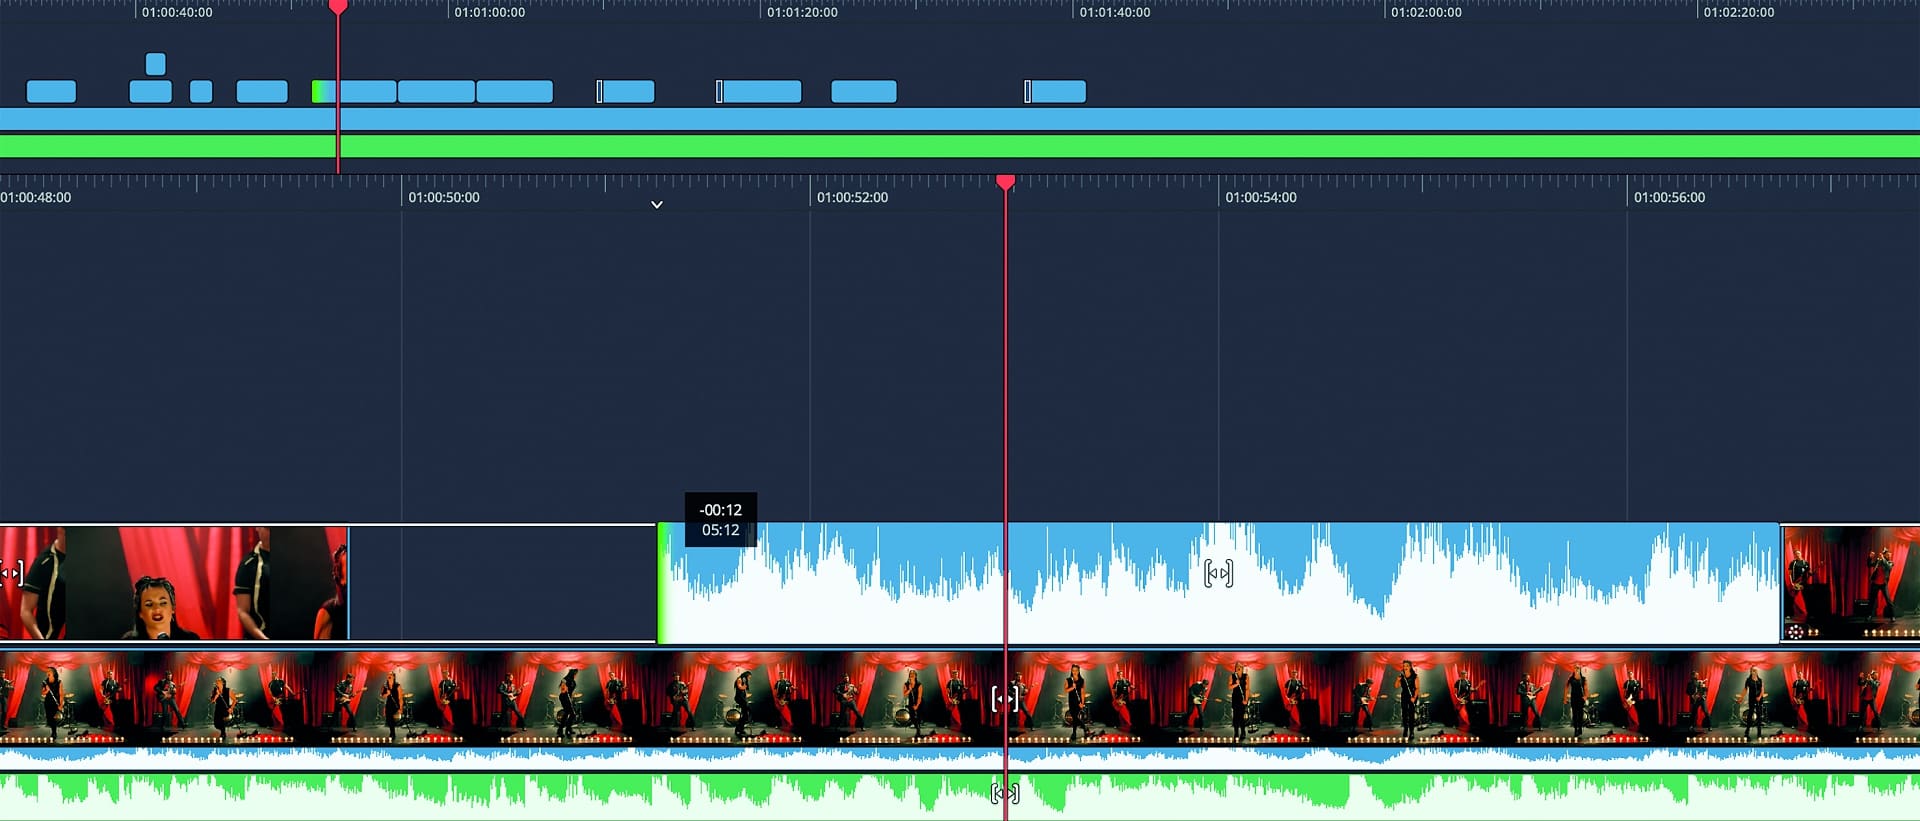
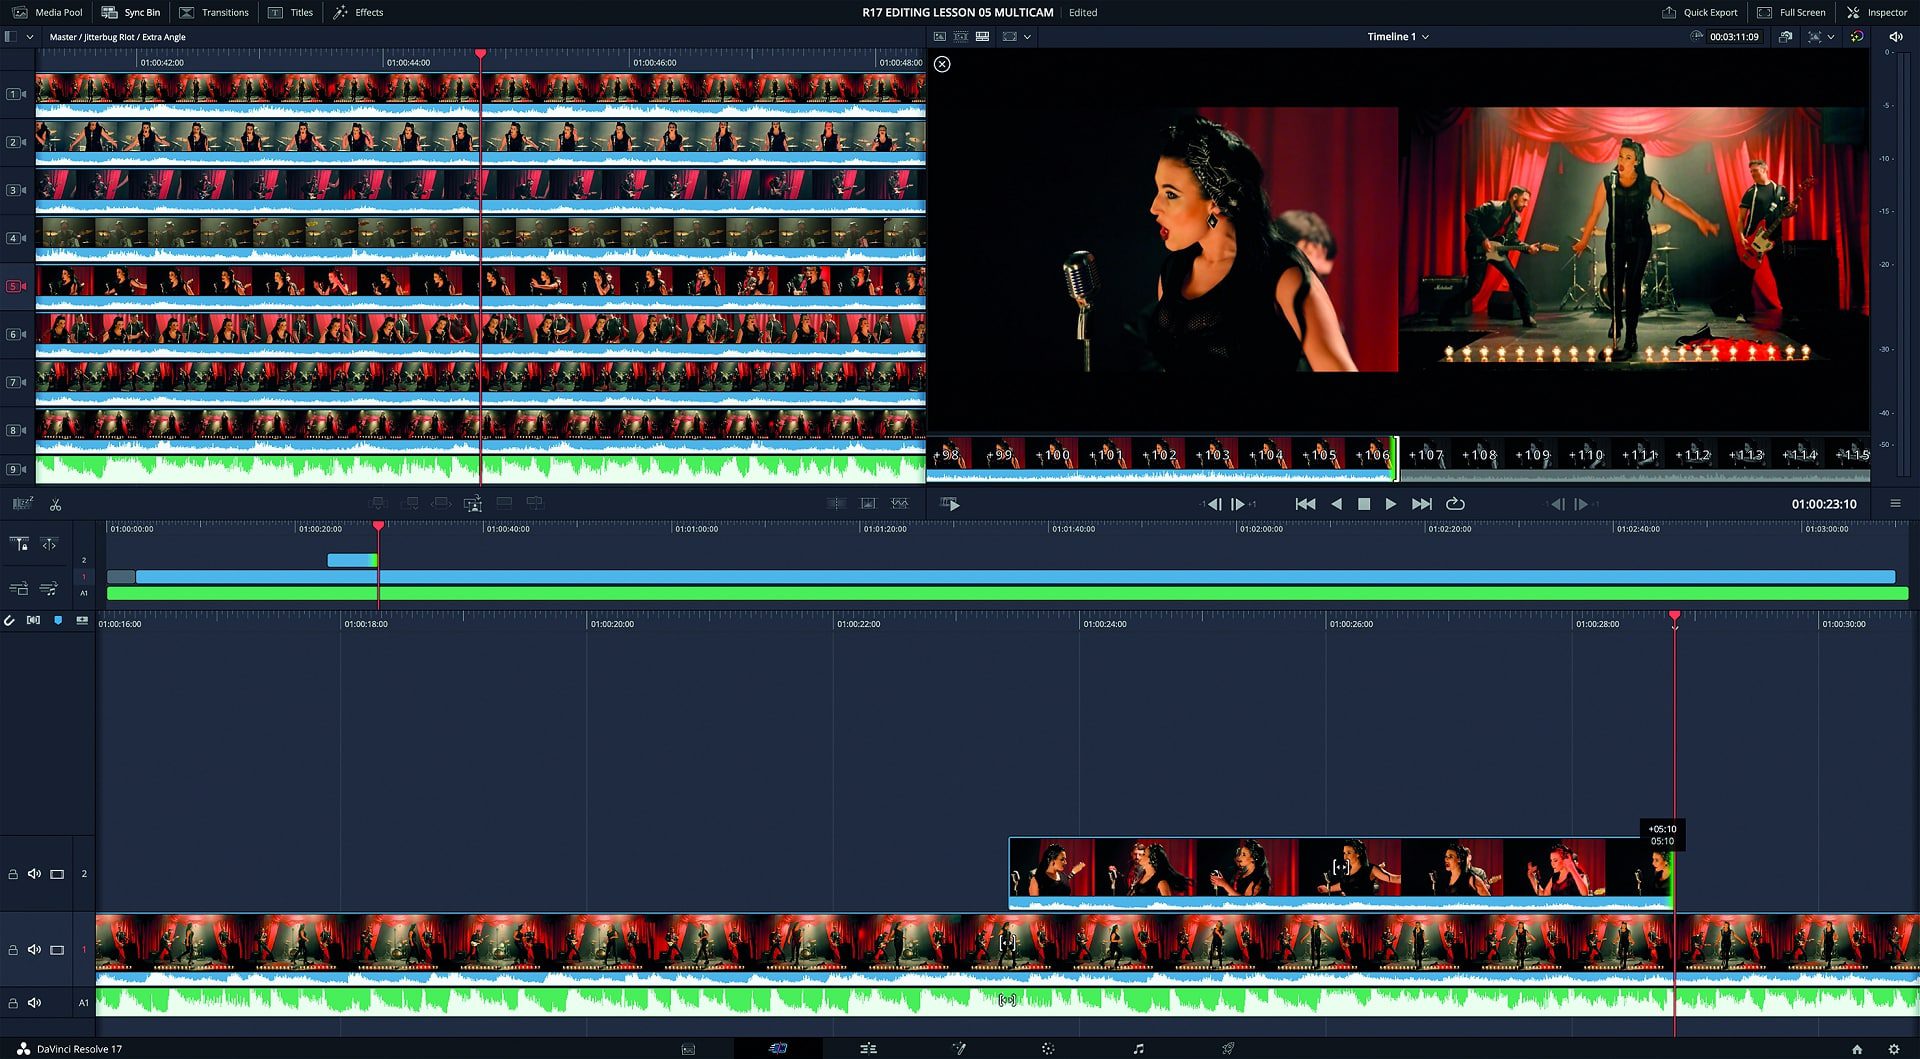
The double timeline is also unusual: The upper timeline always shows the entire length of the film and the cursor moves across it. The lower timeline, on the other hand, has a static cursor and scrolls underneath the greatly enlarged area around its current position. This puts an end to the constant zooming, you can jump and place in the upper timeline and find the desired individual image in the lower one. If you have also activated “Audio Trim” to the left of the timeline, an enlarged audio waveform is automatically displayed in the lower timeline when trimming. This can basically always be left active, as the images are displayed in the viewer anyway when trimming.
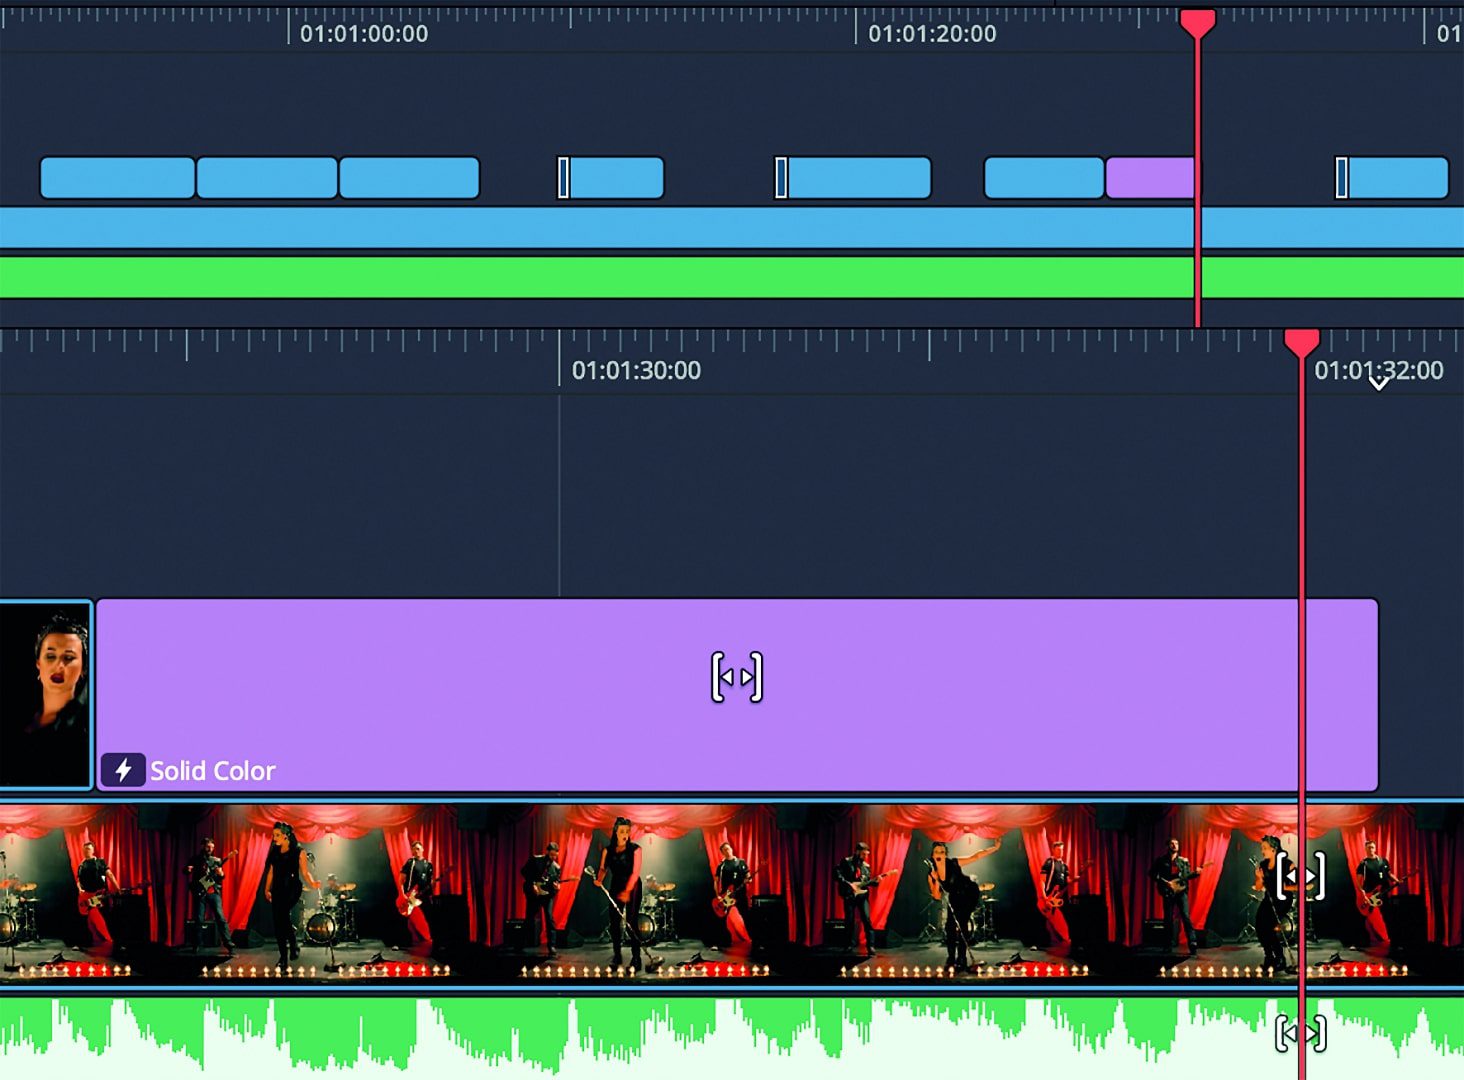
Some people will miss a function for inserting slug (filler material) as a placeholder if a clip is already to be set in the timing but will only be delivered later. To do this, you have to switch to the Edit Page because you cannot insert a colour area (colour generator) in the Cut Page at the touch of a button. Not even by drag-and-drop, which would require a change of hand anyway. Once placed in Edit, such a colour area naturally also appears in Cut. Like any other clip, it can be trimmed there by holding down the “TRIM IN” or “TRIM OUT” button using the rotary wheel or moved between the clips as a whole to other cuts using “MOVE”.
Nevertheless, one could imagine a more elegant solution with the SE without leaving Cut. Is there perhaps an unused switch in the rotary wheel that reacts to pressure but has not yet had any effect? The “IN” and “OUT” buttons naturally correspond to the corresponding letters on the keyboard and set an entry or exit for cuts. However, like many keys on the SE, they have a second function, which is labelled on the front edge and is triggered by a quick double-click. In this case, “CLR” (Clear) indicates the deletion of the corresponding marker; pressing both buttons simultaneously deletes both positions.

Source Tape
There is no separate viewer for the source material in Cut, instead you switch between the view of the timeline and “SOURCE” at the top right. A further, narrow timeline then appears below the viewer, which BMD refers to as the source tape. A rough cut, so to speak, which lines up all the clips from the media pool one after the other in full length like a classic video tape. Their sequence is defined via “Sort Media By” in the Media Pool. If you are in the Master Bin, all the raw material is lined up. The source tape is populated via the bin list at the top left. You should therefore organise your bins sensibly if you don’t want this to be a miserably tedious process.
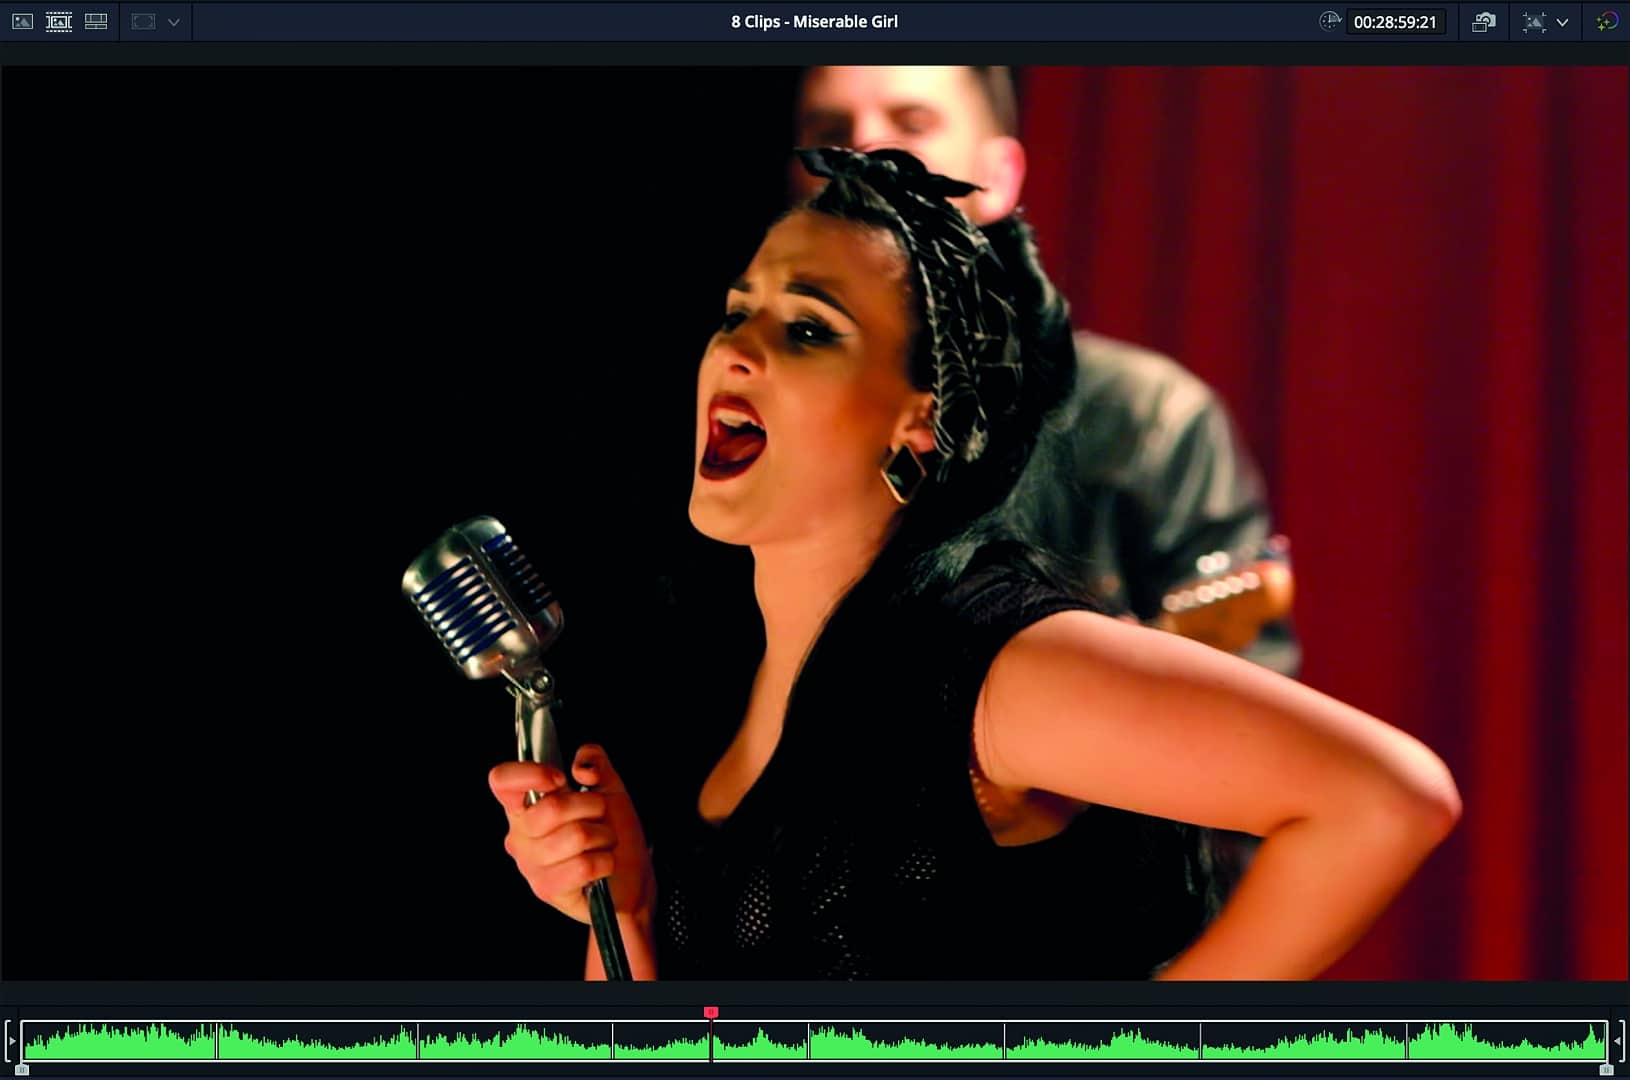
A Smart Bin for subclips would be useful, but you have to create them with Option-B or by drag-and-drop in the Edit Page. Unfortunately, the Cut page does not yet provide access to smart bins, so you have to create a normal bin and drag the subclips over to see them in Cut as a source tape. The current clip under the cursor is also highlighted in the Media Pool. Setting IN and OUT limits the display to a range that can also be changed using the trim buttons; the “ESC” button takes you back. During playback, longer clips are automatically played back faster, as you would probably do manually, while the sound remains reasonably identifiable. Unfortunately, there are no buttons on the SE for jumping between clips, so you have to reach over to the keyboard and use the up or down arrows.
Editing
All editing functions can be restricted using the “VIDEO ONLY” and “AUDIO ONLY” buttons. Pressing “APPND” hangs the clip currently under the cursor or the area marked with In and Out at the end of the timeline. “PLACE ON TOP”, on the other hand, places the source at the current position on a new track, so this is not to be taken literally if Audio Only is active. “SPLIT” sets a cut at the cursor position, i.e. corresponds to the razor blade (Blade Edit) in the Edit Page. Another click on the same position deletes the cut again, if necessary precisely controlled by active “SNAP”. Otherwise, double-clicking Esc regularly acts as an undo.
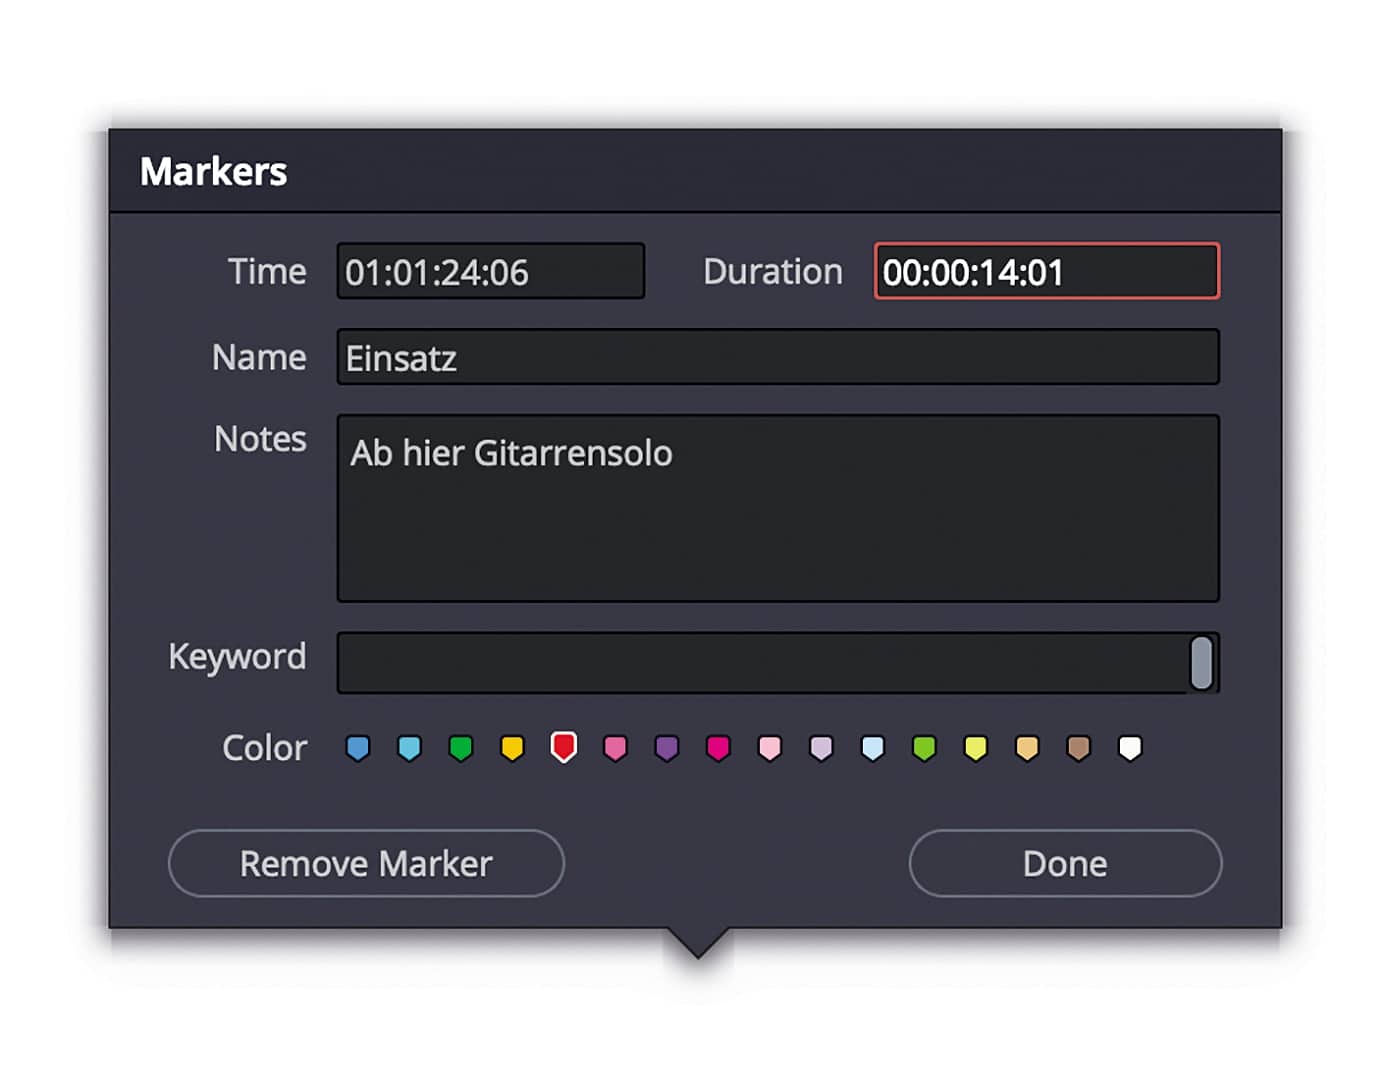
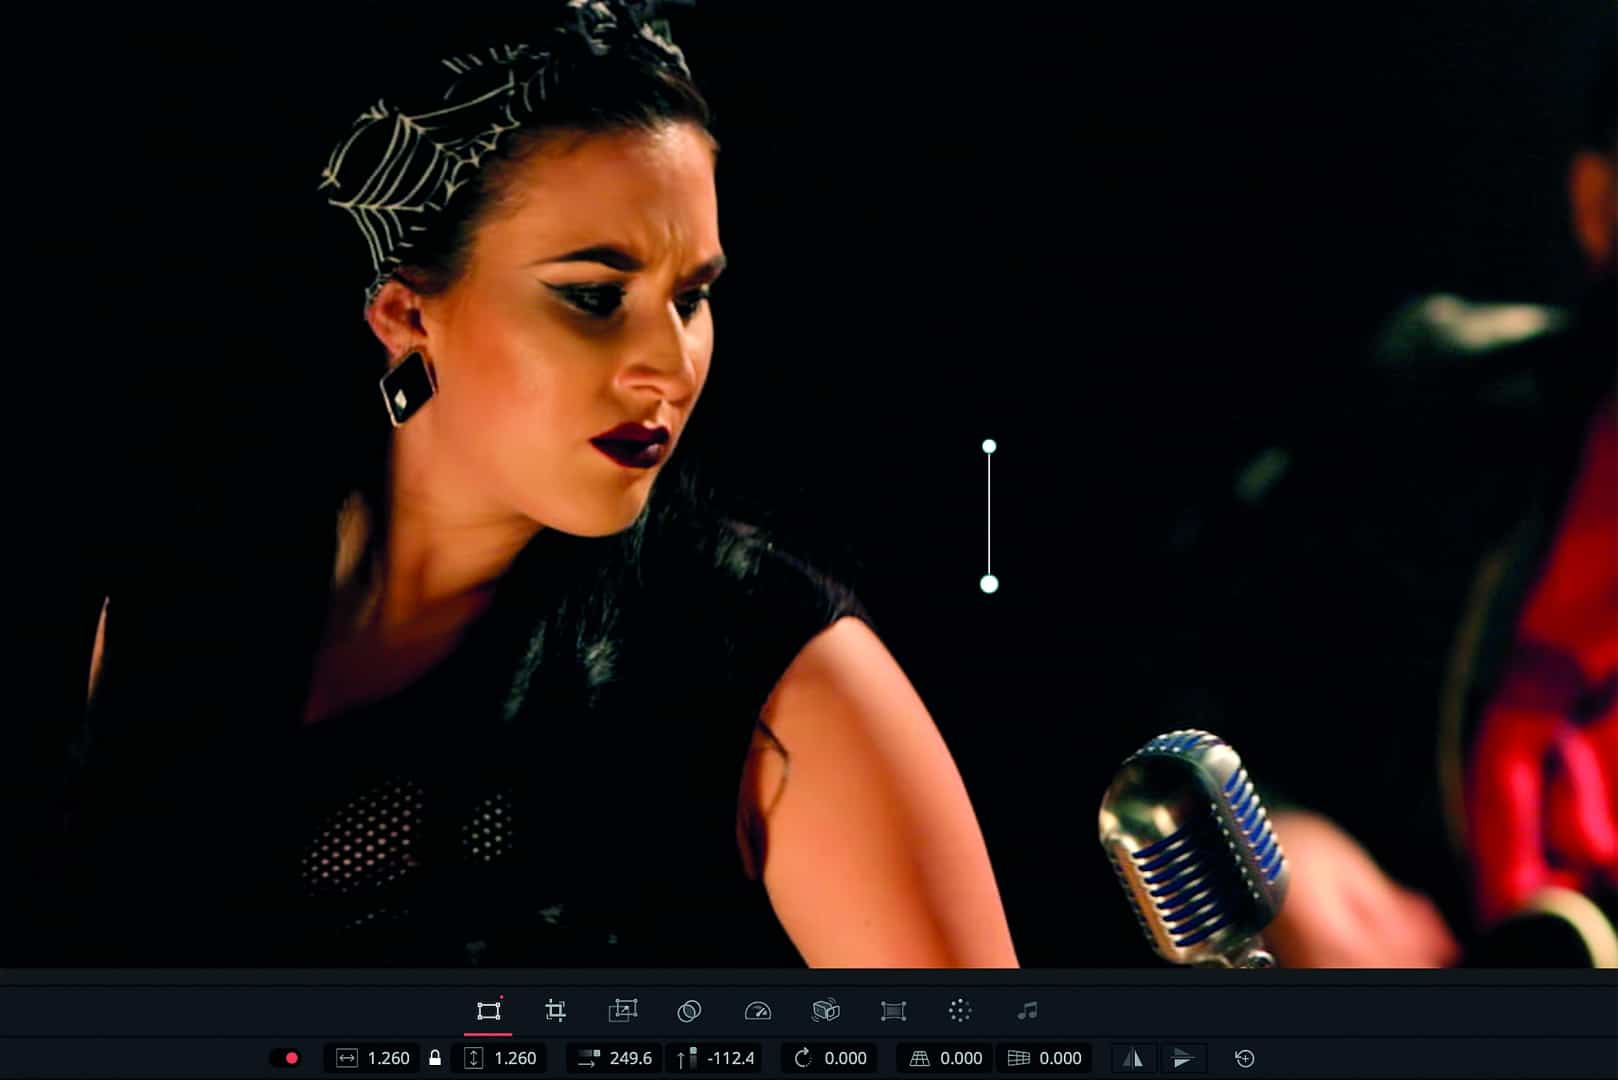
It also takes some getting used to that some of the secondary functions are used by double-clicking, others by holding down. Holding “AUDIO LEVEL”, for example, allows you to change the volume with the wheel, while double-clicking sets a marker. A quick triple-click on it opens the labelling window for the marker known from the edit page – such multiple assignments require quite a lot of practice. “CLOSE UP” uses face recognition to provide a close-up cut when working with 4K material in an HD timeline, for example. If the AI is not so accurate, the vertical position can be adjusted by double-clicking and holding, but unfortunately not the horizontal position.
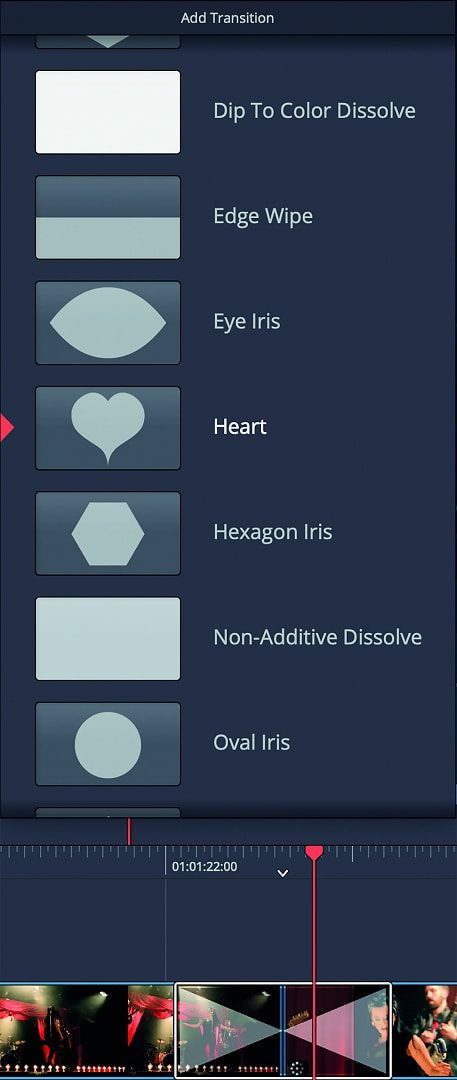
The labelling of the “CUT” button can be somewhat confusing because it does not correspond to the razor blade or the general “Cut” menu command. However, the SE button is a toggle switch with the “DIS” (Dissolve) button next to it. This is used to set an aperture to the next cut and Cut is used to delete it again. Initially, this is always a normal video dissolve, but if you hold down the “TRANS” button, you can use the wheel to select other dissolves (but not fusion dissolves). holding “TRANS DUR” (Transition Duration) and turning the wheel changes the duration, double-clicking (SET) changes it to the standard length.
Unfortunately, you cannot set a different fade as the default here. With the countless effect fades, this may be bearable, but a few variants of the soft transition would be desirable. The favourites from the effects list also have no influence. Unfortunately, the fixed assignment of the “SMTH CUT” (smooth cut) button next to it cannot be changed. That’s a shame, because not everyone needs this aperture that allows you to cheat your way through jump cuts. At least you can work with drag-and-drop effects or fades in the cut page, but that forces you to reach for the mouse again.
Most of you will be familiar with the following terms. But for beginners, we would like to explain the various buttons for editing corrections that intervene in a film when the duration has already been set.
By holding down the “ROLL” button, you can move the wheel to the next cut without changing the overall length of the film. As with all subsequent functions, this only works with enough meat before and after the cut. If this ends, a further rotation will have no effect.
“SLIDE” is a function where the button must be held down after double-clicking, which requires some practice. It moves a clip within the timeline without changing its content, so the neighbouring clips are shortened or extended accordingly. The common “Slip” function moves the content of a timeline clip within the original material without changing its length or position in the timeline. The SE has two buttons for Slip, “SLIP SRC” (Source) and “SLIP DEST” (Destination). This is unusual, but has to do with the smart reaction to the next cut. The rotary wheel acts on the clip before the cut when the Source button is held down and on the clip after the cut when the Destination button is held down.
Sync bin or multicam?
The Cut Page offers an alternative to multicam editing with the SE. To do this, select all files that have an overlapping timecode or a reasonably usable soundtrack. Click on “Sync Clips” (the icon with the double loop above the media pool) to open a window in which you can synchronise on the basis of timecode or audio waveform. If necessary, this can also be done manually using a film clapperboard or other noticeable, short actions in the image or sound. The tool expects the sound in the first two tracks. If this is not the case (as with some Canon models), you can simply reassign the channels to the tracks in the clip attributes.

It makes sense if your camera positions are labelled or numbered A, B, C etc. in the metadata, then they are automatically assigned to the corresponding “CAM” buttons 1 to 9. Now cut the version with the best sound or a separate sound recording from the mixer into the first track. Then mark all synchronised clips and use the “SYNC BIN” button to switch to the display of all camera positions, which is similar to Multicam in Edit. If you now hold down the camera button that belongs to the next desired position and turn the wheel forwards, the image is simply written to the next higher track (set to Video Only if necessary).
If you don’t feel like holding down the camera button, activate “LIVE O/WR” (Live Overwrite) and then simply click on the correct camera – practically like a live switcher, but with the speed of your own hand on the wheel. In addition to Live Overwrite, you can activate an aperture for the beginning or set the button for close-ups. It couldn’t be simpler, and of course the trimming functions also work here. Incidentally, the material in our pictures comes from Blackmagic’s free training programme for version 17 and can be downloaded there for your own exercises. Very helpful tutorials on the SE and the cut page can also be found on YouTube under “Creative Video Tips” by Chadwick Shoults.
Even if the working basis is a pre-cut audio-only track from Edit or Fairlight, the display in the Cut Page now works. In 17.3, there was a bug that caused its display in A1 to disappear. BMD did not mention this in the Read Me, but this has obviously been fixed in 17.3.1. So update! However, there is still further potential for development in the audio area. Unfortunately, it is not possible to create an audio fade or a split in Cut without also editing the image. On the other hand, the camera buttons of the SE can unfortunately not be used in Edit for multicam editing, but perhaps that will come in the future.
Speed Editor in Edit etc.
Blackmagic is obviously working on making better use of the device in other areas too; version 17.3 already shows progress in this area. Cut and Edit in particular are closely linked. You should memorise the key combinations Shift-3 and -4 for quick changes. Of course, Play, Shuttle, Jog and Scroll also work elsewhere, as does setting or deleting In/Out (except in the Media Page viewer and in Colour). However, you should not rely on double-clicking with Esc as an undo: Sometimes it works, in other cases you have to use the usual key combination. The transport wheel even works in Fusion, but nothing else, and the “FULL VIEW” button works everywhere else. In Edit, Source only activates the left viewer without loading clips.
You have to be careful with the editing functions. The “Smart Insert” button, for example, makes an insert on the Edit page where the playback head is currently located. Although Move also reacts in Edit, it does not move the neighbouring clips, but only moves the activated clip or clips and overwrites those below it. The new habits can quickly lead to errors. It is often better to switch to the relevant page. But where it fits logically, some things work, such as setting the volume, close-up or dissolve and smooth cut, the latter even recognising the nearest cut. Cut, on the other hand, only removes an aperture if you are directly at its position.
A lot is already possible in Edit, you should just try it, even if not everything is consistent yet. You can even do something that is not possible in Cut: If you hold down Option-E, you can create a J- or L-cut (an offset sound cut) with Roll. However, this requires both hands to be in action and the hand on the SE needs a slight split. In Cut, you would need a separate video track for this. Once the cut point has been separated in Edit, further trimming is possible in Cut. Split also works in Colour. This is quite useful if you need to re-trim an existing film and some cuts were not recognised by the automatic analysis. Caution: Undo does not work here. The wheel also controls the wipe function in colour when comparing images.
Comment
There is hardly a more useful tool for convenient and fast film editing in Resolve than the Speed Editor. Cut and Edit already work perfectly together: Cut for the quick rough cut and Edit for the fine work. The inexpensive and robust panel is also becoming increasingly useful in other areas, even if some of the software still looks like a work in progress.


