Table of Contents Show
And here’s the beta disclaimer: This article was written before the release of H19.5, so something may have changed..
Rigid Body Dynamics – RBD
It’s getting down to the nitty gritty! RBD is what Houdini is best known for – rigid body simulations. Usually, but not always, to break something. Many of the RBD nodes have been given a tidy new user interface. The parameters are now organised in logical tabs and panels. Rarely used parameters have been “hidden” so that they are not in the way and distracting.
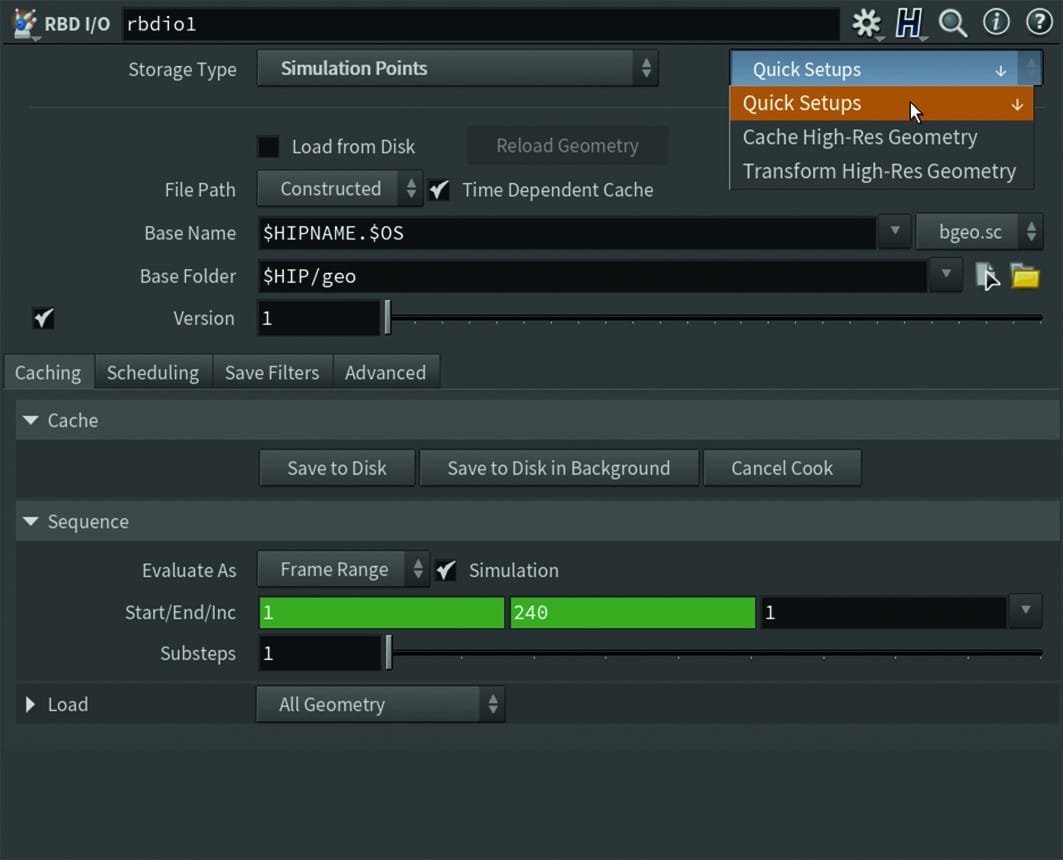
Even more important, however, is the new workflow. Parameters should no longer be set in the solver but in separate “Configure” nodes (e.g. “RBD Configure”). Import and export nodes have been have been adapted to each other and are structured in the same way as the I/O nodes of other solvers, for example the Pyrosolver. The other I/O improvements are not so obvious, as they are more about speed improvements under the bonnet and better handling of inputs and outputs.


RBD I/O 2.0
In Houdini, data, be it geometry or animation, is always outsourced wherever possible. Of course, this also applies to simulation data, proxies and constraints. Geo, proxy geo and constraints can now also be written together in a single file. “RBD I/O” makes it easier to name this data, select the path and folder and create version numbers. In the past, Houdini users had to build this functionality themselves or the Studio pipeline developed tools for it. The file name and path are therefore made up of parts and these can also be variables. In Houdini, $HIP is the path where the Houdini Scene *.hip is saved. All this already exists here and there outside of RBD in Houdini, now this naming workflow is also implemented for RBD. Furthermore, the fourth input of the node is now exclusively for Simulation Points (instead of Geometry and Points in previous versions).
DOP I/O – DOP Import 2.0
The new 2.0 version is of course faster and has a tidier UI. The improvement in speed is particularly noticeable in large scenes, such as crowd animations. And here, too, there is now the Quick Setup drop-down menu in the UI with 2 selection options: “Transform High-Res Geometry” and “Cache Simulation”.
RBD Material Fracture: Performance and memory improvements here too. If, for example, two pieces of wood that are in a group (selection), but also 100 units that are far apart, were to be transformed into wood splinters, this took ages. Now such a scenario is much quicker.
RBD Transform: “RBD Transform” was added in response to numerous user requests and makes it easier to place RBDs. It is similar to the normal Transform Node, but has the three inputs and outputs required for RBD (High-Res Geometry, Constraints, and Proxy Geometry). RBD Match Transforms: With RBD Match Transforms, manual adjustments to individual fragments of an RBD simulation can be included in the stream again. UX improvements: RBD Constraints from Curves and RBD Constraints from Lines
now have a nice HUD.

Pyro & FLIP Fluids
FLIP solvers are hybrid solvers that use both particles and volumes for simulation. These FLIP fluids are not new per se – but they are now also available in the SOP context. That’s awesome!
SOP-based FLIP fluids enable fast, simple setups that no longer require sending back and forth between SOP and DOP. In the past, this has made many things technically difficult to understand and cumbersome. This is now a thing of the past and – I repeat – very cool!
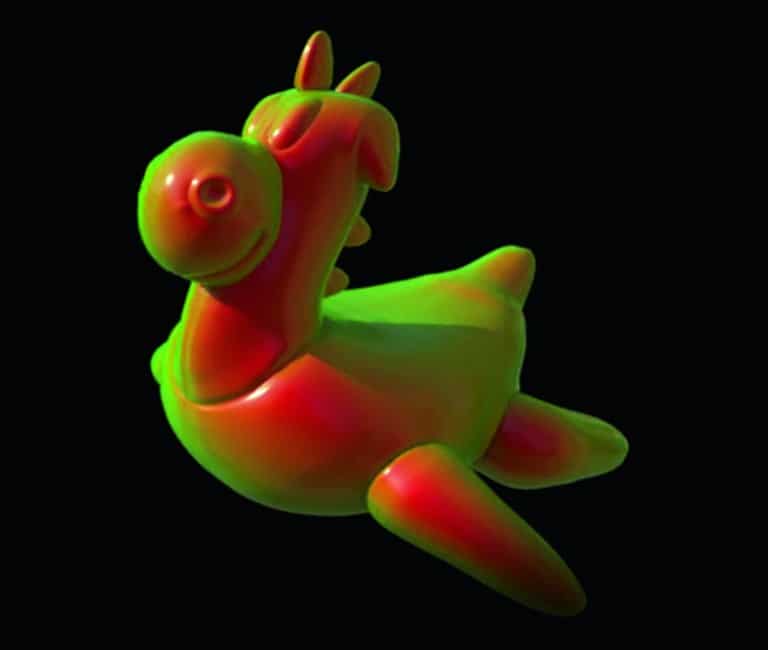
In addition, new methods have been introduced that simplify the addition and removal (source/sink) of particles. The simulation container, i.e. the area in which the simulation is to take place, can not only be a box, but also a cylinder or a sphere. Even deforming animated shapes are possible. There are also presets for temperature, viscosity, beach waves, oceans and melting rubber animals.


Pyro
The “Pyro Sources SOP” can generate pyro instances which are distributed to scattered points – for example for very large explosions, dusty storms or forest fires. Compared to before, these can now be different sources at the same time. The timing of the ignition and the transformation can be adjusted. The whole thing can also be realised with a special packed workflow, the Pyro Source Pack. Pyro Spawn Sources and Pyro Source Instance Operators enable an even more flexible workflow. The new Pyro Spawn Sources and The Pyro Source Instance SOPs create and instantiate spawn points. And Houdini Pyro Simulations have GPU-accelerated noise.
KineFX and Channels (CHOPs)
KineFX, the rigging and animation framework and toolset freshly introduced in Houdini 19, mainly gets many detail improvements. But also new functions in the area of UI and user-friendliness. I/O is also a big topic here again.
Animation
In the area of character animation and rigged animation with skeletons, H19.5 contains a huge number of detailed improvements to the MotionClip SOP, the MotionClip Extract SOP, the MotionClip Pose Delete SOP, the Rig Pose SOP, Rig Match Pose SOP, etc. Some of the improvements here with a little more detail.
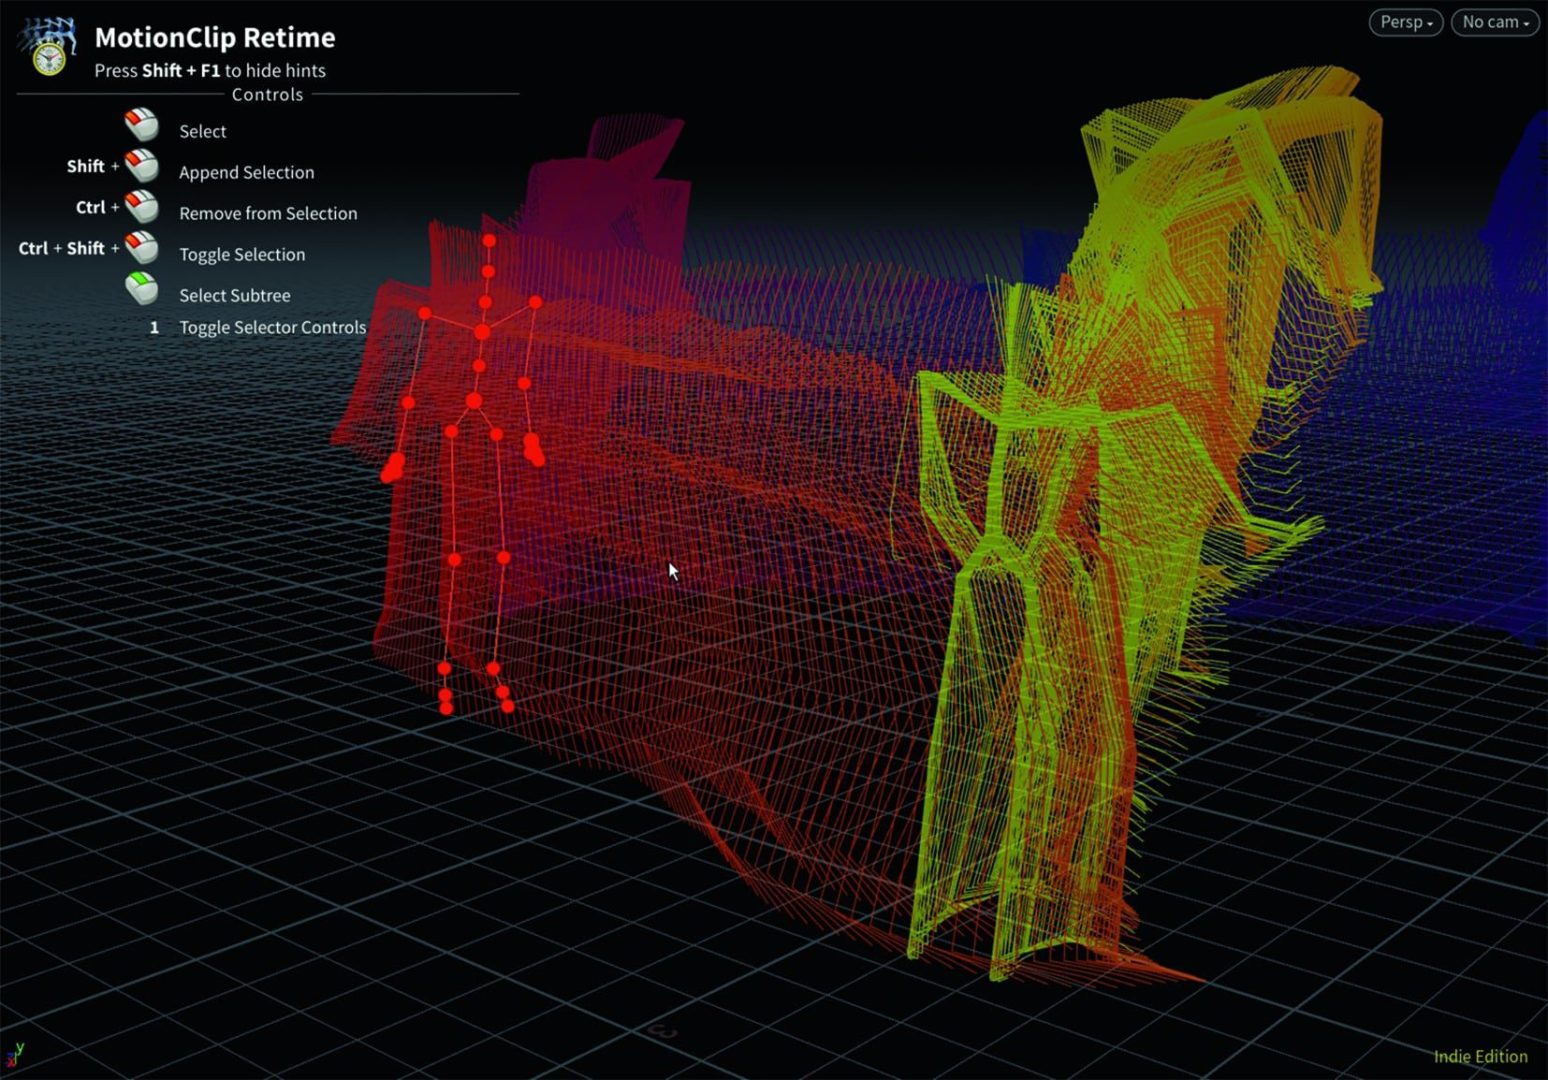
MotionClip SOP Viewport State
SOP nodes that output motion clips can now visualise these clips to display movements or poses. A freely selectable colour gradient can be chosen to represent time. The current frame is also highlighted (or “highlighted”? What a word!). This makes it easier to edit rigged animations, be it motion capture data or animations created elsewhere. The whole thing is a so-called ViewPortState, which shows the direction in which Houdini is heading in terms of UI and viewport. It is becoming more and more user-friendly and the basis for this is the development of viewport states.
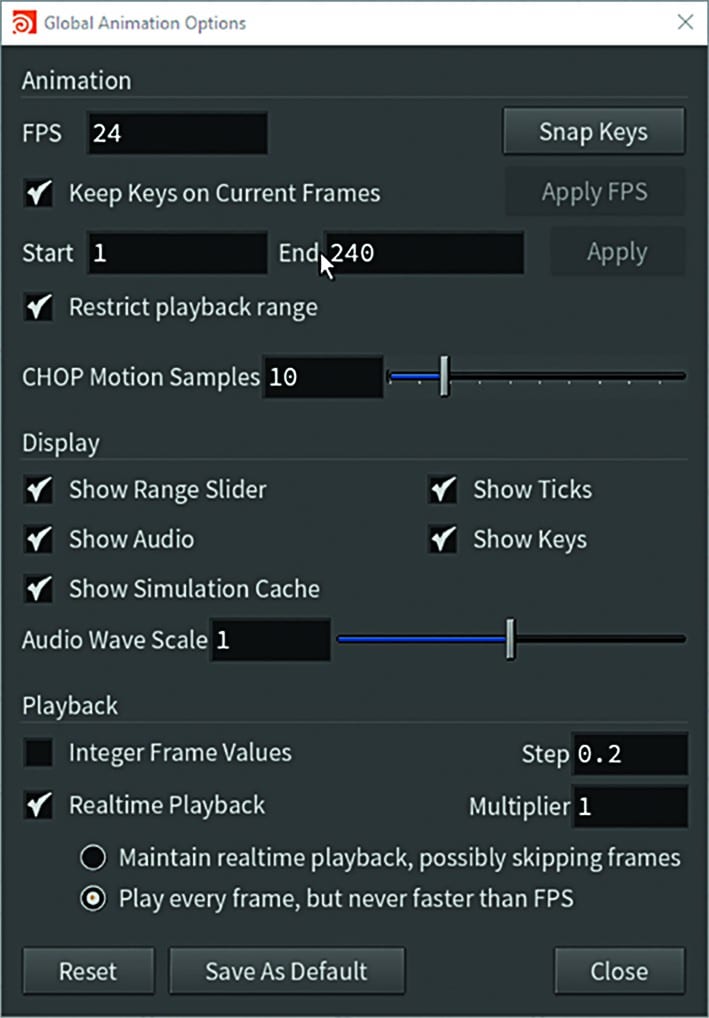
Frame rate change and key position handling
Frame rates and animation keyframes are closely related. It is annoying if the frame rate has to be changed later for whatever reason. Should the existing keyframes remain at the keyframe number or at the same time? And what happens if there is no frame at all? Should it then be snapped to the next one or should the keyframe be on a subframe? All of this is now easier to set. Any changes to the timings must now be confirmed explicitly and are not carried out automatically as before.

Animation Channels – CHOP
The good old CHOPs also get something new: The Pass Filter CHOP, which filters audio as a control signal for animations, now also gets a Butterworth filter, which is particularly steep and thus enables a more precise frequency separation.
Procedural Rigging
The new Joint Capture Paint SOP replaces the old Capture Layer Paint SOP in the KineFX Capture workflow. There is a Rig Tree in the UI, and some new viewport states. A new Point Capture SOP, Character Blend Shape Channels SOP. Since it would go beyond the scope of this article, here is a list of the Procedural Rigging SOPS that have been improved: Attach Joint Geo SOP, Joint Capture Biharmonic SOP, Character Blend Shapes Add SOP, Character Blend Shapes Extract SOP, MotionClip SOP, MotionClip Extract SOP, MotionClip Pose Delete SOP, Rig Pose SOP, Rig Match Pose SOP, Blend Shapes SOP, Rig Doctor SOP, Orient Joints SOP, Visualise Rig SOP and if I’ve missed any I apologise. Procedural rigging is obviously an important topic. Unfortunately, it’s a bit neglected in this article, but we’ll make up for it!
Input/Output
A lot is really happening with regard to I/O in the H19.5 release. I/O is getting the attention it deserves. There is a special character I/O SOP with motion clip support. FBX support for characters has been improved. “Dem Bones Skinning Converter” is not a band name, but a converter to turn animations with geometries that have no topology changes into bones animations. The USD Skin Import SOP, Mocap Stream SOP have been improved. And something with Qualisys.

Still water is new! The Shallow Water Solver
The new Shallow Water Solver SOP is another small highlight in H19.5. What was that? “Still waters run deep” is not true here. Still or little moving water, i.e. without breaking waves or splashes, can now be displayed in Houdini as a 2.5D heightfield (like the terrains). In the example, the water flows down a mountain. Sources and outflows are defined by masks. And moving objects can also displace the water. The “Shallow Water Solver SOP” is not suitable for complex water, but that’s what Vellum and Flip are for.

Oceans
On most computers, Houdini uses the FT implementation from Intel’s MKL library in the “VolumeFFT SOP” and Ocean_sample VEX function. This is much faster at 4K Ocean Spectrum resolutions. And Ocean Rendering in Karma CPU is made possible. Yeah..
Solaris
Solaris is Houdini’s scene layout, lighting and rendering tools. Solaris is based on the Universal Scene Description (USD) framework from Pixar. Several interface improvements, for example in the render settings and some new nodes, ensure that Solaris, which was introduced in H18 (end of 2019), is slowly emerging from the early adopter/ beta feeling. Look development, material library, rendering, caching and import and export are also being optimised. The new Houdini Procedurals Hair LOP generates rendertime hair from guide curves and skin prims. And the Houdini Preview Procedurals LOP enables interactive previews of the procedures.

Other new Solaris Nodes are:
Reference 2.0 LOP, Edit Prototypes LOP, Isolate Scene LOP for Solaris stuff
Light Filter Library LOP for Karma Light Filter Shaders and MaterialX nodes.
Motion Blur LOP, File Cache LOP, Match Size LOP – Matching and centring of prims and models.
Cache 2.0 LOP – efficient caching of subframe samples.
Coordinate System LOP – coordinate systems.
Karma Cryptomatte LOP – Cryptomatte AOVs for Karma.
Karma Ocean LOP – Rendered Ocean Spectra and foam with Karma CPU.
Scene assembly and layout
Again some detail improvements: The Layout LOP now also has a stack and a paint brush. Houdini is on the way to providing interactive tools for set dressing and scene layout. Houdini wants to be not only procedural but also art-directible and artist-friendly. It will be!
Karma
Karma is Houdini’s own renderer, which works together with Solaris and will probably eventually replace Mantra. Some of the new features have therefore already been mentioned in the Solaris section. As you would expect, Karma has become faster. The highlight with regard to Karma is a first version of the “Karma User Guide”, with tips and tricks for optimising rendering with Karma. As with all new help and user guides, I’m really impressed by the detail and illustrations. This is how documentation works!
Shading
The new features in the shading toolset are quickly listed: Principled Shader VOP and Karma Nested Dielectrics VOP now support dielectric materials in MaterialX/Karma. The Karma OCIO Colour Transform VOP transforms colour manually, and Karma Ray Import VOP imports ray variables for MaterialX shading graphs. Karma Volume VOP combines VDF and EDF volumes Karma-friendly, and last but not least Karma Rounded Edge VOP render-time edge rounding and Karma Curvature Surface surface curvature – but both only work with
Karma CPU.
MaterialX
MaterialX is the material counterpart to USD. Not much new and Lama (Material Layer) is unfortunately not yet supported. MtlX Color Correct is a new wrapper to make the MaterialX Colour Correction Nodes more user-friendly. MtlX Facing Ratio is the new node to create a nice soft falloff. The version numbers are now: UsdMtlX update USD 22.05, MaterialX library version 1.38.4.
What’s new PDG/TOPs
PDG (Procedural Dependency Graph) can be used to distribute and process tasks. This can be, for example: rendering, simulation, geometry and landscape generation, Python scripts, connections to other applications (via API) such as render manager, project manager etc. The whole thing works both locally and on other computers and in other apps such as Photoshop or Maya. Python always works anyway, but many things are already well connected.
The Procedural Dependency Graph or TOPs (Task Operators) is certainly the most “exotic” and technically challenging part of Houdini. TOPs was introduced in H17.5 (March 2019). In the meantime, it has become an indispensable part of larger and smaller pipelines. The PDG options for working with USD data have been improved. Error messages for attribute evaluation and the PDG API have been improved. I won’t go into details for reasons (DP is not a programmer magazine and I only understand this to a certain extent).
Global attributes and two nodes are also new: Attribute Promote TOP and Attribute Reduce TOP. TOP Schedulers: The connection from PDG to Deadline, Tractor or even Houdini’s own render manager HQueue, get several “enhancements” in H19.5. TOP Partitioners have been improved in terms of the use of arrays and the partitions can now be sorted by name. The JSON input TOP has been extended.
PDG Services
The Procedural Dependency Graph Services are something like a process in continuous operation, which can be addressed like a server and which can process “work items”, i.e. jobs. These services can now be created and managed directly in the PDG Graph. There are five new nodes at the start: Service Create, Start, Stop, Delete and the Reset TOP node. The icon is a small petrol station, called “Service Station”. There is now also a Python script service that can be created in the PDG Services window. Also
several PDG services of the same type can now be created and each named differently.
Crowds
There are now new versions of Agent Look At DOP and Agent Look At Apply DOP. The agents now also track point clouds or other agents. The attention span of the agents can be defined – how interesting a target is can depend on the distance, the relative speed or whether it is in the field of view of the agent. The rigs can now be controlled by the agent.
Agents
Agents can now have a “Rest Pose” that is used when animations do not move every joint. The Crowd Solver DOP can now handle animation layers. And other detail improvements.


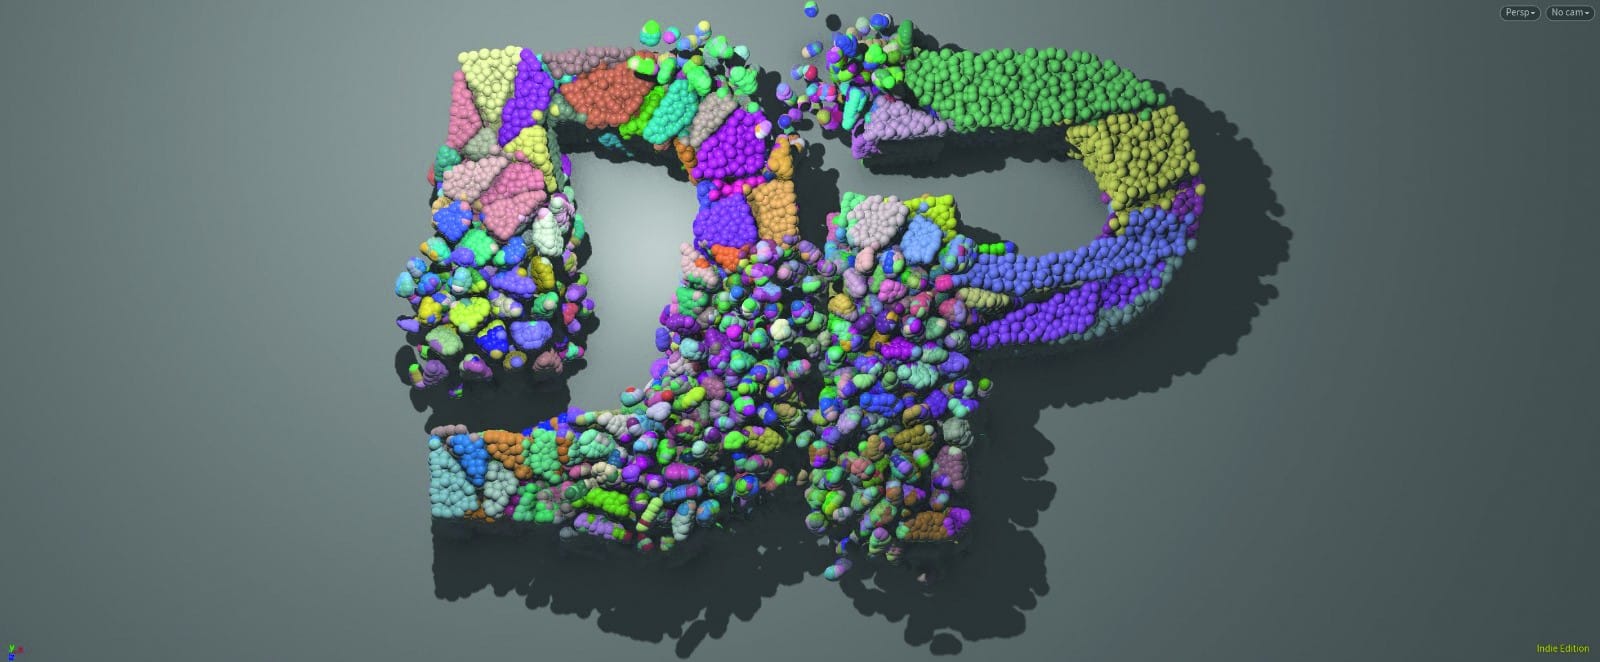

Image 2: DP logo split into pieces
Image 3: Pieces turned into spheres because of Vellum pseudo “RBD”. This is very quick
to simulate. Makes more sense if it then also interacts with vellum sand and ropes and fabric and fluids..
Figure 4: The beads are then replaced with original pieces.
Vellum
Vellum shape matching simulations are another small highlight. The shape is first filled with spheres of different sizes. The constraints of the spheres are set very hard. These sphere objects are then used to simulate. This is ultra-fast, as they are only spheres. At the end, the sphere objects are then exchanged for the geo again, hence “shape matching”. In order to run these “shape matching” simulations on the GPU, Nvidia Ampere graphics cards (from 30 series) are probably required. Otherwise it has to run on the CPU..

Vellum I/O 2.0
The Vellum I/O 2.0 node is now like the Pyro, FLIP fluid, and RBD I/O nodes in terms of UI structure, parameters, and basic functionality.

Static topology
In the Vellum Constraints SOP there is the new Static Topology parameter. This makes them static, i.e. they will not slip, break, be removed or welded. This prevents large and dense objects, such as high-resolution tetrahedra, from having to be recalculated (recoloured), even though this would not be necessary.
Vellum Attach Constraints SOP
The new Vellum Attach Constraints is an interactive tool for editing geometry and stitch constraints. Lines can be attached interactively between fabric and target geometry. Very similar to the RBD Constraints from Lines node.

Resolution Independent Tetrahedron
Then there is the fact that the tetrahedrons have rehearsed a rebellion and can now change their resolution without changing the simulation much.
Modelling
I had already announced it in the last Houdini release article. Houdini is becoming more interactive. Both TopoTransfer and Curve, the curve tool, are getting significant improvements. For example, better operation with a stylus/pen input as far as Topotransfer is concerned. The Curve tool can now add Orient attributes to points and has better interaction in Bezier with two curves. In addition, rounded edges are much easier to set, and keyboard shortcuts and radial menu are optimised. “Convert Line” can now convert edges into curves, to be found in the “Curve from Edges” shelf.
And there is now a primitive for 2D spirals and 3D helixes that leaves nothing to be desired. Both archimedean and logarithmic spirals are created, left or right turning, with all necessary attributes.

Other news
Python 3.9! And Houdini now supports native fullscreen mode for the poor macOS users. Volumes can be illuminated by environment lights in the viewport. And 15 nodes are now verbified i.e. multithreaded, e.g.: dopimport::2.0, fit, groupsfromname, lidarimport, polywire, pointcapturecore and some kinefx nodes.
And last but not least, there is something completely new: the “Dashbox – An interface for finding things”. This new, nerdy search is to be integrated into other existing search functions in the future (i.e. not yet)… At the moment it is self-sufficient, but a quick keyboard control à la Everything/Autohotkey will certainly be helpful when it is in full use.


