Table of Contents Show
Simulation Nodes
The Blender community has been eagerly waiting for over a decade for the ageing particle system to be brought up to date. With the introduction of simulation-enabled Geometry Nodes in Blender 3.6, the time has finally come.
States
The fundamental difference between the previous way of working with geometry nodes and the new simulation capabilities is that it is now possible to access the state in the previous frame. Previously, all frames were independent of each other. However, for simulations such as soft bodies, rigid bodies, cloth or various fluids, the state in a frame depends on what happened in the previous frame. To be able to access this information, a separate simulation area can be set up in the geometry nodes.
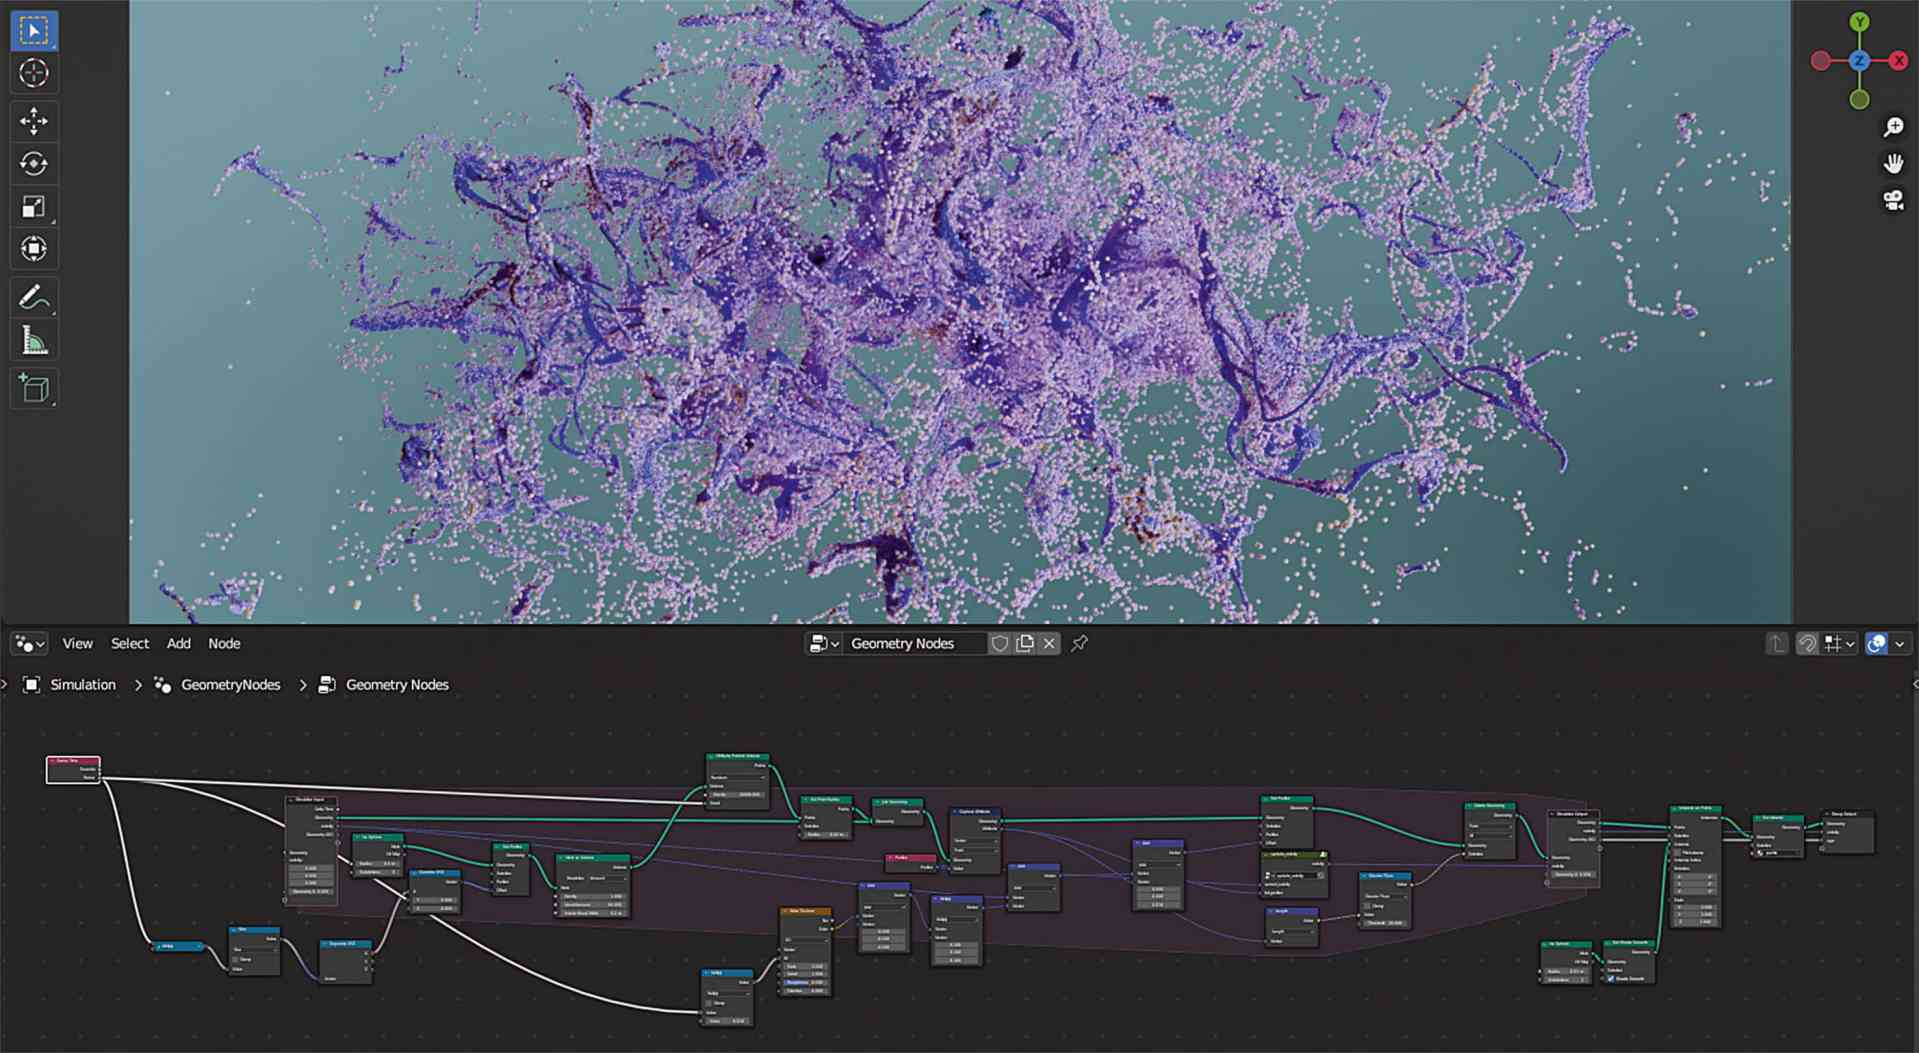
Particles are not everything
This small change has far-reaching effects, as it is now possible to create your own particle simulations with nodes or to carry out a material simulation, for example. In addition, rudimentary caching or baking is already possible.
Who’s next?
The new “Index of Nearest” node returns the index of the closest element. This function is very useful for collision detection, among other things. Once again, not only particle systems benefit from this, but also other forms of simulation.
Subtypes
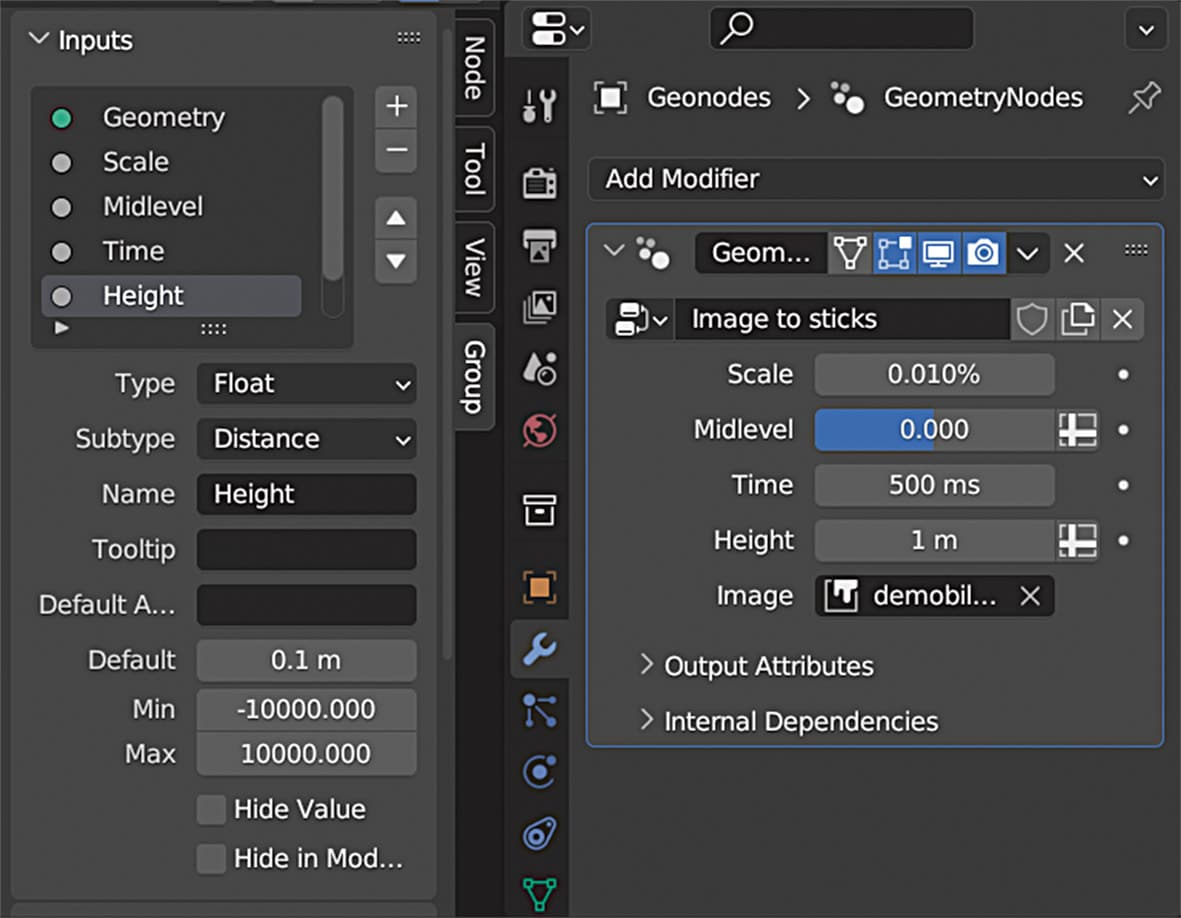
The Spreadsheet Editor is now clearer, as the normals are no longer displayed as an attribute by default. In addition, subtypes can now be defined for input and output sockets. For example, a float value can represent a degree, a distance, a factor or a percentage. The input fields in the modifier are provided with the appropriate units and formatting. As a result, the animation nodes are better integrated into the Blender user interface.
Performance boost for geometry nodes
The performance of the geometry nodes has also been improved in many areas. The nodes “Instance on Points”, “Instances to Points”, “Points to Vertices” and “Mesh to Points” now work up to ten times faster. In general, all operations in Blender in which geometry is copied have been accelerated. Even in simple situations, at least 25 per cent of working memory should now be saved. Linking and unlinking many objects is now even up to fifty times faster.
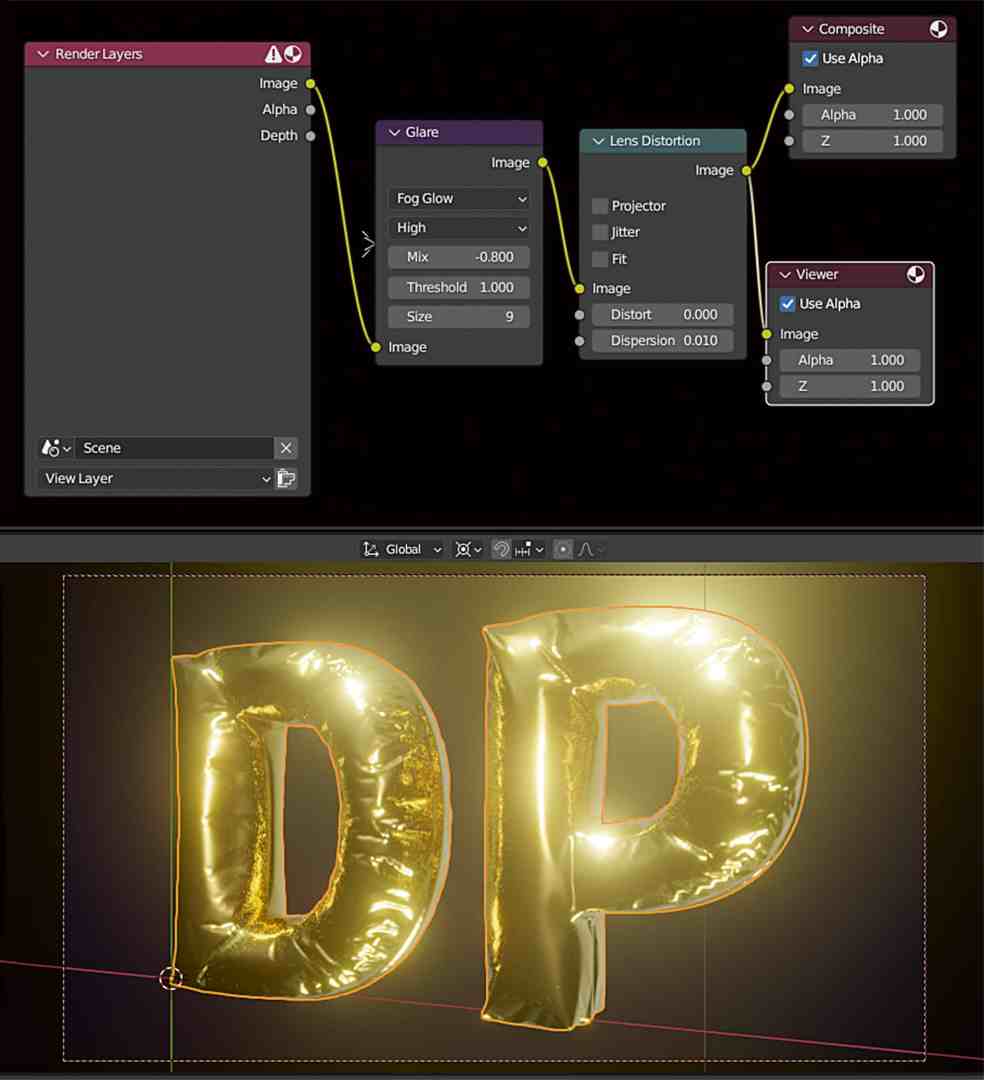
, you can now also give Cycles a preview bloom effect in the Viewport.
Live Compositor
The new real-time compositor in the viewport now supports multilayer OpenEXR images, bicubic interpolation, masks, denoising, anti-aliasing and colour space conversions. Viewer nodes have priority over composite nodes in the output if several nodes are available. In addition, a new render pass has been added for the viewport, which displays the transparency. However, this only works with materials that are set to “Alpha Blend”. However, the displayed result may differ from the final render as soon as colour comes into play. In the future, it is planned to support the remaining alpha modes for materials and to display the correct result even with coloured transparency.
Duration
In the status bar, you can now display the duration of the scene in seconds and frames as well as the current frame. When creating a keyframe in the graph editor, you can now set the restriction to the active F-curve. Previously, this was only possible at channel level. Various offset options are now available when inserting keyframes from the clipboard. For example, you can select whether the first keyframe should start at the cursor position and whether it should also be shifted in the Y-axis so that the new animation is inserted exactly where the previous keyframes end.
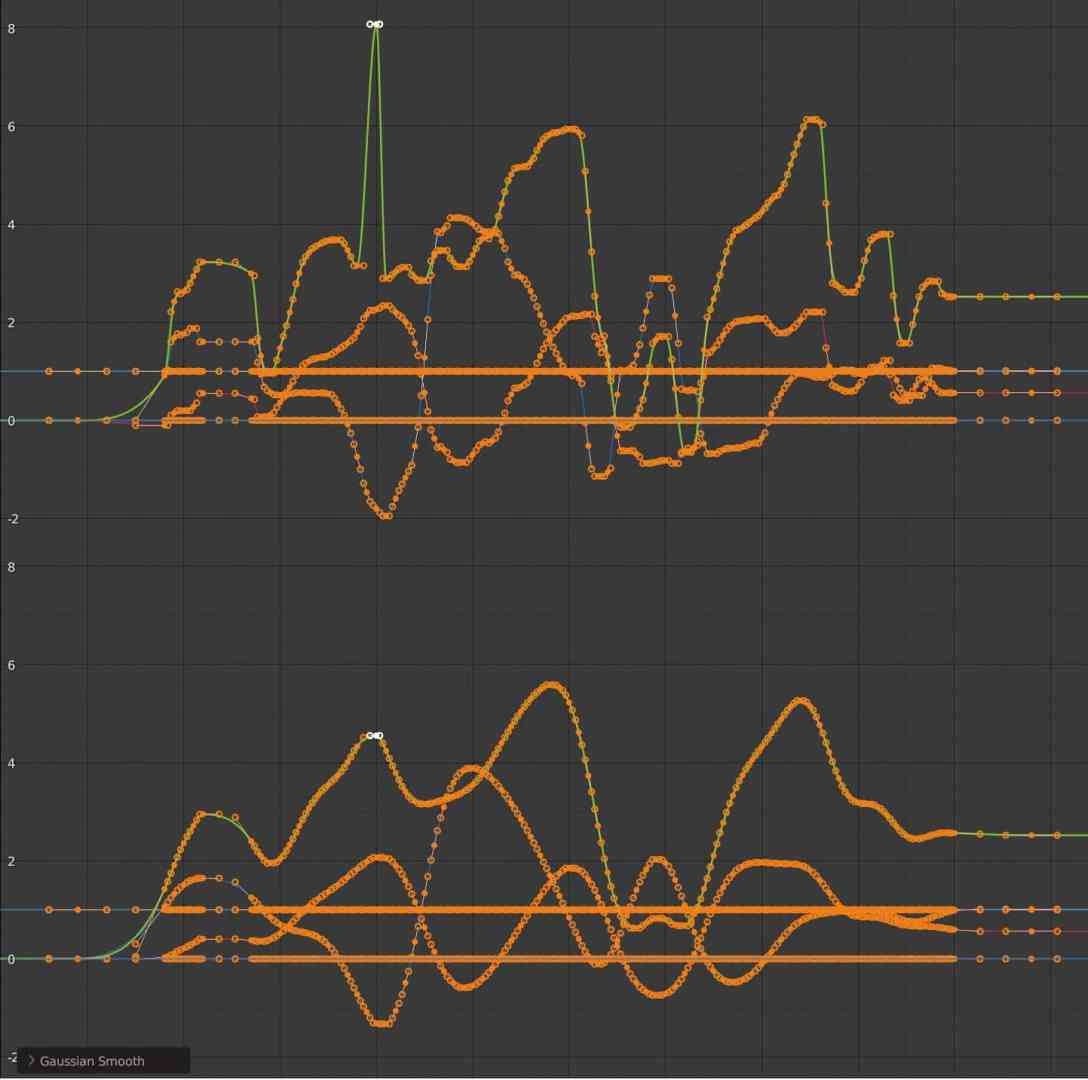
Gaussian Smooth for keyframes
If you have very noisy keyframes, as is the case with motion capture data, for example, you can now smooth them with a Gaussian blur. This is independent of the density of the keyframes, also works with modal operators and shows its true strength when smoothing sudden peaks. The display options “Only Show Selected F-Curve Keyframes” and “High Quality Display” have been moved from the View menu of the Graph Editor to the user settings.
The “Key” menu in the Graph Editor has been thoroughly tidied up. Operations that work globally have been moved to the “Channels” menu, the rest have been split into submenus where possible. NLA strips can now be moved horizontally through other strips and the Solo button can now be found on the right-hand side, where it is grouped together with the Lock and Mute buttons.
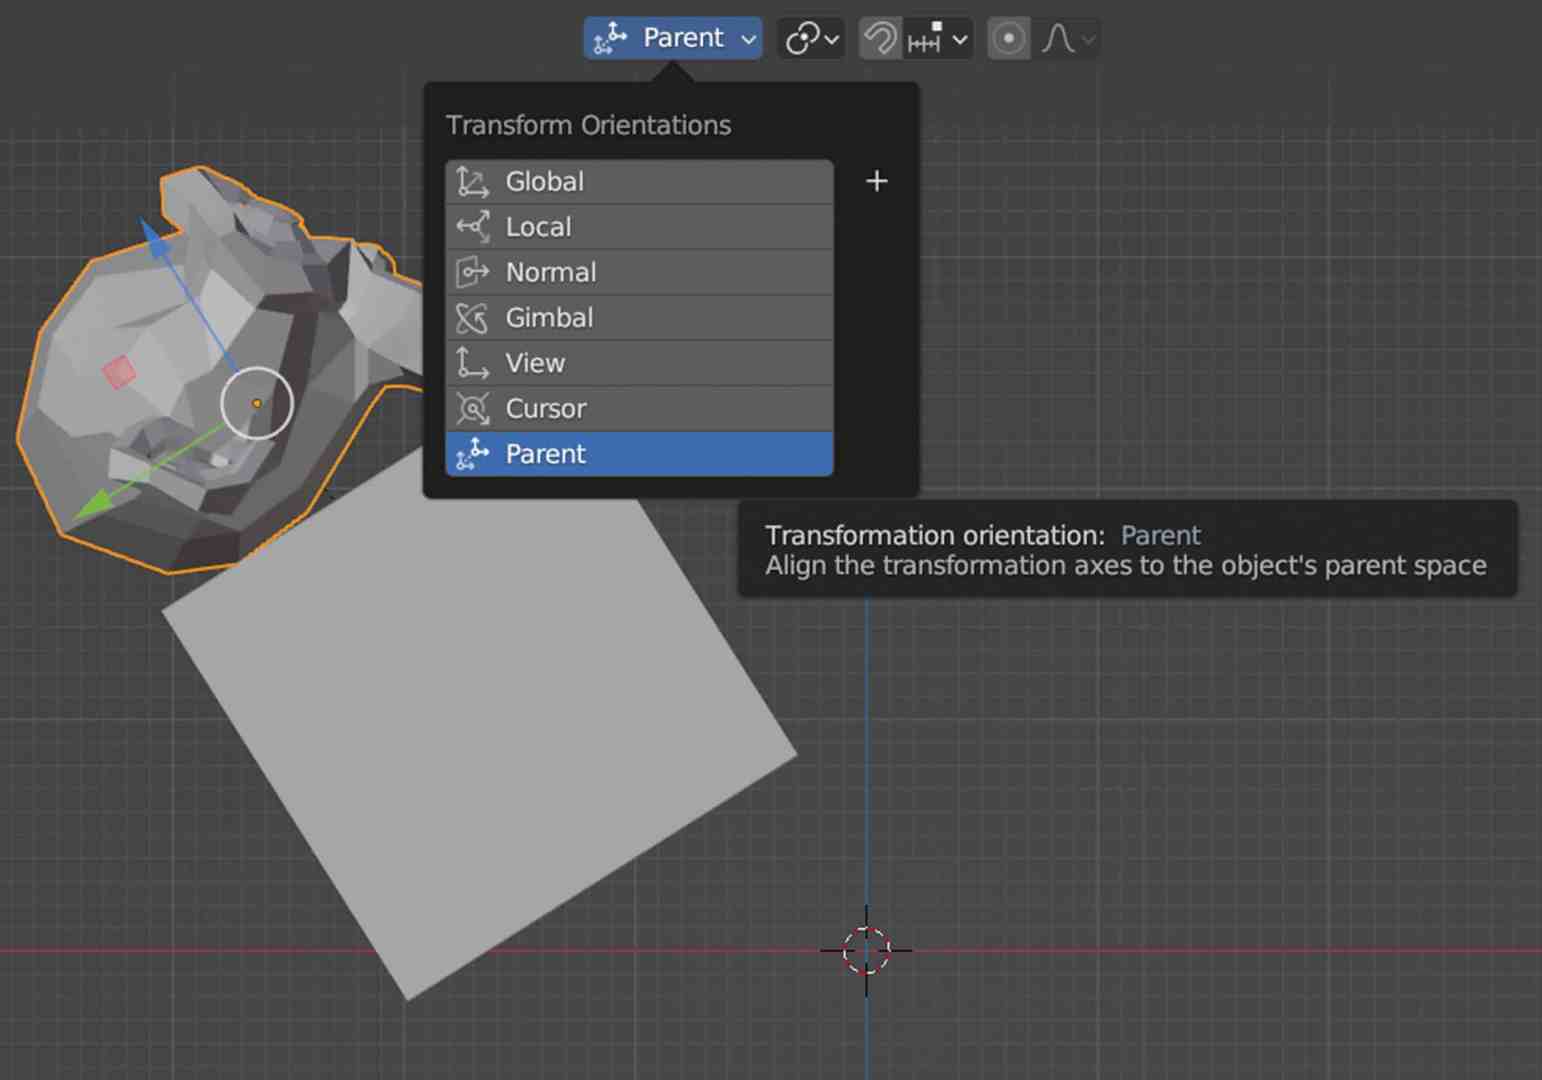
Parent space
The new “Parent” transform orientation allows objects and bones to be moved relative to their parent. This was already possible for bones, but now it works with all objects, is displayed correctly in the gizmos and is no longer hidden in submenus, but is part of the Transform Orientation menu.
When drawing masks for Weight and Vertexpaint mode, you can now expand or reduce the selection with and on the Numpad as in Edit Mode.

Relationship lines
When you create a child-parent hierarchy in Blender, a dashed “Relationship Line” appears connecting parent and child. For bones, you can now select whether this leads to the head or the tail.
Context properties for drivers
The drivers in Blender have been given a new type of variable with the “Context Property”. The idea behind this is that access is not made directly to a data block, but always to the currently active camera, for example. This means that, for example, a plane or a sprite can always be rotated in the direction of the currently active camera.
AMD and Intel: Hardware acceleration with cycles
The graphics cards of the RX 6000 and RX 7000 series from AMD as well as their workstation siblings, the W6000 and W7000, have dedicated cores for accelerating ray tracing, similar to the Nvidia RTX cards. These cores can now also be used in cycles via HIP RT. This requires a driver version 22.40.51.06 specially adapted for Blender, which currently only works under Windows. However, it should be noted that the shadows of hair and motion blur are not yet rendered correctly, and degenerated triangles can lead to crashes or poorer performance. All AMD GPUs now support the Light Tree in Cycles.
Intel also offers hardware acceleration for ray tracing with Embree 4 via the oneAPI backend. If a bevel or ambient occlusion node is used, this leads to a recompilation of the GPU binaries. This process requires 9 gigabytes of memory and takes several minutes. It is expected that this problem will be resolved in the future with improved drivers. The Apple Silicon GPUs now support NanoVDB in Metal, which reduces memory requirements when rendering volumetric effects such as smoke, clouds or fire.
Ten times as fast
The performance of Cycles has also been optimised again. The light trees are now created faster and at the same time require less memory by making clever use of instancing and multithreading. If there is a large amount of geometry in the scene, it is now copied to the hardware much faster. This means that changes to the scene can be rendered more quickly and the switch to the render preview also takes place earlier than before. Large meshes load four to six times faster, attributes such as UV maps even ten times faster, and in particularly extreme cases, the developers have even measured a performance boost of sixty times. Point clouds load up to nine times faster and curves (as used for hair) even up to ten times faster.
Further innovations in Cycles
The glass shader has improved Fresnel handling, which means that energy conservation works better at high roughness values. In addition, the OSL backend now supports the new standard microfacets from MaterialX (dielectric_bsdf, conductor_bsdf, generalised_schlick_bsdf).
Asset libraries, relative
Assets can now be loaded with relative path. The new option is switched on by default and can be defined individually for each asset library in the settings.
Import-Export
The importer and exporter for the Stanford PLY format has been rewritten from scratch in C and now exports four to twenty times faster and imports eight to thirty times faster. The importer can now also load point clouds with vertex colours and read files with non-standard line endings. The option to merge duplicate vertices is also available. FBX exchange has also been made faster, both for import and export. However, it is not C that is responsible here, but numpy in Python. You can now set the active colour layer to the first position in FBX, as some programs only read this.
Curves and hair can now also be exported to USD (Universal Scene Description Language). The emission input of the Principled BDSF is now exported as emissiveColor of the UsdPreviewSurface. The importer and exporter for the 3DS format is back, as this format was requested by many Blender users. It has even been extended so that animations can now be imported and almost all 3D definitions can be imported and exported.
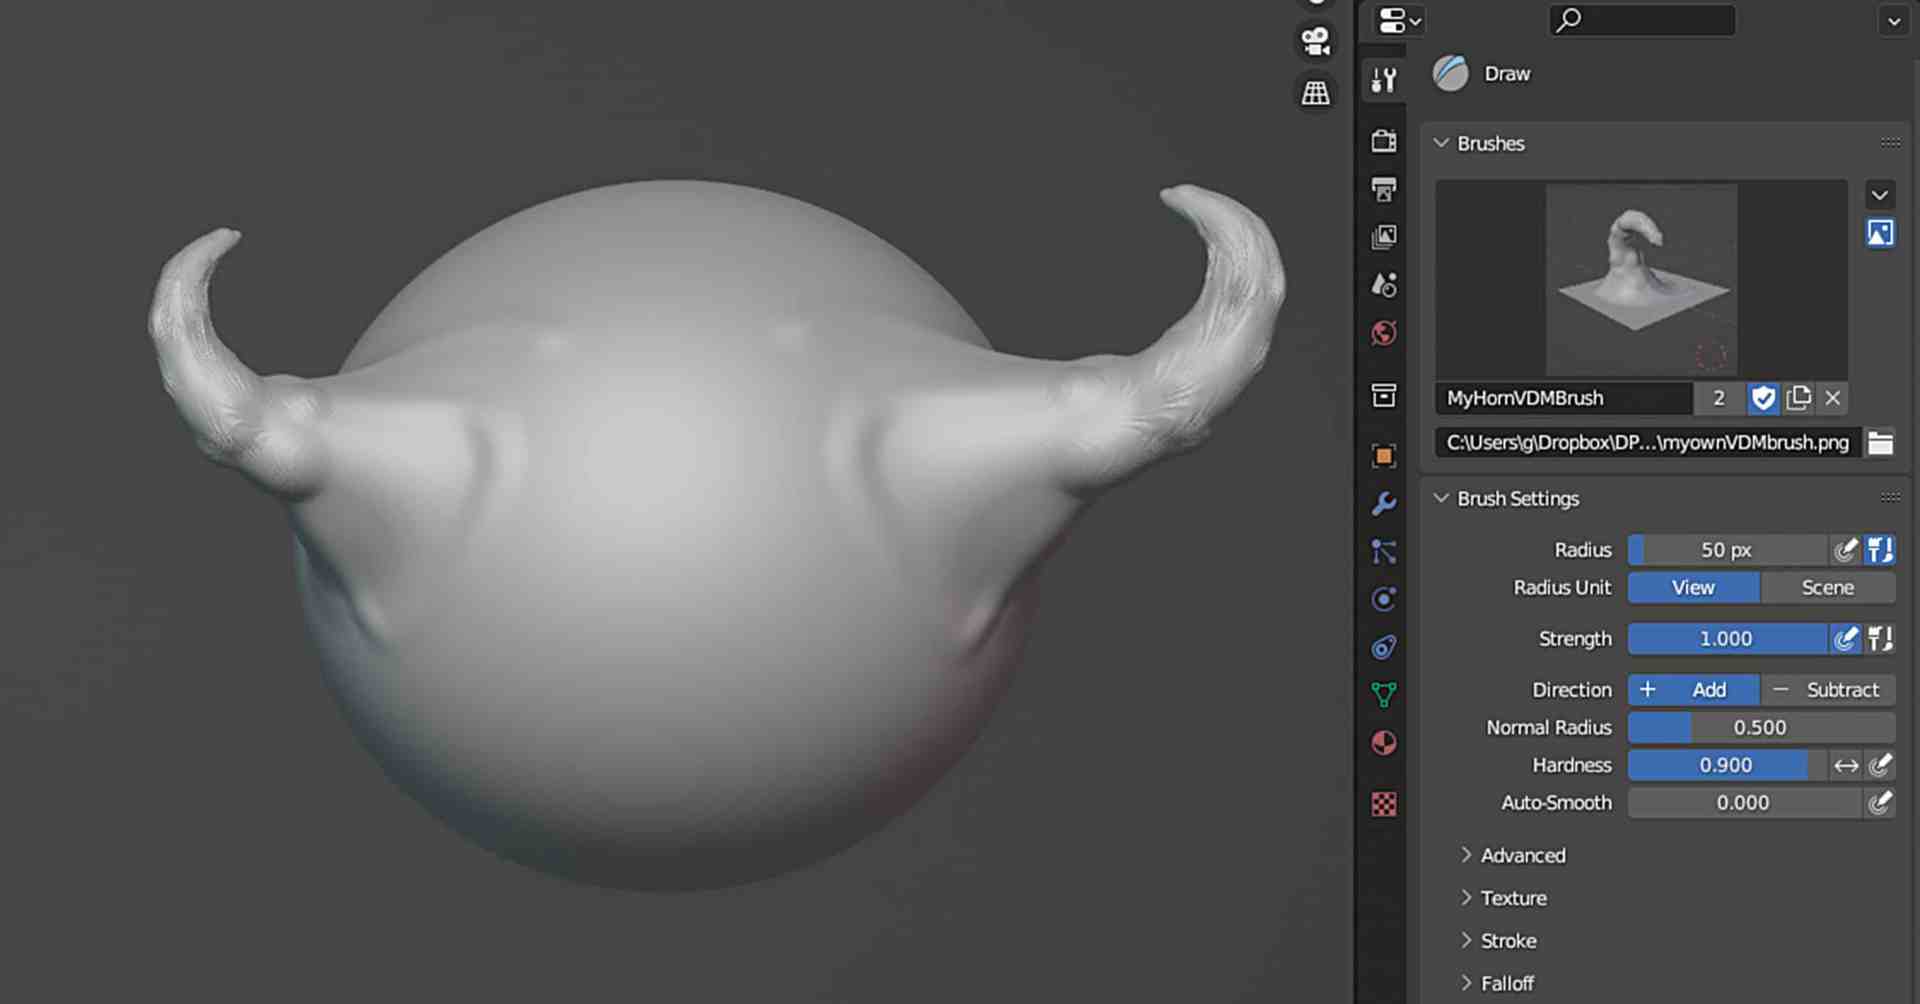
VDM Brush Baker
The new “VDM Brush Maker” add-on allows you to bake sculpting brushes in VDM (Vector Displacement Mapping) format. To do this, a layer must first be created into which the desired shape is sculpted. The brush can then be rendered from this layer. However, a preview image must be created manually.
UV Packing Power
The UV Packing Engine has been upgraded, which has drastically improved performance on large meshes. The finished layout should now also be more efficient than before and better support non-square textures or UV spaces. The inspiration for this is the “Xatlas” algorithm. You can now also choose what to use for UV packing – the bounding box, the exact shape or the convex hull. Especially when using the exact shape, the available space is now better utilised, which is why this option is the default setting. With the new “Merge Overlapped” option, overlapping areas remain together during the packing process. The “UV Sphere Projection” and “UV Cyclinder Projection” can both now handle manually placed seeds and the “UV Select Similar” operator, which allows you to select UV areas that are similar to existing ones, has been given the new options “Similar Winding” and “Similar Object”. The former selects areas with the same winding, i.e. that point in the same direction. The second option only works if you are editing several objects at the same time. Only surfaces on the same object are then selected.

Performance boost for UVs too
When it comes to Blender reading the UV map for display in the viewport, this can happen up to three times faster than in Blender 3.5. Switching from Edit Mode to Object Mode is now also much faster, especially with many UV maps. The calculation of custom split normals, which are frequently required for visualisations and in the games sector, is now up to 44 percent faster. Split normals at surface boundaries, as used in Auto Smooth Shading, are even calculated 80 per cent faster.
Retiming in the VSE
A new retiming tool has been added to the Video Sequence Editor, which is called up from the tool shelf and can be used to intuitively control the timing of a strip via handles. If you move two of them closer together, the clip speeds up in the intermediate area. The transition can be made smooth by holding down the Shift key, clicking on one of the handles and moving the mouse. This defines a transition area in which smooth interpolation between the two speeds takes place.
UI Goodies
If you want to move something in Blender 3.6 using drag and drop, you can now cancel the operation with ESC or the right mouse button and the list of recently edited files now contains 20 entries. The colour picker fits better into the available space and search boxes are now wider if more space is required, e.g. when linking a scene.
In Proportional Editing, the size of the area can now also be changed in a slider in the popover. With text objects, you can now select text in edit mode by clicking with the mouse, and drags and words can be selected by double-clicking. This means that Blender also adapts to other programmes when editing text.
In the Asset Browser, the full name and description are now displayed in the tooltips and a call to “Clear Asset” now works for all selected assets. The file browser has been given an option to edit files in external programmes. Elements in the file browser can now also be moved via click-and-drag when you click on the name. Previously, the area was limited to the icon. Under Windows, images loaded in the image editor can now be copied to the clipboard and pasted into other programmes. On Mac OS, the last opened files appear in the context menu of the Dock and in the App Expose.
Conclusion
Blender 3.6 improves performance in so many ways that it’s a pleasure to finally try out the new version. It’s a good thing that this is a version with long-term support (LTS). It will be provided with bug fixes until 2025. The next version 4.0 will then allow major changes again, e.g. the long-awaited light linking for cycles is planned. ‘ ei


