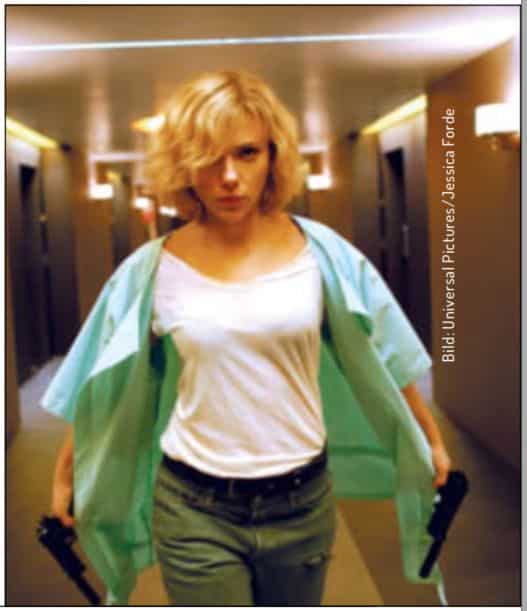
This film is actually an insult to us humans. Because if “Lucy” is anything to go by, we are dumb as a post compared to dolphins: while marine mammals use 20 per cent of their brains, we only use 10 per cent. So, what could we achieve if we finally switched on 100 per cent of our brains? Lucy’s (Scarlett Johansson) brain power increases continuously due to a burst drug bag in her stomach, which makes her capable of more and more superhuman acts. Since the film’s thesis regarding our limited brain function falls into the category of “scientific myth”, we can enjoy the entertainment factor of “Lucy” without a twinge of conscience.
Even if many viewers criticised the plot as a nonsense construct, the film offers superbly produced images: ILM realised around 240 VFX shots, Rodeo FX(www.rodeofx.com) took on around 164 and 4DMax(www.4dmax.co.uk) scanned part of the centre of Paris for the chase scene, which Rodeo FX implemented. The main VFX supervisor for the project was Nicholas Brooks (“Beyond the Horizon”, “Elysium”). Richard Bluff (“Transformers 3”, “The Avengers”) was VFX supervisor for ILM, while François Dumoulin (“The Hunger Games: Catching Fire”, “Heart of the Sea”) was in charge of the VFX department at Rodeo FX.
ILM in an interview
“Lucy” is the most VFX-heavy project in Luc Besson’s career to date, which is why he relied on ILM’s wealth of experience for the work. Compared to other major VFX projects such as “Star Wars” or “Transformers”, “Lucy” was a lean, more artistically orientated project for ILM. Among other things, the ILM team realised the shots inside Lucy’s body, the time travel scene in Times Square, the aircraft sequence with the particle animation and the supercomputer scene. VFX supervisor Richard Bluff explained how the pipeline was set up and what was special about the work for “Lucy”.
DP: How many artists worked on “Lucy” at ILM and which departments were involved?
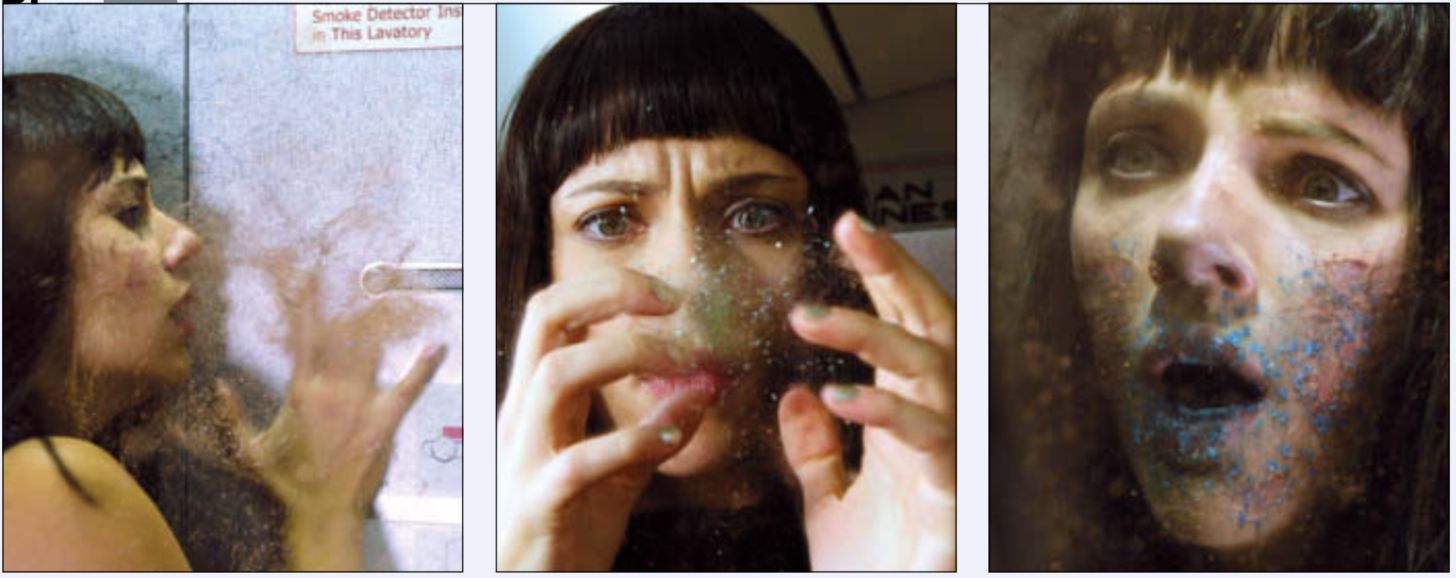
Richard Bluff: There was no usual departmental split: most of the 40 artists used were generalists. The only traditional department on the project was compositing, with the remaining artists switching flexibly between texturing, lighting and rendering. Furthermore, specialised artists created the look of some scenes by developing new tools: Florian Witzel, for example, created the tools for the procedural processes of the supercomputer and Ryan Hopkins realised the particle work for the scene in the aircraft toilet with Houdini.
DP: Why was this different organisation necessary?
Richard Bluff: We knew that we needed a very special, customised solution due to Luc Besson’s specifications. as a project, “Lucy” was a challenge that we had never faced before. For the final result, we therefore needed a number of specialists to set up new programmes and the associated workflow.
DP: What was the process like for the supercomputer scene?
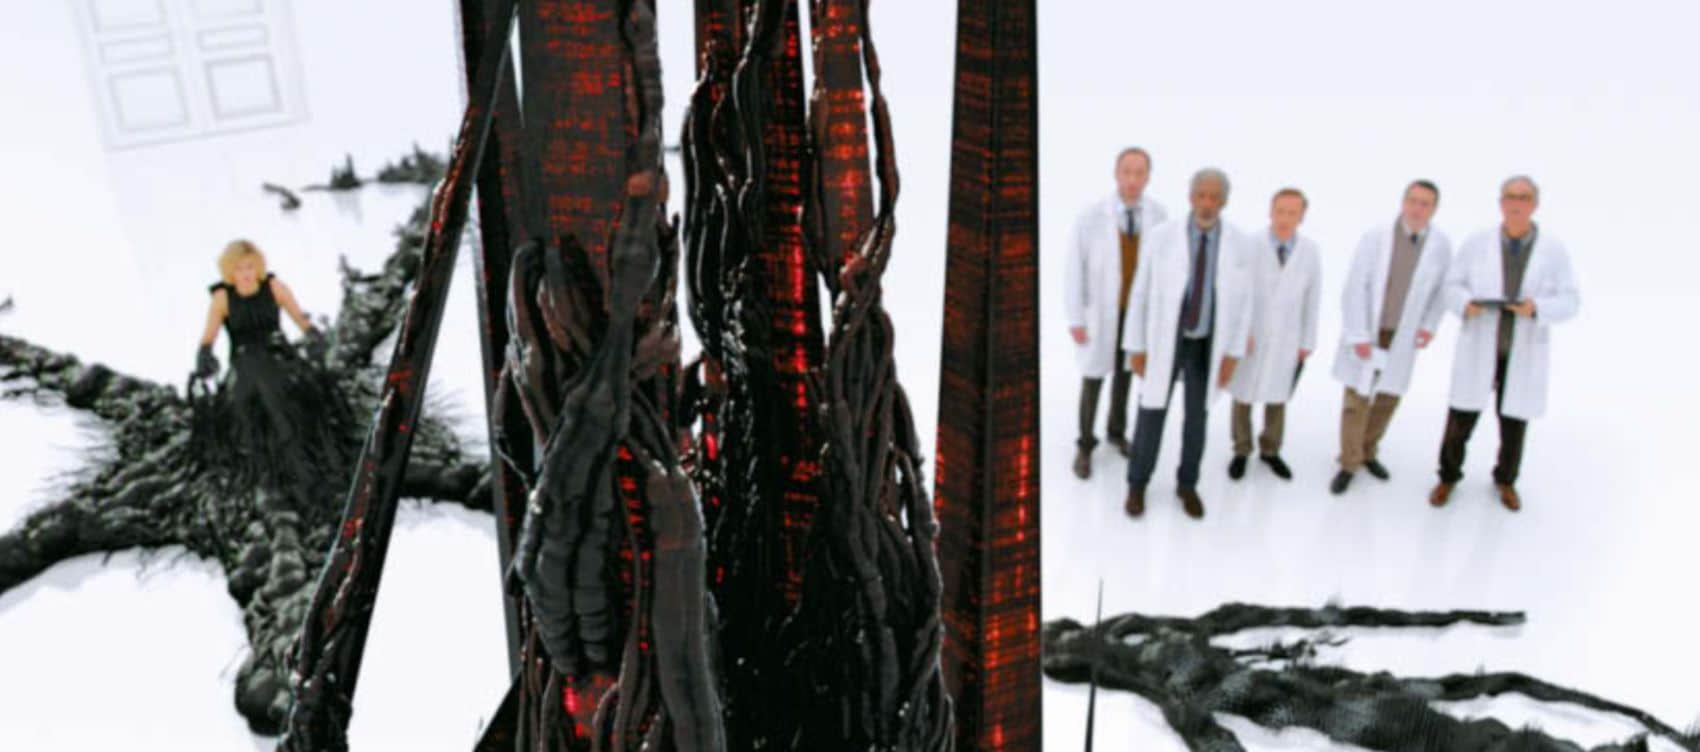
Richard Bluff: From a creative point of view, the first step was to find out what look Luc wanted. The supercomputer should look organic, but the viewer shouldn’t really be able to identify it as an object from nature – so it shouldn’t remind them of snakes or a dripping liquid. The creature should behave unpredictably, but not be frightening or shocking. To realise Luc’s ideas, Florian developed a base code for the procedural processes and wrote a procedural toolset in our Zeno-based pipeline.
DP: How was this structured in detail?
Richard Bluff: Florian created guidesplines that controlled the tentacles growing out of Lucy. The entire interface was procedurally generated with thousands of particle shapes growing out of the spline. The procedural nature of this work was no longer easily controllable beyond a certain scale. Therefore, we put countless parameters around it to determine the direction and overall activity. Florian created a very mathematical look in some parts of the tentacles with flickering cubes and spikes. For the behaviour, we observed ferro-fluids and chemical reactions, and for the black oily surface we looked at crude oil and obsidian as a reference. However, as we didn’t want the audience to have a direct reference at any point in the scene, we had to find a mix of all of these. The result was this unique creature and the impression of a growing computer.
DP: How long did it take to work on the scene and how many artists were involved?
Richard Bluff: Florian did about 80 per cent of the work on the tentacle scene. Two look-dev artists did the lighting and shading, plus three or four compositing artists. So it was a very small team for such an elaborate scene, but in return the scene had a large time frame – which worked in our favour, because Luc was able to participate in the development and rethink our work in terms of changes. Changes were easier to realise in such a small team. Florian developed and tested the workflow and toolset from October last year until January. The team then worked on the 45 or so shots from January to April.
DP: Were the scenes with Scarlett Johansson shot before or after?
Richard Bluff: Before that, in October. I was on set in Paris and brought some edited takes to ILM so that the team could get an idea of the scene. For most of the scene, Luc already had a solid previs that showed exactly where the camera was and how long the scene would be. So there weren’t many surprises for us.
DP: Was procedural technology also used for other “Lucy” scenes and have you used it for other projects?
Richard Bluff: On “Lucy” only for the supercomputer scene, but we also used it on “Transformers: Age of Extinction” for the human-built Transformer robots and their transformation process – but with a completely different toolset there. We hope to be able to use the underlying architecture for many more projects.
DP: Overall, what was the biggest challenge with “Lucy”?
Richard Bluff: Compared to a “Transformers” film, “Lucy” had very few VFX shots – around 240. But once you’ve solved the design of the CG robots, the lighting and the workflow on “Transformers”, one shot helps the next and it’s more of a challenge to integrate the whole thing into the film in a consistent way. In “Lucy”, however, all the scenes were extremely different, so the different design processes were the most difficult task. The design process didn’t end at some point, but continued until the last week of the project. For some scenes, we were still tweaking the look right up to the end.
DP: Which tools were used for what?
Richard Bluff: Because the project was so diverse, we used almost all the tools available at ILM: We used our traditional Zeno backend pipeline along with Renderman and Katana (see also “Lighting with Samurai Sword” in this issue) for some effects work. We also used Mantra in Houdini for certain aspects of the aeroplane scene. However, the majority of this scene was again realised with Zeno and Renderman. we used 3ds Max and V-Ray for the environment in the time travel scene and for the body shots. We created the Big Bang scene with 3ds Max and Krakatoa, and used Modo and its renderer for the cell division at the beginning. The backbone of the whole pipeline is the Alembic file format: Alembic makes sequences uniquely small, so you can tackle problems in a completely different way.
DP: How long has ILM been using Alembic?
Richard Bluff: We have had access to the format for about 3 to 4 years. We’ve been using it across all of our 3D applications for about 2.5 years now. We’ve also been working with various vendors to get their pipeline to support Alembic as well. Before that, we had a robust animation deforming pipeline in Katana, based on Zeno, but not for all the other tools – hooking animations out of the pipeline was still a hard process back then. With Alembic, we can now send the data in every conceivable direction.
DP: Luc Besson wanted to be surprised by ILM and its work for “Lucy”. Did this mean absolute creative freedom for the ILM team – and was this also a hindrance?
Richard Bluff: Luc already had a certain idea of each scene, his concepts were worked out in great detail. What he meant was that we shouldn’t present him with seven different variations of a scene or rough preliminary versions, but only concrete results close to the final scene. We should show him work that we were sure would be convincing in terms of quality. This allowed him to see the VFX scenes like a first-time viewer at the cinema and decide whether the result impressed and surprised him. For the Times Square scene, for example, we received his design concepts and didn’t show him anything until we had created all the buildings and the first lighting pass.
DP: Today’s CG dinosaurs in many productions still don’t come close to the visual benchmark set by ILM’s “Jurassic Park” dinosaurs. Yet the film is over 20 years old. How can that be?
Richard Bluff: “Jurassic Park” has a few unique factors compared to other projects: The VFX shot ratio was less than 100, Spielberg kept the “dinosaur moments” to a minimum and the CG scenes were only used to tell the story. As visual effects are becoming easier to produce, they are now everywhere – over 1,000 VFX shots are the order of the day for many films. But in my opinion, the most successful film work comes from limitations – not from showing everything that’s possible in that area, because that leads to an oversaturation effect. This doesn’t just apply to dinosaurs in particular, but to all effects. In many of today’s productions, there are no limits that a director would have to set.
DP: Many artists dream of a job at ILM. How did you manage to get started?
Richard Bluff: I dreamed of it as a child too … My career started in England in the video games industry. Going from there to Blur Studios was much more difficult than going from Blur to ILM. I was lucky to apply to Blur at the right time with the right kind of work on the demo reel. I was a generalist and that’s what the studio was looking for at the time. At Blur, I was able to put together the right kind of work for a demo reel that I could score with ILM. I never went to a CG or VFX school as there were none in England at the time. The quality of graduate demo reel work submitted to ILM is improving every year, as schools are offering better and better courses, communities and tools. The demo reels I submitted back then wouldn’t get me a job at Blur or ILM today.
DP: Which art artist has the best chance of being accepted at ILM?
Richard Bluff: ILM never hires artists who come to the interview thinking they already have the job. Because that’s the type of artist who doesn’t scrutinise their own work enough, so they can’t achieve a quality that looks real. People with little self-confidence are more likely to get the jobs, because they are usually the most talented artists. I’ve been saying the same thing for ten years: it doesn’t matter whether an artist is a modeller, a texture or lighting artist, a traditional painter or a photographer – the most important thing is a great eye. And ILM simply hires the best in this respect, regardless of whether they are generalists or specialists. Generalists may not make up the majority at ILM, but with around 90 people in the team, it is a healthy mix for the company.
Rodeo FX and 4DMax
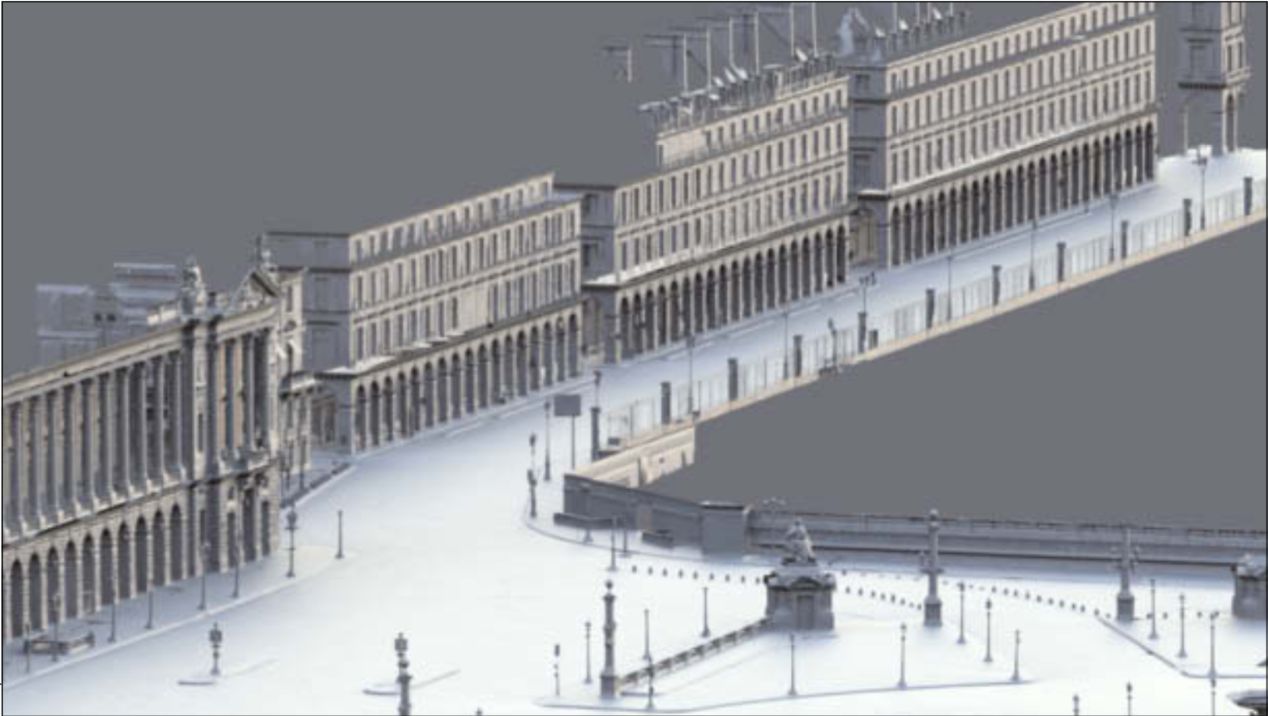
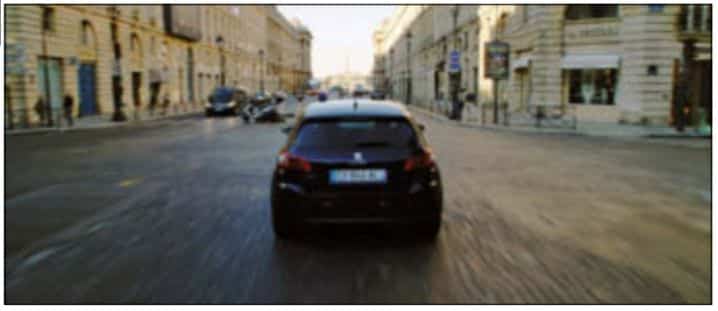
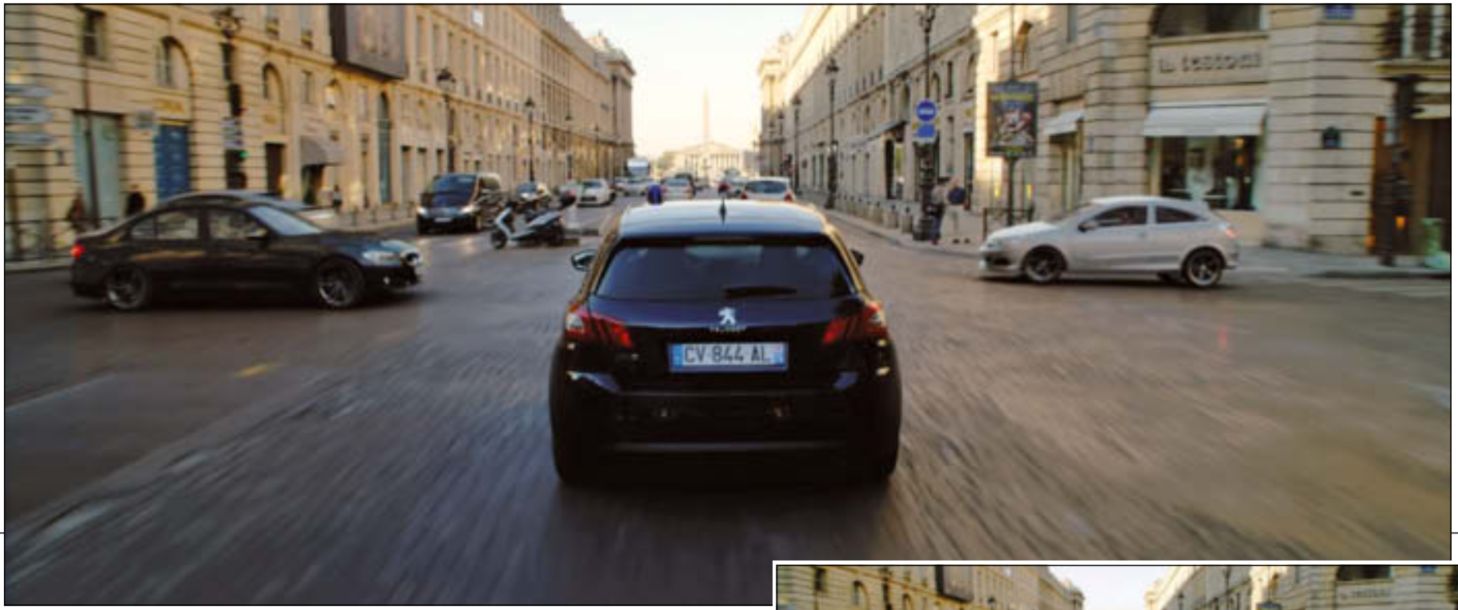
Canadian studio Rodeo FX has already created impressive CG car crashes for previous projects such as “Now You See Me” and “Enemy” (see DP issue 05/14). For “Lucy”, 73 VFX shots were created for chase scenes through the streets of Paris. Luc Besson used the legendary car chase from the cult film “Blues Brothers” as a reference. The scanning experts at 4DMax used LIDAR scanners to capture the streets of Paris from Place de la Concorde to the Louvre, including small details of the road surface. Rodeo FX and 4DMax were initially tasked with creating only these scenes, but over the course of the project they were joined by matte paintings, set extensions, wire removals and the colourful CG light strips across the city that only Lucy can see. In total, 60 rodeo artists worked on the shots for eight months, plus a management and support team of 15 people.
We spoke to François Dumoulin about Rodeo’s pipeline for “Lucy” and asked Managing Director Louise Brand from 4DMax about the elaborate scanning work in Paris.
DP: Car chases and accidents involving CG cars seem to be Rodeo’s speciality. Why are you being asked to do more and more jobs like this?
François Dumoulin: Originally we were more known for our matte paintings and CG environments, but now we have a lot of experience with hard surfaces like cars, aeroplanes and helicopters. Of course, clients like to hire you for the same kind of work you’re known for. Since we have already developed an efficient pipeline for the integration of hard surfaces, this is an advantage for us. Nick Brooks was also VFX supervisor on “Now You See Me” and he liked our car work for the film, so he brought us on board for “Lucy” as well.
DP: What was the previs process like for “Lucy”?
François Dumoulin: Thanks to our own previs department, we can get involved in a project during pre-production. This means that many problems that would arise in post-production can be solved in advance. Another advantage of having our own previs department is that we can reuse the assets from this stage later in post-production. The fact that we already knew the choreography of the chase and that Luc Besson had approved the look before the actual start of production also saved a lot of time. We received a very detailed storyboard from the production as well as a map of the location with instructions on where the real and virtual car crashes would happen. Using this information and the data extracted from Google Maps, our team built a full CG previs in Maya that was accurate to within a decimetre.
DP: How did you use Google Maps data for the previs?
François Dumoulin: Google Maps came in handy to get the scale right for the models of the streets and buildings. We combined this data with photo references of Rue de Rivoli and created an accurate representation of the neighbourhood. This way we knew that the CG Peugeot would fit exactly into the environment without ever having set foot on the streets of Paris. Lead PrevisArtist Alexandre Ménard created hundreds of shots including all the technical specifications such as speed, distances, focal length, etc. We then sent each take in full length to EuropaCorp(www.europacorp.com) and Luc’s editor cut the previs so that most of the sequences were locked before the shooting of the scenes had even begun.
DP: Were you able to combine the Google Maps data with the 4DMax scan data in any way?
François Dumoulin: No, we only used the Google data for the pre-vis, the scan data was used for the final shots. Even though the Google Maps data is very precise, the data was not accurate enough for a final animation and integration. Both data sets were useful for different purposes and different production stages.
DP: How accurate was the scan data that 4DMax provided you with?
François Dumoulin: 4DMax gave us a global LIDAR scan of the complete streets and high-res scans of the different areas of each street. The level of detail of the scans was so precise that when we ran a test suspension rig over the ground geometry for our car animation, it was immediately in contact with the ground. All stages of production – from the initial rig simulation test to the matchmoving of the extremely difficult shot and the back-projection of the HDRIs and textures onto the geometry of the LIDAR scan – benefited from this accurate data.
DP: How did 4DMax manage to deliver such accurate scan data from such a large area in Paris?
Louise Brand: The most important thing is that you know and plan exactly what you want to scan in advance and that you take additional scans of these parts if they are obscured by cars or people. Another factor is the weather: if it’s raining, you won’t get clean data and it’s better to leave it alone if you don’t absolutely have to scan. Reflective materials are also a problem; data behind a pane of glass, for example, is not usable. This data must then be captured from a different position and you should think about the correct positioning of the scanner in advance with regard to this problem. Open communication with the VFX vendor, who then receives the data, is also a good idea – as was the case with Rodeo FX and the “Lucy” project.
DP: Which scanner do you use?
Louise Brand: We use the Leica LIDAR scanner(hds.leicageosystems.com/en/Leica-ScanStation-C10_79411.htm), which is capable of capturing 50,000 points per second. I regularly look around the market and there are many faster and cheaper models, but the Leica scanner is the best alternative so far in terms of price-performance ratio.
DP: How did the scanning process in Paris work in detail?
Louise Brand: The Leica LIDAR scanner is a static model, so it can’t scan mounted on a car. That’s why we carried it through the streets of Paris on foot and it took us about five days to collect all the scans we needed. We only scanned during the day and in the evening, except for one street with a market, which we had to scan at night because there were too many people there at other times of the day. For the biggest job, the scan of Rue de Rivoli, there were three of us at times and we had two scanning devices in use at the same time. The other scans were done by two of us with one device. It’s practical to have two people so that one can concentrate permanently on the scanning process and the recorded data while the other operates the device. We also didn’t have to lug around any other equipment such as a laptop or similar; the scanner’s hardware manages all the data internally for one day. You then make a backup in the evening. Afterwards, a day of post-production was necessary for each individual set, during which I spent a lot of time removing the noise and did many more clean-ups on the data.
DP: What software do you work with?
Louise Brand: I use Cyclone(www.leica-geosystems.de/ en/Leica-Cyclone_6515.htm) and Geomagic(www.geomagic.com). We supplied Rodeo with around 40 or 50 OBJ files for the Rue de Rivoli scan alone, with around ten million triangles and lots of high-res textures in the data package.
DP: What other jobs does 4DMax do?
Louise Brand: We recently worked with Mikros Image(www.mikrosimage.eu) on the new Dior commercial with Charlize Theron. We have also done “Maleficient”, “Iron Man 3”, “Dark Shadows” and “John Carter”. In the past, we’ve also done some crime scene scans, but I don’t consciously chase these kinds of jobs because they can be very unpleasant. We now mainly work for the feature film industry. I’m currently working on a remake of “Tarzan and Jane”.
DP: How were you able to manage the different lighting conditions during the filming of the scene?
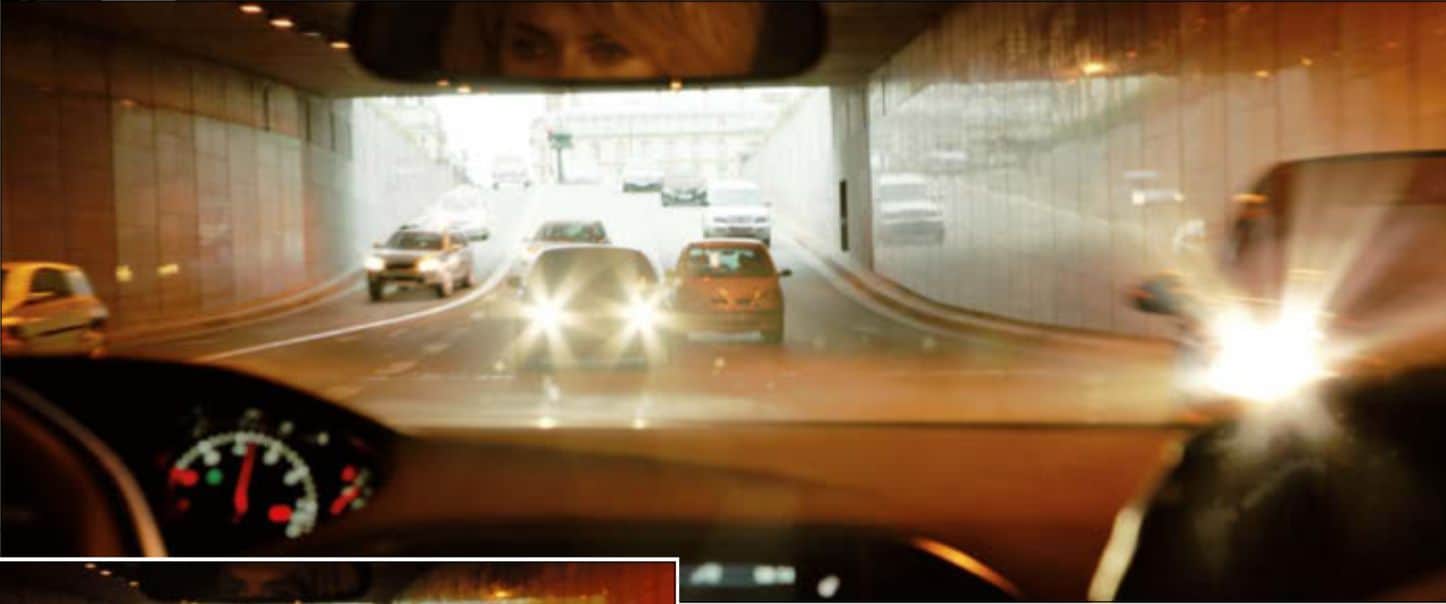
François Dumoulin: This was made possible by the mass of HDRIs shot by VFX DP Robert Bock during the shoot of the car chase. With cars flying everywhere, Robert ran around the set collecting 360-degree HDRI stills for almost every take and from every position where we would integrate CG cars. We correlated the time of day of the shots with the camera metadata to make sure we were using the right HDRI for the lighting. But even this proved to be critical given the fact that the lighting conditions changed quite a bit from one shot to the next – everything from early morning sun to cloudy afternoon. The fact that we ended up placing the CG cars much closer to the camera than we initially thought made the lighting process all the more difficult. Under the guidance of CG supervisor Mikael Damant-Sirois, our lighting team selected the relevant HDRI spheres and projected them onto the LIDAR geometry. As both the camera and the cars were moving through the set at a very fast pace, many different HDRIs had to be used in a single shot to create the correct lighting and reflections.
DP: How many HDRIs were needed in total for the scene?
François Dumoulin: In total, we used about 80 HDRIs for all the shots. In the final scene, the Paris environment is completely real, we only created the CG environment to be able to generate the reflections of the environment on the cars.
DP: What other adjustments did you make to the HDRIs?
François Dumoulin: In some cases, we colour-corrected and painted the HDRIs so that they matched the original plate better. We also had to precisely adjust the position of the sun in all the shots. In some situations, such as the tunnel scenes, where the lighting conditions changed drastically and quickly, the HDRIs were not precise enough, so we manually placed place light sources in the CG space. The Position Pass in Arnold allowed us to pick out specific areas of each object in the scene and apply 2D elements there, for example to change reflections, add dirt or modify the car colour. In addition to the CG elements, we organised a shoot in our rodeo studio and filmed the dirt and smoke as well as some of the compositing artists – including myself!
DP: How was the CG car crash rig set up?
François Dumoulin: We developed a deformation rig that deformed the mesh depending on the impact point, speed and angle. Once we were able to display the impact correctly, we refined this deformation base with details: we modelled certain internal parts that would be visible in the accident, broke up individual areas and added further animations. Houdini simulations in the form of dirt, haze, smoke and much more were added on top. All these elements were pre-compressed by the lighting artists, who then handed the scenes over to the compositing artists.
DP: How did you create the X-ray vision of Lucy?
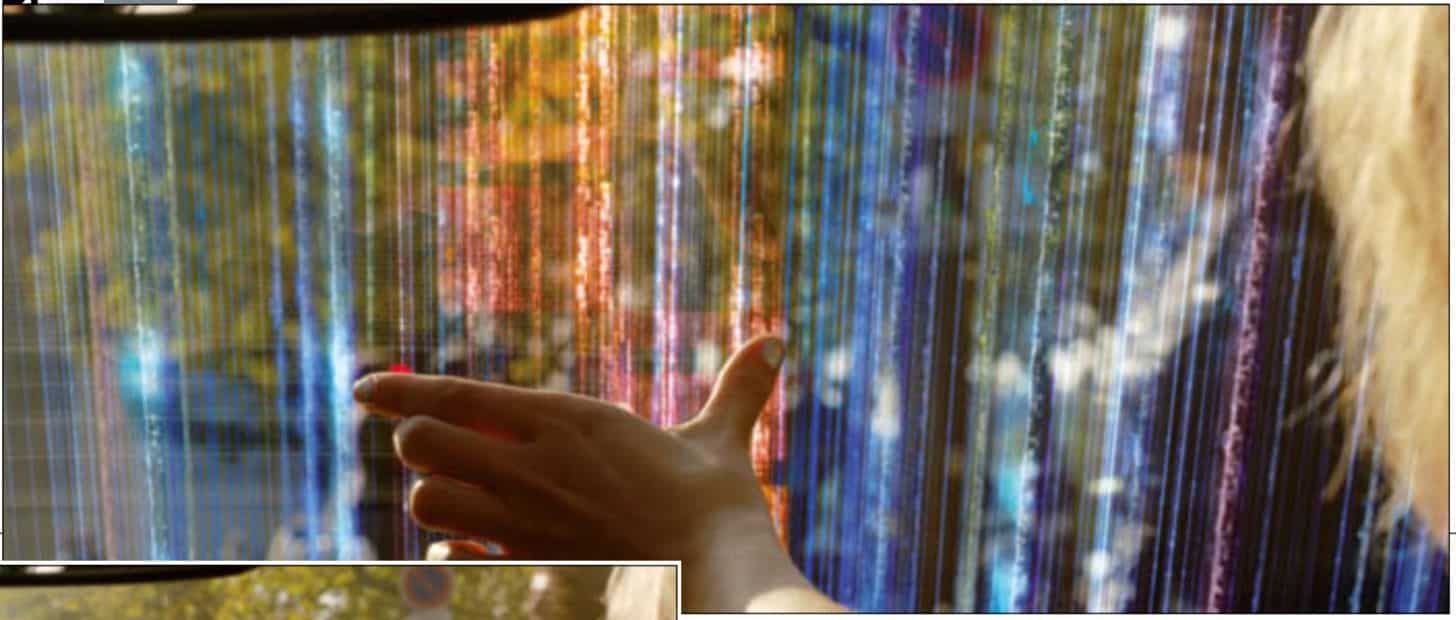
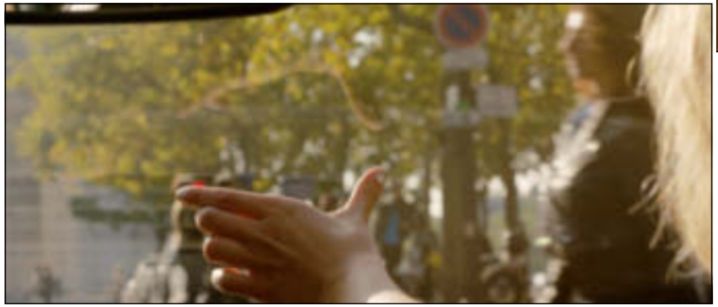
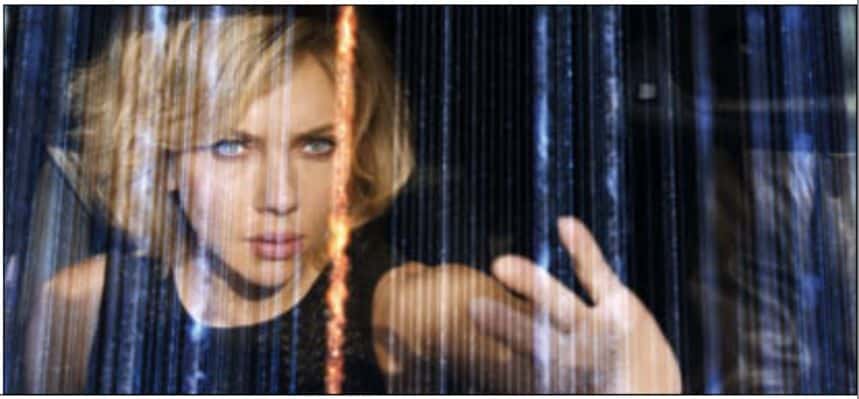
François Dumoulin: The most difficult thing about the scene was that we had to add the coloured rays entirely in post-production. Besides the main plates, the production didn’t film any specific elements, we only had some additional sprite elements that Nick Brooks shot for us after the shoot. So we had to be very creative in terms of a new concept and imaginative because we had to use elements that were already available or that we could quickly generate ourselves. Our basic idea was a combination of X-rays and thermal images to emphasise that Lucy starts to see the invisible. As Lucy is not a cyborg, we wanted it to look organic at all times, but at the same time somewhat abstract.
DP: How did the process continue?
François Dumoulin: We split the live action plate into depth layers, similar to what we do for a stereo 3D conversion. Once we had an arrangement of the different depth layers, we replaced the extras of the plate with some green screen sprites in the same process. We recreated the set using simple geometries with projections and reinvented the invisible area – a hospital with corridors and examination room – using Softimage. For this we used the model and the LIDAR scan of the current location. We sent a rough set of these elements to Luc and Nick, and once the timing was locked, we created a 3D photo of the sprites to change the rendering from static to an X-ray look. We rendered out passes of the set extension as well as the CG characters with different shaders. Our compositor Xavier Fourmond then put everything together in Flame. The fluid and organic look was mainly created using animation loops that we generated in Houdini and Trapcode Particular.
DP: Were there any intersections with ILM’s pipeline?
François Dumoulin: There is only one sequence where we shared elements. In one scene, Lucy connects to the brain of a villain and observes the action from above. ILM was responsible for this scene, which took place in one of our environments – a digital matte painting of Taipei. We therefore supplied ILM with a pre-comp of our matte painting and the projection setup in Nuke.


