Table of Contents Show
Volumetric effects such as clouds, fog, plasma etc. are a frequent task in the daily work of a 3D artist. Technical approaches for the creation in Cinema 4D would usually be simulations with plug-ins such as Turbulence FD and X-Particles or the use of the ageing, voxel-based Pyro-Cluster system from Cinema 4D.
In the following, however, we will get to know working methods that enable volumetric effects in a very simple yet elegant way using only the onboard tools of Cinema 4D – and without the usual techniques mentioned at the beginning. We will focus on two possible applications with increasing complexity: 1. thin clouds and nebula fields and 2. stellar nebulae.
Thin clouds and nebula fields
The simplest and most direct approach to creating basic atmospheric effects is to use Cinema 4D’s inbuilt light sources as the actual clouds or nebulae. With a light source option to create foggy visible light and some inbuilt noise features, you can create thin, non-shadowy clouds or fog patches in no time at all.
But before we go into detail, let’s look at some of the basic functions of light sources in Cinema 4D. As soon as you create a light source in Cinema 4D, the corresponding attribute manager displays a series of tabs (Figure 01):

Light source – General tab
In the General tab, the colour selection and the intensity scale are the first noticeable parameters. The type of light source can be selected in the Type drop-down menu below. The types of light sources are listed below according to their degree of relationship to each other. The shape of the light emission determines the shape of its visible / volumetric effect:
- Omni: concentric light emission
- Spot: conical light emission
- Square spot: pyramid-shaped light emission
- Parallel spot: parallel, cylindrical light emission
- Square parallel spot: parallel, cuboid light emission
- Parallel: parallel light emission
- Infinity: parallel light emission from a point infinitely far away
- Surface: spatially extended light emission with a definable geometric shape
- IES: simulates the manufacturer-specific behaviour of lighting systems with photometric intensity
The Shadow drop-down menu offers a choice of three types of shadow generation:
- Shadowmaps (soft): generates a shadow texture from the perspective of the light source with selectable resolution, blur radius and proximity tolerance (bias).
- Raytraced (hard): creates an infinitely hard shadow from the perspective of the light source. This is by far the
oldest and most unrealistic way of creating shadows. - Area: the only type of shadow that becomes sharper or more diffuse depending on the distance to the object casting the shadow. This type of shadow is mainly intended for use with area lights or infinite light.
To create thin clouds or fog patches, we do not need to use shadows as the visible structure comes from the light source itself. However, to create fluffy, shadow-casting clouds, we will come back to area shadows in the next article.
The Visible light drop-down menu in turn creates the actual effect with which we simulate thin clouds or fog: misty and therefore visible air.
It offers three modes:
- Visible: Objects in visible light do not cast a volumetric shadow, even if a type of shadow is activated.
- Volumetric: Objects in visible light cast volumetric shadows – even if no shadow is activated (!).
- Inverse volumetric: Visible light is only generated in the volumetric shadow of objects.
Light source – Visibility tab
The Visibility tab refers to the Visible light drop-down menu in the General tab and offers numerous parameters for defining the visible light and its visibility along the axis or radius of the light sources:
- Axial decrease reduces the visibility along the Z-axis of the light source (e.g. for spots).
- Radial decrease reduces the visibility along the radius of the light source (e.g. with parallel spots).
- Inner/outer distance defines the start and end point of the strength of the visible light starting from its origin. These decrease parameters work independently of the decrease parameters in the Details tab – however, the handles of these parameters can easily be confused with each other in the editor.
- Brightness controls the intensity of the visible light.
- Dust adds a black component to the visible light at low brightness values, which creates the impression of an opaque cloud of dust.
- Relative size allows you to compress and stretch the visible light disproportionately and independently of its actual shape (e.g. for point lights).
If the Volumetric option is selected in the General tab / Visible light drop-down menu, the visible light creates volumetric shadows – even if no shadow is activated for the light source (!).
Sample-based calculation
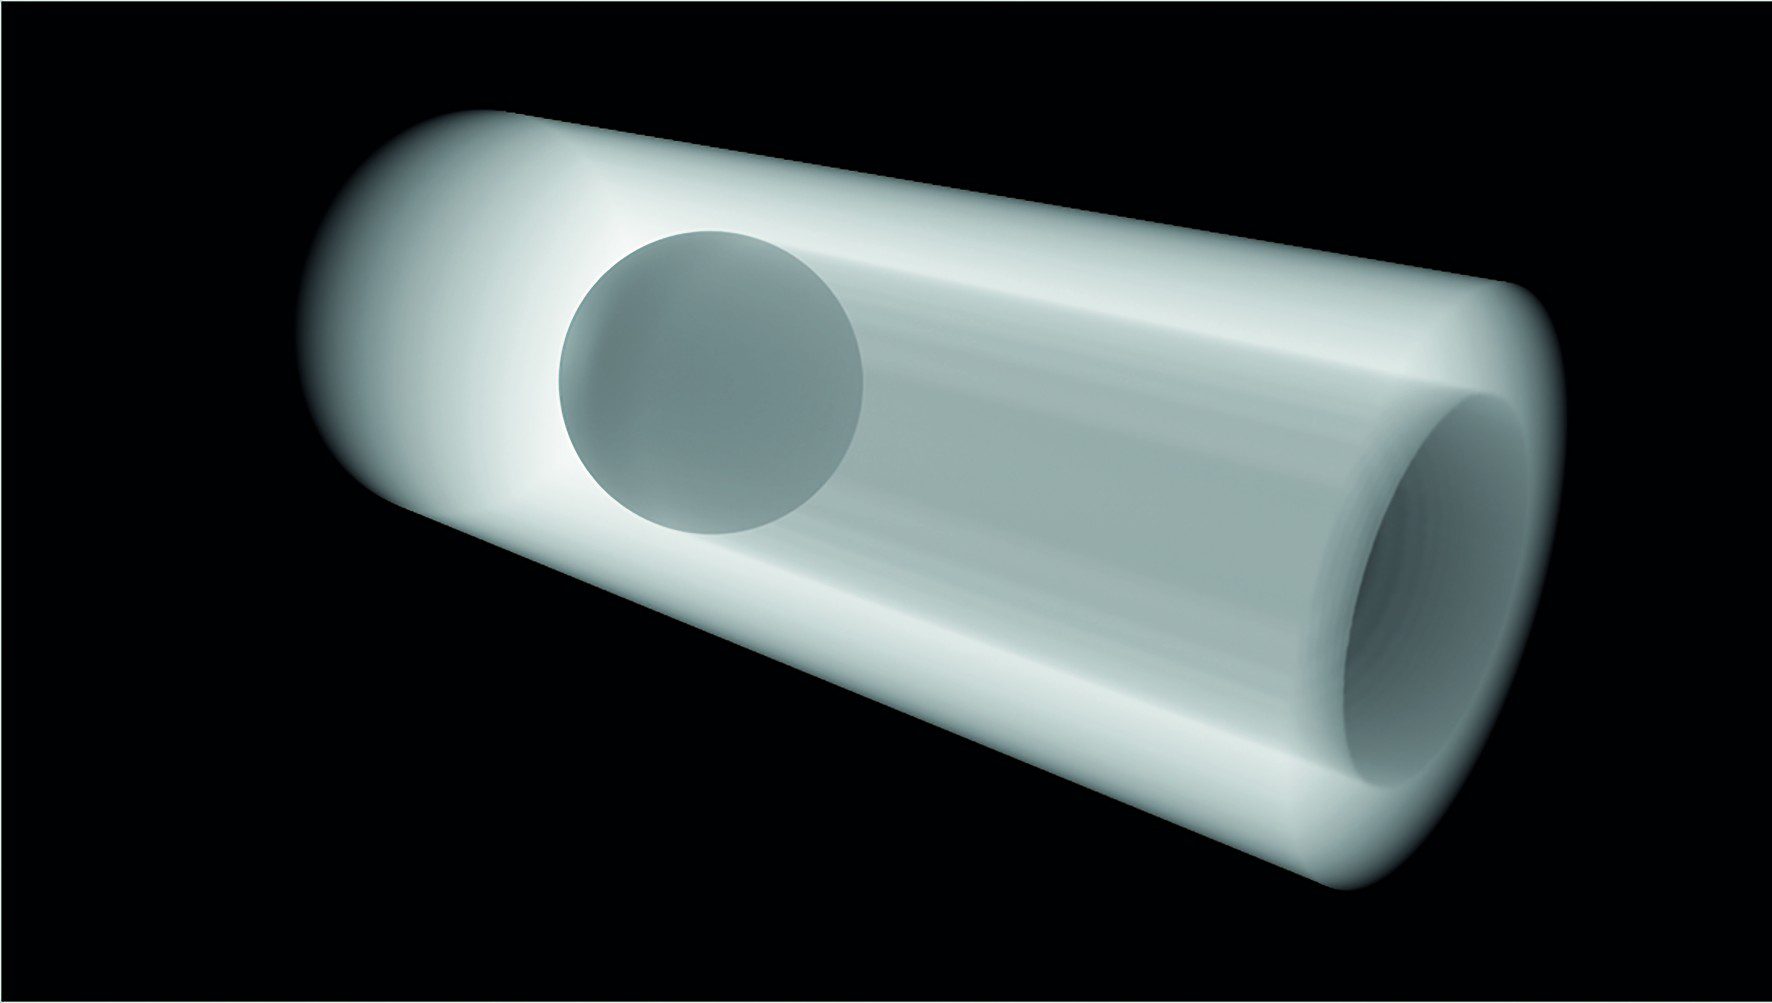
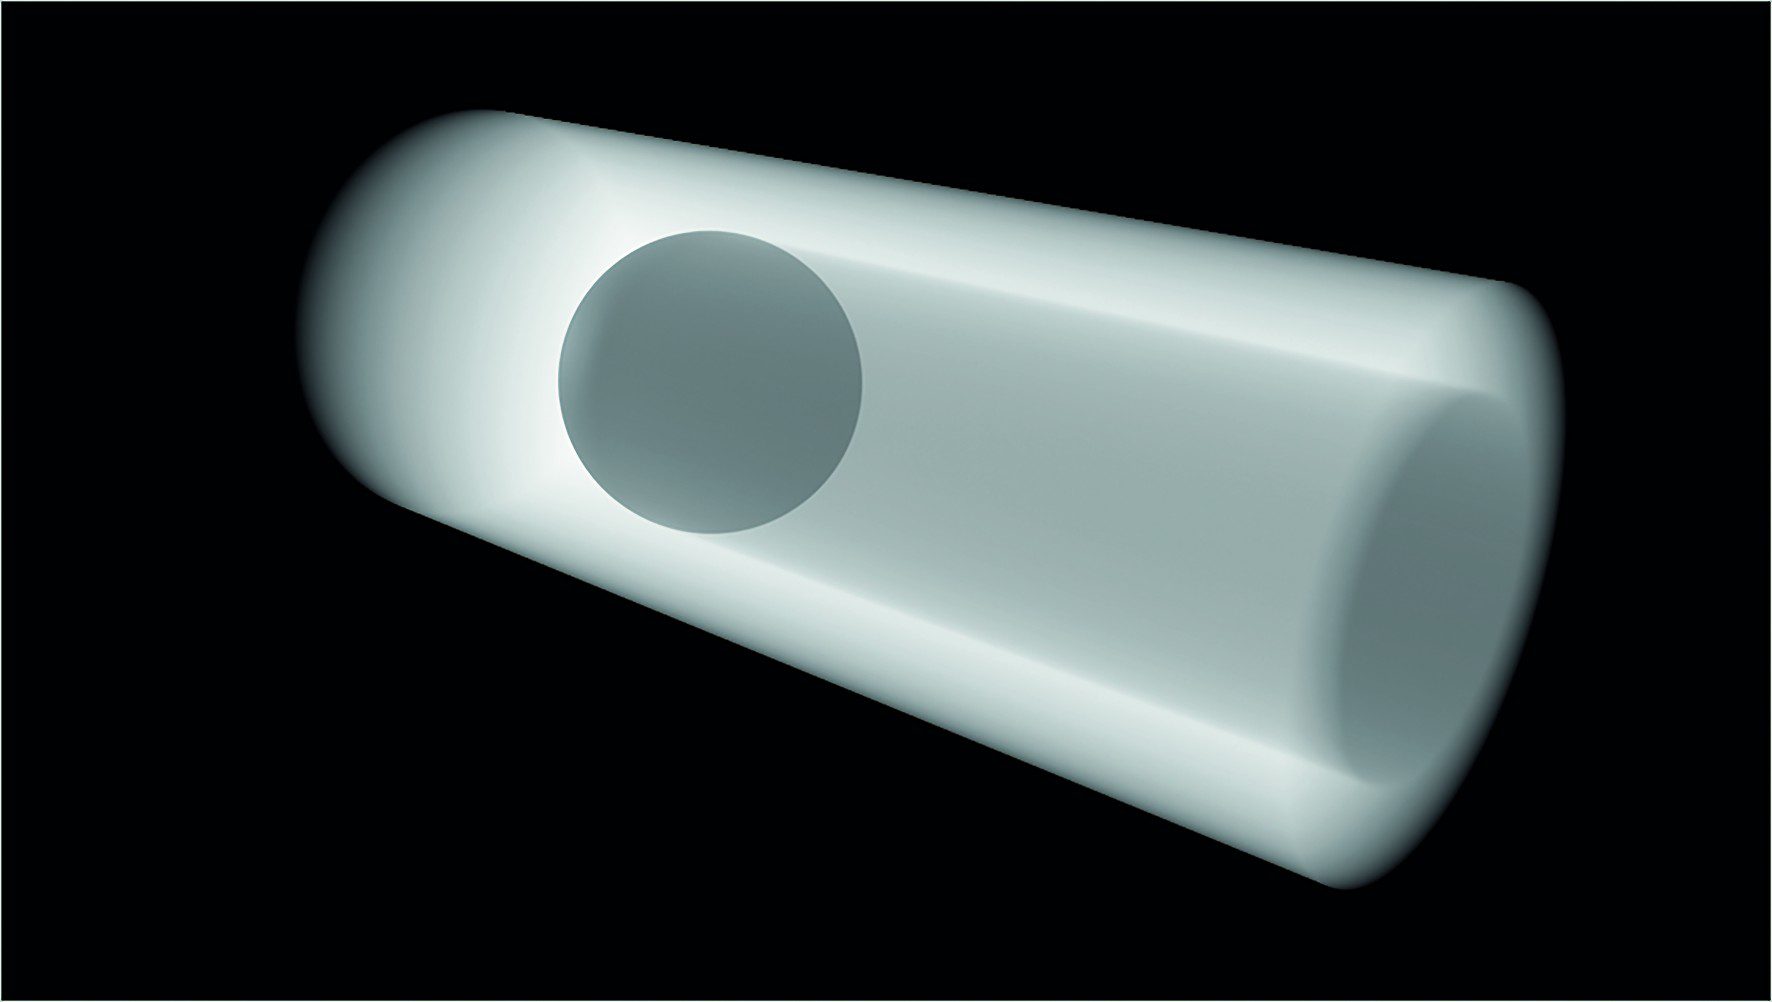
The resolution of the visible volumetric light is determined in the Visibility tab by the Sample density parameter. You have to think a little outside the box with this parameter and its name: The sample density must be reduced in order to increase the number of samples. A high value (low sample density) speeds up rendering, but can lead to disc-like artefacts in the light volume. For a homogeneous result, you need a higher sample density, i.e. a lower value, e.g. 5 m instead of the preset 25 cm. However, this can slow down the rendering – see image 02 (low sample density) and image 03 (high sample density).
Tip for rendering
Especially if you combine volumetric light and a complex scene setup (complex objects, high-resolution textures, strong anti-aliasing), rendering can be slowed down considerably. You should therefore always render volumetric lights separately on black and then combine them with your scene in compositing. This can save you a lot of rendering time. Cinema 4D’s take system and the “Single material” option for overwriting all materials with just one material (render presets) provide the ideal tools for this (Fig. 04). You can find more information on this procedure in the Cinema 4D Help using the keywords mentioned.

With the parameters presented up to this point, we are already able to create effects such as search spots, halos etc.. For clouds and fog, however, we need to give our visible light one thing above all: irregularity. To this end, let’s take a look at the Noise tab.
Noise tab
The Noise tab gives light sources random irregularities in terms of visibility and/or illumination. The former varies visible light (if activated), the latter purely the lighting effect. There are 4 noise functions available for both purposes: Noise, Soft Turbulence, Hard Turbulence and Wavy Turbulence.
These noises can be adjusted in terms of octaves (number of calculation passes and therefore level of detail), brightness and contrast. Size defines the size of the noise only in relation to visible light, illumination size defines the size of the noise only in relation to illumination.
A movement of the noise can be set via the parameters speed (movement in itself), wind (direction of a uniform movement) and wind speed (speed of this uniform movement).
The Local coordinates checkbox determines whether a global or local noise is used. If deactivated, moving light sources are moved by a global noise; if activated (default setting), moving light sources virtually take the noise with them.
As visible light sources with noise are a fairly old but still current feature of Cinema 4D, the four types of noise are not directly related to the onboard noise shaders.
Case study – Nightmare Flying
This project for the TV documentary series ZDF “Leschs Kosmos” stages the hidden dangers of aviation in several animations. For the two sequences about the ditching of US Airways flight 1549 in the Hudson River and about the functional principle of radar, we used simple point lights for thin, turbulent clouds in the foreground (image 05, image 06).


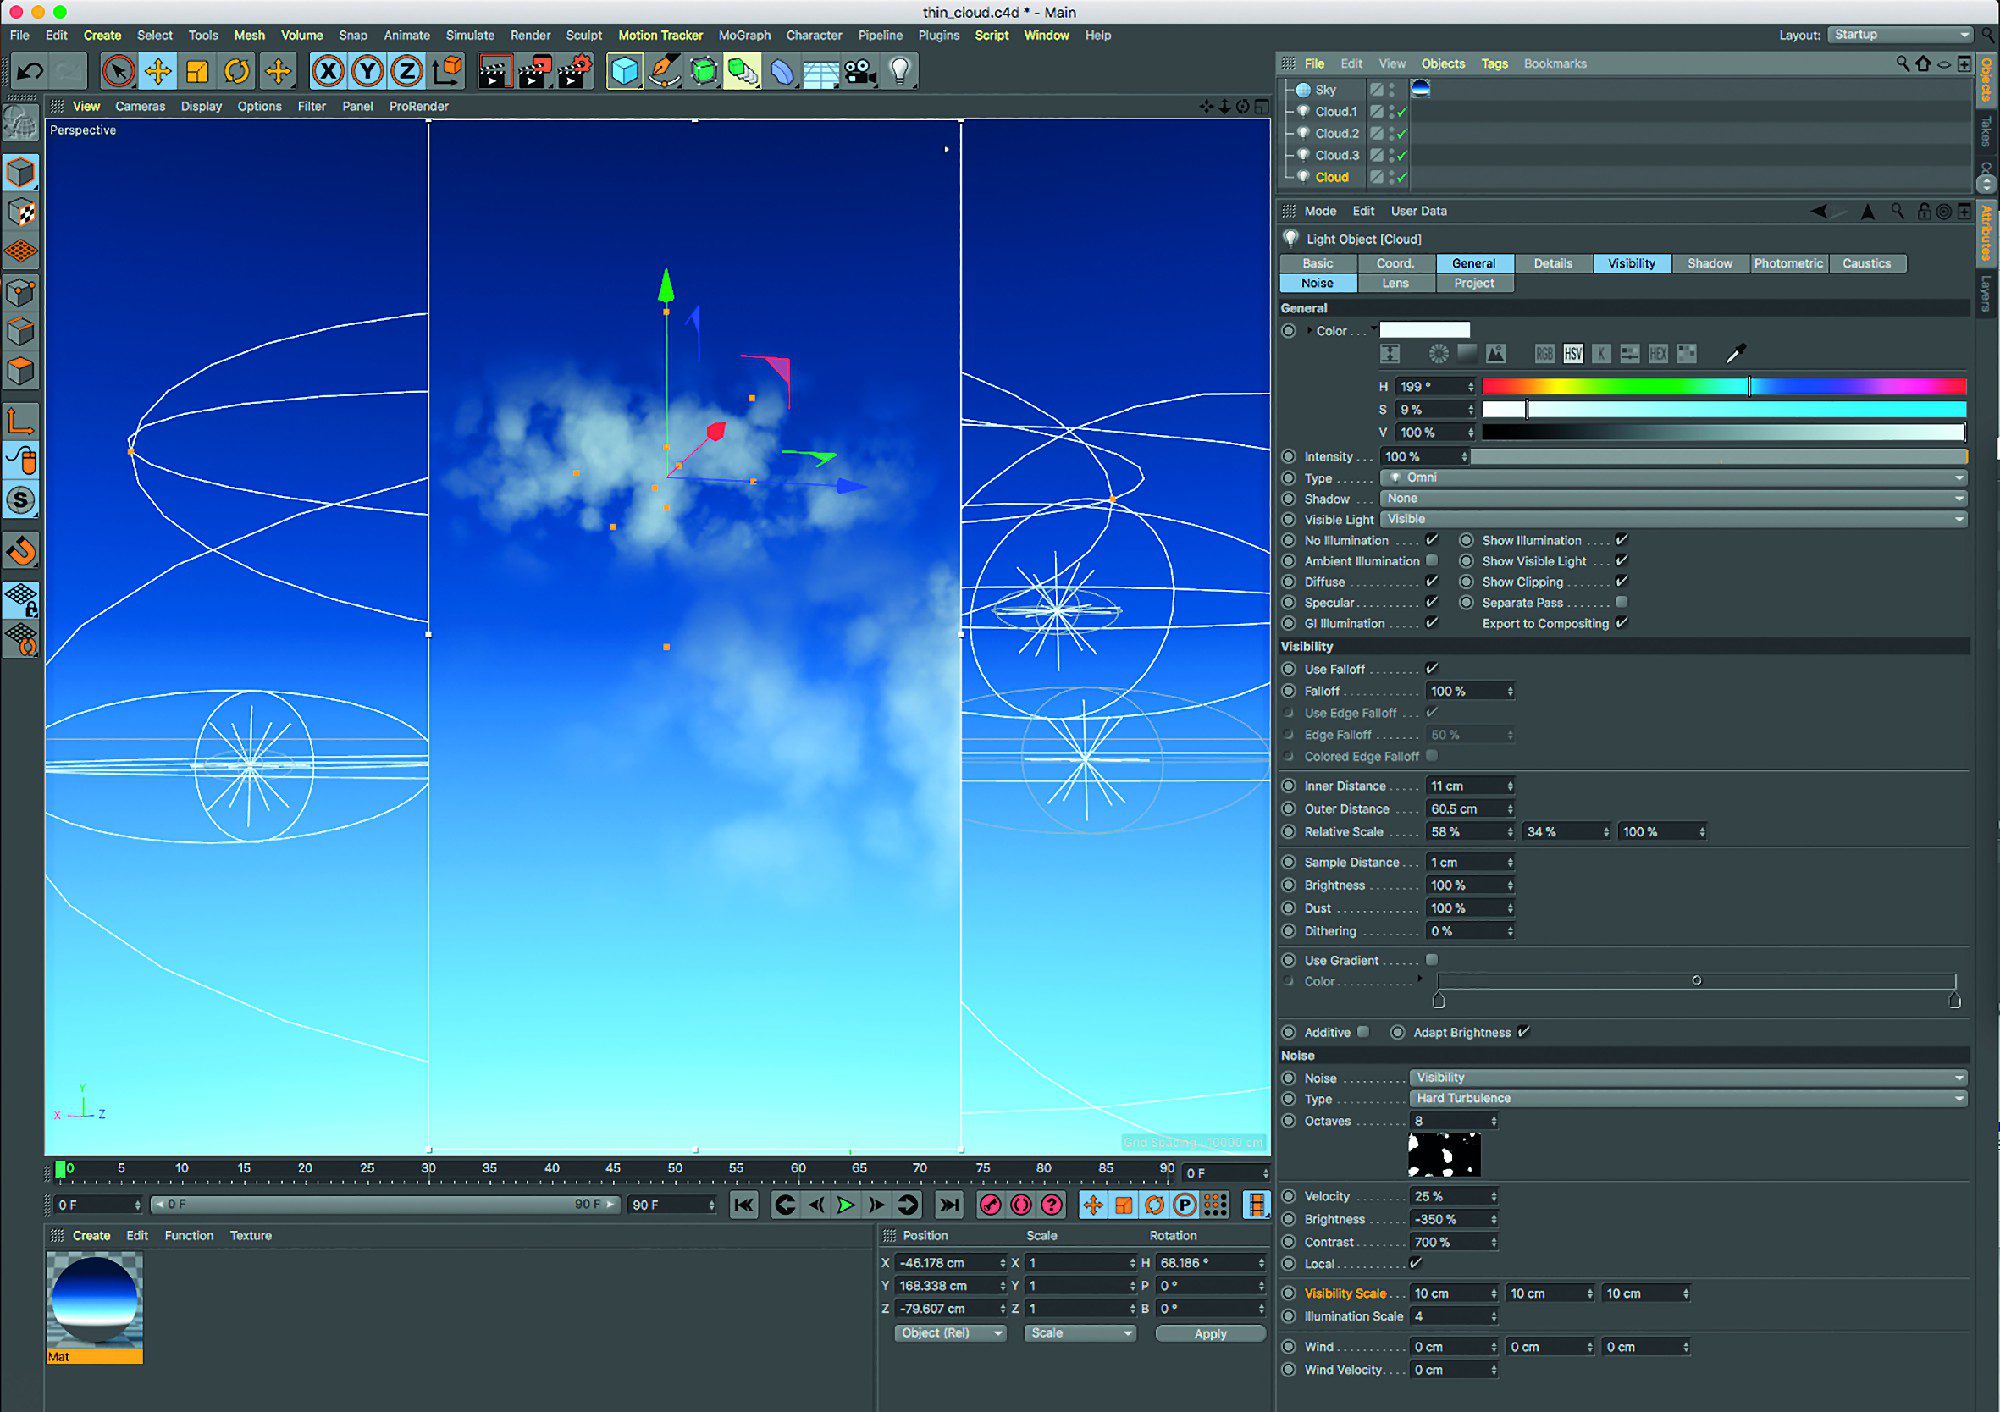
In both cases, the point lights were set to Visible, but not to Volumetric. The Lighting checkbox in the General tab was deactivated to prevent the clouds from emitting light. The point lights were flattened using the Relative size parameter in the Visibility tab.
A hard turbulence was used as noise in the Noise tab. The trick to creating defined cloud structures lies in the combination of a strong negative (!) brightness and a strong positive contrast (Fig. 07).
The dense, fluffy clouds in the two scenes were created with the Ozone Cloudfactory 2015 plug-in – a plug-in for Cinema 4D R17 that enabled the creation of impressive cloud fields, but was cumbersome to use. The plug-in was discontinued by the manufacturer e-on Software at the end of 2018. A detailed making-of of the project can be found as a recording of my talk at Siggraph 2015 in Los Angeles here.
Case study – Steigenkogel
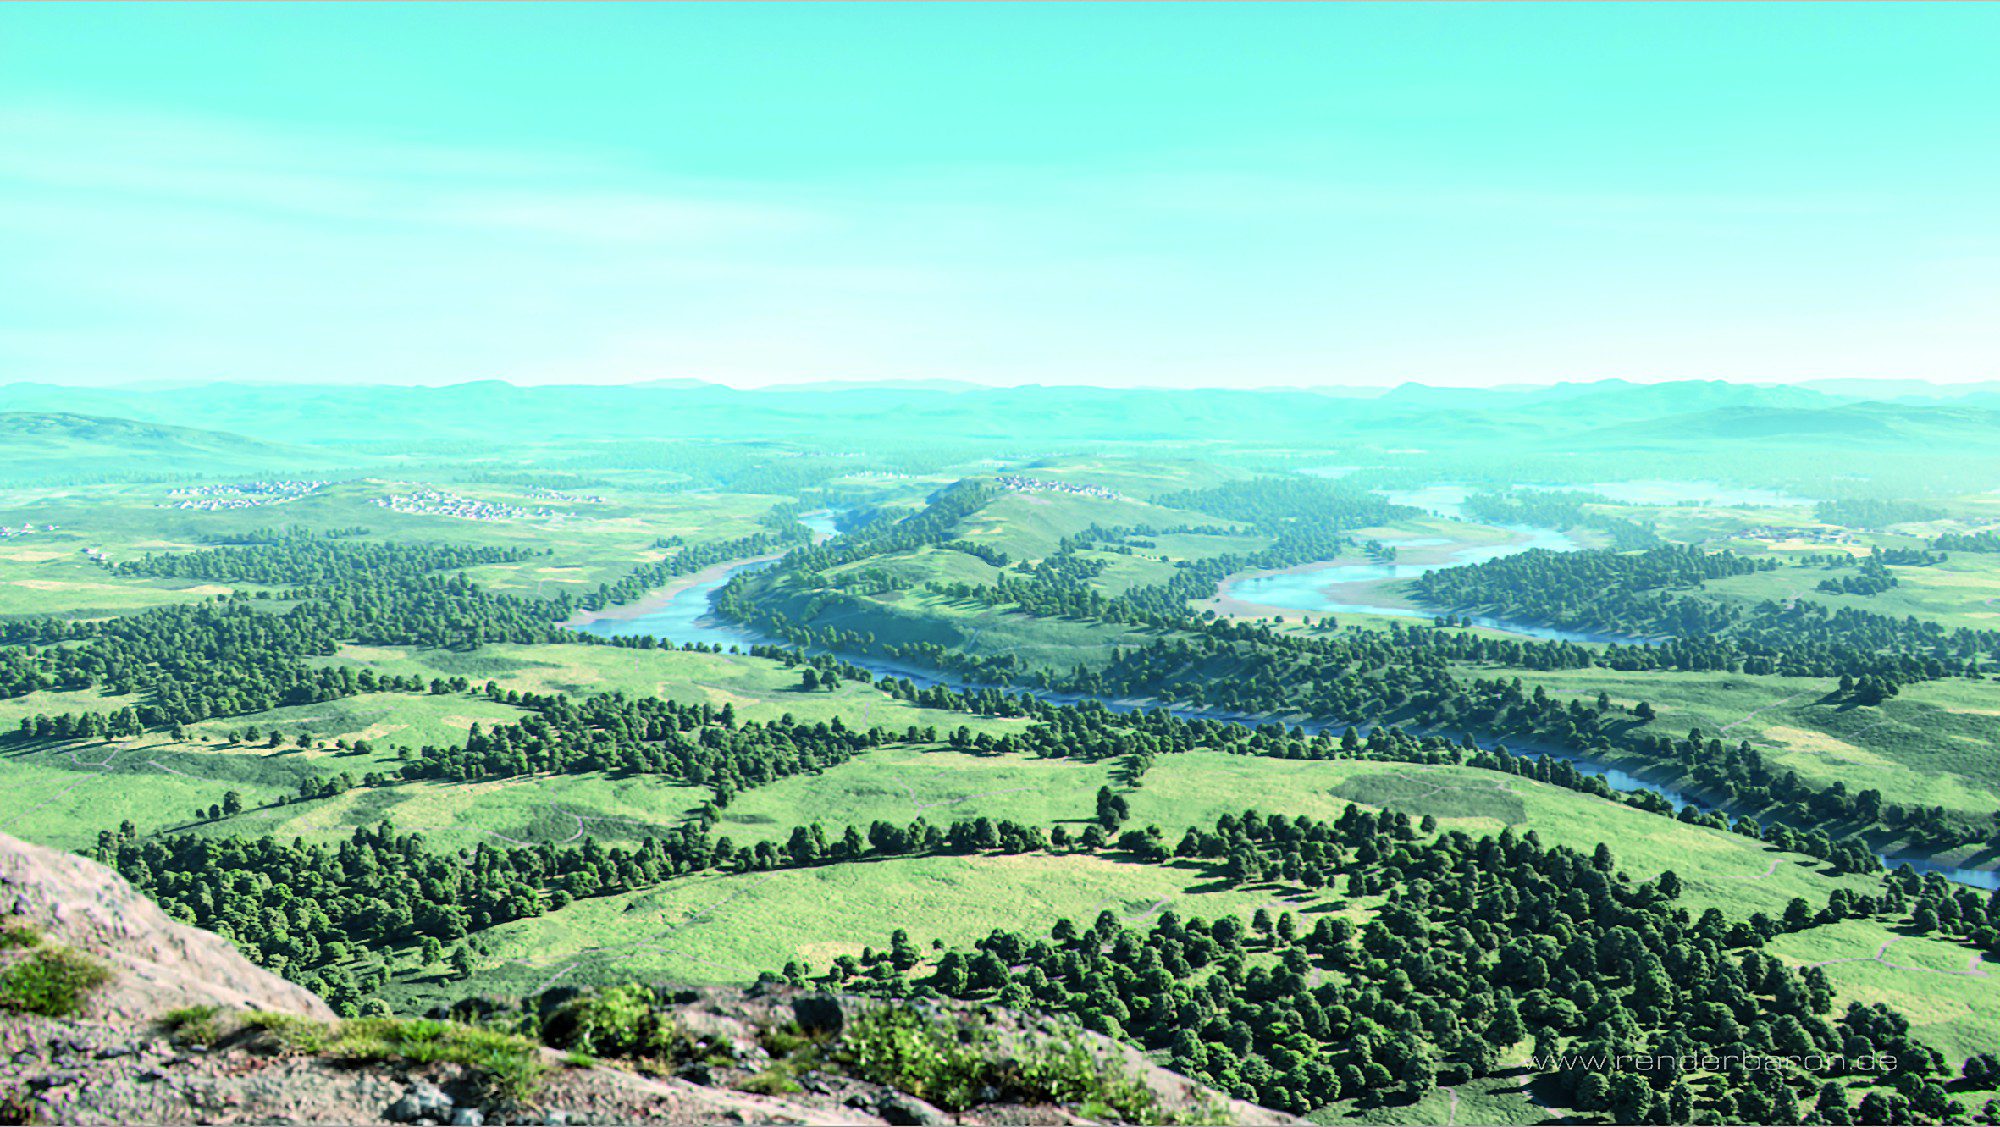
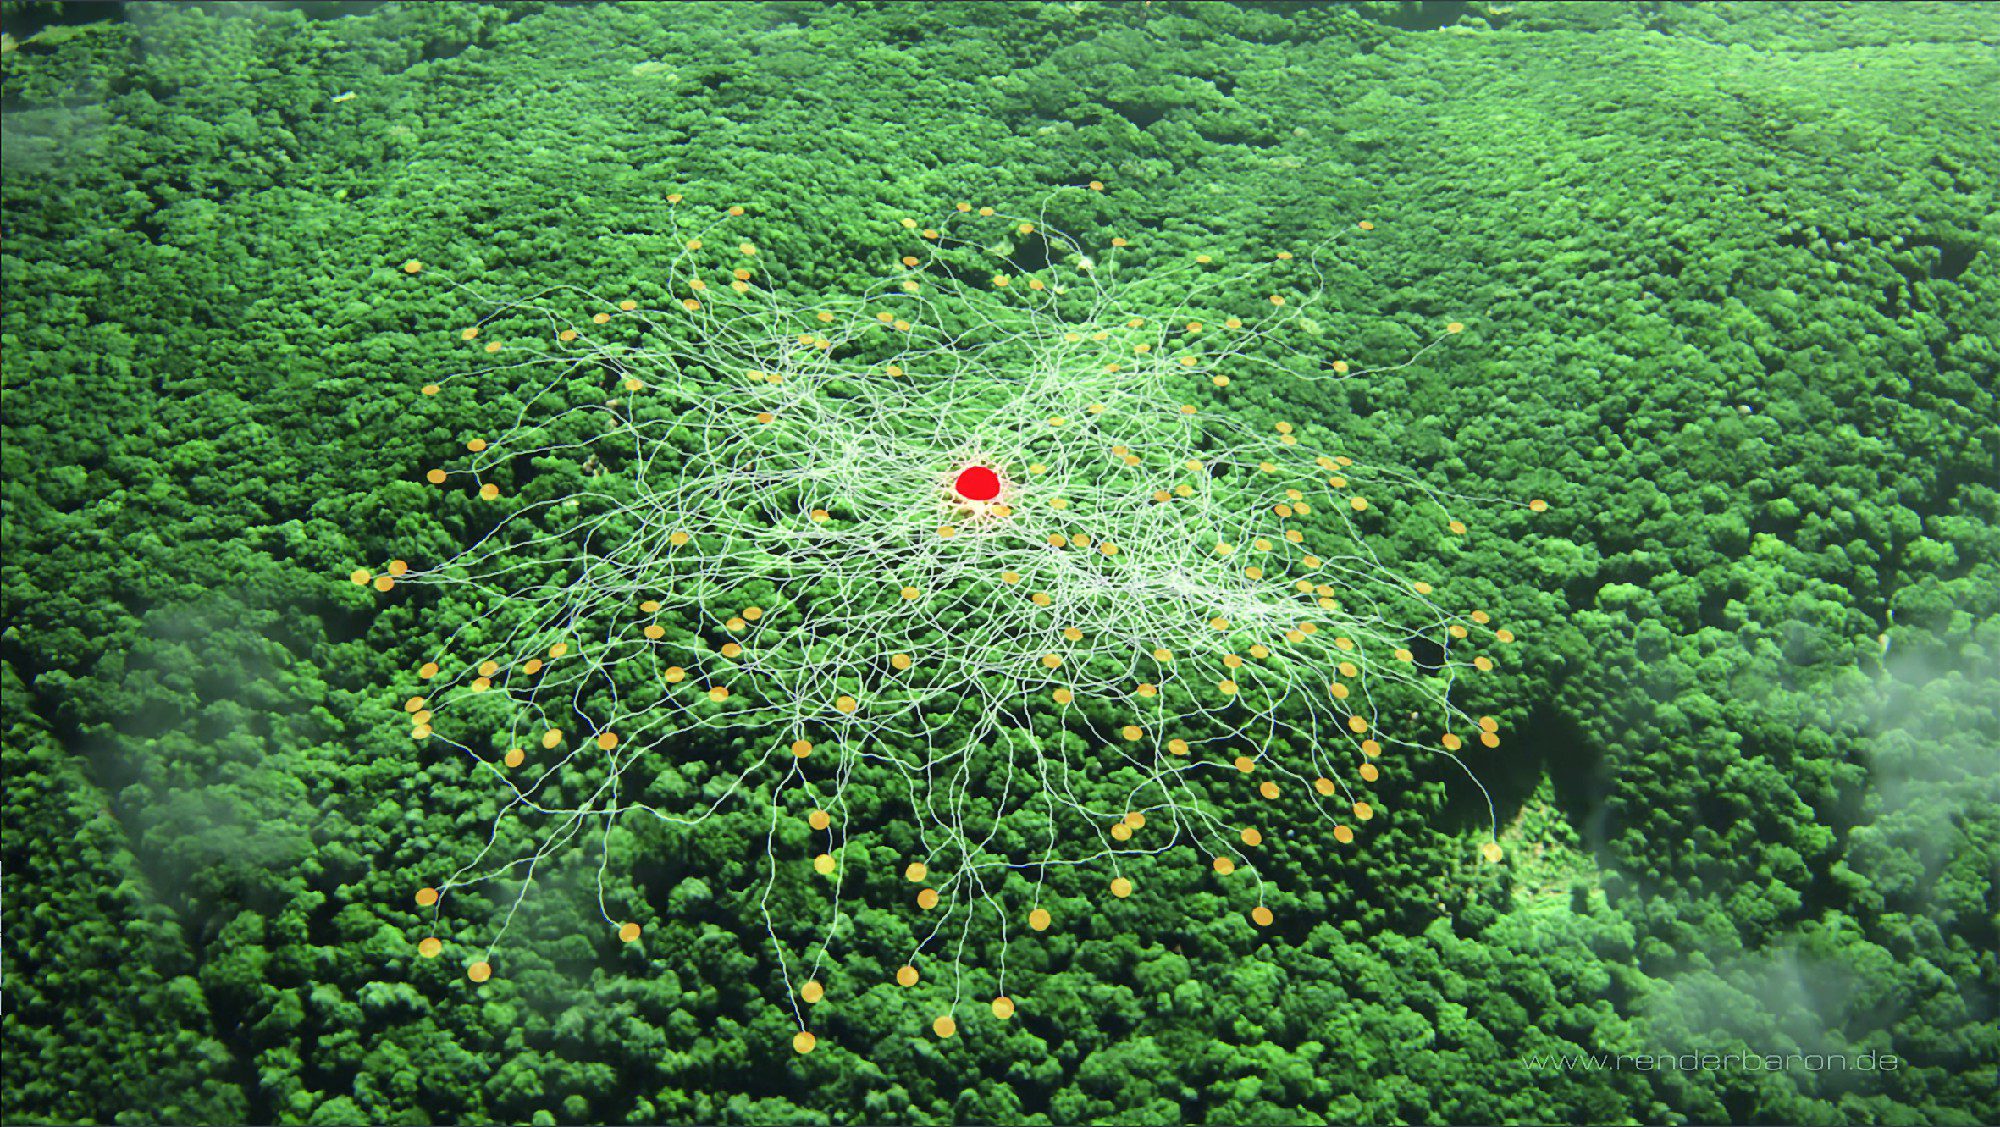
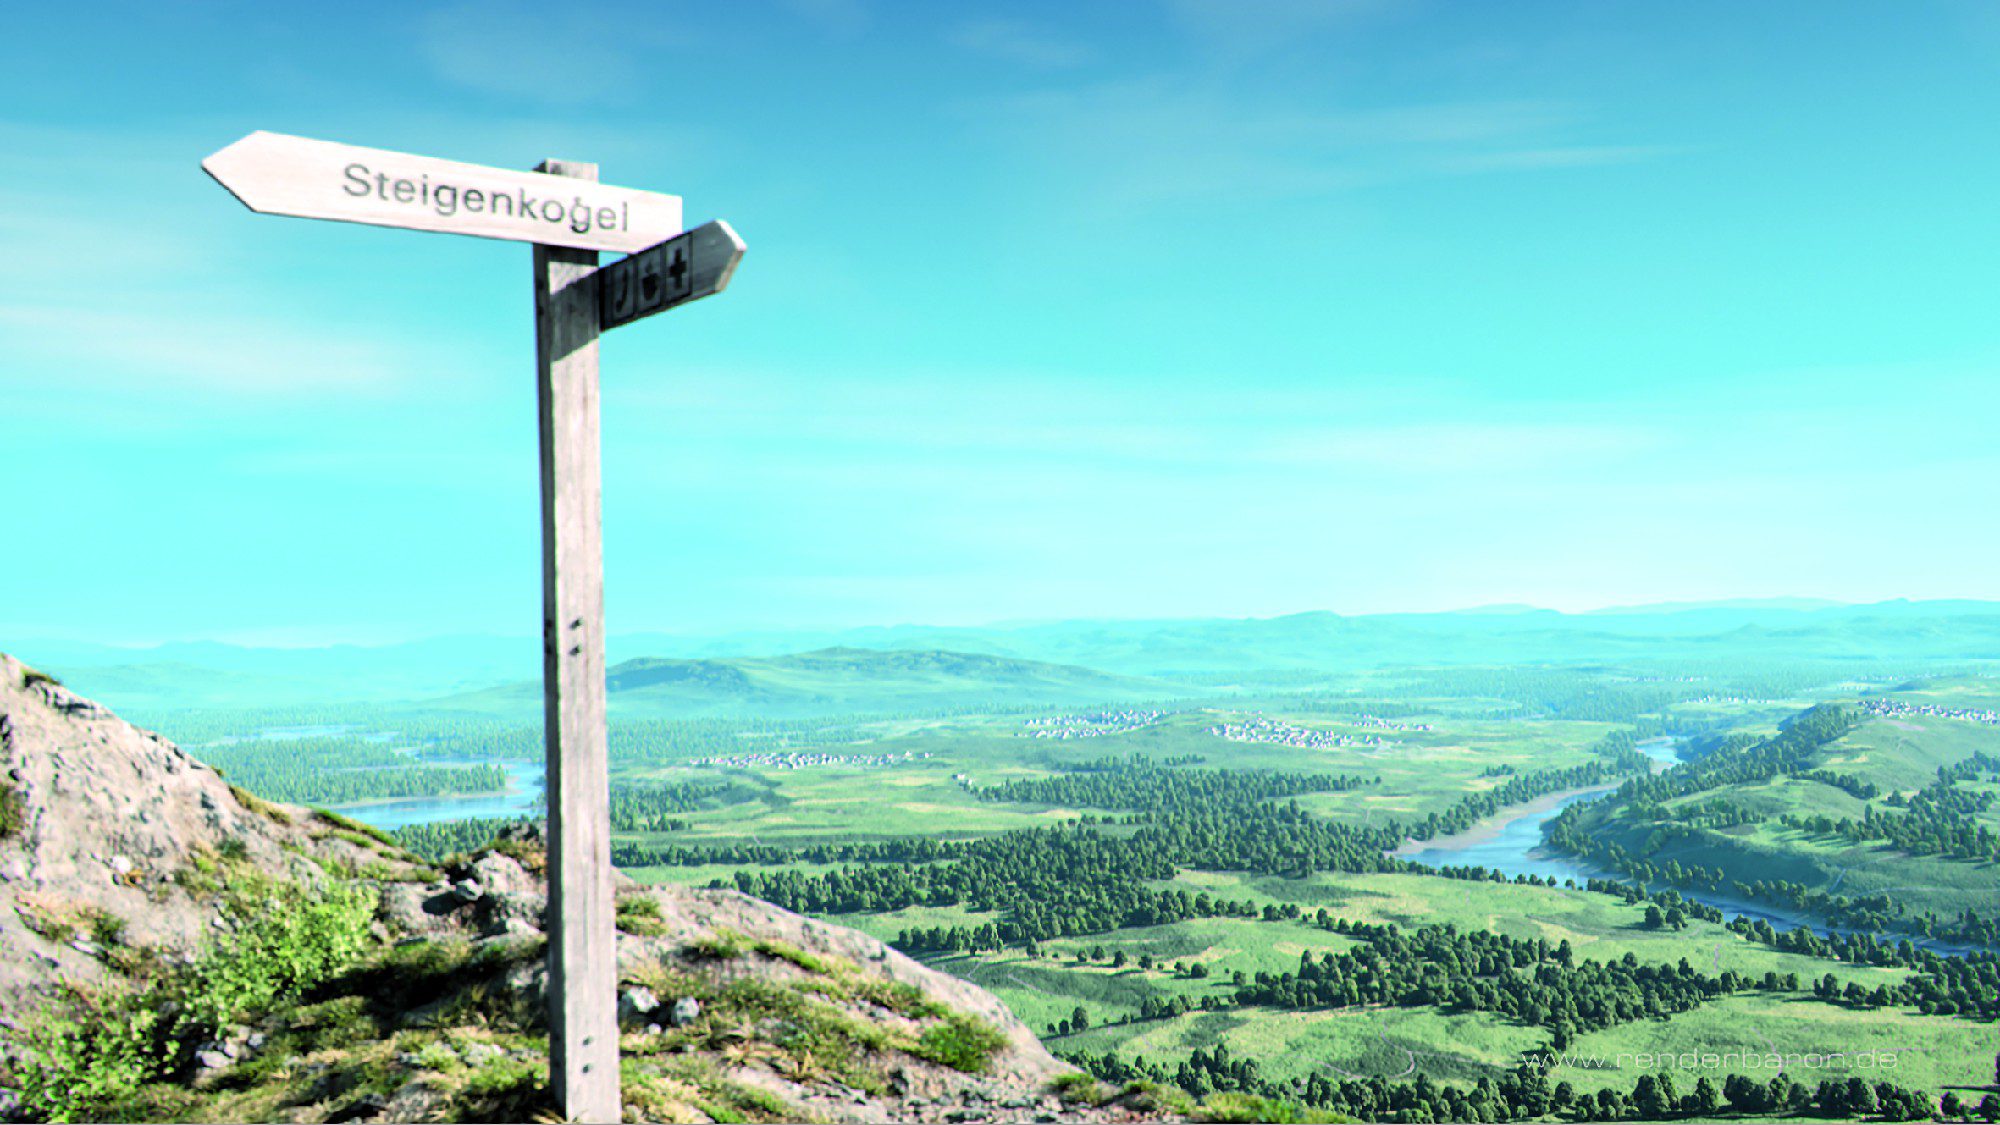
This free project is based on the Intel® benchmark scene“Mountainvista“, which I created for Intel in spring 2018. The landscaping of the scene is completely procedural – from rocks, pebbles, roots and dirt to valleys, mountains and clouds.
Large patches of fog in the distance were created using the same simple technique as described above: large, flat point lights with only visible light and an activated hard turbulence in the Noise tab (image 08).
Conclusion
Only with point lights, visible light and some high-contrast noise functions can thin, non-shadowy clouds or fog fields be created. This procedure is absolutely easy to master and is available at any time with just a few clicks.
The main limitation of this technique is the very basic use of 4 types of noise, which can neither be coloured nor combined with practical Cinema 4D shaders. So let’s take a look at another technical approach that allows us to overcome these limitations.
Stellar Nebulae
A more advanced approach to creating volumetric effects is based on the principle of texturing visible volumetric lights: you can easily apply any material to a light source – for example, if the active transparency channel contains a 3D noise shader, the volume of the light source uses this shader for three-dimensional volumetric texturing. The light source thus becomes a kind of aquarium for every volumetric shader that takes place within the transparency channel of the material! Important: This principle only works with visible volumetric light; visible light alone cannot be textured volumetrically.
With such a light container, it is easy to create more complex structures such as gas fields or stellar nebulae. The method of texture projection in the texture tag only plays a subordinate role here – as long as you use three-dimensional shaders 3D colour gradients or noise shaders in Room: Object or Room: World.
Let’s take a look at a simple example first: In Figure 09, a 2D tiles shader is applied as a texture to a parallel spot with visible volumetric light. In the texture tag, the projection has been set to surface mapping. The 2D texture follows the surface mapping and penetrates the volume of the spot in a rather boring way.
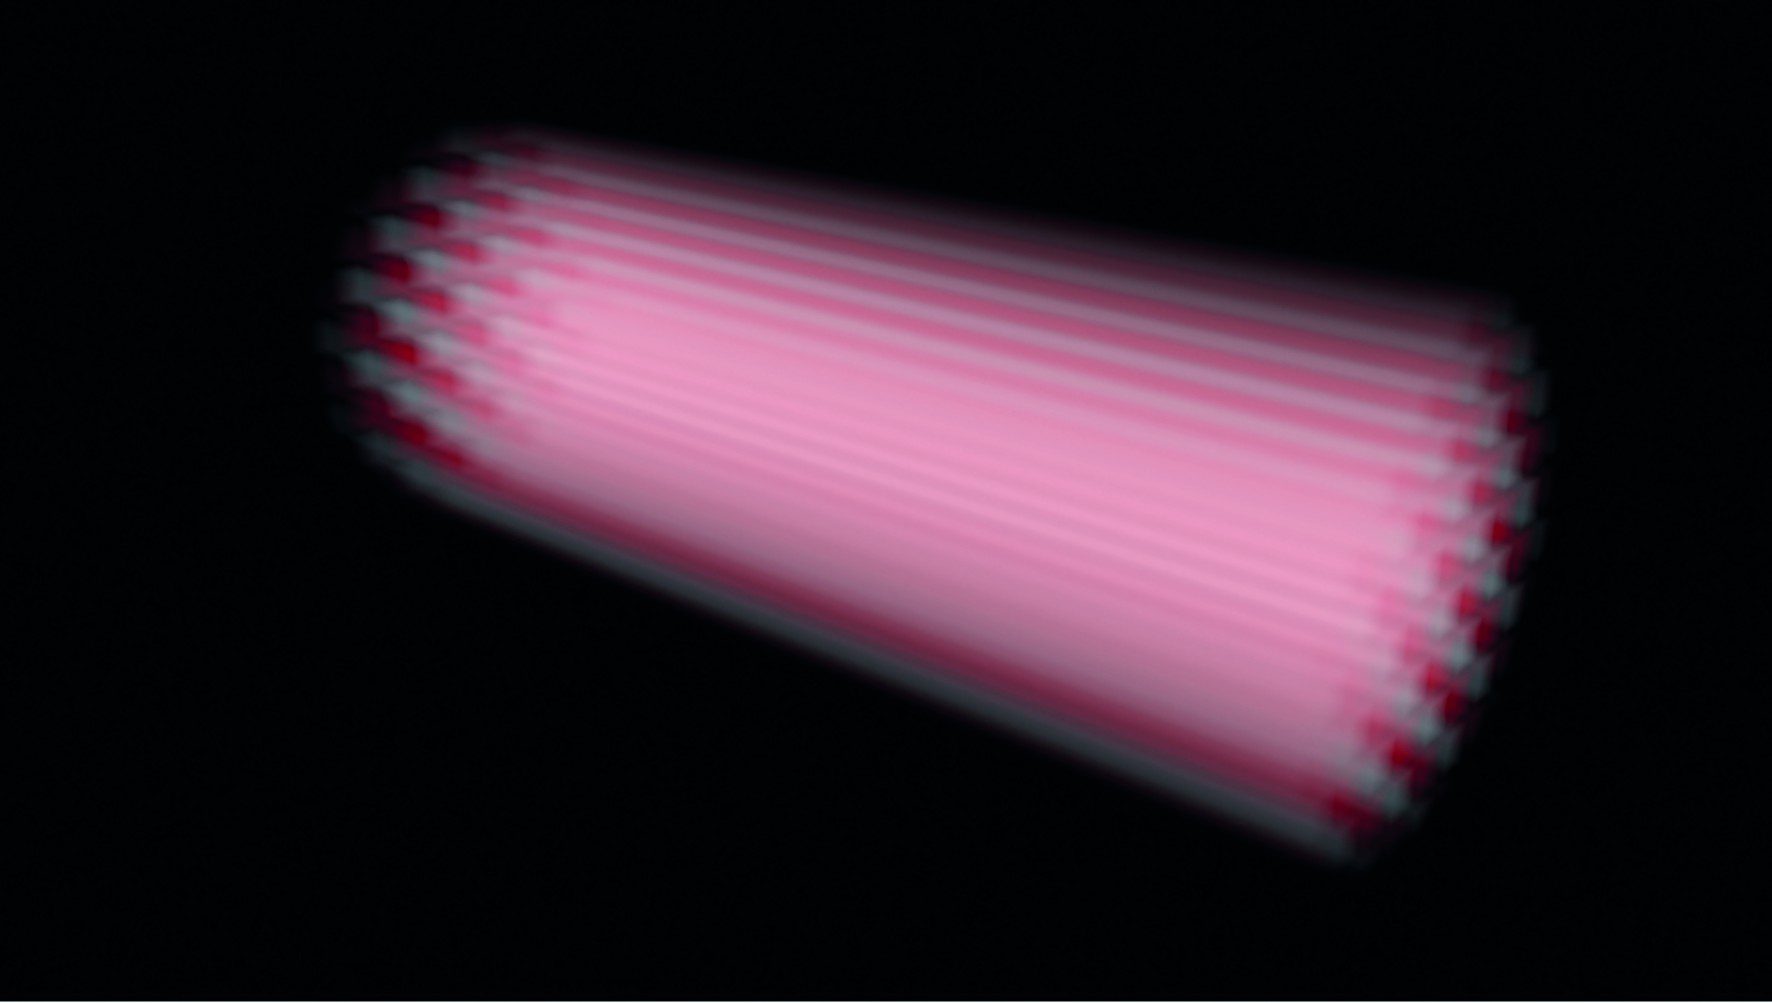
In Figure 10, a 3D noise shader is applied to the spot as an alternative. The surface mapping now no longer has any effect, as the noise shader has a three-dimensional or volumetric effect in relation to the light source due to its Room: Object parameter
(Noise parameter, see below).

One of the limitations of the thin cloud technique described at the beginning was the strict use of only 4 built-in noise functions. In order to use Cinema 4D’s more complex noise shaders as 3D textures for volumetric lights, it is important to first familiarise yourself with the basics of noise shaders:
Noise shaders – systematic randomness
Natural phenomena such as clouds, rocks or water surfaces are characterised by random structures with varying behaviour and complexity. In computer graphics, noise shaders approximate such natural structures. Noise makes it possible to give surfaces a random but reproducible irregularity, making them appear more analogue and natural. Noise can be used to modulate all aspects of a material. Compared to 2D textures, noises offer the decisive advantage that they can also be applied to objects in three dimensions, eliminating all the issues of correct texture projection or UVW mapping.
The US mathematician Ken Perlin was the first person to dedicate himself to the development of a noise shader. in 1981, as an employee of MAGI in Elmsford, New York, he was involved in the development of the Disney classic TRON. With his pioneering work on noise shaders, Perlin wanted to give the generated objects a less perfect and more natural look. in 1985, Perlin published a Siggraph paper on the resulting Perlin Noise, and in 1997 he received an Oscar for his achievements.
Through various further developments (e.g. Steven Worley’s Cell/Voronoi Noise from 1996), a handful of noise shaders found their way into Cinema 4D Release 5 as early as 1998. As part of the Smells Like Almonds (SLA) shader plug-in developed by David Farmer, two dozen more complex noise shaders were available for Cinema 4D from 2001, with exotic names such as Poxo, Luka, Sema or Pezo. Since Cinema 4D Release 7.2, they have been an integral part of Cinema 4D and are still on board today in an extended version.
With the classic channel-based material system of Cinema 4D, noise shaders are available as channel shaders and can be found in the shader drop-down menu of the material editor under Noise. From Release 20 of Cinema 4D, noise shaders are also available as nodes of the new node-based material system.
You can find them under the keyword Noise in the Asset Manager of the Node Editor. As the customer projects shown in this article were created with Cinema 4D R19, we will focus on the channel shader version.
Perlin, Turbulence, Luka & Co.
Cinema 4D’s noise shaders have very individual properties and are predestined for different purposes. Let’s take a look at a few examples:
- Noise as the default choice is nothing other than the original Noise Perlin: All components are of the same size, gradients between light and dark are represented by soft gradients. Higher octaves, i.e. further calculation passes, are not available.
- The closest relative, Turbulence, is basically a noise with additional octaves and can be used to create thin, turbulent clouds (Fig. 11).
- Luka, with its vividly different, partially scrambled details, provides a good basis for fine, thin clouds (Fig. 12).
An unequal kinship
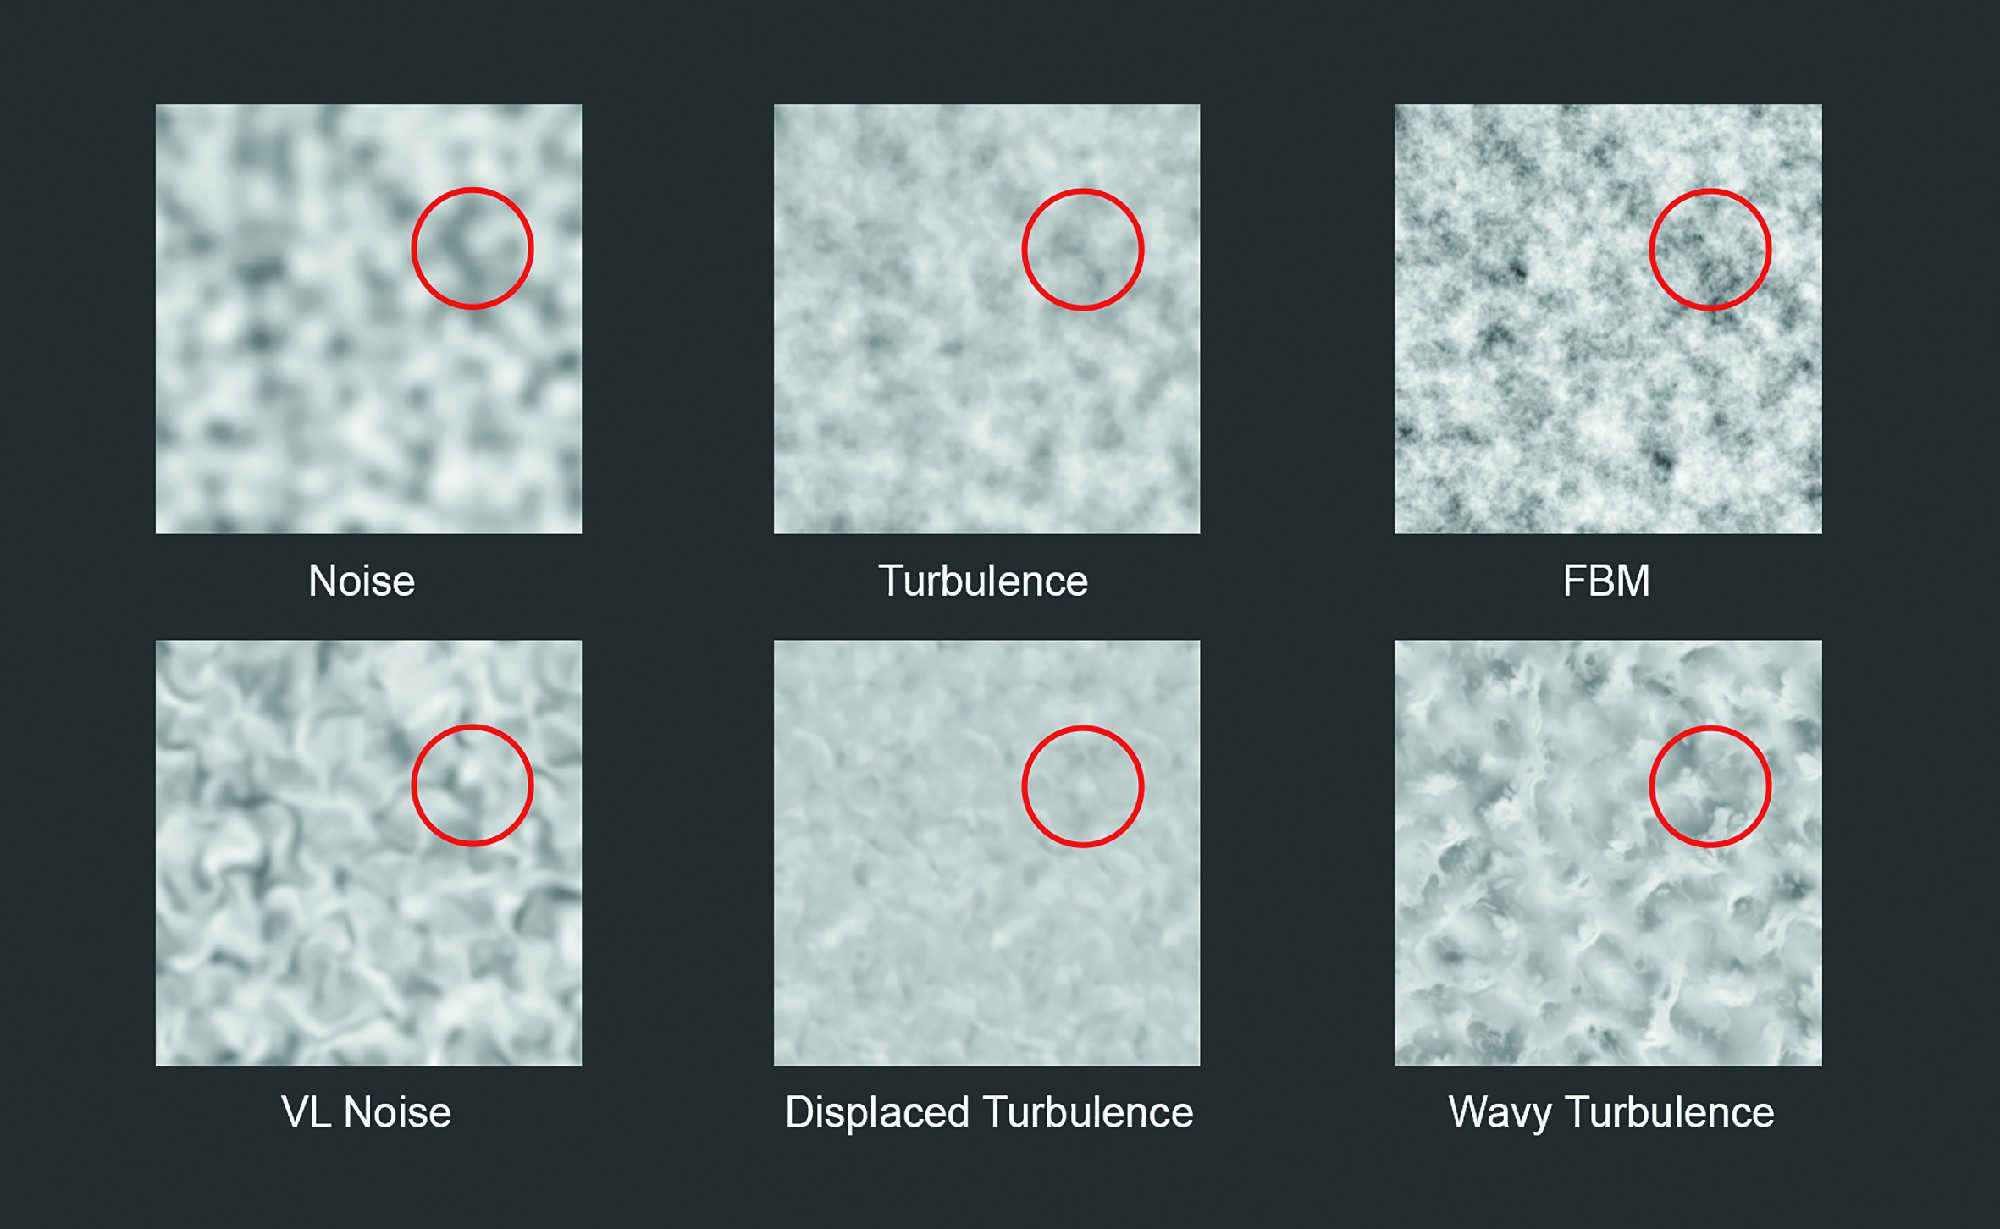
At first glance, the noise shaders appear to be a loose collection of characters, but they are obviously close relatives: Turbulence with only one octave looks confusingly similar to Noise (test it out!), FBM seems to be a higher-contrast sibling of Turbulence, and the smeared versions such as Wavy Turbulence, VL Noise etc. already bear the kinship in their names (Figure 13). All these similarities have a reason: All noises in Cinema 4D are the offspring of a parent pair: Perlin and Voronoi.
For the selection and characterisation of noises, Cinema 4D’s help offers comprehensive and large-format overview images. An additional description of the shaders can be found in the somewhat older Noise Reference from cg.tutsplus.com.
Use of noise shaders
Regardless of whether you use noises as channel shaders or as nodes – noises follow a basic function and have almost all parameters in common: The type of noise is selected via the Noise drop-down menu. The Octaves parameter specifies the number of calculation passes and thus adds detail as the number increases.
This is followed by parameters for size, animation speed and gradation (clipping, brightness etc.).
Noise is applied in various reference systems. These can be selected via the Room drop-down menu. Four of these reference systems are of practical importance for everyday use:
- UV (2D) projects the noise onto the UV coordinates of the texture. Deformations of the object are taken into account.
- Texture uses the mapping specified in the texture tag
specified in the texture tag. Deformations
of the object are ignored. - Object applies the noise three-dimensionally to the axis system of the object. Rotations, movements and scaling of the object are taken into account.
- World applies the noise three-dimensionally to the axis system of the world so that the noise remains in place while rotations, movements and scaling of the object are ignored.
In terms of our topic, the creation of volumetric effects, Room: Object is our reference system of choice, as in this case the noise permeates the volume of the object in three dimensions – or the volume of a visible volumetric light source. (You just thought “Aha!”, didn’t you?)
Layer and colour gradient shaders
To create more complex volumetric structures, it is important to have the ability to combine, overlay and mask different shaders within the same material channel. For this purpose, Cinema 4D contains the layer shader.
In order to be able to combine shaders in Cinema 4D in a modular and flexible way, the layer shader is the linchpin. The layer shader acts as a kind of container in which layers (shaders or bitmaps) can be mixed in a Photoshop®-like style, masked with others or used in different layer modes. The layer modes include common methods such as normal, multiply and copy into each other etc., but also a layer mode mask. In this mode, the layer above is masked with the grey levels of the layer below.
In the layer shader, bitmaps can be loaded by clicking on the Image button, shaders are created by clicking on the Shader button. Bitmaps and shaders can also be copied (Shader / Copy image) and pasted (Shader / Paste image) by right-clicking on a layer.
For better organisation, folders can be created by clicking on the corresponding button. To paste into a folder, drag a layer onto a folder until the mouse pointer changes to a small vertical arrow. You can also use the Effect button to create manipulations such as colour tone, saturation, contrast, distorter etc. on the layer below the effect.
Tip: If you load a shader or bitmap into a material channel such as transparency and then create a layer shader in the same place (by clicking on the small triangle to the right of “Texture”), the shader or bitmap is automatically moved into the layer shader as a layer.
Masking is an important topic within a layer shader, as you may want to restrict certain aspects of your shader setup to specific areas of your light volume. Gradient shaders are ideal for this.
Note on the corresponding node counterpart: The equivalent of the layer shader in the node material system is the layer node. In the layer node, it is also possible to mix layers with different opacities and layer modes. Each layer offers an open port for feeding in a suitable shader or image node. There are no folders or layer effects as in the layer shader. There is also no explicit layer mode for masking – instead, a layer is masked by connecting a suitable node to the opacity port of a layer. This is created in the layer node by right-clicking on the corresponding layer.
Colour gradient shader
The colour gradient shader creates 2D colour gradients on surfaces or 3D colour gradients through objects (or volumes of light). A 2D colour gradient can run linearly along the U or V texture axis or in certain shapes such as a circle, box or star. They can be rotated by specifying the angle, broken up by turbulence and frequency with animated irregularities and applied independently of texture tiles by deactivating Cyclic.
3D colour gradients, on the other hand, penetrate the volume of the object or the volumetric light source. The start and end values of 3D colour gradients refer to the reference system selected in the Space drop-down menu, e.g. the axis system of the object or the world. A pair of start and end values of -100 cm and 100 cm along the X-axis (the left of the three value pairs for start and end) means that a linear 3D colour gradient in Room: Object starts at -100 cm on the X-axis of the object and ends at 100 cm on the X-axis of the object. Start and end values on several axes can be used to angle a linear or cylindrical 3D colour gradient.
Note on the corresponding node counterpart: The equivalent of the colour gradient shader in the node material system is the node colour gradient or basic colour gradient. The only difference between the two variants is the richness and depth of detail of the available parameters.
In Release 20 of Cinema 4D, colour gradients come with some long-awaited features for interactive editing:
- Right-clicking on the colour gradient now offers the Size option to change the size of the display.
- You can now use the familiar hotkeys 1 and 2 to pan and zoom through the colour gradient, as you are familiar with from the Cinema 4D viewport. To reset the changed view, simply press H or click on the small black brackets to the left and right of the colour gradient.
- Click in the gradient, drag a frame with the mouse and select several nodes at the same time.
- As soon as several nodes are selected, you can move several nodes or several bias points together, change the common interpolation and execute various commands by right-clicking, e.g. invert nodes, etc.
Masking volume noises
And now let’s bring it all together: 3D colour gradients are ideal tools for masking 3D noises in a layer shader. Let’s look at a simple example: In Figure 15, the three-dimensional Sema-Noise is finished exactly cut off by the edges of the parallel spot (radius 100 cm).

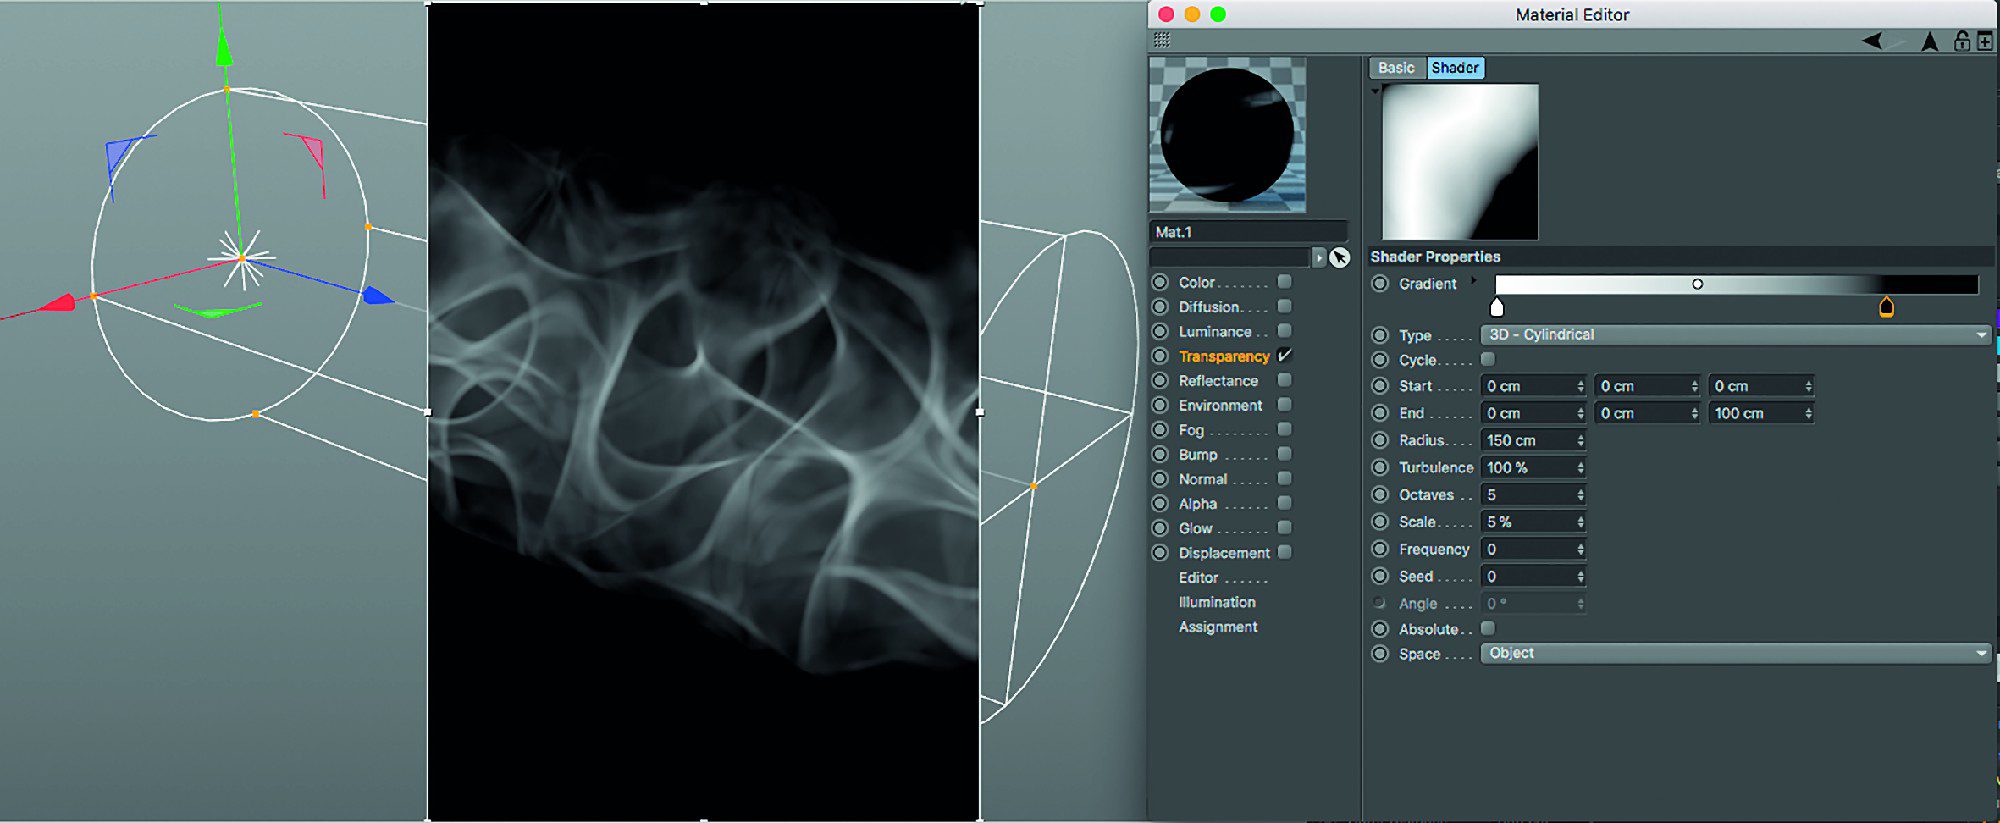
In image 16, a colour gradient in 3D Cylindrical mode is used as a layer mask. The gradient is created using start and end values along the Z axis of the light source. This gives us the direction of the cylindrical 3D gradient. The radius is defined as a generous 150 cm and a large-area turbulence is applied (please note that a large turbulence structure requires smaller values and vice versa). The cylindrical 3D curve used in this way breaks up the edges of the 3D noise with a natural-looking irregularity.
Case study: A question of time (stellar nebula)
This project for the TV documentary series ZDF “Terra X” stages the process of stellar nuclear fusion, the molecular structure of salt and the principle of uranium-lead dating of fossils. For the sequence about hydrogen and helium atoms in stellar nebulae, I used exactly the principle described above: a (!) volumetric light source as an aquarium for mixed and mutually masking 3D shaders. The result can be seen in the title image.
If we take a look at this stellar nebula from an oblique angle, the whole dizziness becomes apparent (Fig. 17): The camera moves linearly through a visible volumetric light of a parallel spot – nothing else. A hard turbulence noise roughly characterises the large-scale structure of the light in the Noise tab.
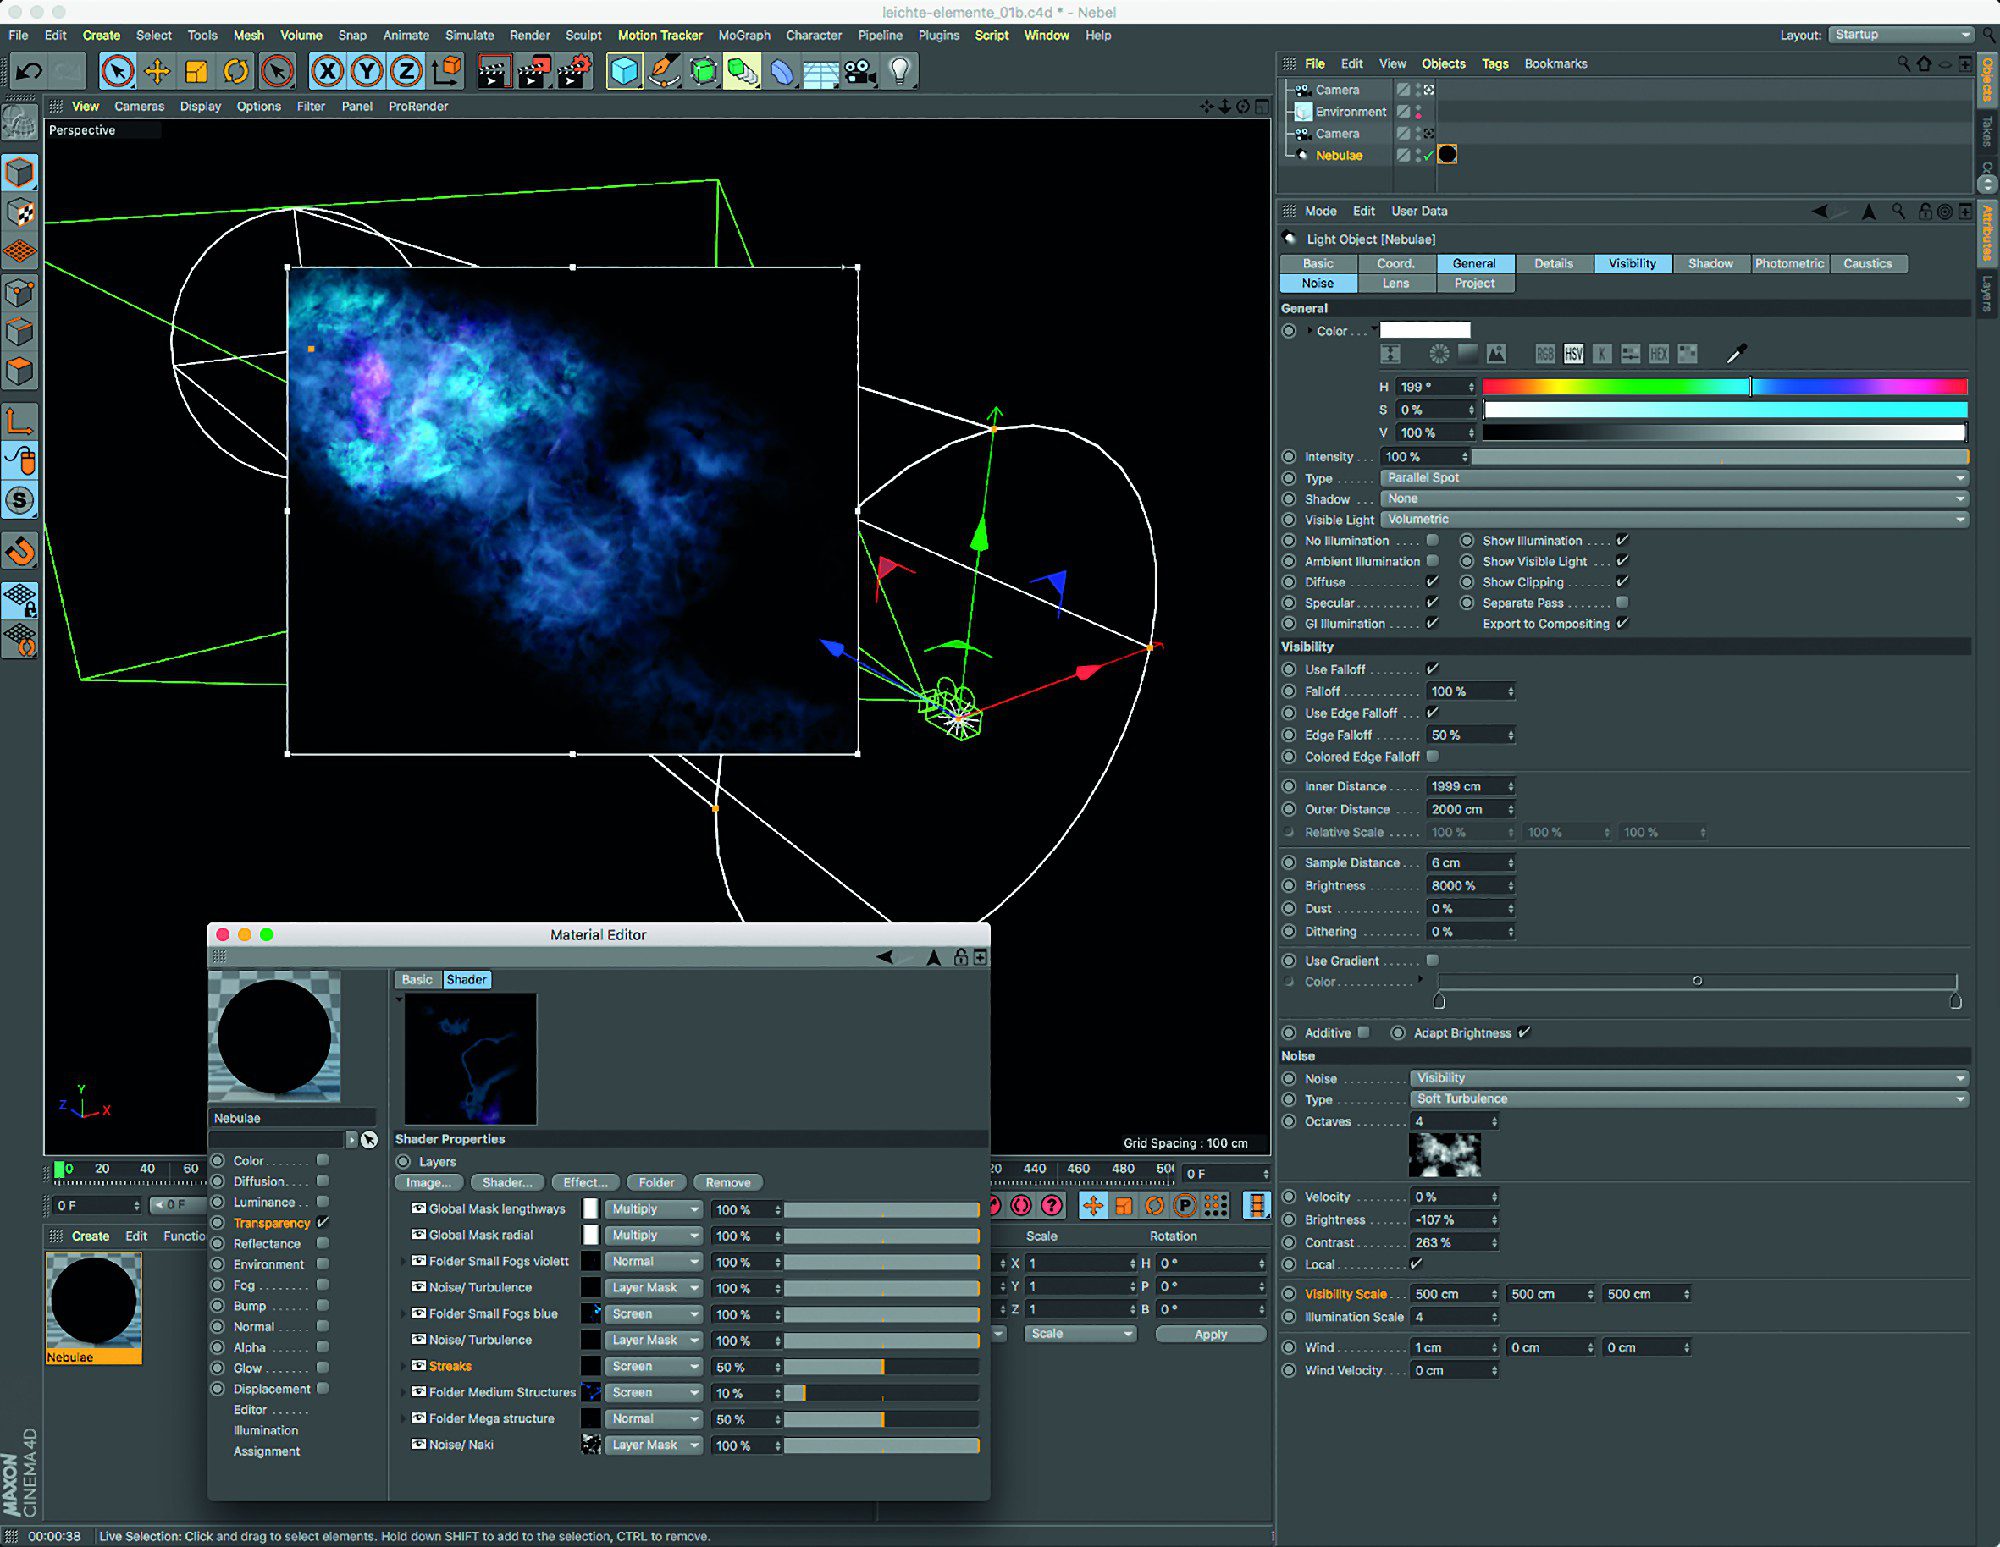
In the Visibility tab, the brightness of the visible light is set to a huge 8000 % in order to also display darker noise details. A material called “fog” is applied to the light source, which contains only one active transparency channel with an integrated layer shader.
Within the layer shader, 3D noises and 3D gradients are organised in folders that relate to the logical structure of the stellar nebula: Mega structures, medium structures, small structures (“Nebula Blue” etc…) folders are in turn treated like normal layers and masked by noises or colour gradients.
When folders are expanded, their contents are revealed: noises of different types are coloured by a colourizer layer effect and restricted / masked to certain areas of the light source by 3D colour gradients. For a better overview, all layers are named accordingly.
In addition, the scene contains an environment object (Main menu / Create / Environment), which creates a simple but efficient black fog along the camera’s Z-axis by ticking the Activate fog checkbox. This fades out superfluous optical details in the distance that would otherwise only distract the eye.
Conclusion
With this article, we have learnt about two approaches to using visible or visible volumetric lights to create clouds or complex fog-like structures. In the upcoming second article in this mini-series, we will explore how to create an animated solar corona and even shadow-casting fluffy clouds.


