As with most science fiction films, “Oblivion” also required a lot of VFX work. Pixomondo and Digital Domain were responsible for the film’s digital eye candy. VFX supervisors Thilo Ewers from Pixomondo and Paul Lambert from Digital Domain explain how to create a huge ice canyon, 3D Tom Cruise models and a space station, among other things.
The plot of the film, in which Tom Cruise plays the superhuman in a post-apocalyptic world, can – in keeping with the film’s title – be forgotten. Visually, however, “Oblivion” is an extremely impressive film. Another positive aspect: the film has been released exclusively in 2D, which is unusual and courageous for an action blockbuster at the moment. The Blu-ray and DVD release is on 15 August – and you can win two BDs and two film posters in the reader survey in this issue of DP.
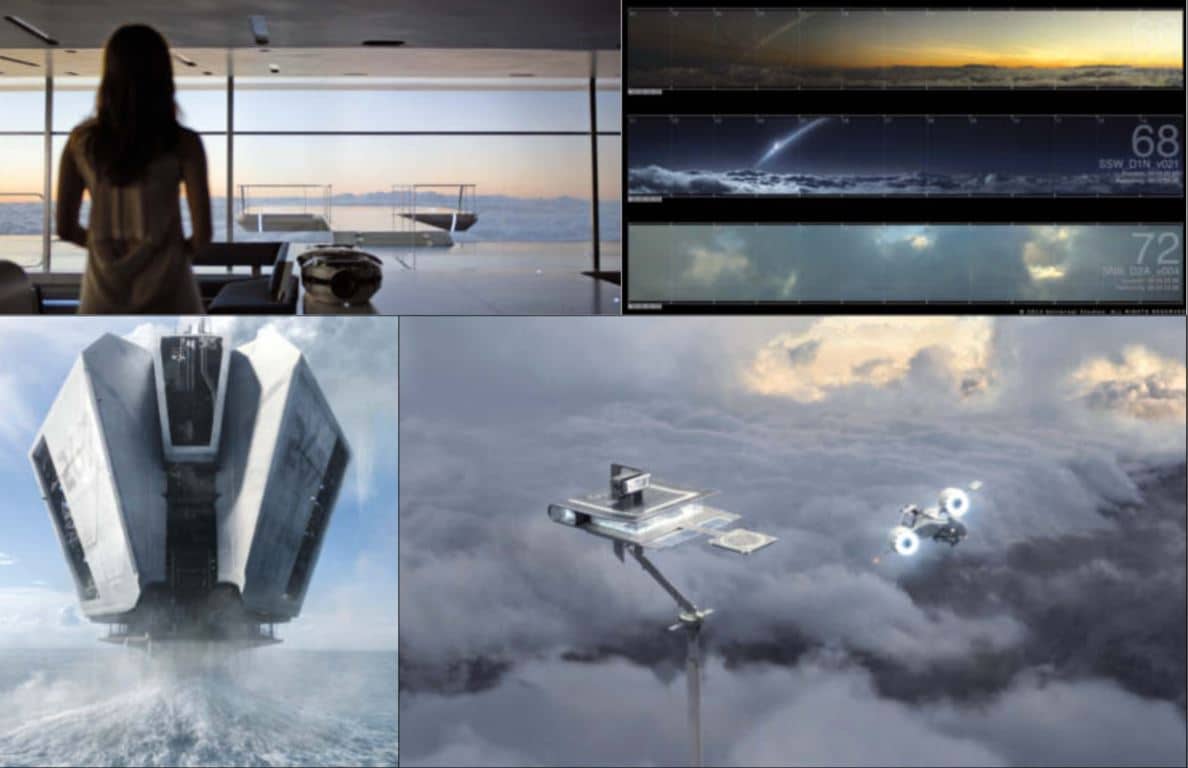
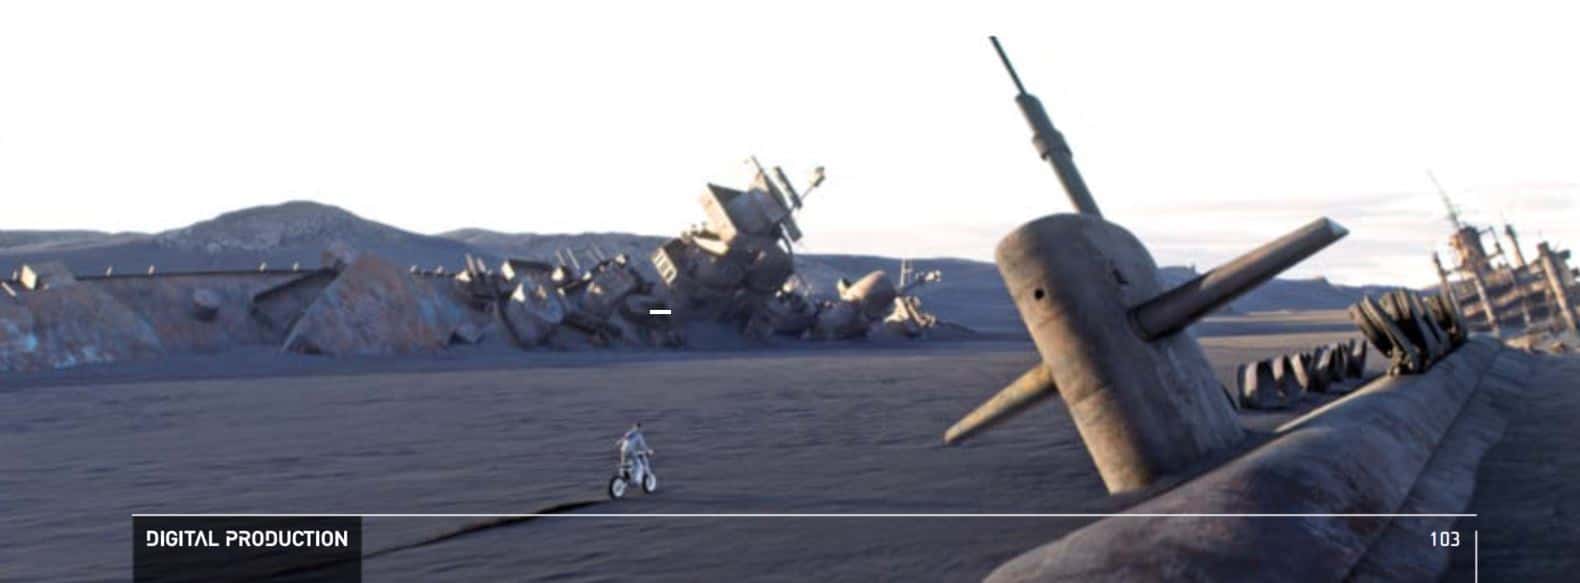
The VFX supervisors Eric Barba from Digital Domain and Bjørn Mayer from Pixomondo split the total of around 800 VFX shots between the two companies so that no scenes were edited together, only assets had to be exchanged. For example, Pixomondo created the 3D bubbleship and the ice canyon, while Digital Domain created the combat drones and the “TET” space station. The film was directed by Joseph Kosinski, who had already worked with Barba on “Tron: Legacy”. Among other things, the environments are crucial for the realistic look of the film. The film team shot many scenes not in green screen, but in the impressive landscape of Iceland. In addition, almost all of the film’s backdrops were recreated in real life, so that the digital elements in the film do not stand out excessively, but could be integrated almost seamlessly into the live action scenes. Over two-thirds of the film was shot at Celtic Studios in Baton Rouge, Louisiana, where the futuristic Skytower, the Bubbleship and the 2,800 square metre New York Library set were located. This set provided the VFX team with an ideal reference for the reconstruction of the 3D models using Lidar scans and HDRs. Tom Cruise was even allowed to take the motorbike that was constructed for “Oblivion” home with him after filming as a present for his 50th birthday. The Skytower was an important location, as around half of the film takes place there. Kosinski decided against using green screens in front of the windows in order to create a realistic atmosphere in this building of the future, designed with lots of glass and steel and located in the middle of the clouds. Instead, he used front projection technology with 13 metre high and 152 metre long screens and 21 projectors. The hi-res footage for the projection consisted of dramatic sky shots with variations in the time of day and weather. Bjørn Mayer and his team filmed these for almost a week on the Haleakala volcano in Hawaii using a rig with three Red Epics strapped to it. The real-life lighting setting was not only extremely helpful for the VFX team during the shoot in post, it also created a realistic atmosphere for the film team and the actors.
DP: Hello Thilo, how big was the Pixomondo team for “Oblivion” and which scenes did you work on in Stuttgart?
Thilo Ewers: A total of 231 people worked on 456 VFX shots, mainly in Los Angeles, Stuttgart and Beijing. In Stuttgart we had 144 shots and, as we are a well-rehearsed team here, Bjørn entrusted us with the most demanding scenes, such as the ice canyon with 100 shots and the drone attack in front of Raven Rock. We also did the hydrorigs, huge futuristic oil rigs that pump out water, and complex cockpit scenes.
DP: How were the assets swapped with DD?
Thilo Ewers: DD uses Maya, we use 3ds Max, so both companies have their own special pipeline. So that the other studio knows what to do with the respective asset, a kind of rule book was drawn up beforehand to define how data is to be saved and named. We also sent the rig files, as we each rigged the models ourselves. Which is quick to do once the creative work is done.
DP: Which database do you use?
Thilo Ewers: We use Shotgun because it works very well globally. We have programmed our own extensions to the software for the project, otherwise you would quickly lose track of the many individual parts.
DP: How did the real Bubbleship help you to recreate the 3D model?
Thilo Ewers: We had a high-resolution lidar scan of the ship itself and the cockpit as well as the designer’s CAD model, which was extremely helpful. Thanks to the CAD model, we discovered that there were other things planned that could not be realised in the replica of the bubbleship. There was also a separate mock-up shoot with the bubbleship, in which the actors were moved according to the flight movements.
DP: What tools did you use for the 3D bubbleship?
Thilo Ewers: We modelled and rigged with 3ds Max and textured with Mari. In Stuttgart, we set up our Mari pipeline especially for the project and expanded the tool for our purposes. We’ve been using Mari for two years now and everyone has learnt to love it.
DP: How was the lighting for the 3D bubbleship realised?
Thilo Ewers: There were two shot categories: Firstly, the flying ship in backplates from the Iceland shoot. We used HDRs from the respective shoots for the lighting. On the other hand, there were land scenes where we had to blend the 3D model into the real ship, which was a little more complicated in some cases. We also used HDRs for this. As we had recreated the ship precisely thanks to the lidar scans from the set, it usually matched the real ship well. We edited four of these landing shots.
DP: The brief was: “The landing platform shouldn’t have a Transformers look.” What means did you use to realise this?
Thilo Ewers: The production designer made a significant contribution to this. It was important to the director that the platform had a futuristic, straightforward and cool design that still had to look realistic. He was an architect himself and has a great penchant for functional design. In “Transformers”, the design is detailed and therefore appears rather overloaded at times.
DP: What was it like for you to work with the Skytower filming material using the front projection technique?
Thilo Ewers: Super. It worked so well that none of us could have imagined it beforehand. Almost everything you see in the final film was exactly the same during the shoot. That was a huge time and money saver. Creating the different sky clips beforehand was much more effective than having to matchmove everything and add the reflectors afterwards.
DP: Let’s move on to your biggest challenge in the film, the ice canyon. How did you go about it?
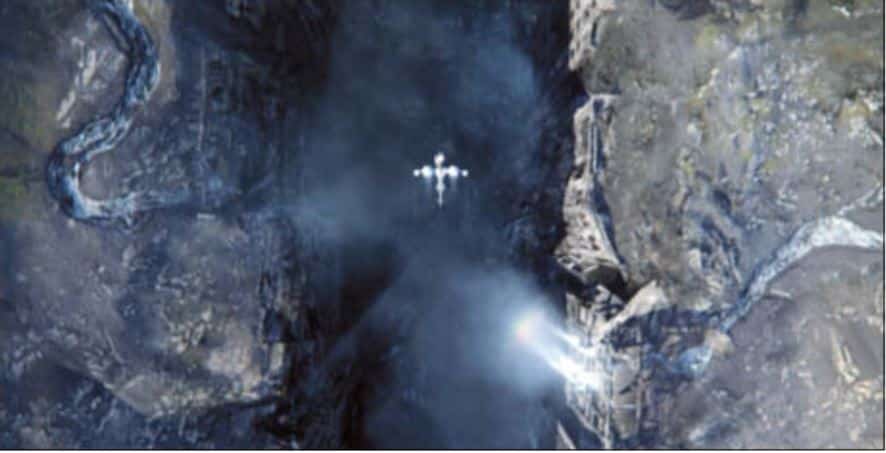
Thilo Ewers: Yes, that was something … At the beginning of the process, the question was: Will the canyon be made of ice or stone? And at first we just asked ourselves: What would be worse for us? Towards the end of the shoot, in July, the director decided in favour of the ice version. Bjørn took pictures of glacier formations that the director found interesting. After filming was completed, the Previz studio Third Floor created a post-viz based on our concepts to determine the speed of the animation and the camera work. But apart from this intermediate phase of development, the film was created entirely by Pixomondo. And despite the post-viz, we still had to design things like the floor completely ourselves when modelling.
DP: How did you go about the modelling?
Thilo Ewers: First of all, we thought about whether we should create the canyon in one big piece that we drive through or whether we should build it from individual parts. To do this, we created a kind of map for all the scenes, on which we saw who was flying where and how at what time – and realised that we were passing the same places several times. That’s why we opted for the modular solution and created around 150 individual parts for twelve categories, such as “overhangs” or “arches”, with different texture variations. The individual parts were around 30 to 60 metres high and 20 to 30 metres wide, fully modelled and textured and therefore extremely large with around eight million polygons per piece.
DP: That sounds like a lot of hard work ..
Thilo Ewers: Of course, it wasn’t possible to create 150 ice cream pieces individually. We would have gone mad and it would have cost far too much. So we initially populated the categories with relatively simple basic shapes that we built using the Postviz. In the first step, the artists created and animated the shots with these low-res objects, which were also the basis for the texturing.
DP: How did you then use procedural animation?
Thilo Ewers: Parallel to these processes, we created the procedurals with the low-res ice pieces in Houdini. When the animation artists were finished, we replaced the low-res pieces with the more detailed and textured hi-res pieces. Once everything was programmed in Houdini, we were able to turn a low-res part into a hi-res part within ten minutes and change the properties via self-programmed containers in Houdini. We didn’t solve everything using procedural processes, but also placed stones by hand so that we had an influence on the animation. We wanted the canyon to look modelled and not like a procedural. When the canyon was assembled with the floor in high quality, we ended up with up to 300 million polygons.
DP: How did you deal with this immense number of polygons?
Thilo Ewers: With V-Ray Proxy. We never saw the canyon in 3ds Max. And on the hardware side with normal 8-core and 12-core workstations.
DP: What physical laws were used for the procedural animation?
Thilo Ewers: We racked our brains over this for a long time and at some point realised what else makes ice besides shading. It can have pretty much any appearance, but it often has this flow and a layered quality. With Houdini, we were able to change the direction of the flow and the entire piece of ice was adjusted in all its procedural parameters. Funnily enough, we put hair on the surface to visualise the flow. We brushed it so that we could see how the ice would flow.
DP: How long have you been using Houdini?
Thilo Ewers: Since “Hugo Cabret”, so about two years. But here in Stuttgart we used it really intensively for the first time for “Oblivion”. We first had to integrate Houdini into our pipeline and build sync tools to keep Houdini and 3ds Max on the same level. Before Houdini, we used 3ds Max for procedural processes. But large quantities are simply more convenient and faster to handle in Houdini.
DP: How long was the ice canyon scene and how many shots did it have?
Thilo Ewers: The scene in the film was about 3.5 minutes long and had 89 shots.
DP: What new projects does Pixomondo have?
Thilo Ewers: We are currently working on the children’s film “Pettersson and Findus”, the cinema adaptation of the bestseller “The Medicus” by Noah Gordon and the children’s book adaptation “Doctor Proctor’s Fart Powder” by the successful Norwegian crime writer Jo Nesbø. Other commissions include the Fox TV show “Sleepy Hollow” and 3D motion ride films for the Chinese theme park Wanda.
DP: Hi Paul, what were VFX supervisor Eric Barba’s tasks on the project and yours as second supervisor?
Paul Lambert: Eric Barba has worked with Joe Kosinski for many years and was on set. My role was to supervise all the DD departments, including problem solving, so that everything could be delivered on time. I was also on set once for a camera test. I did colour checks and made sure that the look of all the cameras used was consistent.
DP: Which cameras were used for “Oblivion”?
Paul Lambert: “Oblivion” was shot with the Sony F65, which was brand new at the time. “After Earth” and “Oblivion” were the first projects ever to use the F65 camera. The production team used the Red Epic and the on-set team worked with the Canon 5D Mark III, 5D Mark II and 1ds Mark III cameras for the references.
DP: How big was the DD team for the film and how many shots did you have?
Paul Lambert: The DD team was 100 people in total and it was all done in Venice. We worked on 370 shots for “Oblivion”.
DP: With the different tools that DD and Pixomondo use, were there any problems with exchanging models?
Paul Lambert: Both companies use V-Ray for rendering. However, as Pixomondo works with 3ds Max and we work with Maya, we were able to share models, but not the exact shaders. That’s why we had a copy of 3ds Max at DD, which we used to view the Pixomondo models and then recreated them in Maya. Once you understand the look, it’s not difficult to recreate. What also helped a lot were the masses of references from the set that were available to both companies.
DP: What tools did you use to realistically integrate the digital elements of the film into the live action scenes?
Paul Lambert: This was possible thanks to the good reference base with the real models in the respective lighting situations. This allows us to concentrate more on the details and achieve a believable look. With a poor asset, more time is spent on pure integration.
DP: Were there any elements in “Oblivion” that DD created with procedural processes in Houdini?
Paul Lambert: Yes, we created all the classic Houdini scenes such as storms, explosions and smoke using our in-house tools such as the Storm Renderer and Houdini. These tools really help to fine-tune the effects.
DP: How long has DD been using Houdini?
Paul Lambert: Longer than I’ve been working at DD and I’ve been here ten years.
DP: Did DD write extra scripts for the project?
Paul Lambert: We have written some scripts, for example for dealing with Deep Shadows and other little things. But there are fewer and fewer projects that we have to script, because our pipeline now has a good basis so that we can work efficiently.
DP: Is it easy to find Houdini artists?
Paul Lambert: At the moment, yes – but it is becoming increasingly difficult. We currently have a good core group of eight Houdini artists at DD.
DP: For which shots did DD recreate Tom Cruise in 3D?
Paul Lambert: We recreated Tom Cruise for the scene where he fights his clone. For these scenes, he fought with a stunt double in both positions in front of a green screen, and we then rotoscoped the double out afterwards. However, there were some scenes where we had to completely replace Tom Cruise’s face. For such cases, we use a technique that we originally developed for the film “The Curious Case of Benjamin Button”. It was then used in films such as “Tron: Legacy” and “The Girl with the Dragon Tattoo”.
DP: What does this technique consist of?
Paul Lambert: We designed shapes in Maya with different facial expressions that we put on characters. But the core of this work is capture data. We take each actor to the Institute for Creative Technology in Los Angeles, which is run by Paul Debevec. He’s very well known in the industry for image-based lighting. There we place the actors in a dome with a special lighting setup. The actor’s face is captured very quickly with every light on it. The sampled light values provide a geometry of the light structure that can be imported into the CGI scenes. With this data from the light stage, we can make the CG version of the actor’s face look like the real thing.
We took hundreds of HDR photos of Tom Cruise in the dome, so we had a perfect reference for every conceivable lighting condition. The Oblivion scenes with Tom Cruise were a little easier than past film work because he doesn’t speak in the scenes.
DP: Was Tom Cruise also completely scanned for the scenes?
Paul Lambert: Yes, a full body scan was made of him in the suit. We also shot props such as his suit and helmet individually with different lights.
DP: What was the most complicated scene for you on the project?
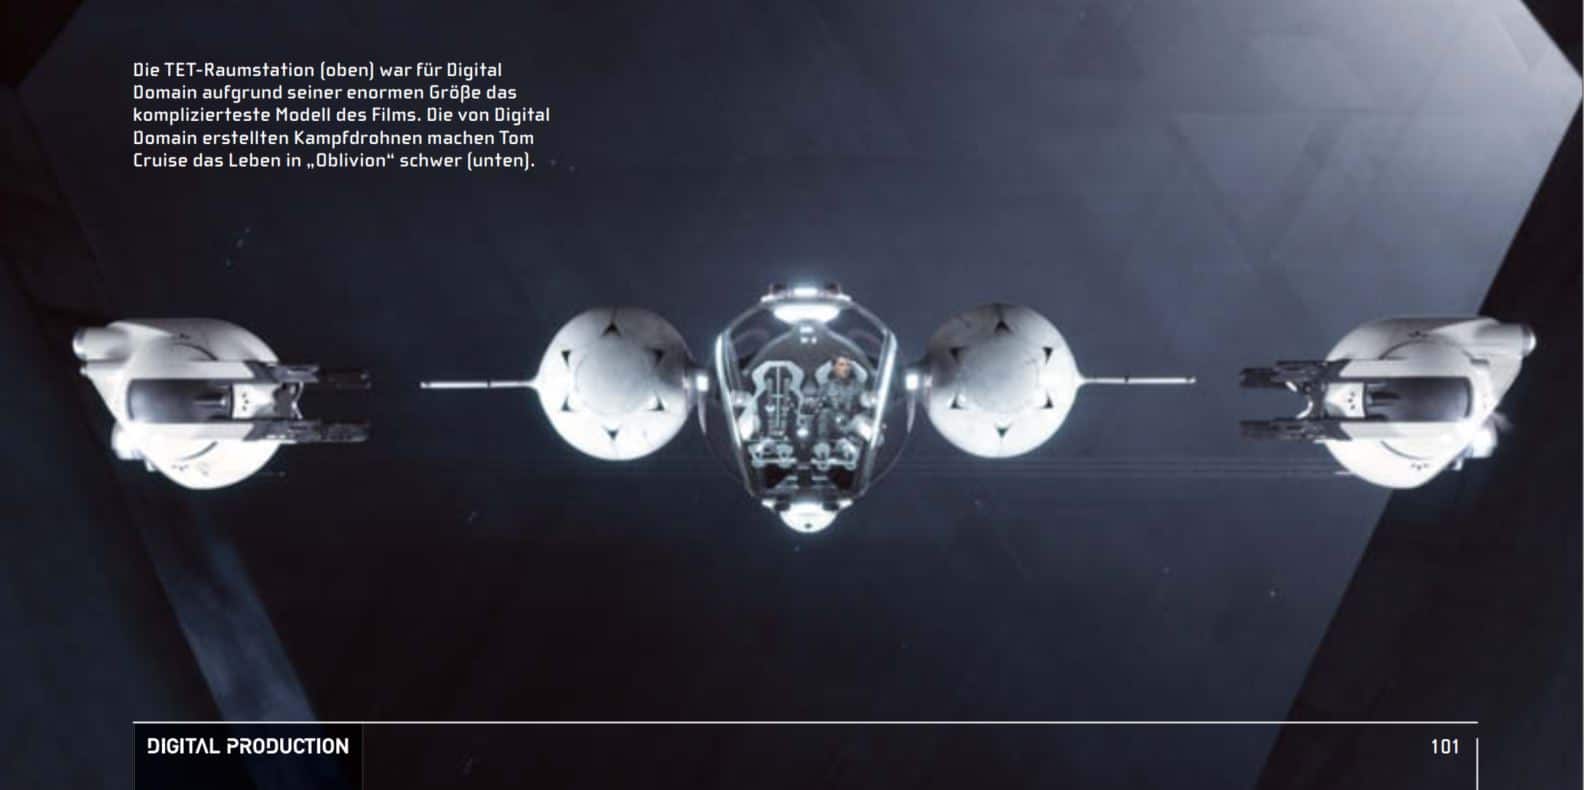
Paul Lambert: That was the final scene with the TET space station. As soon as we saw the concept, we realised that it was going to be very complicated. The space station was around 100 kilometres long and extremely detailed. And modelling and texturing an asset on this scale was very complicated, but we still managed to pull it off.
DP: How did you become a supervisor?
Paul Lambert: I’ve been with DD for ten years, before that I worked as a CG artist in the UK for eight years. I’m currently still working in California, but the tax incentives in Canada have really hurt the Californian VFX industry. And at the moment, companies are looking at the tax incentives and going there. I think that’s why I’ll be moving to Vancouver sooner or later.
DP: What school did you go to?
Paul Lambert: When I started in the VFX industry 18 years ago, there were no schools for this field. It happened more by accident. Initially I studied engineering at college, but it wasn’t right for me. Then I went to art school and graduated. In the meantime, I worked as a courier in London for a while and one of our clients was in the film business. I talked to the film team a lot and was able to work there a bit. I thought to myself that this job is both technical and artistic. It suits me perfectly. I wouldn’t want to do anything else.


