Table of Contents Show
Hello DaVinci Resolve
Now I had six months to leave the Adobe ecosystem and transition away from Premiere, Audition, Encoder, Photoshop and Lightroom. Those tools are embedded into my workflow like no other. Every single video and image was created in these packages but now it was suddenly over. What happened?
Adobe Premiere
A quick background to who I am and how I use those applications: My name is Alexander Richter, I’m a Technical Director and Coach for Visual Effects, Animation and Games who worked at Weta FX on Avatar: The Way of Water. I’m also a YouTuber who creates educational masterclasses, especially for Python scripting. Over the years, Premiere has become my go-to editing software. I’ve used it to edit two-hour podcasts, ten-minute YouTube videos, hour-long coding masterclasses, trailers, short films, and social media clips.
I’ve a mobile setup with a laptop paired with an additional screen, nothing resembling a dedicated suite. For me, the on-the-go experience is crucial. The machine itself is not an overpowered workstation, but a professional-grade mobile device, powerful enough to handle real projects, yet light enough to keep my setup flexible and portable.
For this test I used DaVinci Resolve 20 (free and studio) and compared it to Adobe Premiere Pro 2025 using a Dell XPS 15 9510 Laptop (11th Gen Intel Core i7-11800H @ 2.30GHz with 32 GB RAM pushing a Nvidia GeForce RTX 3050 Ti Laptop GPU) in a Windows 11 Home System, showing on a 3.5K OLED display and an additional Full HD ProArt monitor. My clips are usually HD to 4K, Desktop recordings and the output of a Sony A6600. Just so you have a reference when talking about performance and things.
My use case is very common for any type of content creator nowadays. However, Premiere has always felt heavy and clunky, and that feeling has intensified over the years. A quick edit was impossible due to its cumbersome structure and long loading times. Still, Premiere mostly provided a reasonable editing experience until everything started to crumble.
“Death by a thousand cuts.”
I first realized something was wrong a year ago when the audio waveforms didn’t align with the actual audio. Since audio plays a crucial role in editing (D’uh!), I had to start guessing where to cut. The correct waveform appeared when I zoomed out but it was far from optimal. “That’s new!” I thought to myself and deleted the cached files, which fixed the problem temporarily, but the error came back.
It was then that I noticed a few things in quick succession:
- an unchanged clunky interface
- missing simple audio and video features (Who needs sharp videos?!)
- lack of actually functional AI tool integration
- and more and more bugs.
Adobe updates introduced half-baked features that are prominently displayed on the splash screen while neglecting functionalities. With each year and missing update, Premiere slowly became a dinosaur until it was overtaken by a free software.
Why DaVinci Resolve
DaVinci Resolve by Blackmagic Design is an editing software that began as a color grading program and is still used for that purpose in many professional productions. It now occupies a similar niche as Premiere, and with its latest releases, it has significantly caught up to the editing giant while offering incredible value.
You might be wondering: Why DaVinci Resolve and not one of its famous competitors like Avid and Final Cut Pro? Adobe Premiere is editing software for personal and professional videos which doesn’t require a degree to use or master. Whenever I expressed my dissatisfaction with Premiere, the most common response was: “Why don’t you try Resolve?!” so I did, but it took multiple attempts before it finally stuck. DaVinci Resolve covers a similar audience as Premiere and is also used in major film and series productions, such as Netflix’s Stranger Things, though less frequently than Avid or Premiere.
Honorable mentions are: Avid Media Composer, which is probably the most famous and used for professional filmmaking while leaving others behind including amateur editors. If you ever use Avid you know how well it performs but it is also unintuitive for a beginner. Then there is Final Cut Pro – a staple in Mac editing which dropped the ball in the last years, especially for professionals. Additionally it’s focused on the Apple ecosystem, and as a Windows user this won’t work for me. Finally there are Autodesk Flame (No chance) and Assimilate Scratch, which are not primarily editing systems.
First impression
First I downloaded DaVinci Resolve from the Blackmagic Design website, installed it, and it was ready to use – no registration or payment required. The process was very straightforward and seamless. After being greeted by the project manager, I created my first project and was ready to start editing after a few minutes.
Here are my first impressions of working with DaVinci compared to Premiere:
- Fast save
- Smooth performance and editing
- Editing is slightly different but mostly intuitive. It feels more natural and fluid, and the workspaces are overwhelming but clear
- The UI is more modern but also crowded and unchangeable
- My first bug was losing shortcuts on fullscreen preview
- Occasional warnings and hiccups if studio features are used (needs restart)
- First crash in a simple scene but it was restored without data loss
- One of the exported videos had artifacts
Small Projects: DaVinci feels easier and more accessible for simple edits. Premiere Rush was created alongside Premiere for simple edits, but it feels rather like a temporary fix than a real solution. Despite combining the equivalent of at least five Adobe software packages, DaVinci feels lighter and opening a fairly simple scene with 4K clips illustrates that point:
- DaVinci Resolve: 21 seconds
- Premiere: 38 seconds
First bug: I encountered my first but with DaVinci Resolve by losing the shortcuts I had just learned. For some reason, the editing shortcuts stopped working, though the others were still fine. After experiencing this issue multiple times, I figured out what was causing it. The bug only appeared when I used dual monitors and Cinema Viewer mode on the preview window. It looks like a bug, but it’s actually a feature – sort of.
The issue seems to be related to Cinema Viewer mode switching the shortcuts to navigate the video rather than the edit. To avoid this issue, use the “Workspaces/Video Clean Feed” feature with the Studio version. With the free version, however, you’re stuck with either a smaller preview or no shortcuts. Editing without shortcuts is torture, so a small preview it is until we upgrade to the Studio version – we’ll get to that a bit further on. Version 20.1 finally allows us to hide the media pool window which which expands our preview even further.
Transform Inspector: DaVinci offers much more precise number sliders with the mouse. In addition to the rough sliders, it’s easy to make precise adjustments by selecting the numbers and moving the mouse for a fine selection. This is especially important when working with colors.
Effects and Presets: I’ve seen the text presets in Premiere before, but I’ve never really used it. This is the first time I’ve started integrating them into my new and shiny Resolve workflow. DaVinci’s basic video transitions and effects are much better than Premiere’s. These effects provide a more consistent experience and deliver a professional result.
Though my first impression with DaVinci Resolve was positive, I constantly felt stuck looking for simple elements and had to Google A LOT. No matter which tool, there is always a learning curve, especially once you go into professional territory. Luckily, there are enough tutorials out there to guide you through the rough spots.
Workspaces
One feature that instantly sets DaVinci Resolve apart is its “Workspaces. These transform Resolve from a pure editing software into an all-in-one solution that covers all our video editing needs from start to finish.
Adobe uses workspaces more as layout presets to organise its panels, whereas a complete edit often requires a variety of software packages (Premiere, After Effects, Audition, …). A major drawback is, that these software packages are disjointed in terms of UI, functionality, and connections. Premiere offers a dynamic link feature that sends current edits to After Effects for motion graphics work. However, this feature can be clunky and can cause crashes and slowdowns. Additionally, there is always a delay or export involved when switching to different software. In contrast, all the DaVinci workspaces are fluid and can be accessed with close to no latency.

DaVinci offers seven workspace environments connected to the same edit. Media for ingest, Cut for the rough first collection, Edit for the real editing, Fusion for comp & motion graphic, Color for – you guessed it – color grading, Fairlight for audio and Deliver for the final rendering of the files.
Media
Media is our first workspace, where we prepare our project, import and organize clips into bins. We can also add attributes (sequence, shot, etc.), precut clips, synchronize audio and video, and pretransform clips (which is an awesome feature). Most of the time I skip the Media workspace since my edits often involve little media or they’re added over time. However, a more complex production will find this workspace useful when working with the cloud features or with a team.
Cut
Apparently, the Cut workspace is for pre-cutting and setting up edits. I literally had to watch a tutorial explaining the differences between Media and Cut to even see the usefulness of Cut. So far I found it redundant because most of those actions can be done in the Media or Edit workspace but maybe again it’s about project complexity and a space to prepare your advanced edit.
Edit
The core workspace for me is Edit. This is where the magic happens. Despite my experience with Premiere Pro, Camtasia, and Avid, I still needed some time to get used to the core editing process in DaVinci. One improvement I appreciated was how seamlessly the clips connected and moved within the timeline. Ripple cutting, moving the cutting point, and adjusting the clip’s content felt very natural. Premiere treats media like concrete blocks, DaVinci’s clips feel much more elastic and moldable – including the link between video and audio.
Fusion
For all graphics and motion design we’ve got the Fusion workspace. It’s a node-based compositing software similar to Foundry’s Nuke, which is also sometimes used in professional productions, so it’s not just an afterthought. I personally use Fusion for simple effects, such as round borders for my webcam video. One reason to use it more sparely is that the DaVinci Effects presets cover a lot of the important aspects, while Fusion adds custom effects directly into your edit. Fusion has a steeper learning curve than After Effects, and some of the workflows are different, but it has the capabilities to replace or extend After Effects.
Color
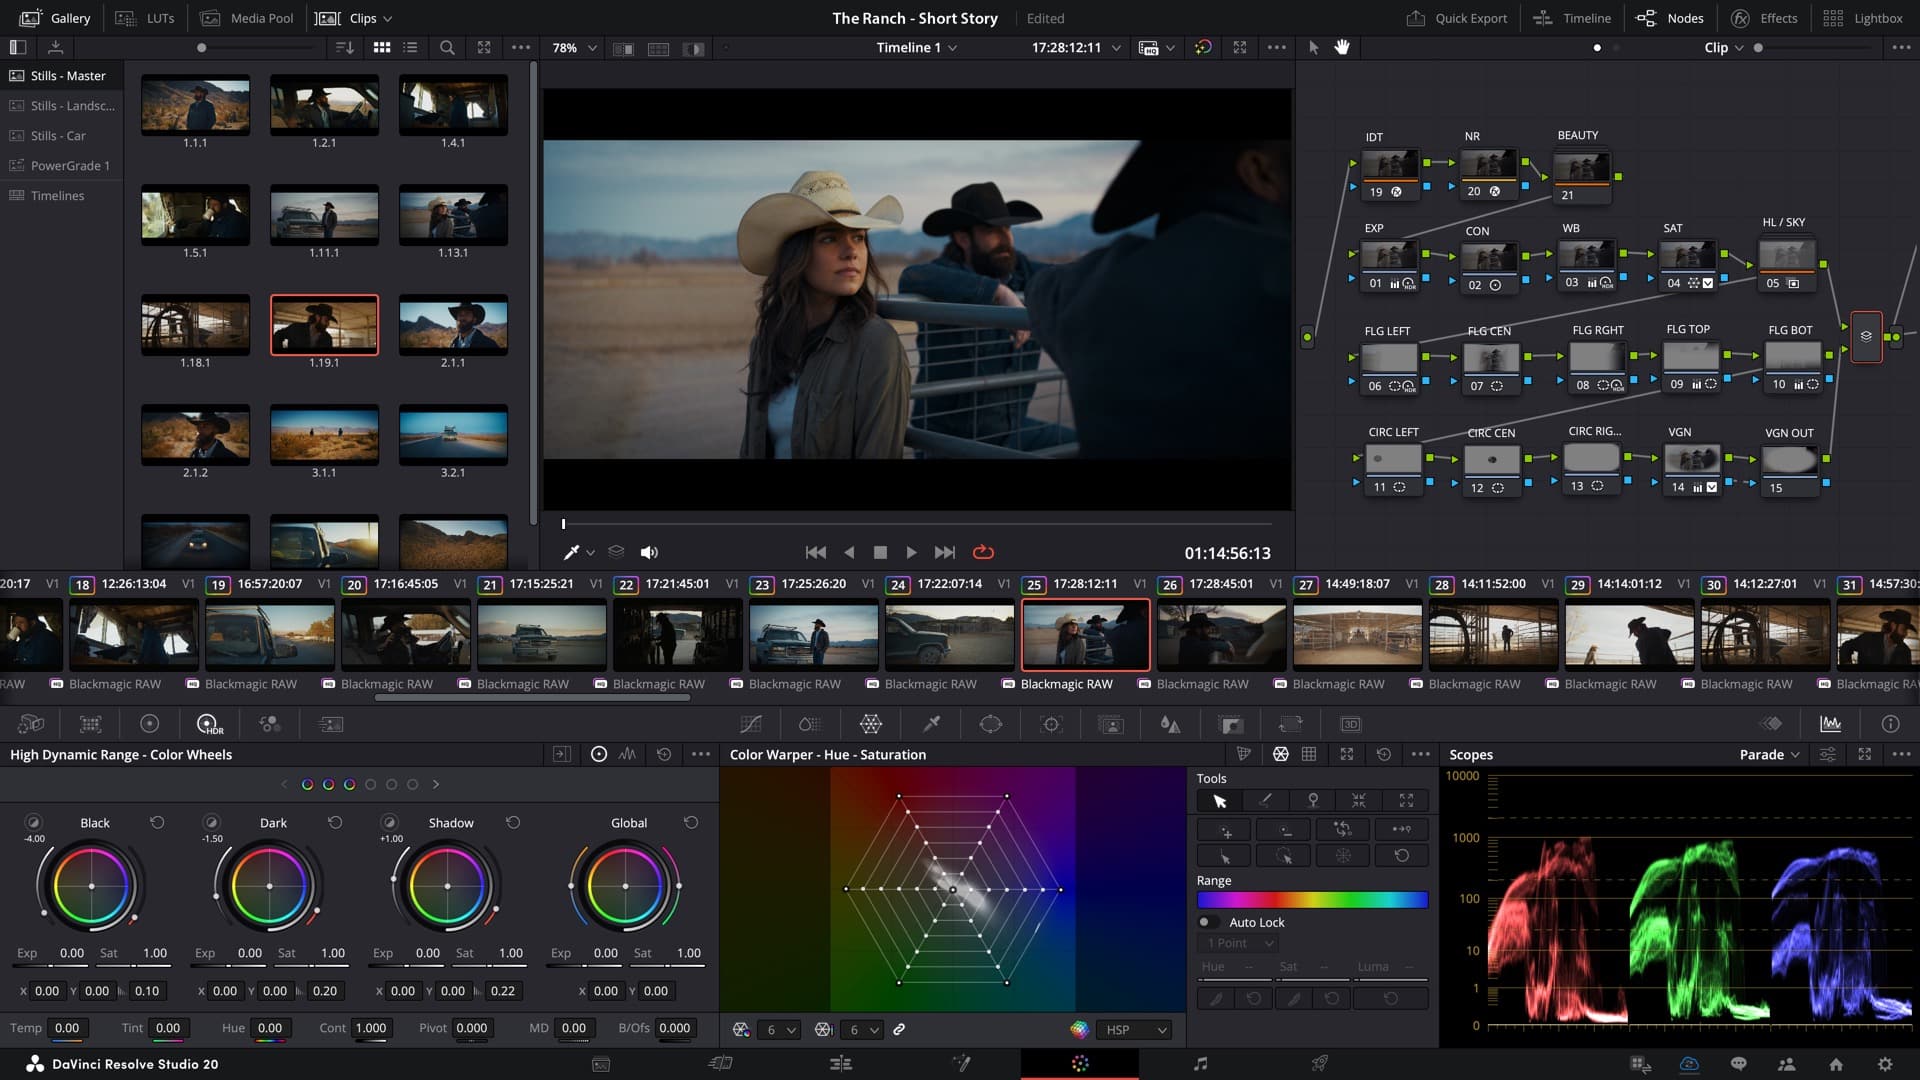
Next is the Color workspace. DaVinci is famous for its color grading tools and capabilities. This is where it all started before it became a designated editing software. A few years ago Resolve wasn’t a competitor to Premiere, but to Baselight, Nucoda, Lustre and the other Grading Suites. That’s one of the reasons I was drawn to the software: It offers a more sophisticated color grading solution for videos. It is still used by professionals as a dedicated color grading tool, even though the edit is done in Avid, Final Cut or Premiere – it’s that good.
Premiere’s Lumetri setup is decent, but not exceptional – considering that it was birthed by the excellent Speedgrade, many years ago. Its usability is far from the smooth, clear experience of photo editing software Lightroom which always struck me as odd since they’re from the same company. Unsatisfied with the quality of the colors, I tried the Photoshop LUT workflow, in which I exported a still frame from Premiere, color graded it in Photoshop (which has better tools), and exported a LUT or matched colors in Premiere. However, the results weren’t satisfying, so I abandoned this path quickly.
While working on our latest TD Meetup USDSkel episode with Paul Kanyuk from Pixar, I did the original grading for the intro in Premiere. Then, I started transitioning to DaVinci. I put it to the test and created a comparison. I graded the same intro in both applications. Obviously, Premiere has an advantage since it’s been my color grading software for the past ten years. Still, I wanted to try it.
Color correction and grading in DaVinci is far more complex and less accessible for casual colorists with its node based system than Premiere’s Lumetri. DaVinci has a steeper learning curve and more depth, making it more interesting for professional video creators.
When comparing my color correction in DaVinci to Premiere, it looks stronger and more contrasting, especially the skin looks much more realistic than the more magenta tone in Premiere. DaVinci’s workflow guided me to keep the colors closer to reality instead of oversaturating them and making them look unnatural. I’m sure the result will further improve as I gain more experience with DaVinci’s color system.
Fairlight Audio
Our next workspace is the final but important touch before we deliver our edit: Fairlight. Previously I had to use Adobe Audition to boost and balance my audio because Premiere’s audio effects are too shallow and not built for quality audio manipulation, which – again – is strange. This back and forth led to additional workflows, mistakes, and more files. Exported WAV files can easily take up an additional 10% of the project’s space. An 80 GB podcast episode can easily accumulate another 8 GB of Audition-edited WAV files.
DaVinci’s Fairlight allows us to add advanced audio effects in real time, disable them during the editing process if necessary, cache them and render them all at once. This small change has had a huge impact on my workflow. While creating a video to explain Git for the Python Advanced masterclass, I made an incorrect statement about a particular detail of ‘git revert’. Previously, due to the more time-consuming recording process using Audition, I would correct this by editing and adding a text overlay, in order to avoid a rerecording that often did not match in sound. This time, however, I tried using the audio recording option in Fairlight. The benefit was that I could work directly in the edit while using the same effects added to the mix track. This workflow is seamless and frictionless. The additional audio recording blended in with the rest of the audio. This improved the quality of the edit while providing a simple, quick way to make additions and updates.
Tip: Create a global preset for your microphone to reuse it for each future recording.
Deliver
The final step in our editing process is exporting, which is called “Deliver” in DaVinci. Deliver is very similar to exporting in Premiere, but it feels more preset-based than Premiere’s approach of setting exact bitrates. Deliver also combines Adobe Encoder elements to set up multiple renderings, which is practical and somewhere between Premiere and Encoder.
Timeline Render: One nice feature is that we can see the progress in the timeline while the export runs, which provides a nice visual effect and can highlight slowdowns and bottlenecks.
In Premiere 100% isn’t ready: A small but strange thing Premiere always does is that 100% doesn’t mean it’s done. Oftentimes it still needs time to actually write the file and do final processes which makes the progress bar very unreliable. As someone who used to this I was pleasantly surprised to see that in DaVinci 100% actually means ready-to-use.
Burn-in: To add watermarks and project overwrites, we need to use Workspace/Data burn-in.
The overall workspace experience is fantastic, offering a breath of fresh air compared to Adobe’s disjointed, outdated approach. However, although we can access editing features in each workspace, the workspaces themselves often have unique workflows and must be treated as mini software packages, which requires learning how they work.
Transition
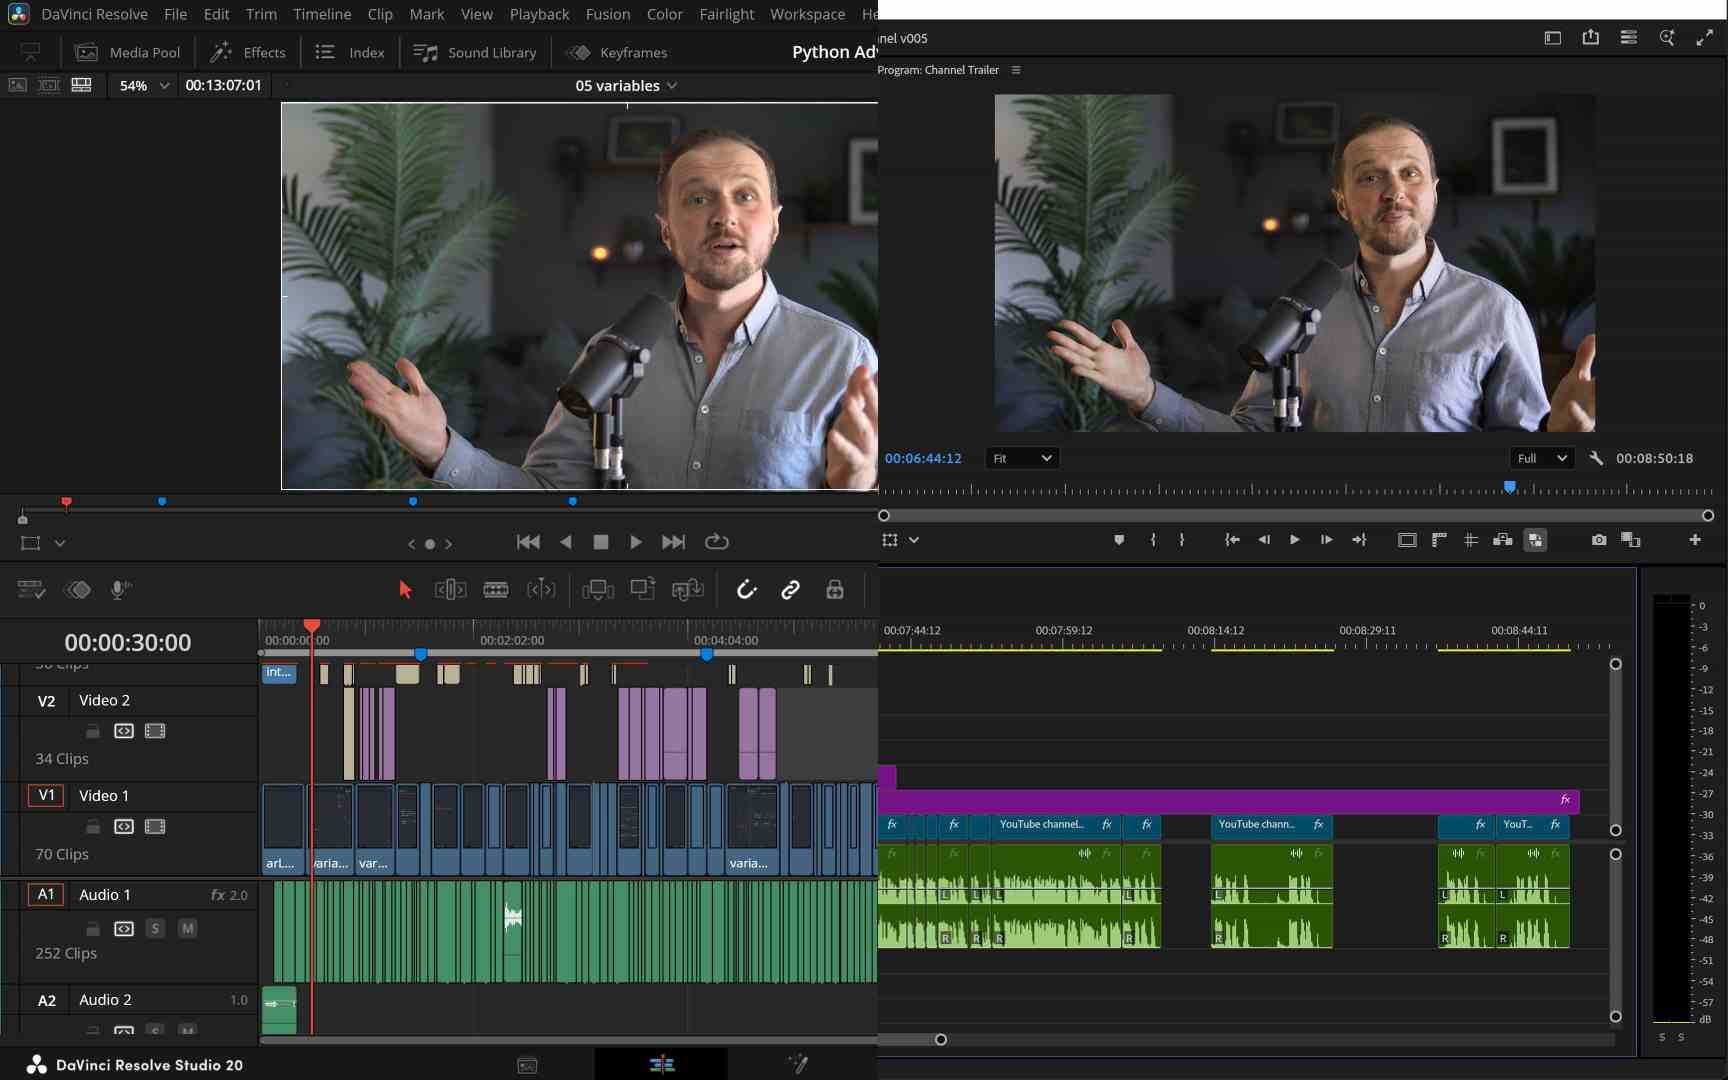
The most painful part of the transition is having to relearn certain workflows. This includes everything from handling media and editing to using shortcuts and workflows, and organising the project structure. At the same time, we now have a collection of legacy files that we won’t be able to access once our Adobe subscription expires. We need to plan for the future!
When transitioning from Premiere to DaVinci, it is important to proceed slowly and deliberately. One good approach at the beginning is to keep expectations and frustrations to a minimum by choosing small edits for your initial projects. This will help to cope with the constant challenges and setbacks that come with using a different software. Working on smaller projects also gives us time to experiment and explore the differences and additions in a low-stakes environment.
At first, DaVinci’s names and navigation can feel unfamiliar. While some names and command locations feel more natural and intuitive compared to Premiere, others are located in strange places and have either unnecessarily long names or unusual terminology.
After we got over the first bumps, we must prepare for the future when we lose access to our legacy Premiere files. We can either export clean copies of the edits without certain effects, transitions, music, overlays, etc., or export our Premiere files as XML data files to import them into DaVinci Resolve.
- Export Adobe Premiere to DaVinci Resolve: Open a Premiere project, go to File/Export/Final Cut Pro XML …
- Import Premiere XML to DaVinci: File/Import/Timeline
Importing edits into DaVinci is not without its flaws and can result in errors. When I tried to convert my Premiere project to DaVinci, I was partly successful, but had issues with a few elements, such as adjustment layers. Therefore, I would only use it for important edits that need to be adjusted afterwards to work properly in DaVinci.
Every transition takes time and effort, so it’s important to define your reasons for making the change and set aside time for adjustments at the outset. DaVinci’s UI takes some getting used to, as the individual UI elements aren’t fully adjustable or undockable, which can limit how you work optimally with your setup. The shortcuts are different, too, and it takes a moment to understand them. The most dangerous ones are DEL and BACKSPACE; both delete the clip, but ‘DEL’ will also ripple-move all the other clips, which isn’t always what you want.
One of the benefits of a transition like this is that we get the opportunity to restructure and cleanup our legacy projects and files which can be significant for our future workflows. Additionally cleaning Premiere previews, autosaves and old files can free up multiple gigabytes of space. I personally saved over 20 GB cleaning up 4 projects.
Honestly, I’ve spent a lot of time Googling and watching tutorials on simple things, such as how to export a still image and how to customize the layout, as well as setting up DaVinci and getting to grips with the slightly different workflow. At the same time, it was exciting to experience the energy of Resolve, which offers a focused set of features that cover most/all of what you would want from an editing experience.
The transition will take some time, but the more you experiment with the different workflow, the more you’ll wonder how you survived without those features and a more streamlined but occasionally complicated, way of working.
DaVinci Resolve Free vs Studio
After working with the DaVinci Resolve free version, an important questions popped into my mind: Do you need the DaVinci Resolve Studio version, or does the free version offer everything ? To answer this, we first tested the free version of DaVinci Resolve for a month to see what features we had and missed. Afterwards, we asked Blackmagic for a DaVinci Resolve Studio key to test the full functionality.
DaVinci Resolve is a blessing because the core software is free and includes most of the features you need to get started. The free version has everything required for basic editing tasks. The Studio version becomes interesting when you start to explore more detailed elements, such as AI image enhancement and video effects, to give your work that extra oomph.
Here are a few of the Studio features that might make it worth upgrading:
- Media has built in Face Detection
- Edit can go above 4K resolutions (BMD sells a 17K camera, sooo….). Also, you get AI Upscale: Upscaled a Google Meet webcam video using the highest settings possible (4x NVIDIA RTX Video ULTRA) and the results were barely noticeable. So, it’s something but maybe not always delivering.
- In the Color workspace, you get Magic Mask, HDR Tools, Advanced Noise Reduction, Depth Map, Film Grain
- Fusion also has the Magic Mask, as well as tools for VR and Script Control.
- Fairlight Audio brings Auto Classification, Voice Isolation for noisy environments.
- Delivery goes for the 4K or higher resolution, with 60 frames or more.
One thing that confused us was determining whether something was a missing feature or a bug. The UI is relatively fixed, and I had an issue with placing my preview window correctly, as the options were limited or the shortcuts were removed in full-screen mode. I later found out that the Studio version offers more options for full-screen preview. It’s a mystery why this wasn’t clearly stated in the menu, as it felt like the free product was broken.
Upgrading from the Free to the Studio version was also a little strange and confusing. Instead of entering a key to upgrade, we have to install the Studio version, as it’s a different build. There is no indication whatsoever in the free version on how to do this, and when we try to install the Studio version, it recognises the free version and doesn’t allow us to install it. It never highlights that these are different versions, which made us believe that it was in fact the same software. We only found out later that it is not.
Therefore, before installing the Studio version, we have to uninstall the free version. After installation, we can enter our Studio licence key when we first open the software. The switch is confusing, but luckily it’s only a one-time process while we had no issues continuing our previous projects with the studio version.
Overall, DaVinci Resolve offers the best free software for editing, color grading, basic sound manipulation and compositing. I recommend using the free version until you find yourself in desperate need of the Studio features. Then it’s time to save up for the incredible deal of a $295 lifetime licence.
Let’s do a quick cost comparison after 10 years of editing:
- DaVinci Resolve: $0 – $299
- Premiere: $2,638.80 (Premiere only) – $6,598.80 (Creative Cloud), plus perks like 100 GB of storage, etc.
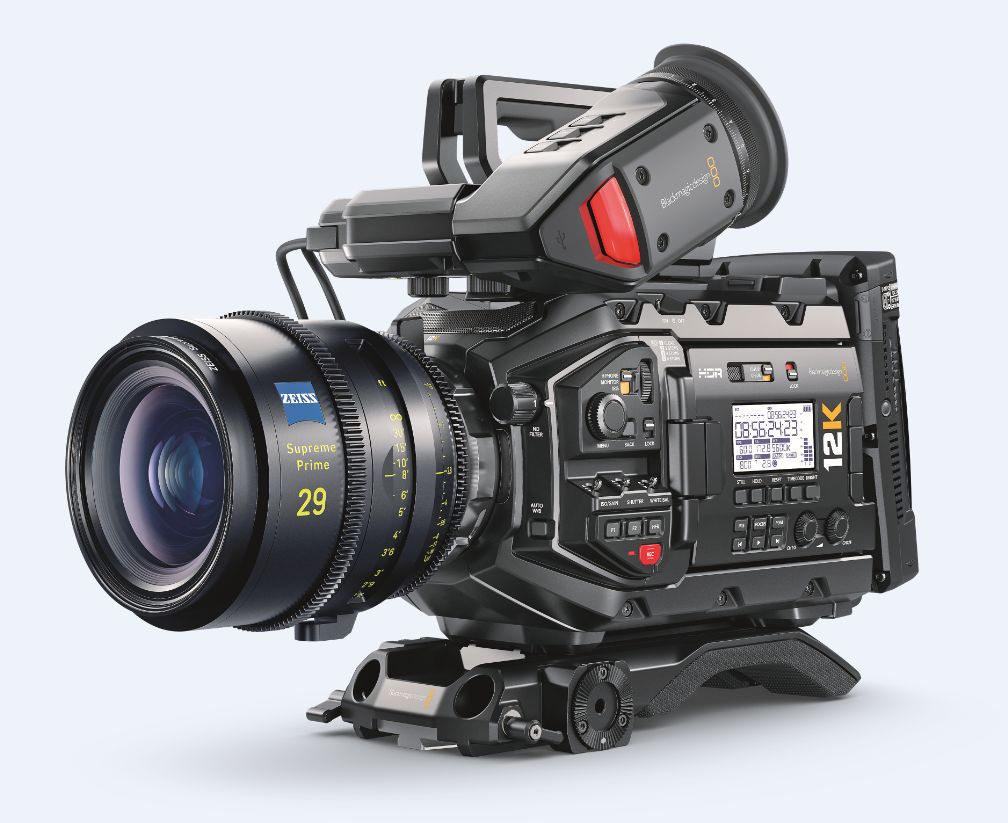
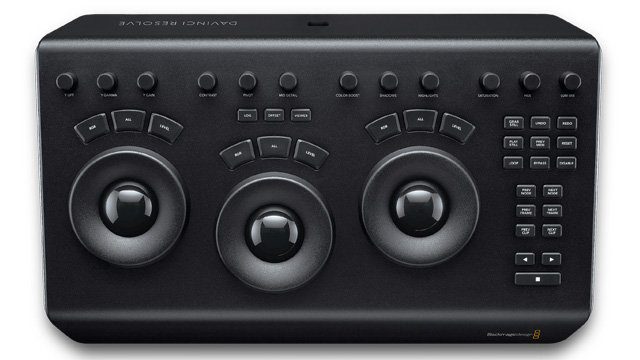
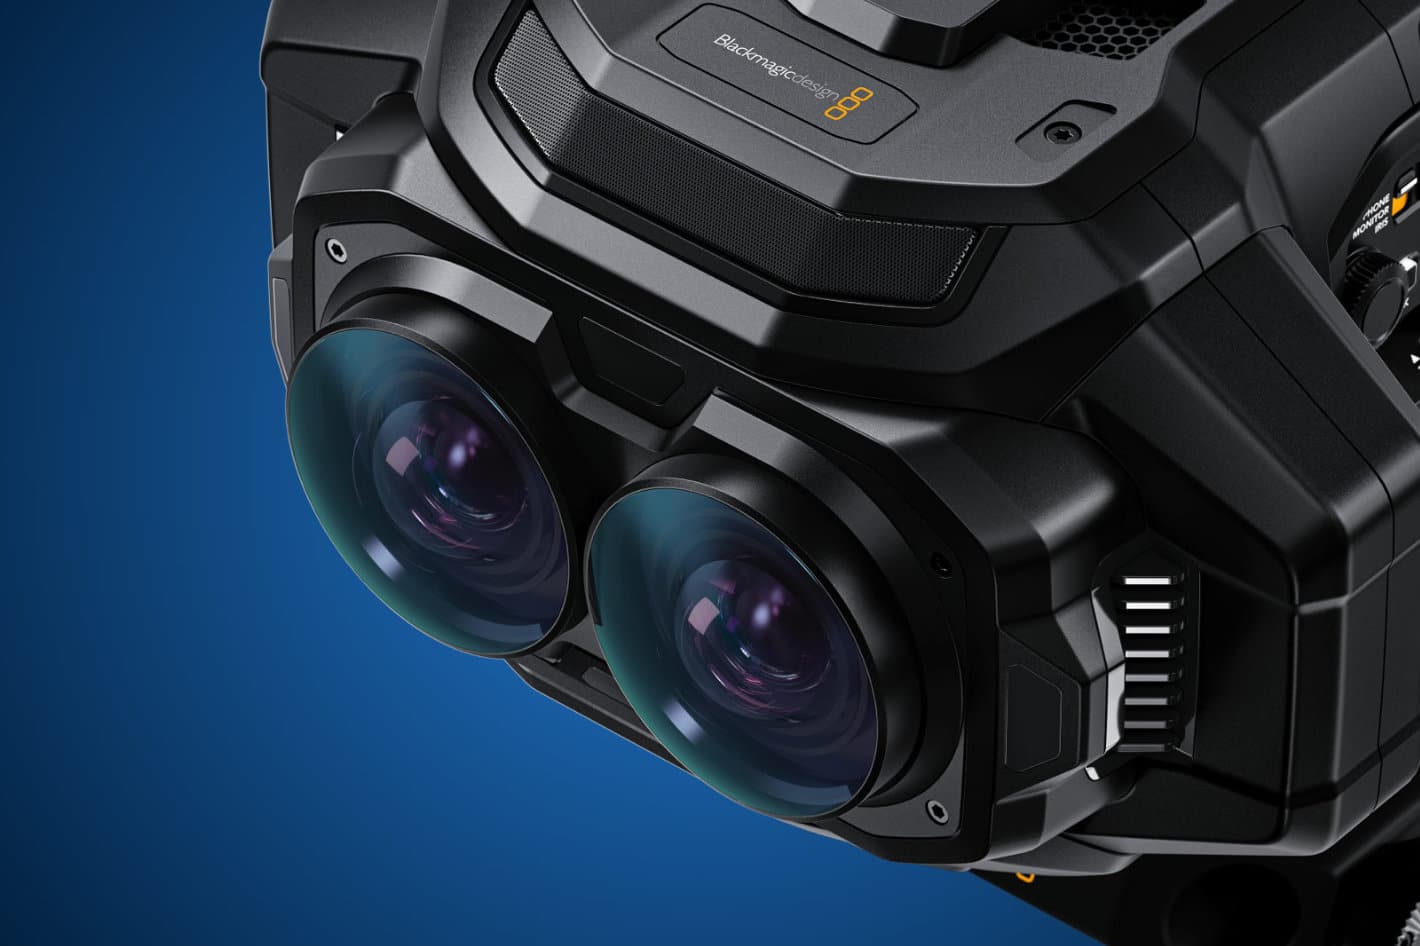
In terms of costs Blackmagic wins over Adobe by a significant margin (10-30-fold price difference). When comparing costs, it is important to remember that Blackmagic Design is not primarily a software company. Unlike Adobe, which focuses on subscriptions and a broad ecosystem of small utilities, Blackmagic earns its margins with hardware. Resolve itself is aggressively priced, or even free, but the company offers a wide range of dedicated peripherals: From the compact Editor Keyboard and Edit Pad to full-size grading panels that scale from roughly €300 up to €30,000.
In my own workflow, which is deliberately lightweight and laptop-based, these tools are not essential but if you work on a static workstation, the integration of dedicated hardware can significantly accelerate editing and grading. In addition, Blackmagic sells a range of I/O, Grading Panels and routing devices like the DeckLink, UltraStudio, and other “connecting boxes”, Cameras and their different parts, and many more things – which Adobe does not provide. While these are outside the scope of my everyday use, they can be decisive in your workflow.

Resume
Is DaVinci Resolve the perfect replacement for Premiere Pro? After a while, we often think the grass is greener on the other side – and sometimes we’re right. DaVinci Resolve has its flaws and a few kinks, but overall it delivers high-quality editing software that doesn’t cut corners, providing everything you need in one suite.

A huge benefit of DaVinci Resolve over Premiere and supporting software such as After Effects, Audition and Encoder is that everything is in one software package and can be easily accessed without the need for exporting, rendering or creating unnecessary external links, which can cause issues. Also, the other Adobe software often only shares the company name, neither workflow nor UI philosophy and needs to be relearned from scratch.
One major drawback of DaVinci Resolve is performance. I’ve encountered hiccups and stutters much earlier when doing anything remotely difficult, such as working with 4K materials, compound clips, and audio denoise effects, especially combined. Overall Premiere performed better longer before it required any pre- or proxy renderings.
My main reasons for switching to DaVinci Resolve were costs, missing features and Premiere bugs, but I was surprised at how quickly I could adapt to the basic features and become productive in Resolve. It’s also important to prepare old Premiere files for the time when they become inaccessible, and to export important elements and templates as video files in case they are needed in the future.
Overall, DaVinci Resolve outperforms Adobe Premiere in almost every category, but most importantly in terms of workflow, AI features and price. There is something else that Adobe seems to have forgotten: Excitement. I’m excited about every DaVinci update (Version 20.1 allowed to hide the Media Pool which increased the Preview. Nice!), whereas with Adobe it is the same as with Microsoft: ‘A new update?! What have they broken this time?!‘
My final verdict is to switch to DaVinci Resolve as soon as possible, but be aware that there are some initial hurdles before you can reap the huge benefits.
And, by the way, if you want to “Roundtrip” between Premiere and Resolve, Uli Plank has a helpful article about …


