Table of Contents Show
A tasting of the dynamics and geometrys side (of) effects
This release is not about the number of features, but about finishing what was started, achieving true production readiness, robustness, performance, and ease of use. It’s a version focused on quality of life. Feature sets like MPM simulations and Karma have matured like a good wine. The machine learning tools respect the artist’s skill set and have left their state of play are actual usefull in production.

Even though SideFX remains modest in its official statements, Houdini 21 is a massive release. For the feature-hungry among us, the highlights include a fully matured APEX; a refined and clever animation and rigging framework; a simulating Copernicus (think Substance on Dope), and in the VFX realm, the production-ready MPM Solver. On top of that, we’re seeing machine learning tools popping up in all the right places (AI for people who don’t expect a Pixar film from a single click), faster and expanded rendering with Karma, and a healthy dose of quality-of-life improvements.
Since our editorial cat can only count to 300, we can’t tell you the exact number of new or improved features, but we’re impressed nonetheless. And soon, you will be too. To avoid overwhelming both writer and reader, we’re breaking this article into a mini-series. We’ll start with VFX & Geometry, followed by Solaris & Karma, Copernicus & Terrain, and the massive Animation & Rigging tools.
MPM
One of the most exciting additions in H20.5 was without question the MPM Solver. The MaterialPointMethod truly allows you to simulate a wide range of different materials. From water, snow, and sand to honey, metal, and concrete, all within a single Solver setup. The geometry is simply substituted by points or particles, which are then simulated. The different materials interact physically accurate and constraint-free, purely based on their assigned parameters.
The initial release was already impressive, but it left users standing somewhat in the simulated rain when asking: “How do I get a proper mesh with UVs?” That exact issue has now been beautifully solved in H21. Any MPM simulation, whether rigid body or fluid, can now be meshed (as polygons or SDF volumes), including UVs, color, and other attributes, using no more than two nodes.
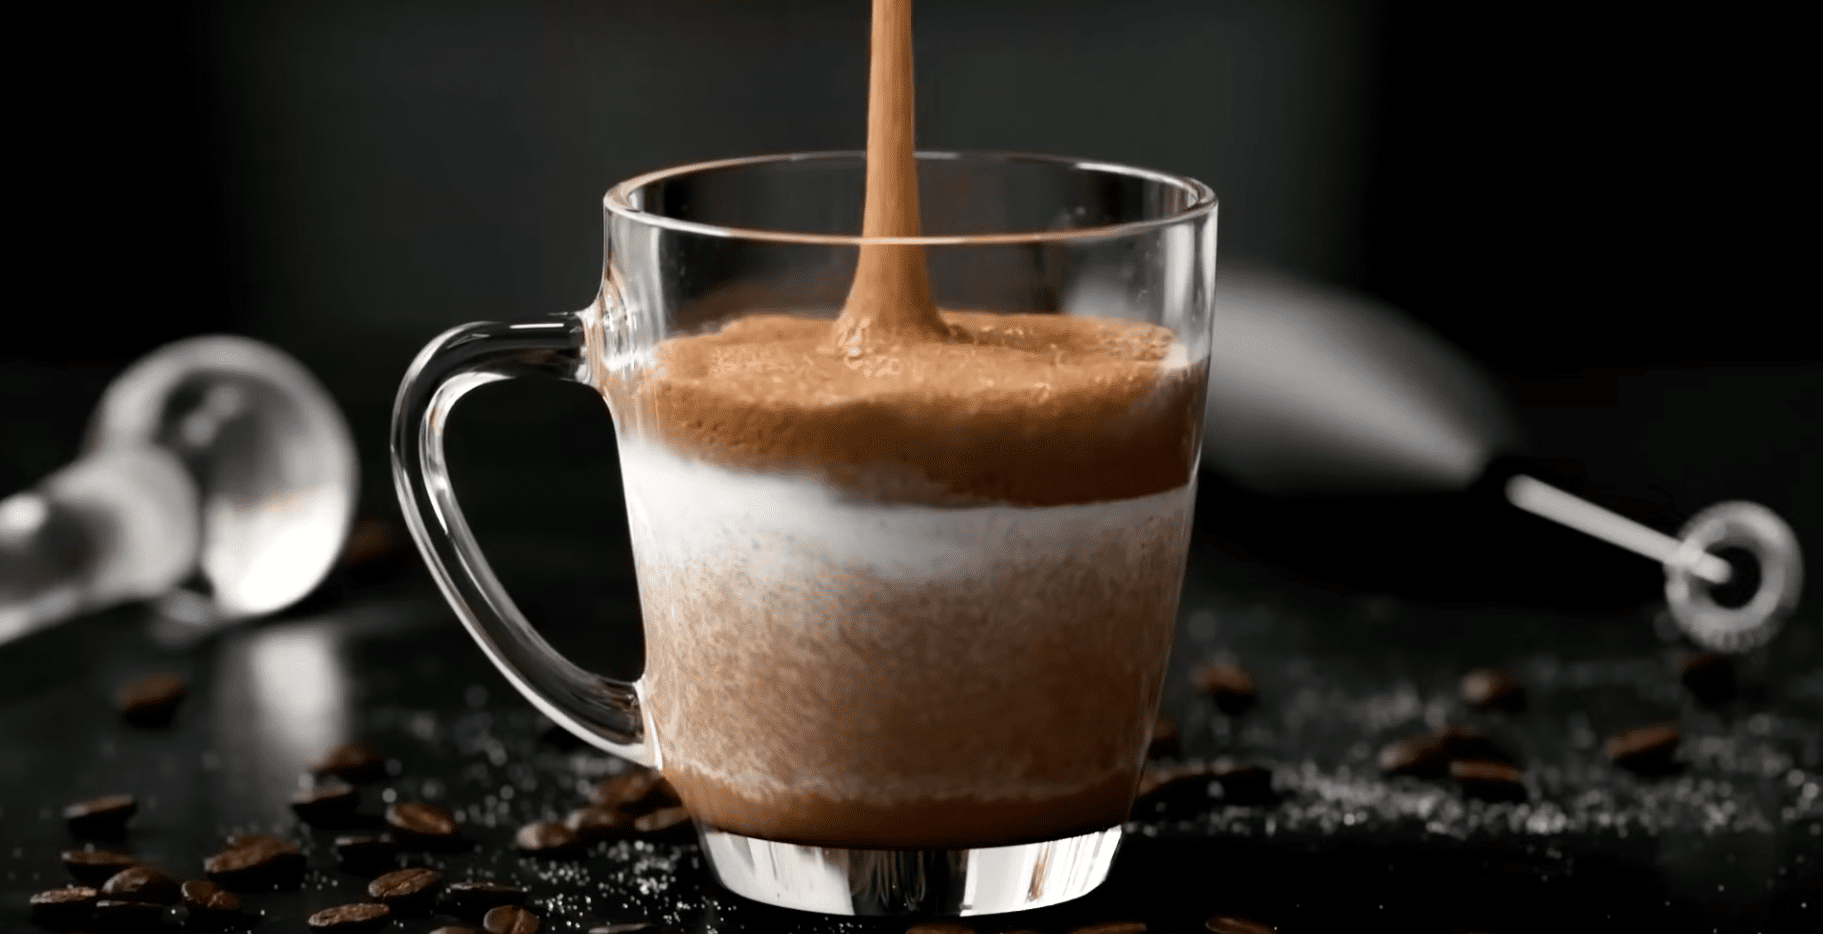
A nice and usefull addition to this workflow is the MPM Debris node, which generates new points along fracture lines as sources for smoke, dirt, or secondary debris effects. So let’s take a look at meshing hard and fluid or granular surfaces across a few setups and scenarios and wrap things up with a creamed cookies drink while watching the official and very excellent MPM demo.

Surfacing MPM Simulations
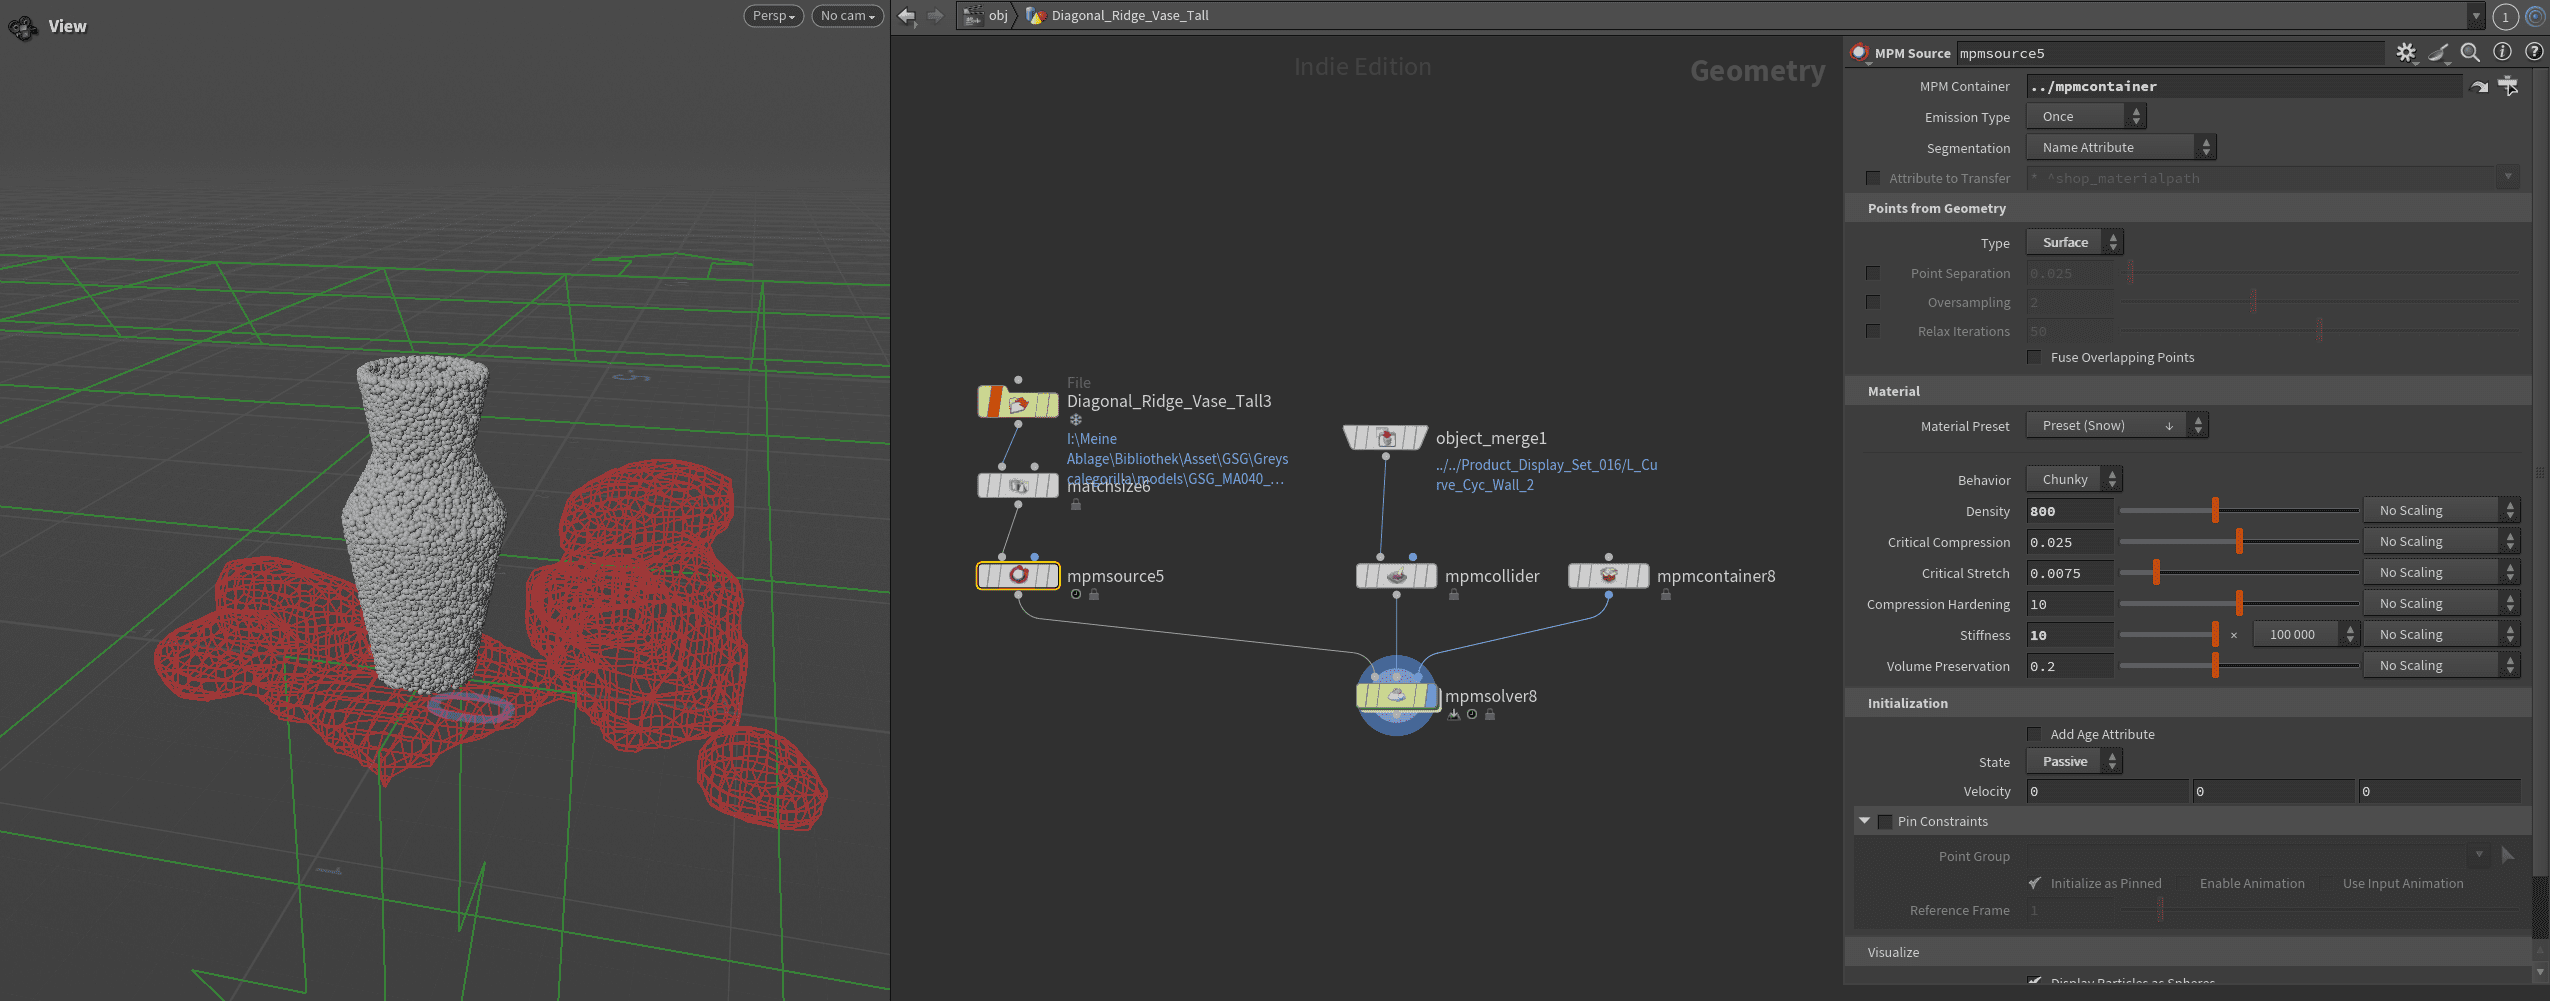
Testing time! For this test setup, we’ll have a clay ball smash into a vase model, paying close attention to UV transfer and the generation of smaller fragments through the Debris Source. The easiest way to start an MPM simulation is by typing “MPM Configure” into the node search. This gives you a complete set of starter nodes right away. (Under MPM Configure, you’ll also find plenty of additional example setups for study or creative repurposing.) By the way, the MPM container on the far right controls the overall resolution of the entire simulation.
We replace the default sphere with our own model and can now assign materials directly inside the mpmSource node and tweak them to our liking. It’s genuinely fun. Feels a bit like a mini-game. Since a concrete material would be more realistic but also quite boring as a vase material, we went with Chunky Snow instead. The environment comes in via an Object Merge directly into the mpmCollider Sop, ready to go. Our clay ball, the antagonist of this little simulation, isn’t a collider per definition but another mpmSource ready to be smashed, merged with the vase and given its own material behavior, Chunk Soil.
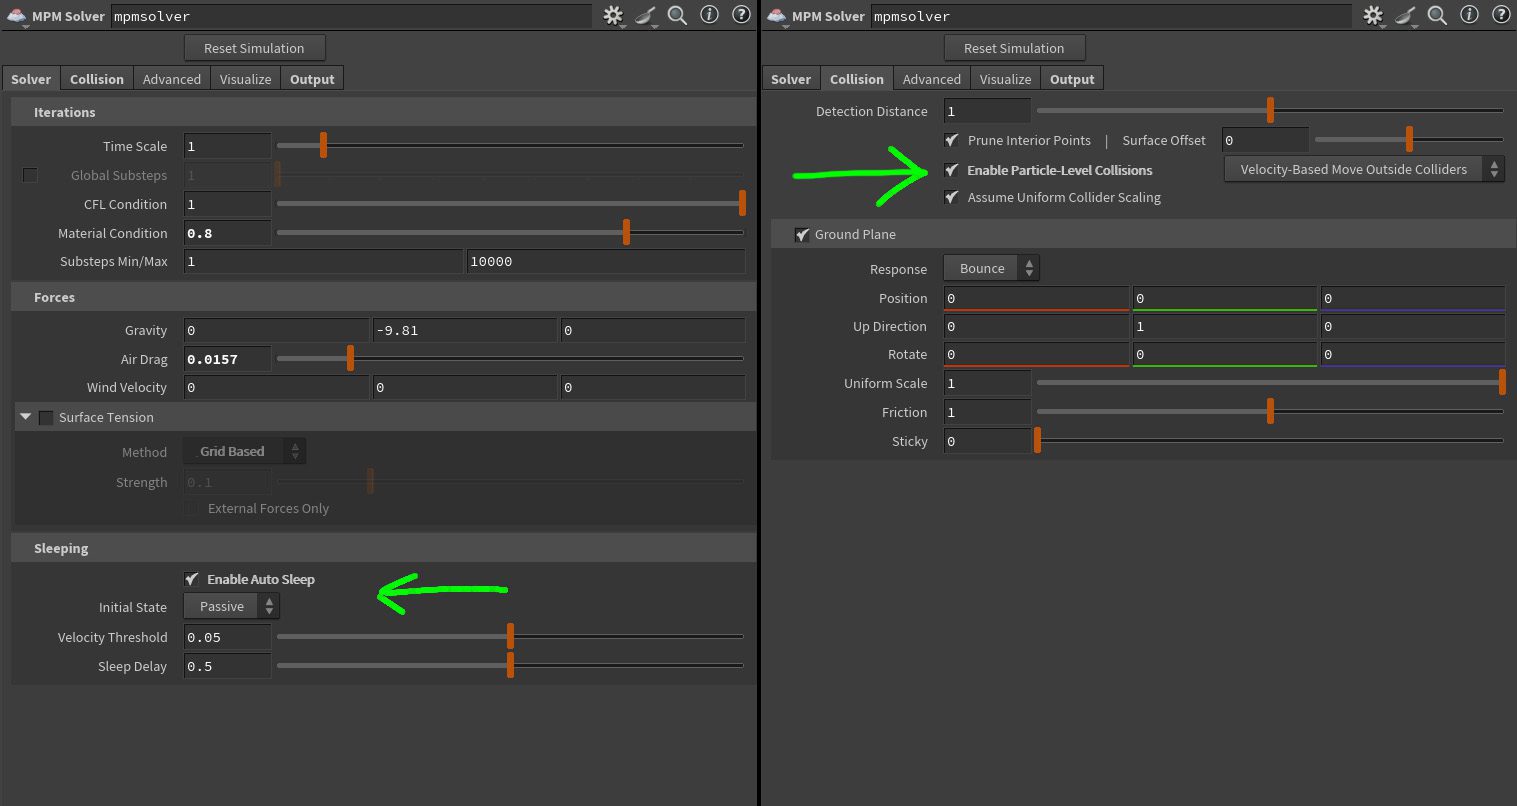
To make sure the particles can actually see and “love” each other, we need to enable Particle-Level Collision in the solver. The new Auto Sleep feature helps keep the vase passive until the collision happens, preventing it from collapsing at frame one and saving quite a bit of compute time.
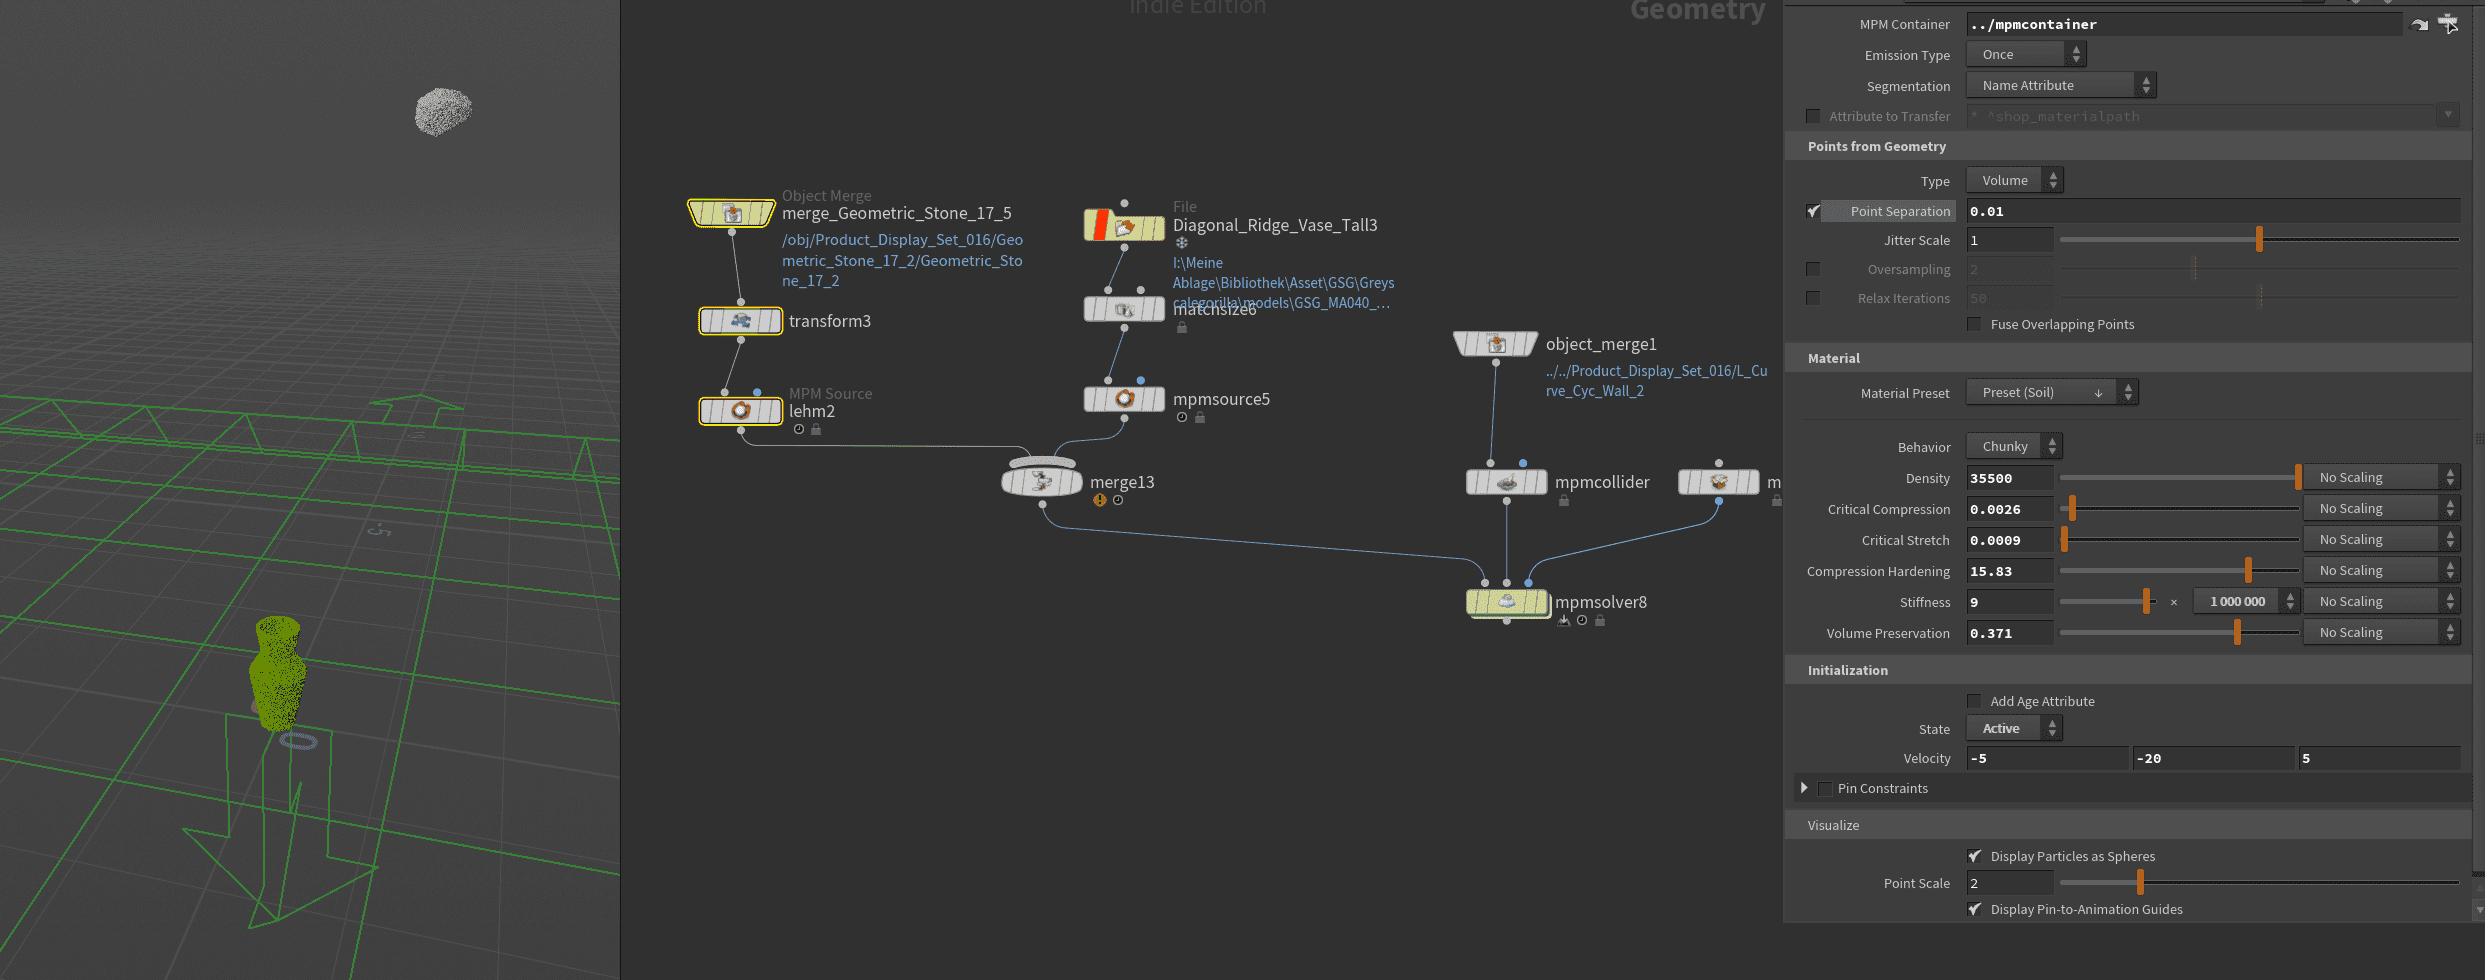
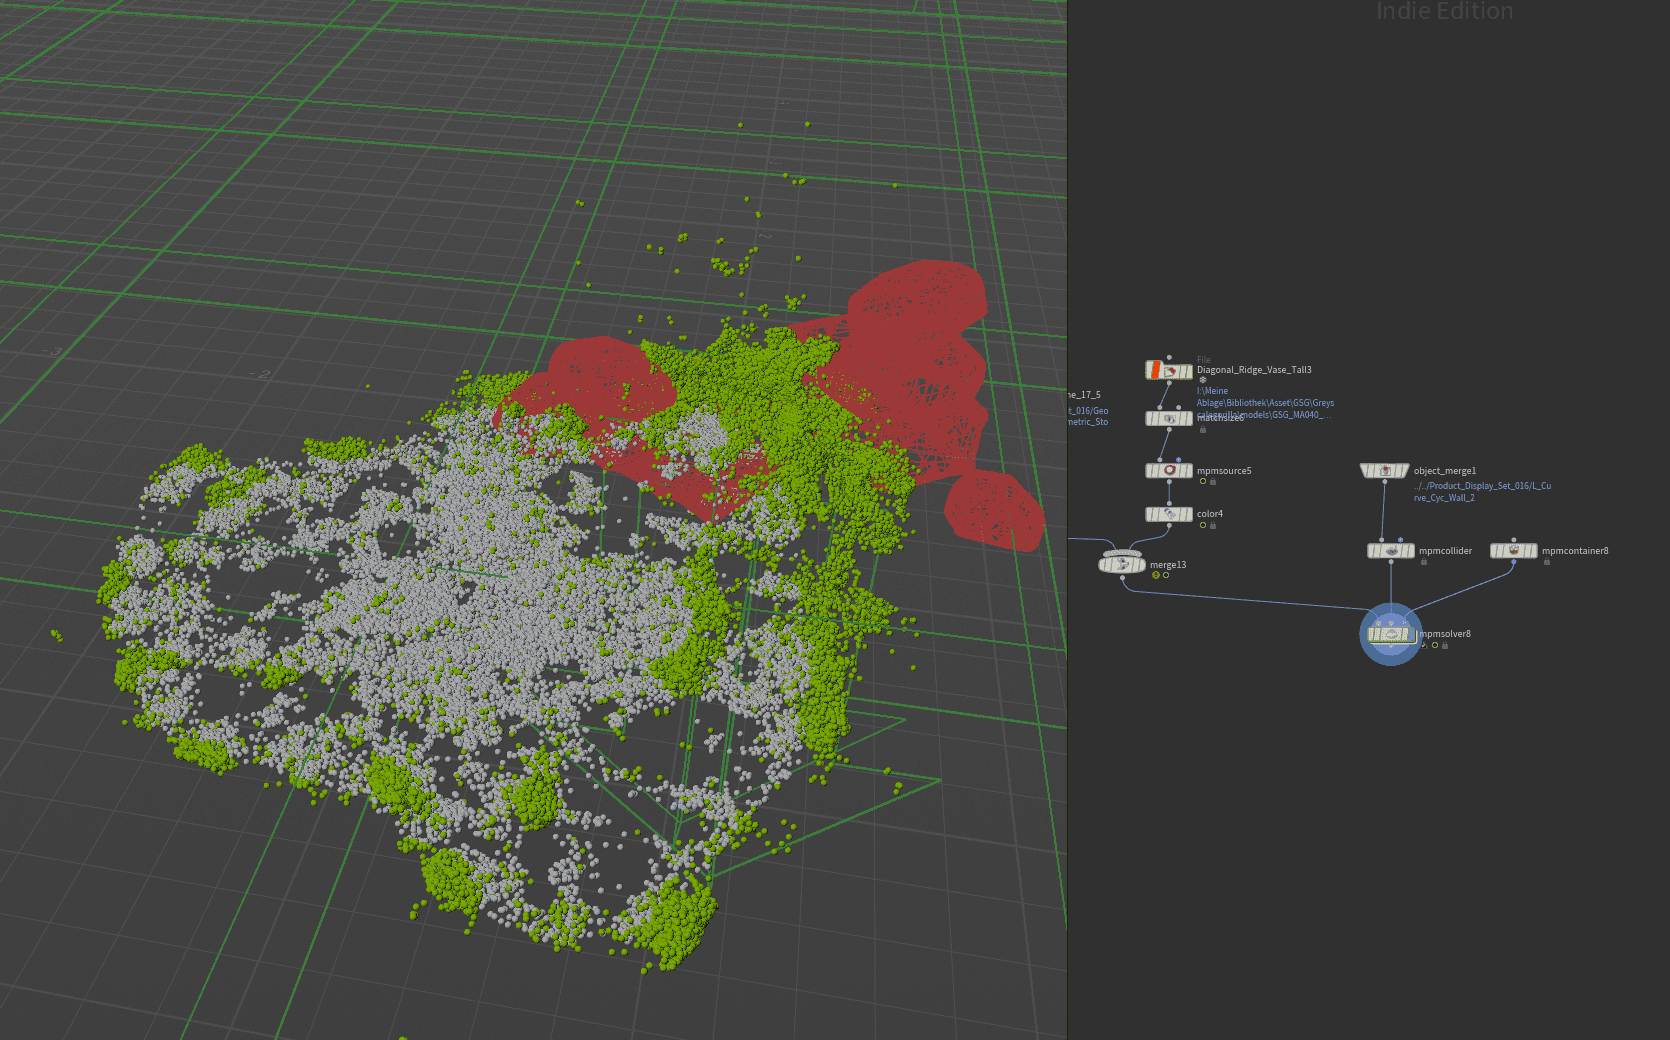
Since the clay ball will be meshed as a fluid and granular surface and the vase as a rigid object, we first separate the MPM particles using a Blast node, filtering them by their respective source names.
For surfacing the vase, we use the mpmPostFracture node, which takes the rest-geometry and the MPM particles as input. This node essentially breaks the geometry apart “end to start,” so it needs to be fed the final frame of the simulation. After that, we choose either Voronoi or Boolean Cut as the fracture method. The latter can generate interior details, subtle irregularities on the inner faces of the fracture, that weren’t visible before, and it’s also faster to compute. We can further control the number of pieces as well as define the minimum fragment size at which new pieces should be generated.

The final node in the chain is mpmDeformPieces, which transfers the newly generated fracture geometry onto the MPM particles and just like that, the vase shards, physically convinced they’re made of snow, go flying through the scene, complete with perfectly intact UVs. For more of a muddy mess, we could have generated a liquid or granular surface instead, but we’ll save that for the clay ball. The result from the Debris Source, which lets you precisely define when and where particles based on fracture are emitted, is then passed into a POP network, including collisions from the vase and background).
Time to get serious:
Continuos Emissions & Surface Tension
With this new option, you can quickly fill containers, simulate expanding materials, or layer different materials on top of each other. The option is located in the mpmource node and spreads new particles apart using positive pressure.
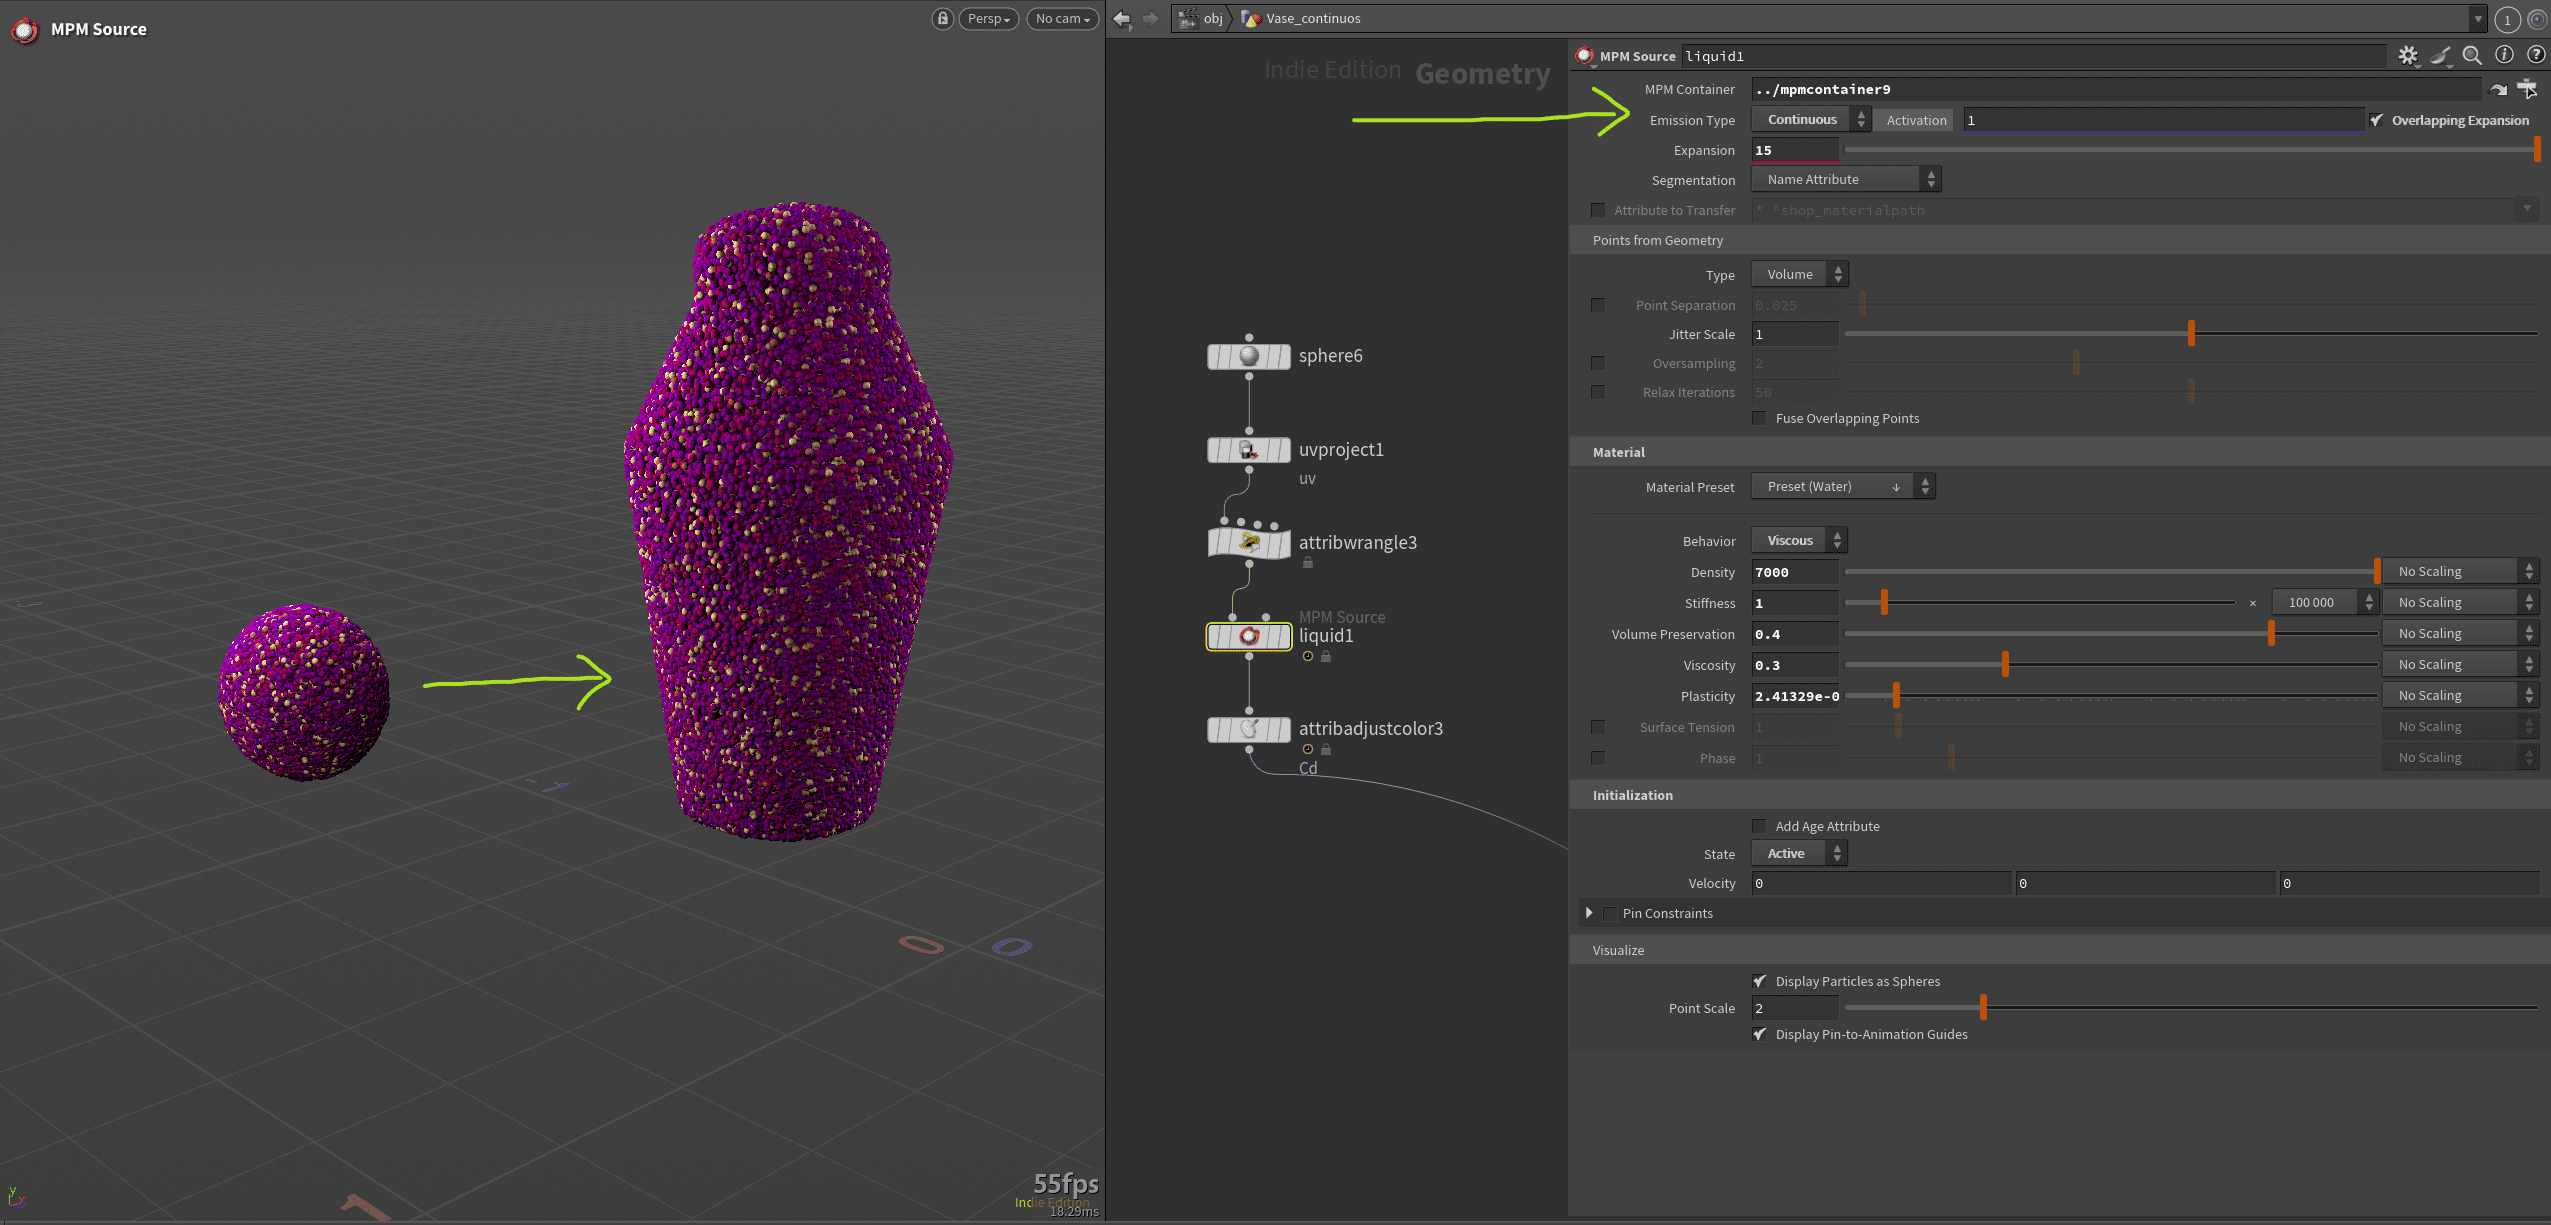
Let’s take our vase and let a thick, viscous something ooze out of it. A good chance to show how simple MPM can be: if we want things to float inside the fluid, they just need a lower density. A few cubes are generated and assigned a jelly material. Two geometries, two MPM Sources, merged and fed into the solver. That’s all it takes. Just as easily, you can mix different fluids within the same setup. And for a bit more drama, we can dive into the solver and add a POP Wind node with some turbulence.
Surface tension allows for realistic effects such as droplets, tendrils, and flowing water. H21 introduces two new ways to control surface tension for both liquid and viscous materials inside the MPM Solver. The Point Based method offers higher accuracy and stability, making it ideal for small and detailed simulations. The Grid Based method, on the other hand, is optimized for performance and handles millions of particles more efficiently, which makes it better suited for large-scale scenes. External forces and friction can be increased if objects keep moving when they shouldn’t. Otherwise, you might end up with a scene straight out of Terminator 2.

To achieve high levels of detail without an unnecessarily large number of simulation points, the new, more precise collision detection allows you to use the fracture edges of a simulation as the source for a targeted secondary simulation. The attribute Jp (Plastic Compression/Stretching) is key here. It can be used to isolate the fractured areas and feed them into a Surfacing node set to VDB mode. This resulting volume can then serve as the source for the second simulation. And don’t forget to use the main simulation result as a collider.
And finally to top it off, the official demo. A detailed breakdown of that beautiful cookie shot.
Machine Learning in Dynamics
You won’t find any generative AI native in Houdini, but rather a growing collection of smart, locally running models, often trained by yourself, designed to simplify or speed up time-consuming tasks.
Surfacing Flip, Vellum & Particle Simulations
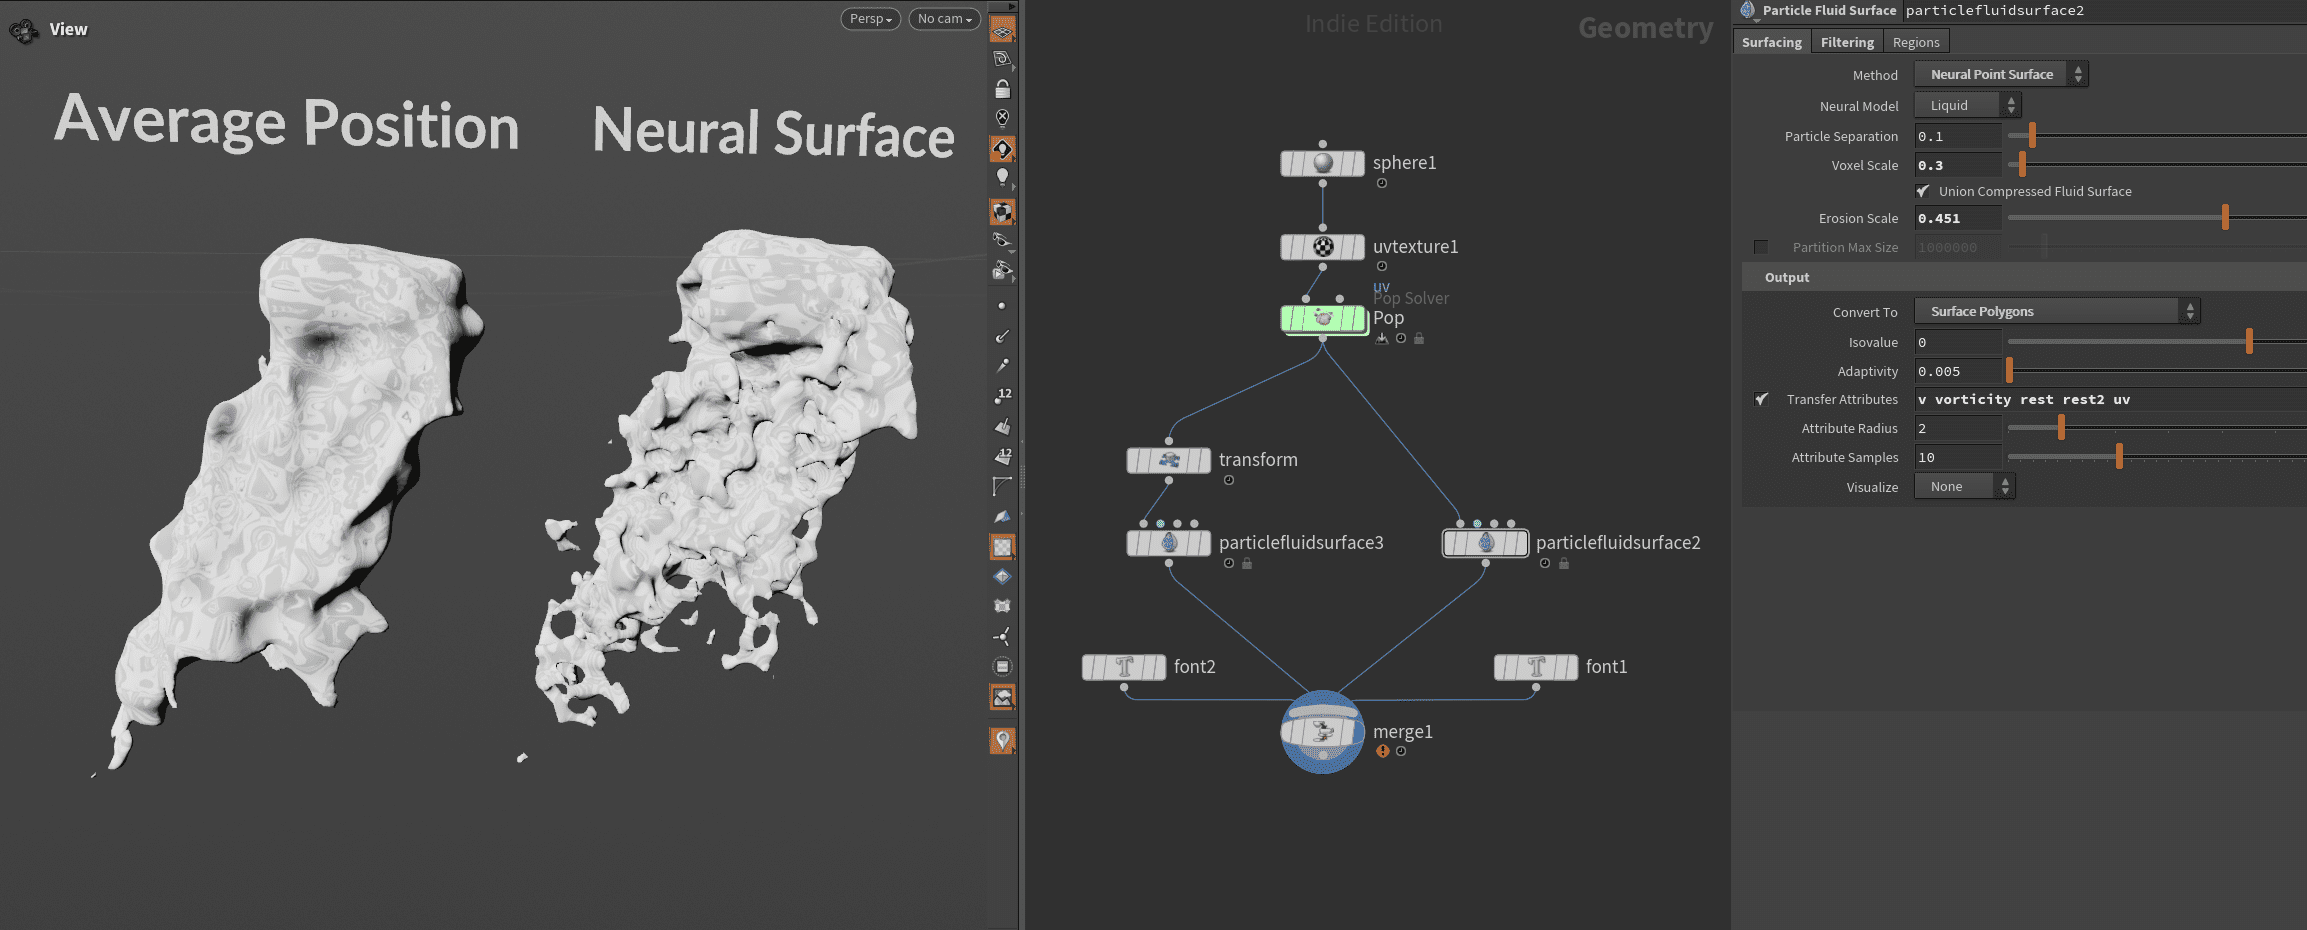
Alongside Neural Point Surfacing for MPM, the new Neural Point Surface and proven Particle Fluid Surface nodes now bring neural meshing to FLIP, Vellum, and POP simulations as well. Until now a bunch of points are trying to reconstruct the surface of a material. With neural meshing, you can now achieve much sharper, more detailed surfaces across a both high and low frequencies. The result: surfaces that are no longer uniformly fuzzy, but crisp, structured, and temporally stable. As before, you can train your own models, but even the included presets already produce finer details. And thankfully, the whole thing is GPU-accelerated.

Volume Upres
The core problem behind volume up-resing: for efficiency, artists often create and approve low-resolution simulations. But once the voxeldensity is increased, the overall shape of the sim tends to change. With the new tools, a low-res simulation can now be upscaled while preserving its exact shape. This not only keeps previously approved versions intact, but also allows for far more iterations. A model that’s been trained on a specific motion or behavior can now upscale multiple variations of it.
The Billowy Smoke recipe (or shelf tool) comes with a pretrained up-res model already integrated. Let’s start by looking at a comparison between the low-res input simulation and the 3× up-res result.
Details are nicely added, while the overall shape is preserved impressively well. Caching took a bit of time, but it’s still far faster than running a full high-res simulation. The real idea, however, is that we can now reuse this up-res model for all our future Billowy Smoke setups and honestly, we probably should. So, let’s quickly modify the setup and see if we can break the upscaler.
This time, the solver runs at a voxel size of 0.05, using the 2× upscaler. The 3× model didn’t really add more detail, just extra waiting time. For a bit more fun, a Gas Wind with random direction and a collision shape were added. That collision shape, as it turns out, gives the upscaler a bit of trouble as seen below.
But when comparing the up-res result to a true high-res sim, it’s clear that the system is really good at preserving the base form. Doubling the voxel size in the high-res sim, on the other hand, changes the overall shape and eats up a ton of time but stays artifact-free. Or, if you really want perfection, you could just train a model specifically for this type of collision.
If you want to train your own model, this Equinox Hive talk walks you through every detail:
Zibra AI VDB compression
With this plugin you can save up to 99 percent of storage space when caching VDB simulations, which makes it perfectly suited for use in real-time engines such as Unreal Engine 5. The Zibra toolset, distributed via SideFX Labs, provides three dedicated nodes.
The first, zibravdb_compress, writes and exports .zibravdb files for use in Unreal and similar environments. The second, zibravdb_decompress, brings those files back into Houdini. And finally, zibravdb_filecache acts as a modified File Cache node that automatically handles compression, loading, and decompression for further use inside Houdini. Before diving in, you’ll need to download the model and obtain a license, potentially a free personal one if your revenue is below 100 K USD. The license management can be accessed directly from any of the three nodes.
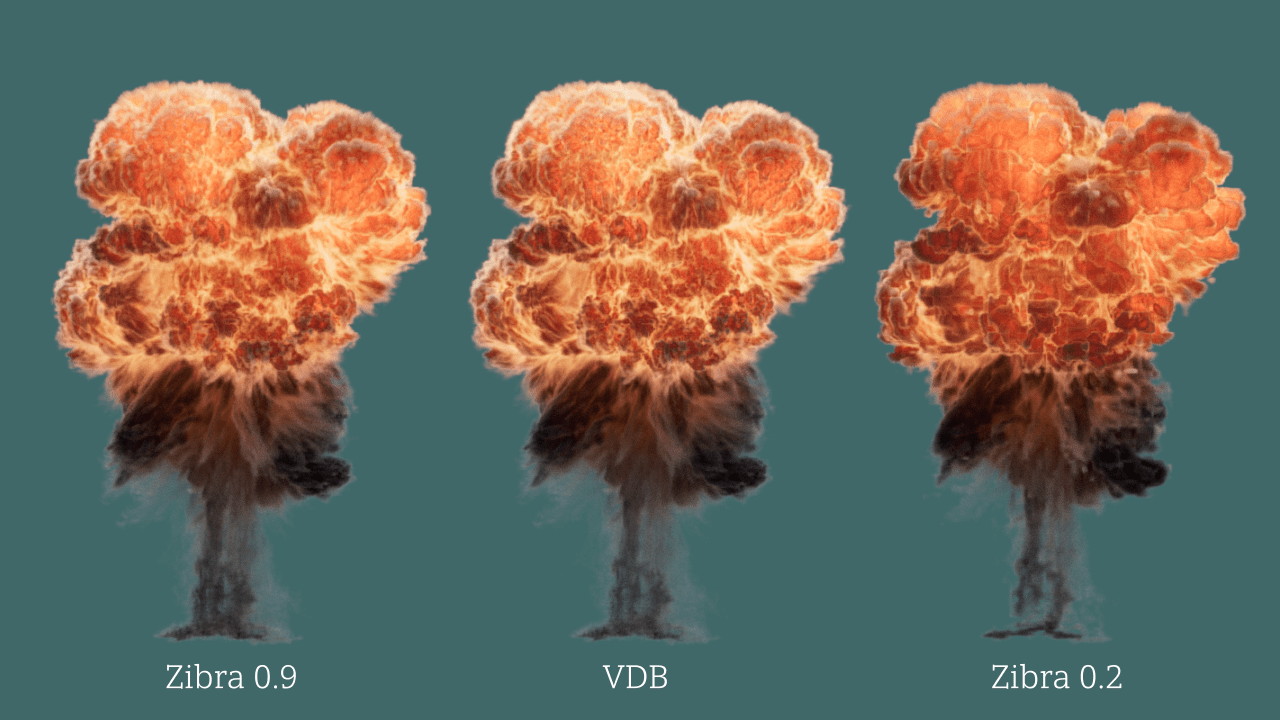
For a quick benchmark, I used the Fireball Recipe and cached one regular VDB sequence alongside two Zibra versions with different quality settings. The original VDB sequence weighed 294 MB. The Zibra compression at a quality setting of 0.2 came in at only 5 MB, roughly 98 percent smaller. At a quality setting of 0.9, the result visually matched the original VDB almost perfectly while staying at just 36 MB, around 88 percent less.
That insane low file size at 0.2 naturally comes at the cost of lost detail, as visible in the comparison graph below. Still, the results are impressive and they open up the possibility for bringing volumetric simulations into real-time pipelines far more efficiently than before.
Pyro Shelve Tool Presets
Another way to get artists up to speed faster are production-ready presets, not just educational examples, but tools meant to be customized for your very real projects. Each of them comes with a ready-to-use Solaris network, fully set up for rendering straight out of the box. Even better, the Help section now includes a short guide and exploanation of important Nodes for every preset.
SideFX strikes a noticeably new tone here, aiming to flatten the learning curve rather than overwhelming newcomers with endless options (which, to be fair, they still do from time to time). These guides can be found under Documentation → What’s New → Pyro. In this section, we’ll take a closer look at three fundamentally different presets, each showcasing its own approach and creative use case.
Stylized Flame

With the refined Copernicus toolset, entirely new worlds open up: stylized fire based on a classic Pyro simulation, right inside Houdini. And if needed, even live-rendered in Solaris.
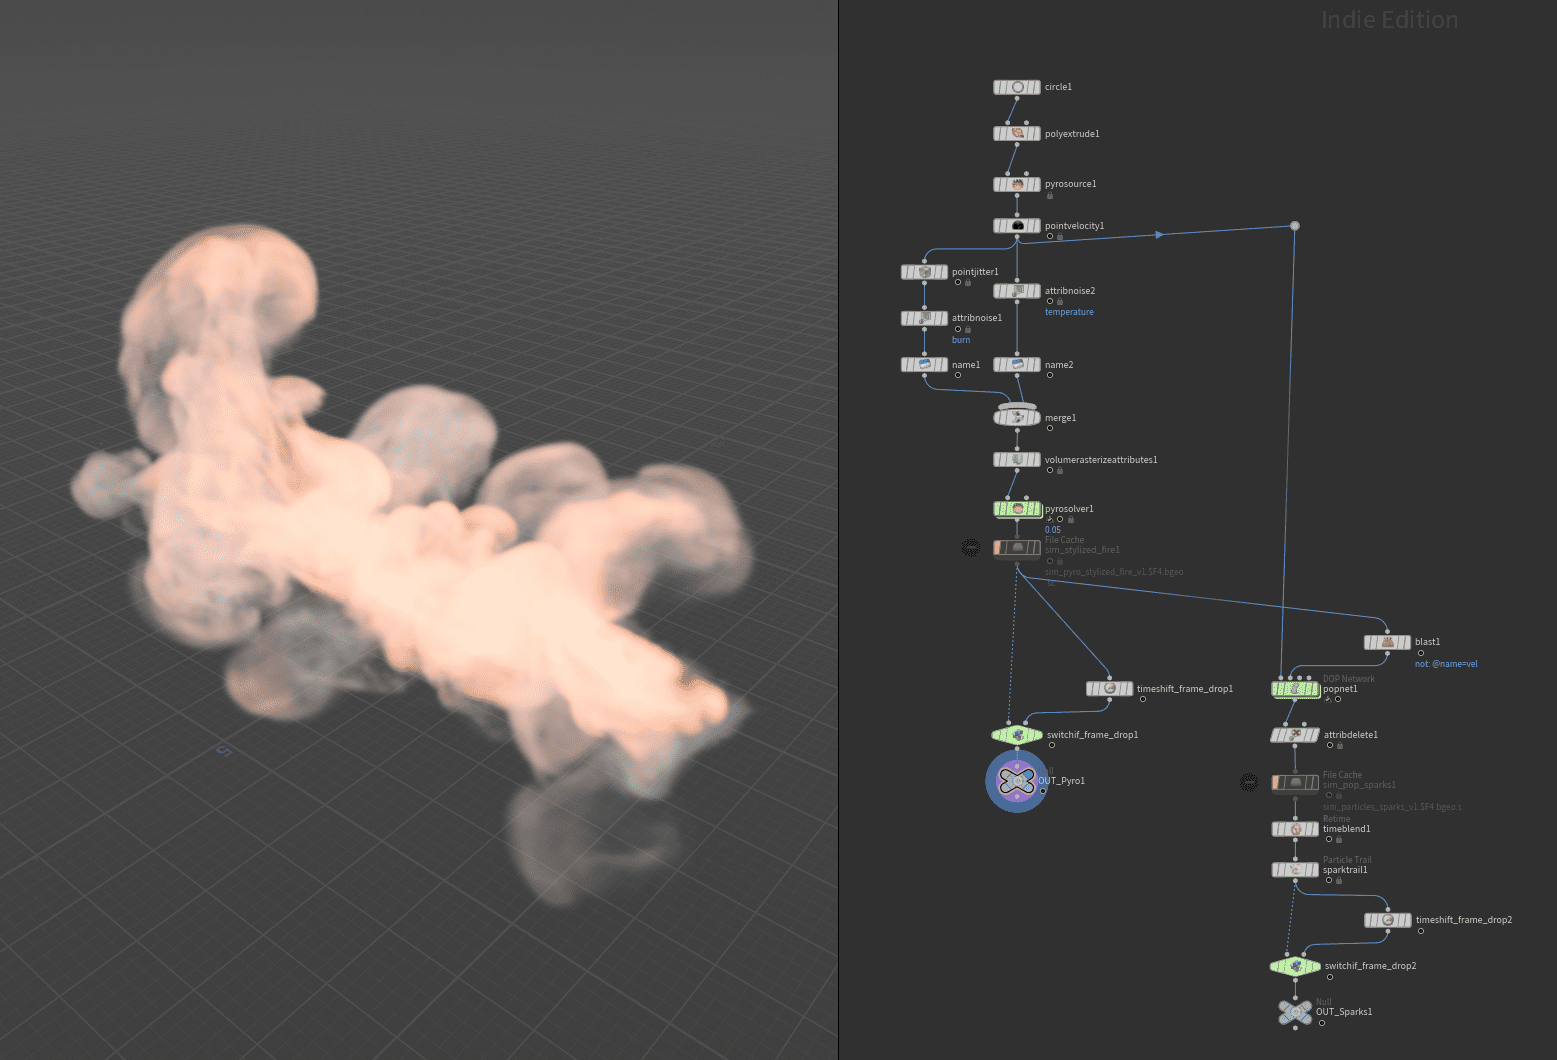
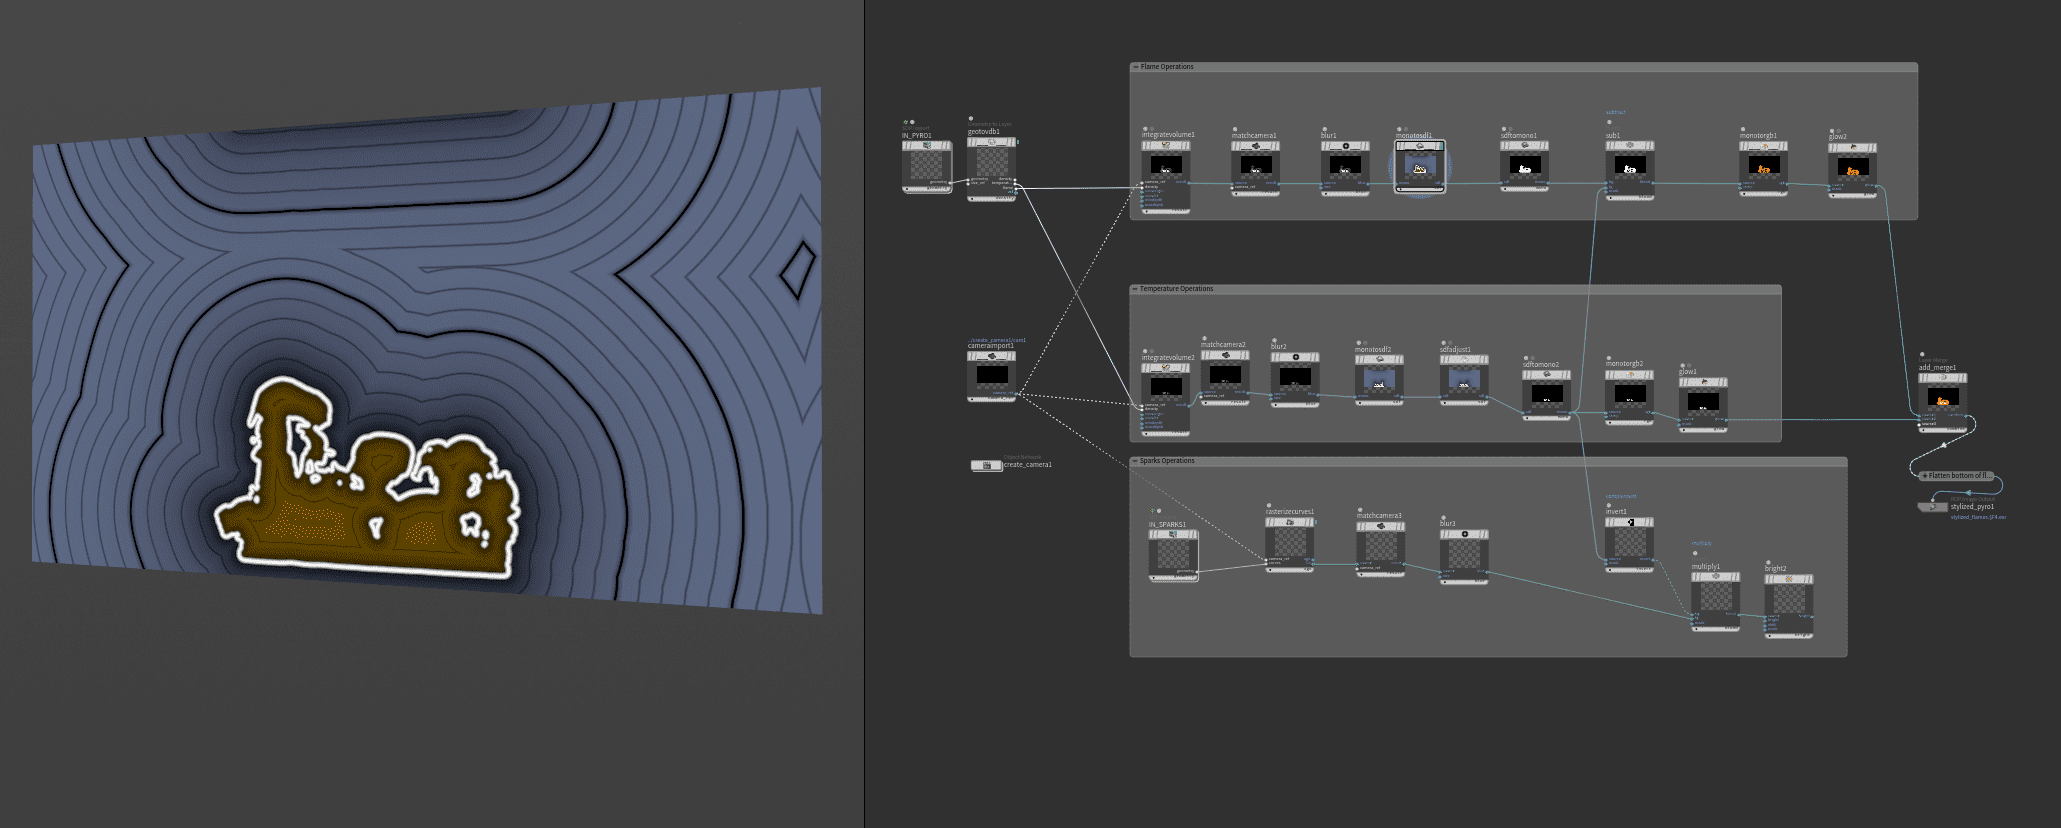
To put the claim of “easy adaptability” to the test, we took the Pyro Fireball preset and gave it a Toon-style makeover. Adding the VDB field “Flame” inside the solver’s output was all it took to make it work. The output from the Cop node, by the way, can be merged directly into the scene for further Houdini style editing.
Ground Explosion B
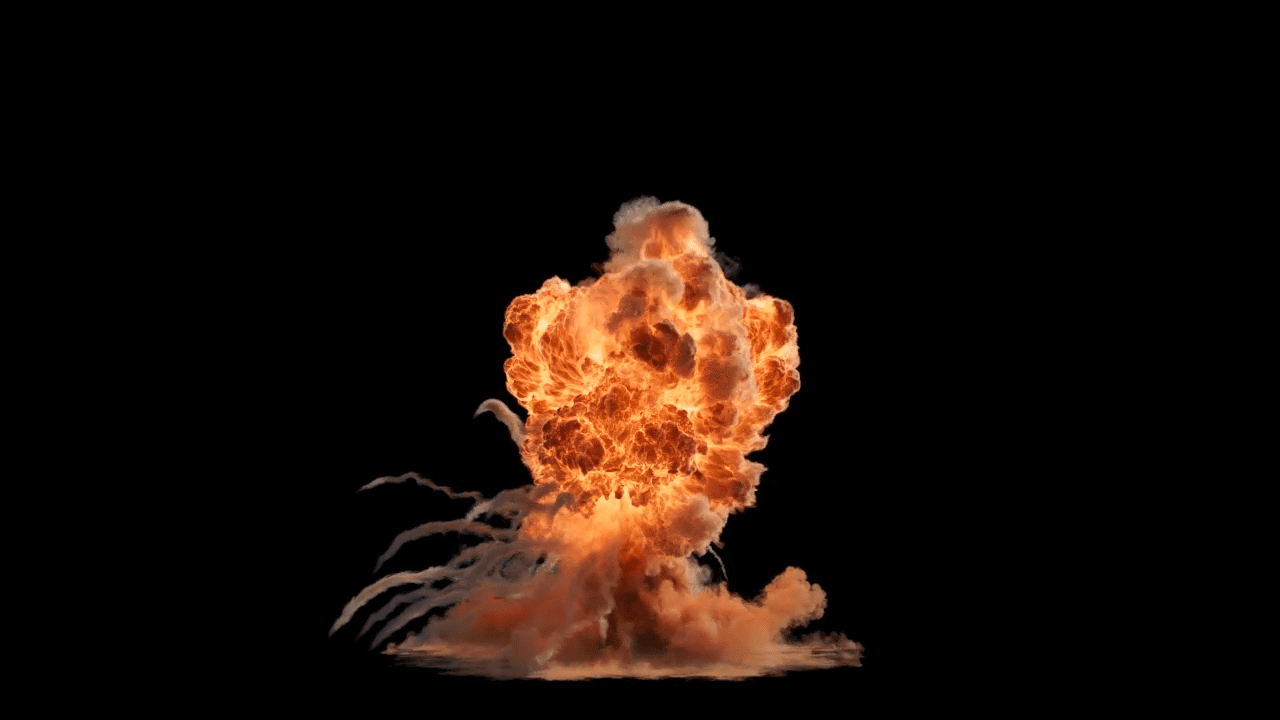
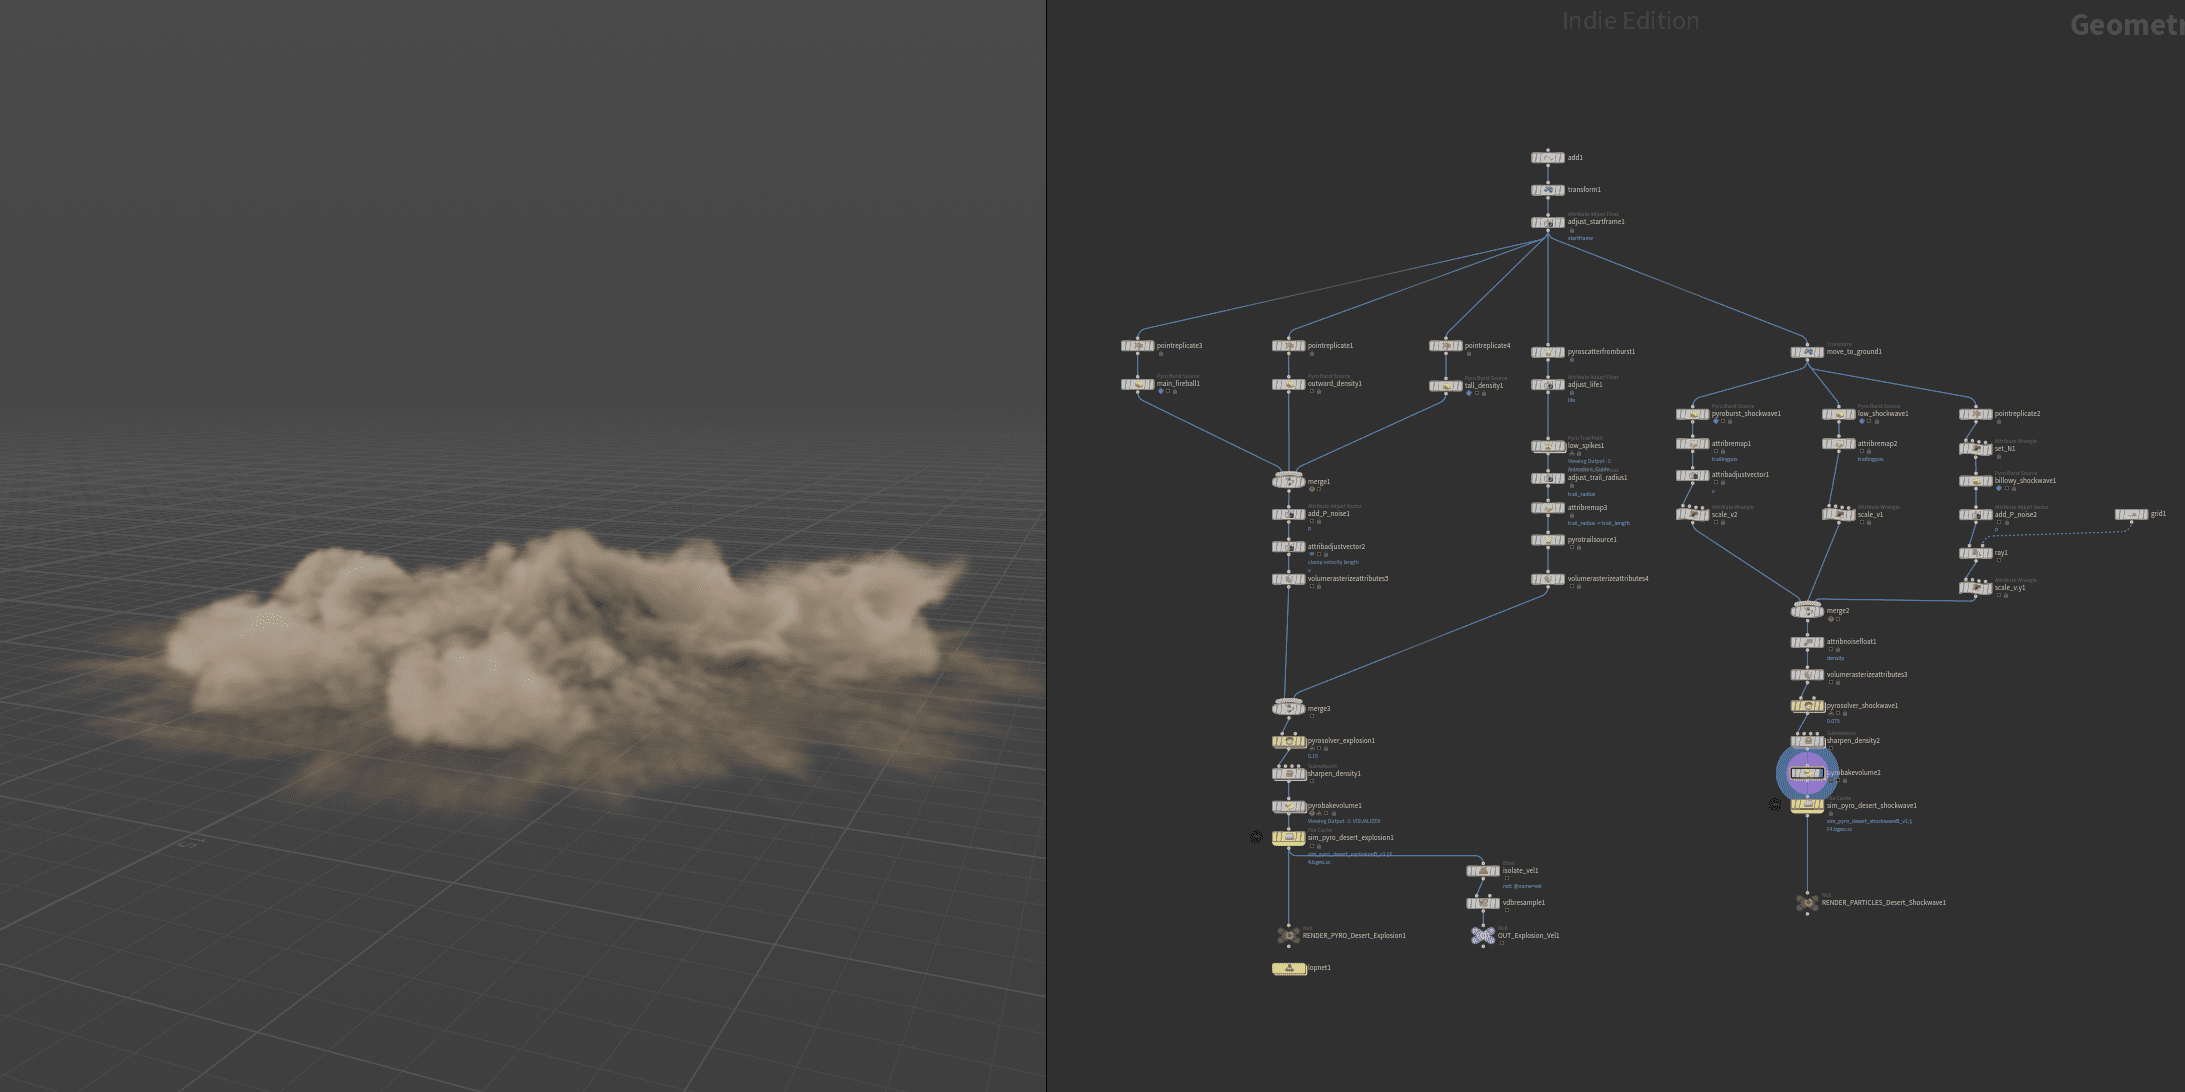
This shelf tool sets up a sparse pyro simulation featuring a large-scale explosion, smoke trails, and a shockwave. For more control and efficiency, it’s actually made up of two separate simulations, layered on top of each other and interacting through their velocity fields.
Candle Flame

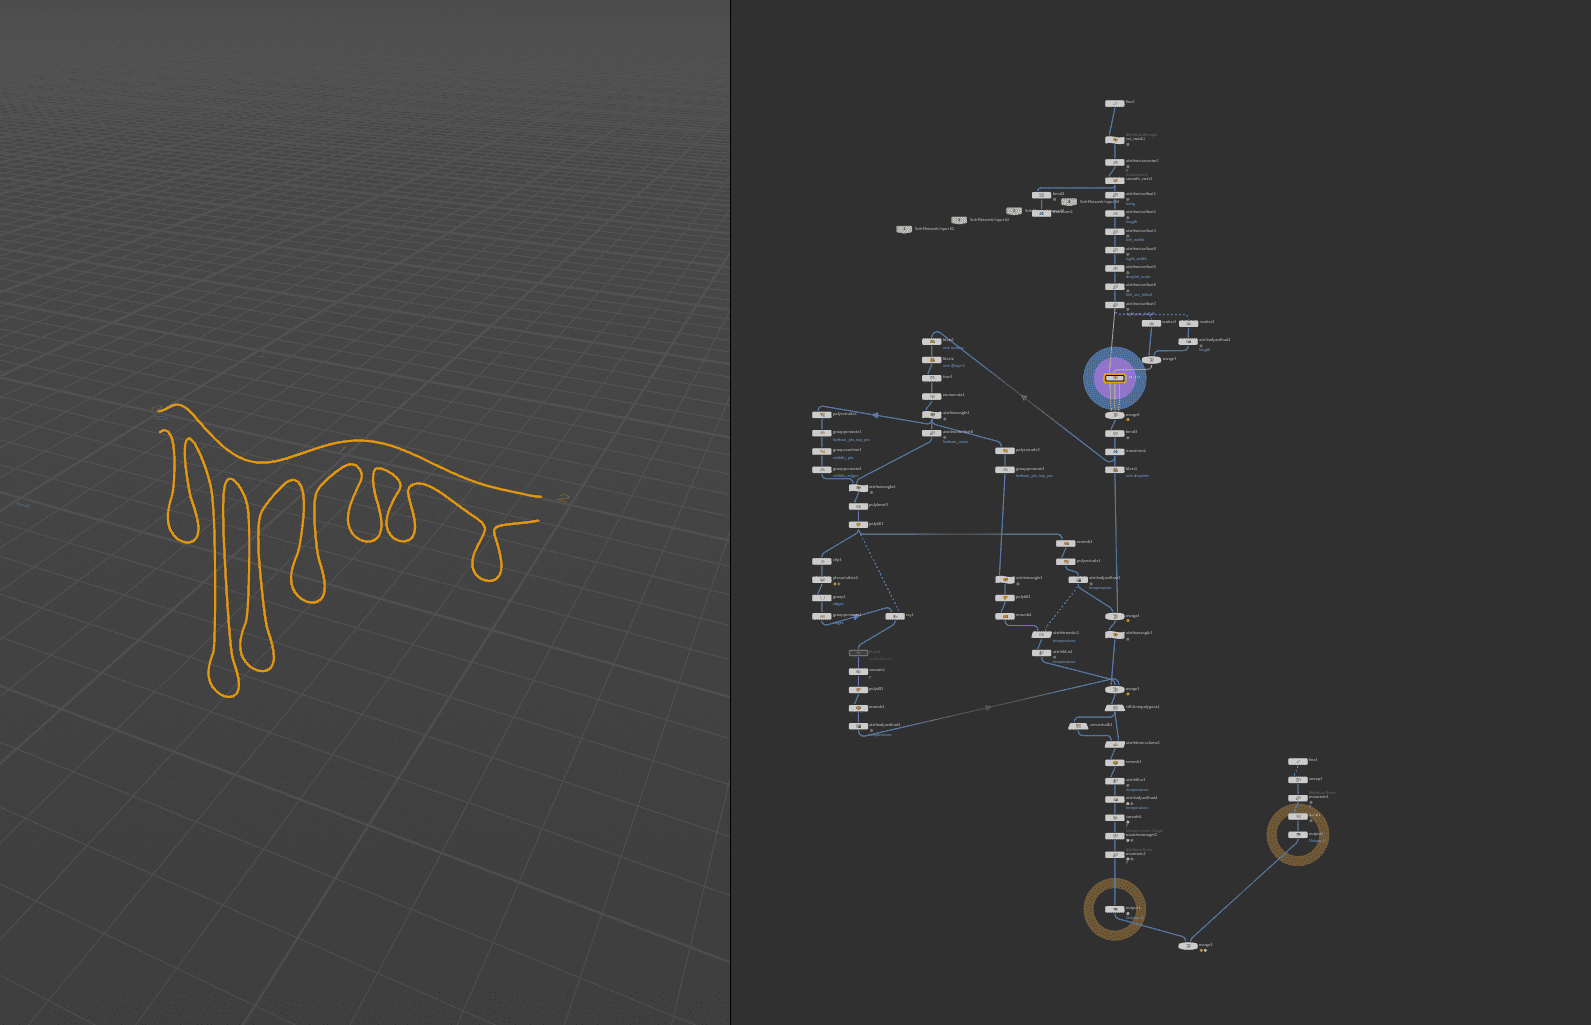
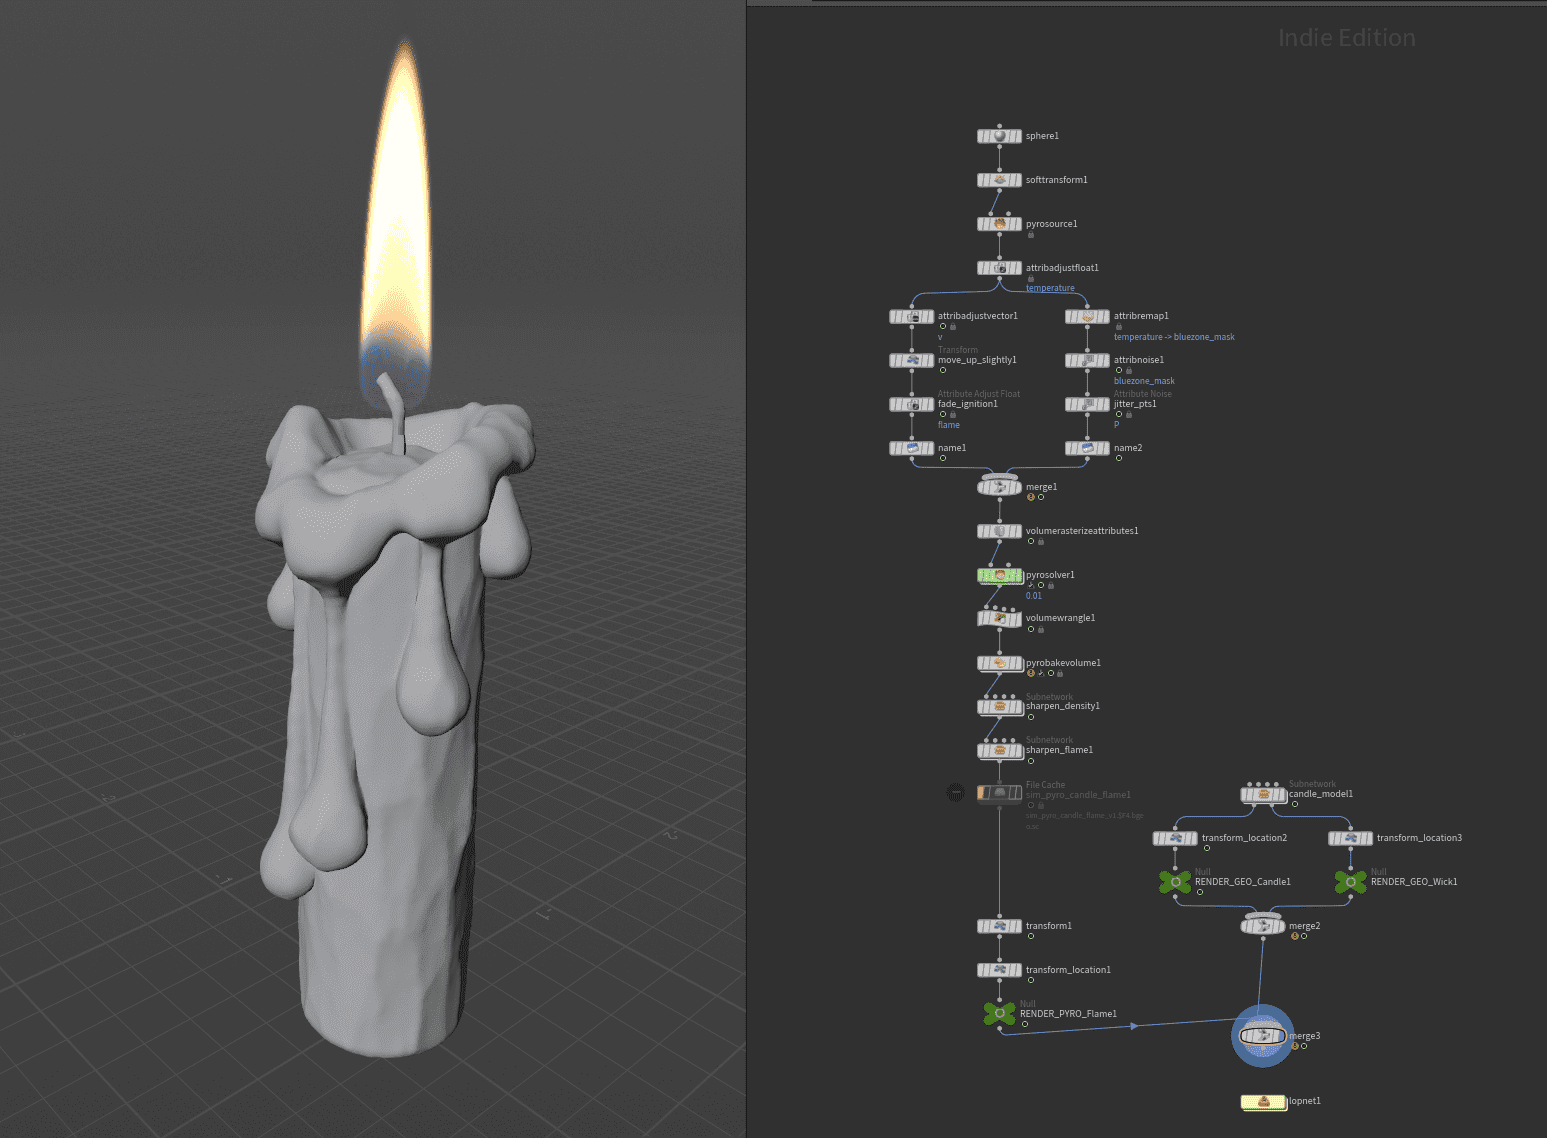
A candle flame might not be the most exciting thing visually, but it’s one of those Pyro results you end up needing again and again. What makes this preset interesting, though, is the procedurally modeled candle that comes with it. Exploring that setup is almost more fun than the Pyro sim itself.
Thruster FX
In true H21 fashion and in the spirit of overall efficiency boosts, the new Thruster FX tool makes its debut: a setup designed to create engine and propulsion emissions with ease. It’s not just a new node, but rather a complete Recipe, a preconfigured network of nodes that some might, in hushed tones, simply call “presets.”
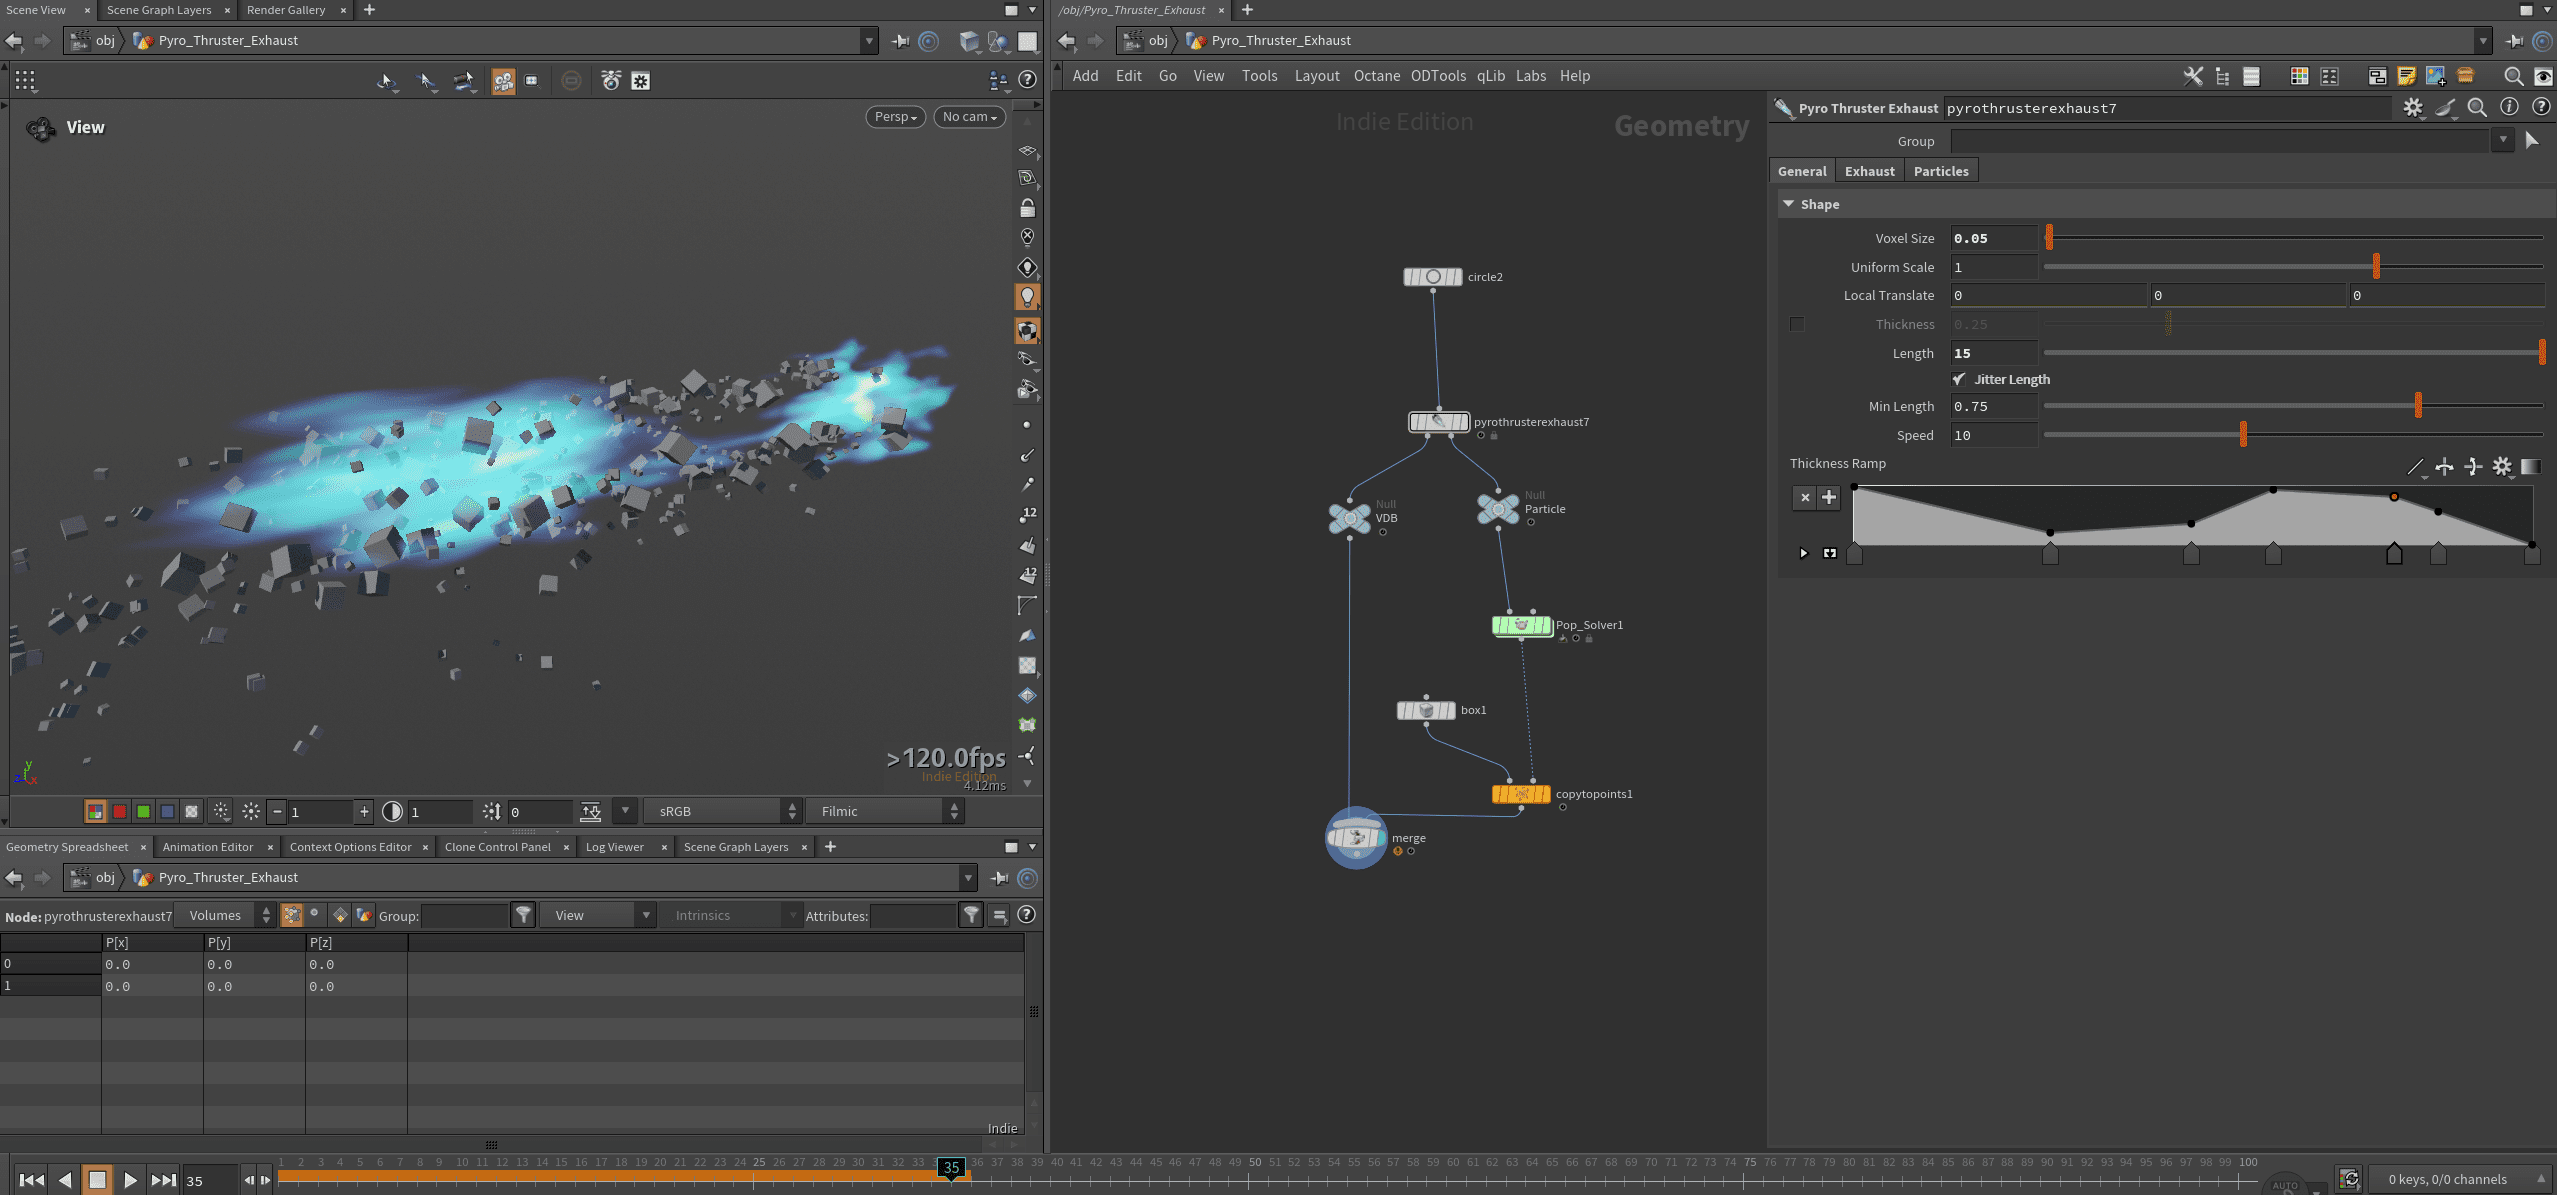
With a cheerful click on Thruster Exhaust in the Pyro Shelf Tools (or via Configure Thruster in the Tab menu), you’ll get a fully adaptable node tree, including a ready-to-render Solaris network. The effect itself isn’t a simulation but a cleverly layered, art-directable procedural system built around VOP Nodes. Multiple pyrothrusterexhaust nodes are stacked in layers, each responsible for different components like sparks, fire, and plasma. All working together to form a surprisingly easy to use thruster system.
So, what does it actually look like? And can it really be used straight out of the box, as promised? The short answer: pretty much, yes. The rendering comes surprisingly close to the viewport preview. To get it running, only a few connections inside the included Solaris network needed to be adjusted. For our small test scene, we did a bit of kitbashing inside Solaris, then added some glow and polish in Fusion.
Let’s take a closer look at the node, both from the outside and under the hood. The node expects a primitive as input, and a simple circle usually does the trick. It outputs both particles and a volume containing density and temperature fields. In the General tab, you can control speed, length, and the overall shape via a spline ramp. The Exhaust section handles the color ramp and lets you tweak the underlying noise pattern, which has a strong impact on the overall form. Under the hood, the node generates a VDB from Polygon, then modifies the result with a Volume VOP and a Volume Adjust Fog node.
As part of the ongoing effort to simplify things and lower the learning curve, SideFX has also released a good and detailed tutorial mini series: sidefx.com/tutorials/how-to-create-thruster-fx
Car Destruction FX
So that we can also crash the rigs built with the Car Rig SOP introduced in H20.5, Houdini 21 brings us the new Car Destruction Tools, led by the mighty RBD Car Fracture SOP, supported by the RBD Car Transform SOP. The first one takes care of fracturing and constraint creation, automatically handling the typical materials you’d expect in a vehicle: glass, metal, wood, and rubber. The RBD Car Transform SOP, similar to Transform Pieces, ensures that all pre-fractured parts are efficiently transformed based on the simulation points. You’re not limited to cars, by the way. Anything that follows the same basic logic can be blown apart. From motorcycles to helicopters, it all breaks just fine.
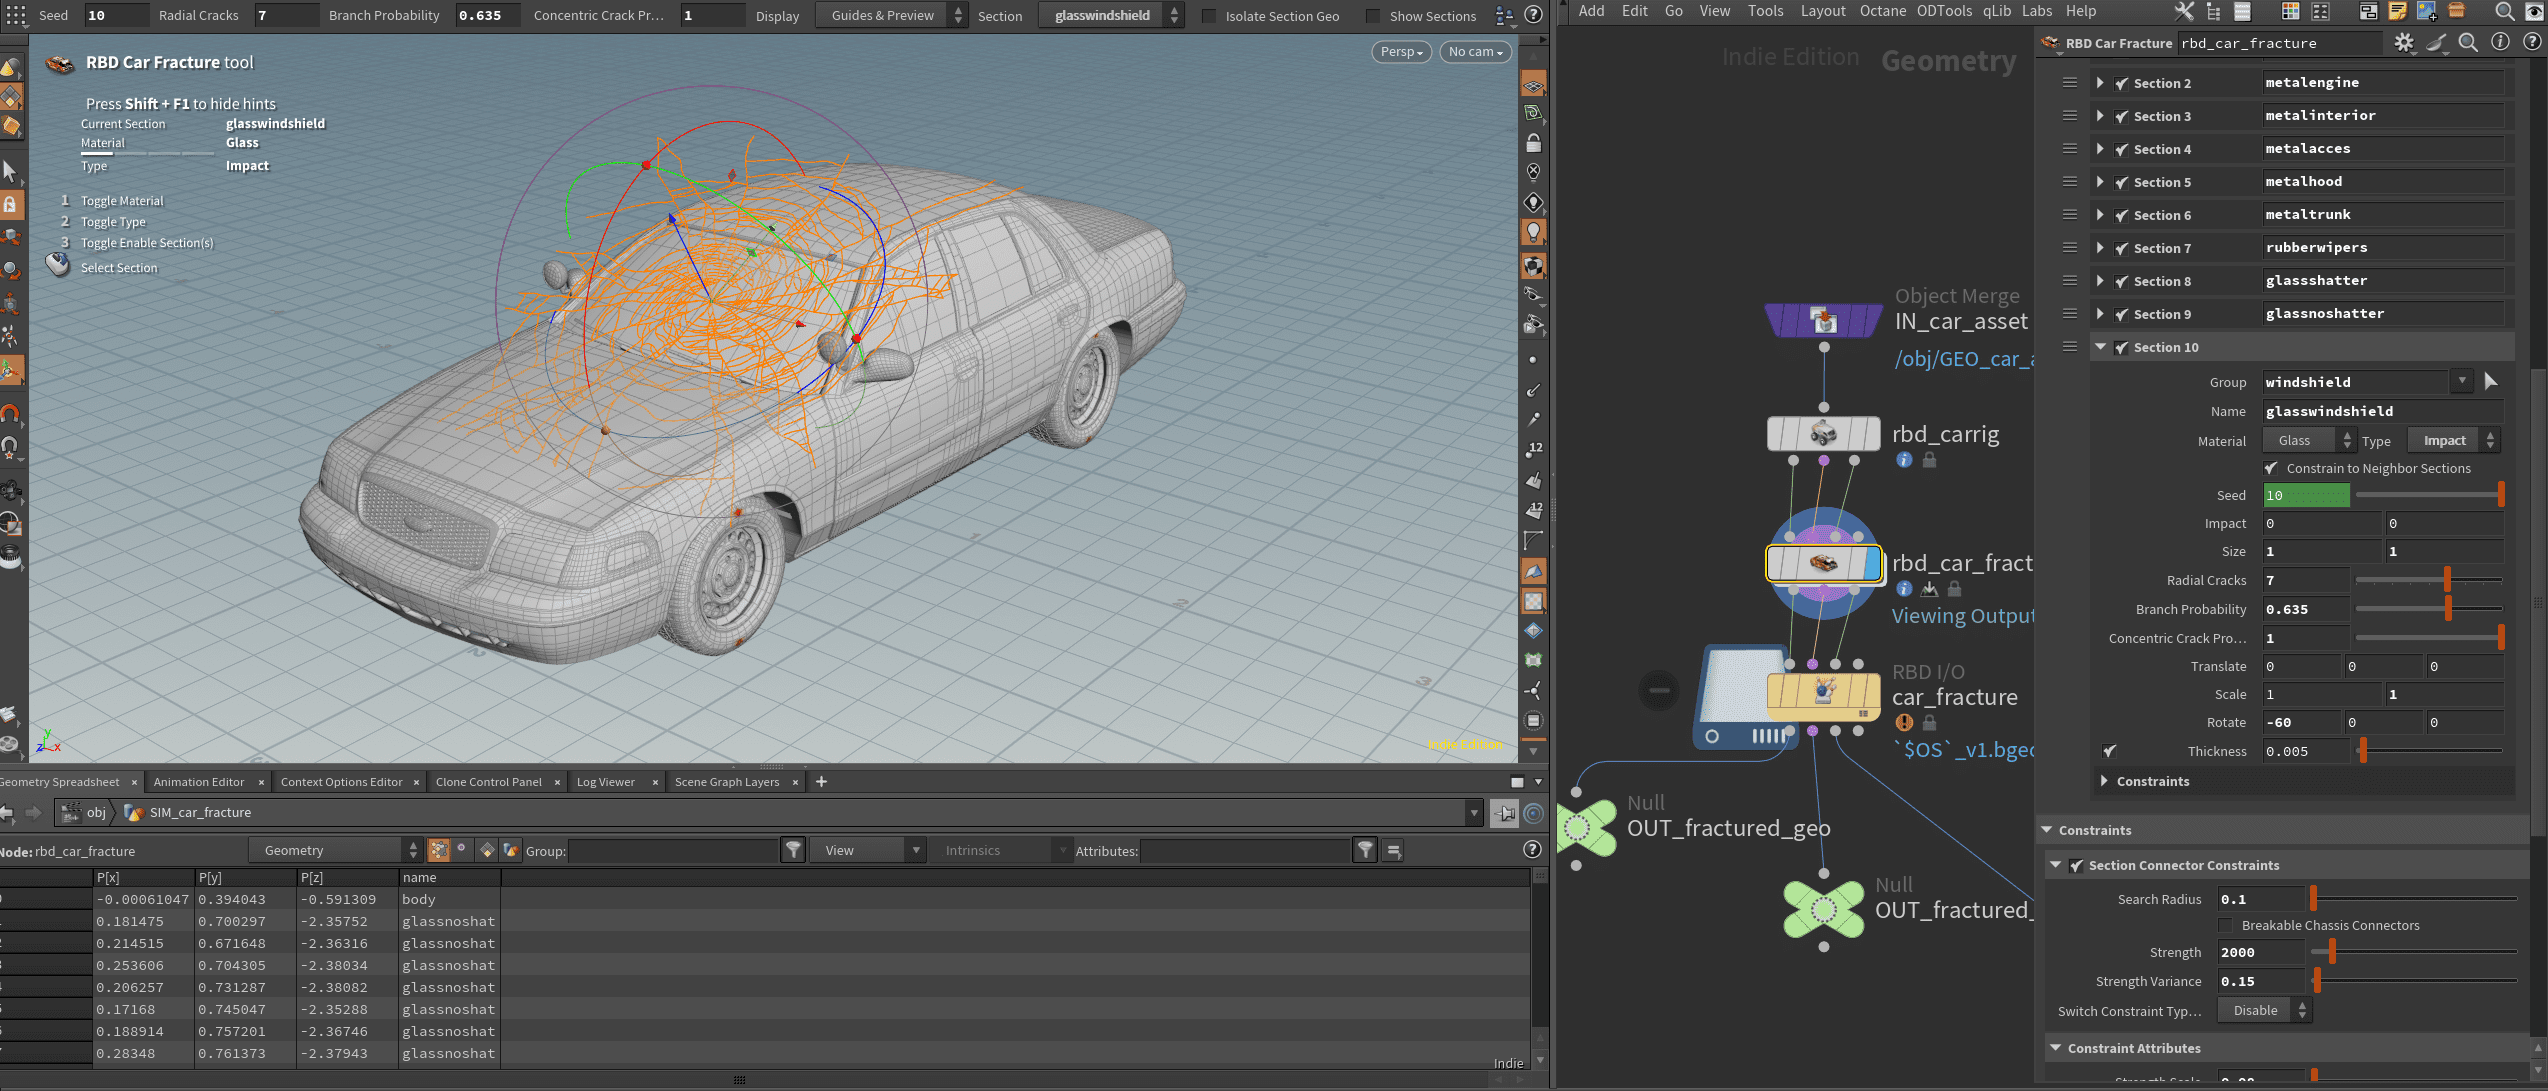
Destruction-hungry artists will find a detailed yet easy-to-follow example scene in the SideFX Content Library, the same visuals you might recognize from the keynote: sidefx.com/carbd-dual-car-collision/. A fitting go-through video can be found here:
Geometry, Viewport and other tasty QoL
Coming from its deep VFX roots, Houdini has taken quite a journey to establish its own distinct style of procedural modeling. With H21, that journey continues, extending existing nodes and adding a few genuinely useful new ones along the way. This time, even the viewport got some well-deserved love, now powered by Vulkan and capable of loading Gaussian Splats directly.
Sculpting in Time
The Sculpt SOP, introduced in H20.5 and (surprisingly) quite useful, now gets a genuinely groundbreaking new feature called Shot Sculpting allowing time-based, keyframe-free sculpting. Originally intended as a correction tool for character animation, the node turns out to be just as handy for VFX and motion design work.
Temporal control is handled through the Shot Sculpt panel, which at first glance looks a lot like an NLE timeline and, in principle, works much the same way. Sculpting can be organized into layers that can be offset in time, faded in and out (complete with easing), muted, or adjusted in opacity. Alternatively, you can use mask_track to paint time-based attributes, which can then be passed downstream and used in other nodes, for an obvious example, as masks.
Otherwise, the same rules apply as for the regular Sculpt SOP, whose updates we’ll take a look at next. In line with the new Shot Sculpting feature, the mask system has been reworked. Masks can still be painted manually, but can now also be loaded from an upstream float attribute, saved permanently, and blurred or sharpened as needed.

There are also new brushes. My personal highlight, the Elastic Grab brush:
Of course, the complexity and depth of ZBrush remain unmatched, but for many tasks, artists can now comfortably stay right inside Houdini.
Geometry Masks
There are also updates when it comes to masking. Several well-known nodes now include a Mask parameter, allowing the effect to be restricted to a painted or procedurally generated mask. Among them: Peak SOP, Soft Peak SOP, Inflate SOP, Flatten SOP, and Point Jitter SOP.

UV Flatten from Points
The latest addition to Houdini’s already powerful UV toolset could just as well be called “UV from Voronoi” since that’s exactly what it’s based on. The node distributes random or precisely placed points across the surface and uses them to calculate clean, non-overlapping UVs. It’s primarily designed for complex, high-resolution meshes, where traditional unwrapping tends to get messy fast.

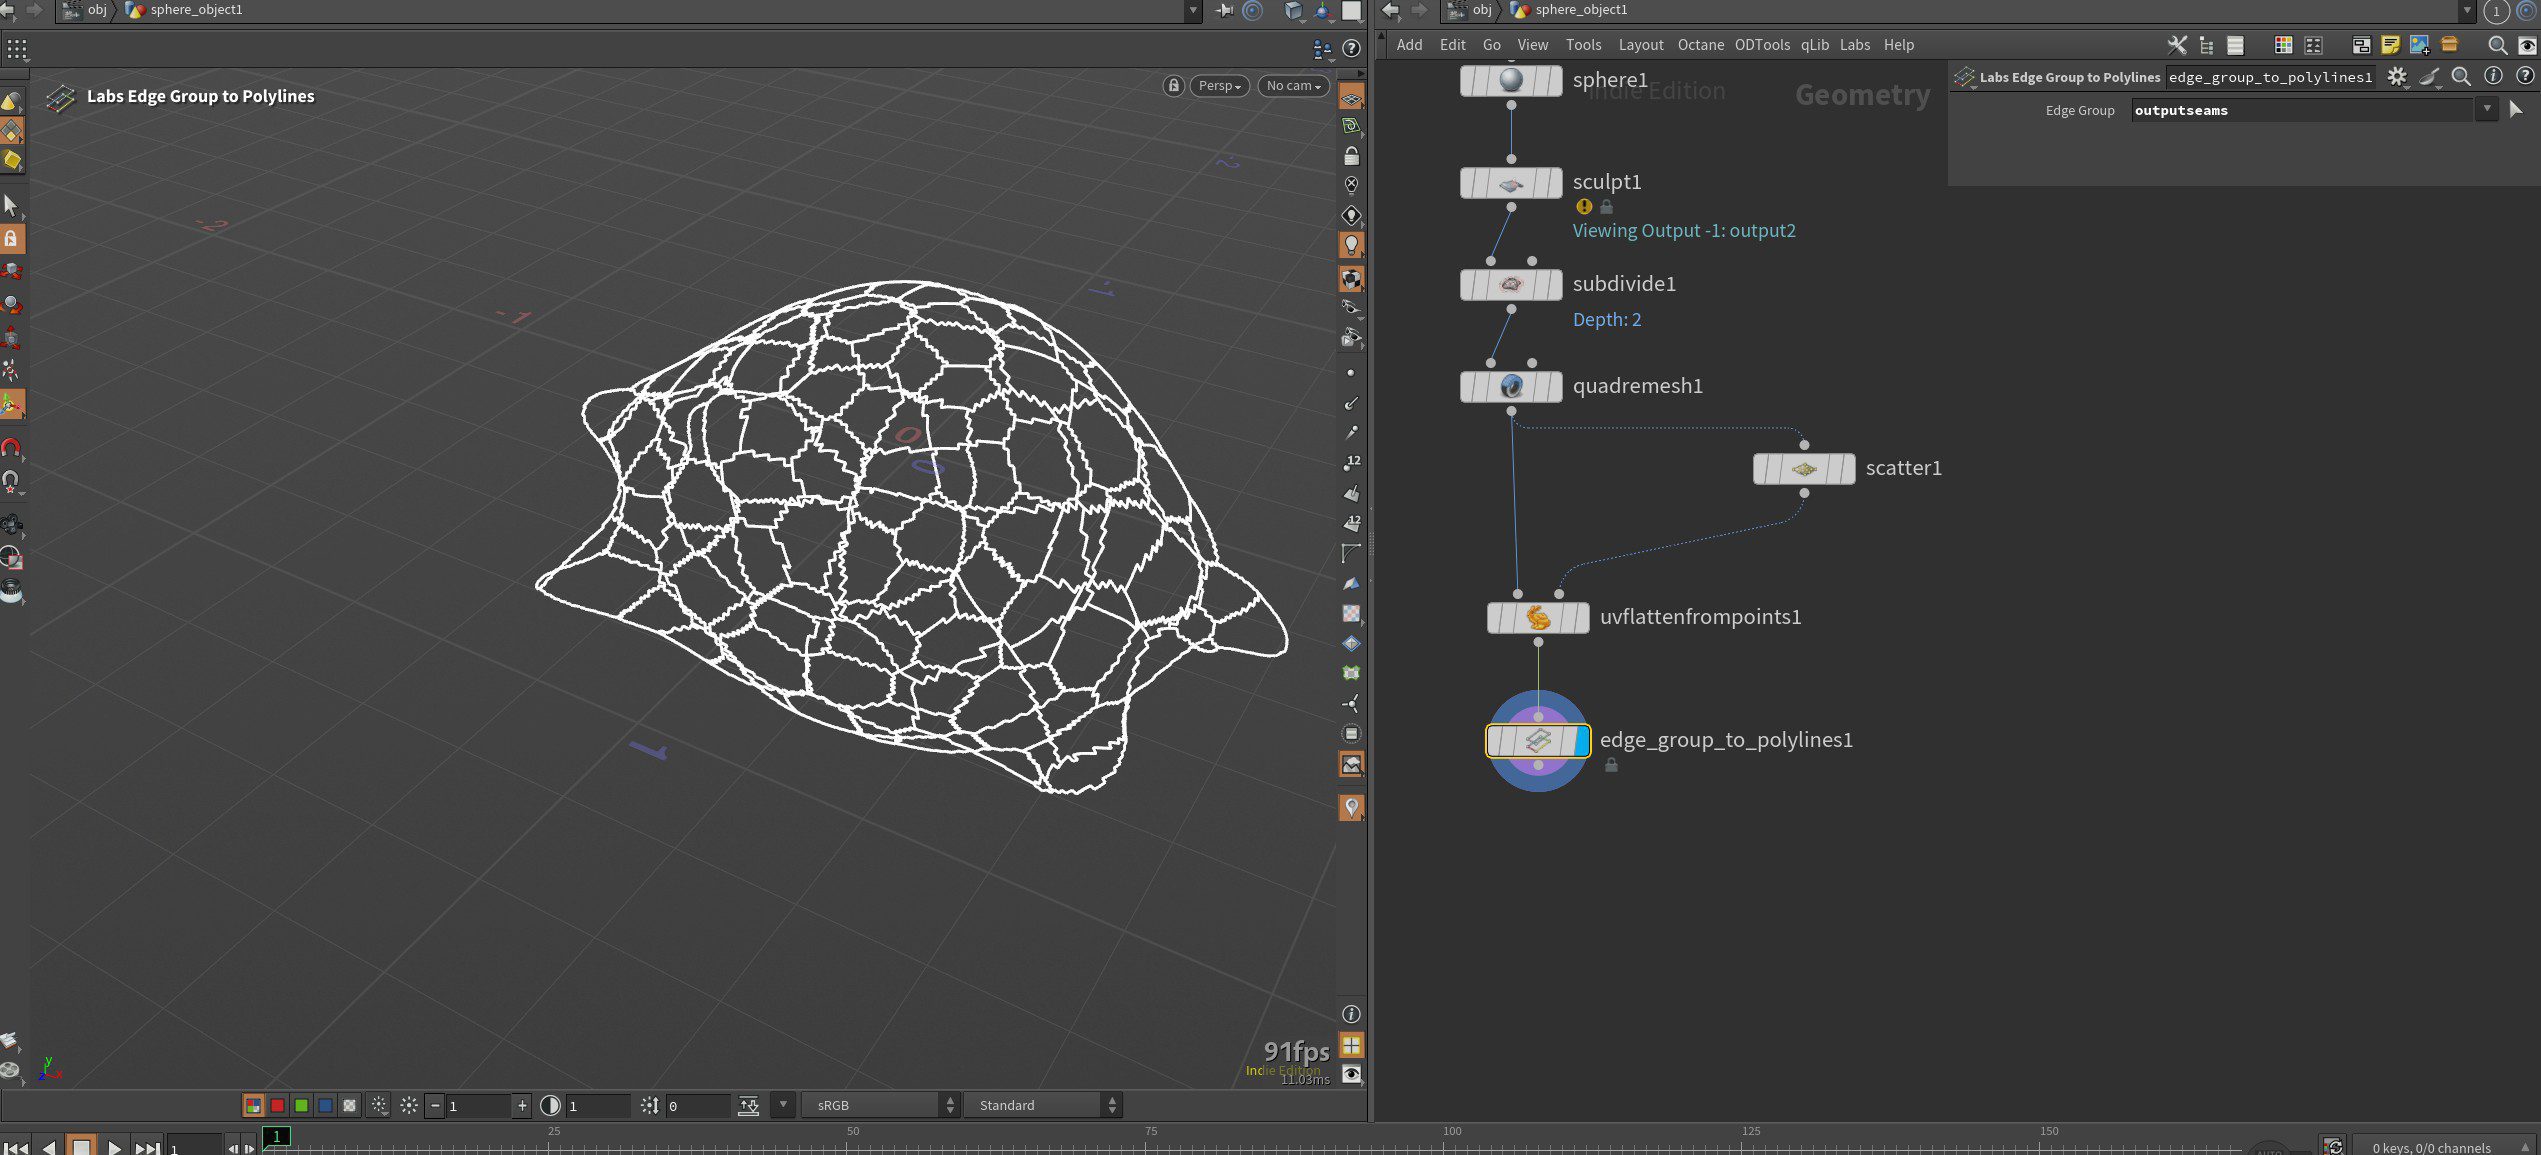
Vulkan Viewport
Now enabled by default, the new Vulkan 3D viewport offers noticeably improved lighting, Ambient Occlusion, shading and ray tracing with built-in denoising, and a more accurate texture display though performance can take a hit if you push it too far. New worklights including a fully adjustable Dome Light, Physical Sky, and Three-Point Light setup now serve as the default viewport lighting.
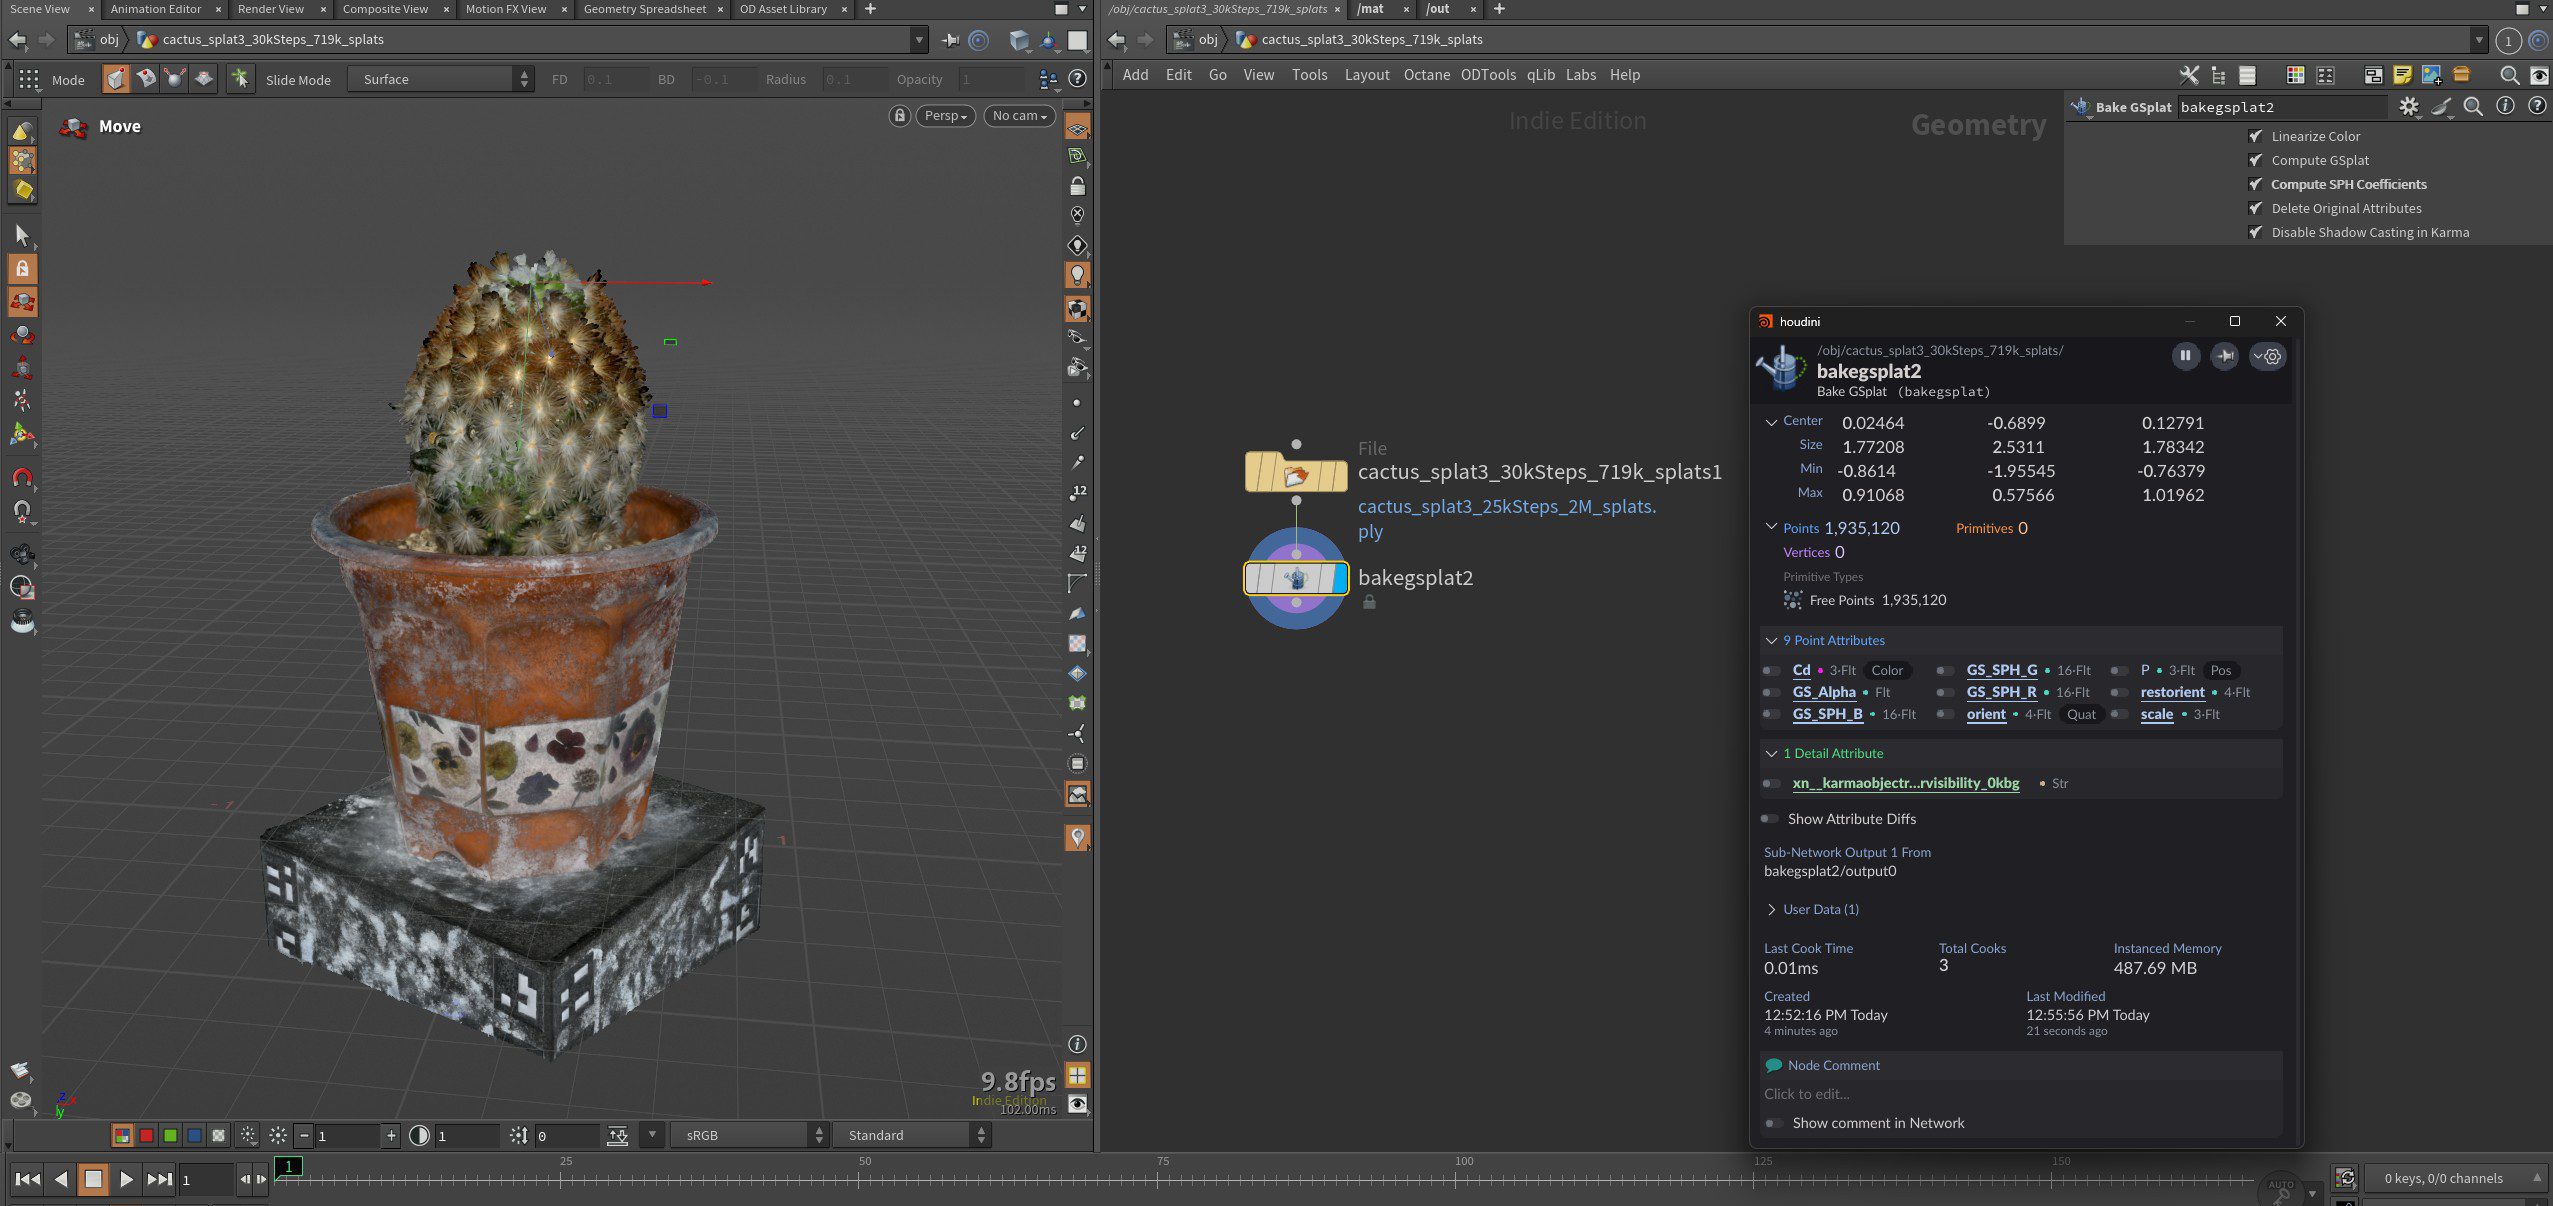
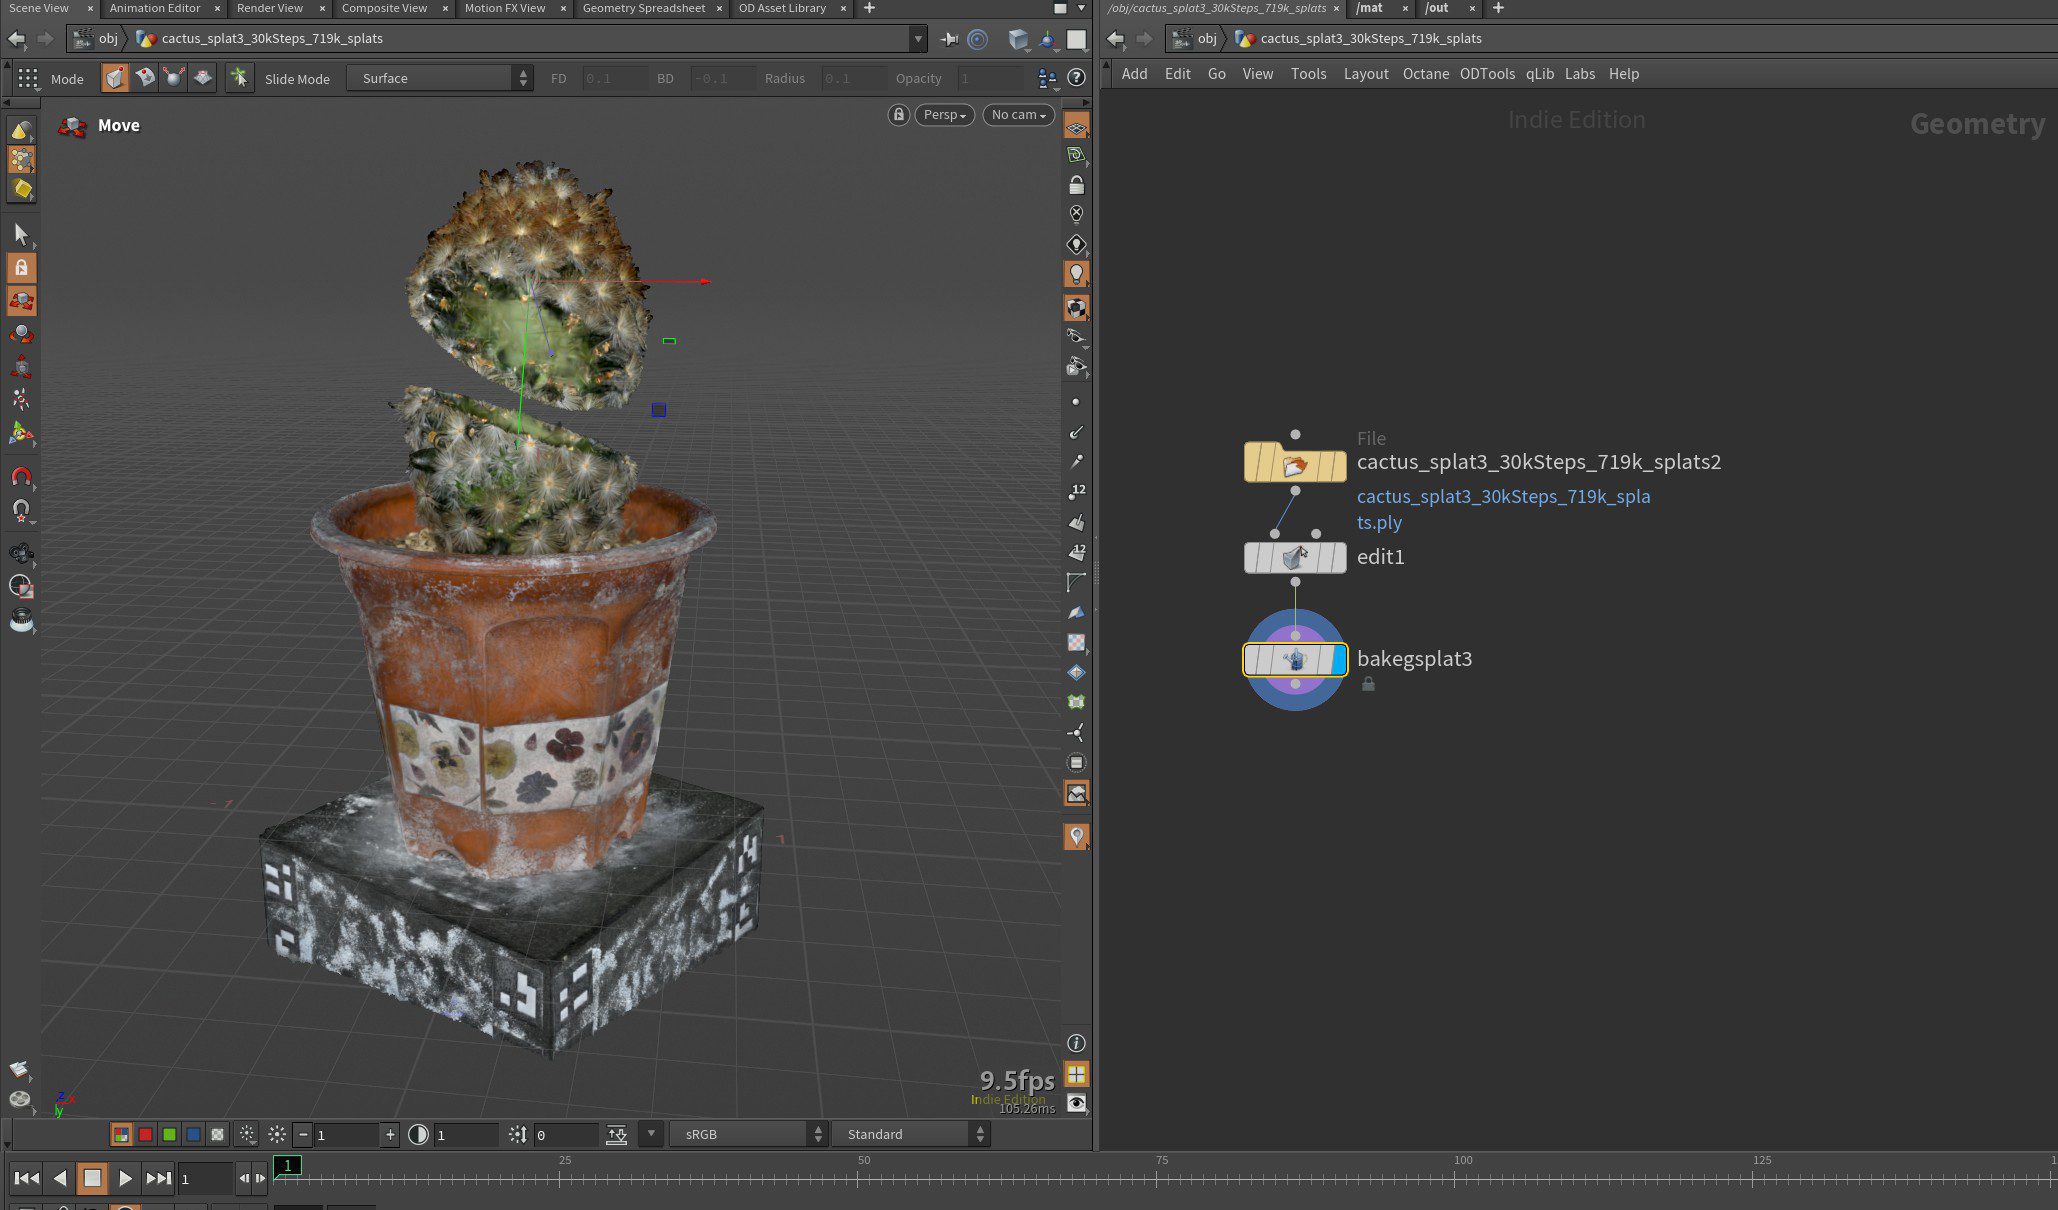
Looking toward the future, the viewport can now display Gaussian Splats directly. Since splats are essentially just point clouds, and Houdini is fundamentally point-based, this opens up a rather promising combination. The .ply file can simply be loaded via a File SOP and passed into a Bake Splat SOP for further processing. From there, you can treat and manipulate the splats just like any other geometry using the usual SOP tools. More on rendering those Splats in the upcoming section on Solaris & Karma.
Curve Tools
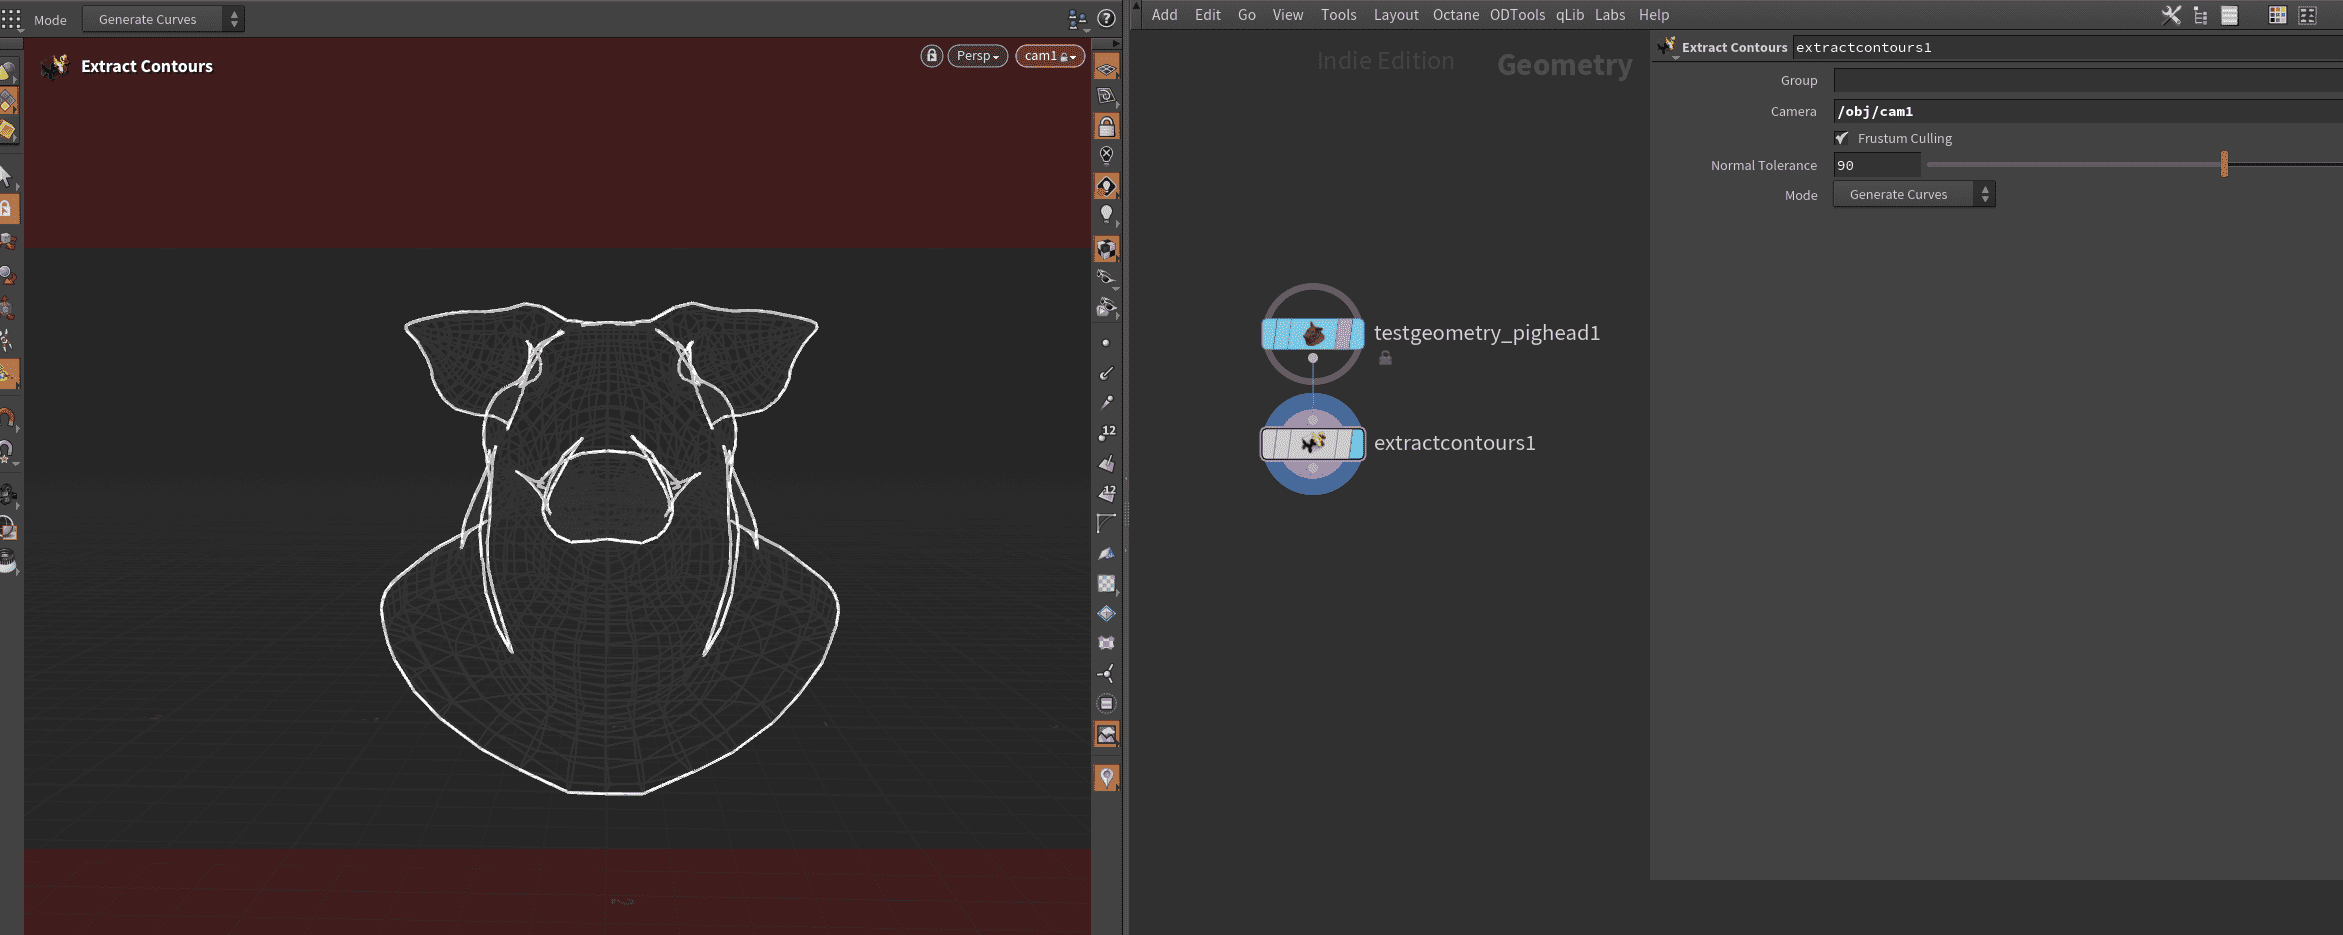
The new Extract Contours SOP can generate object outlines from a camera’s perspective either directly as edges or as an edge group. Quite handy for toon-style effects.
The well-known Curve SOP now allows you to interactively split points into branches (with unique vertex numbers) or fuse them back together.
Unsubdivide
If things ever get a bit too much, this node can reconstruct a low-res input geometry based on Catmull-Clark.
Conclusion after some bottles of VFX
Even though the stated (and achieved) goal of H21 was mainly polishing existing systems and adding plenty of quality-of-life improvements, it still manages to sneak in a massive load of new features along the way. And we’ve only scratched the surface here. Deep dives on Copernicus, Solaris, Karma, Rigging, and Animation are already in the works.
What’s also refreshing is the ongoing effort to flatten the learning curve through better documentation, tons of in-house tutorials, and solid example files in the Content Library. Many things have become easier or let’s say, more accessible, without losing depth, at least for those who want to go there. As always, most nodes can still be cracked open and modified at their core. Nice one, SideFX.


